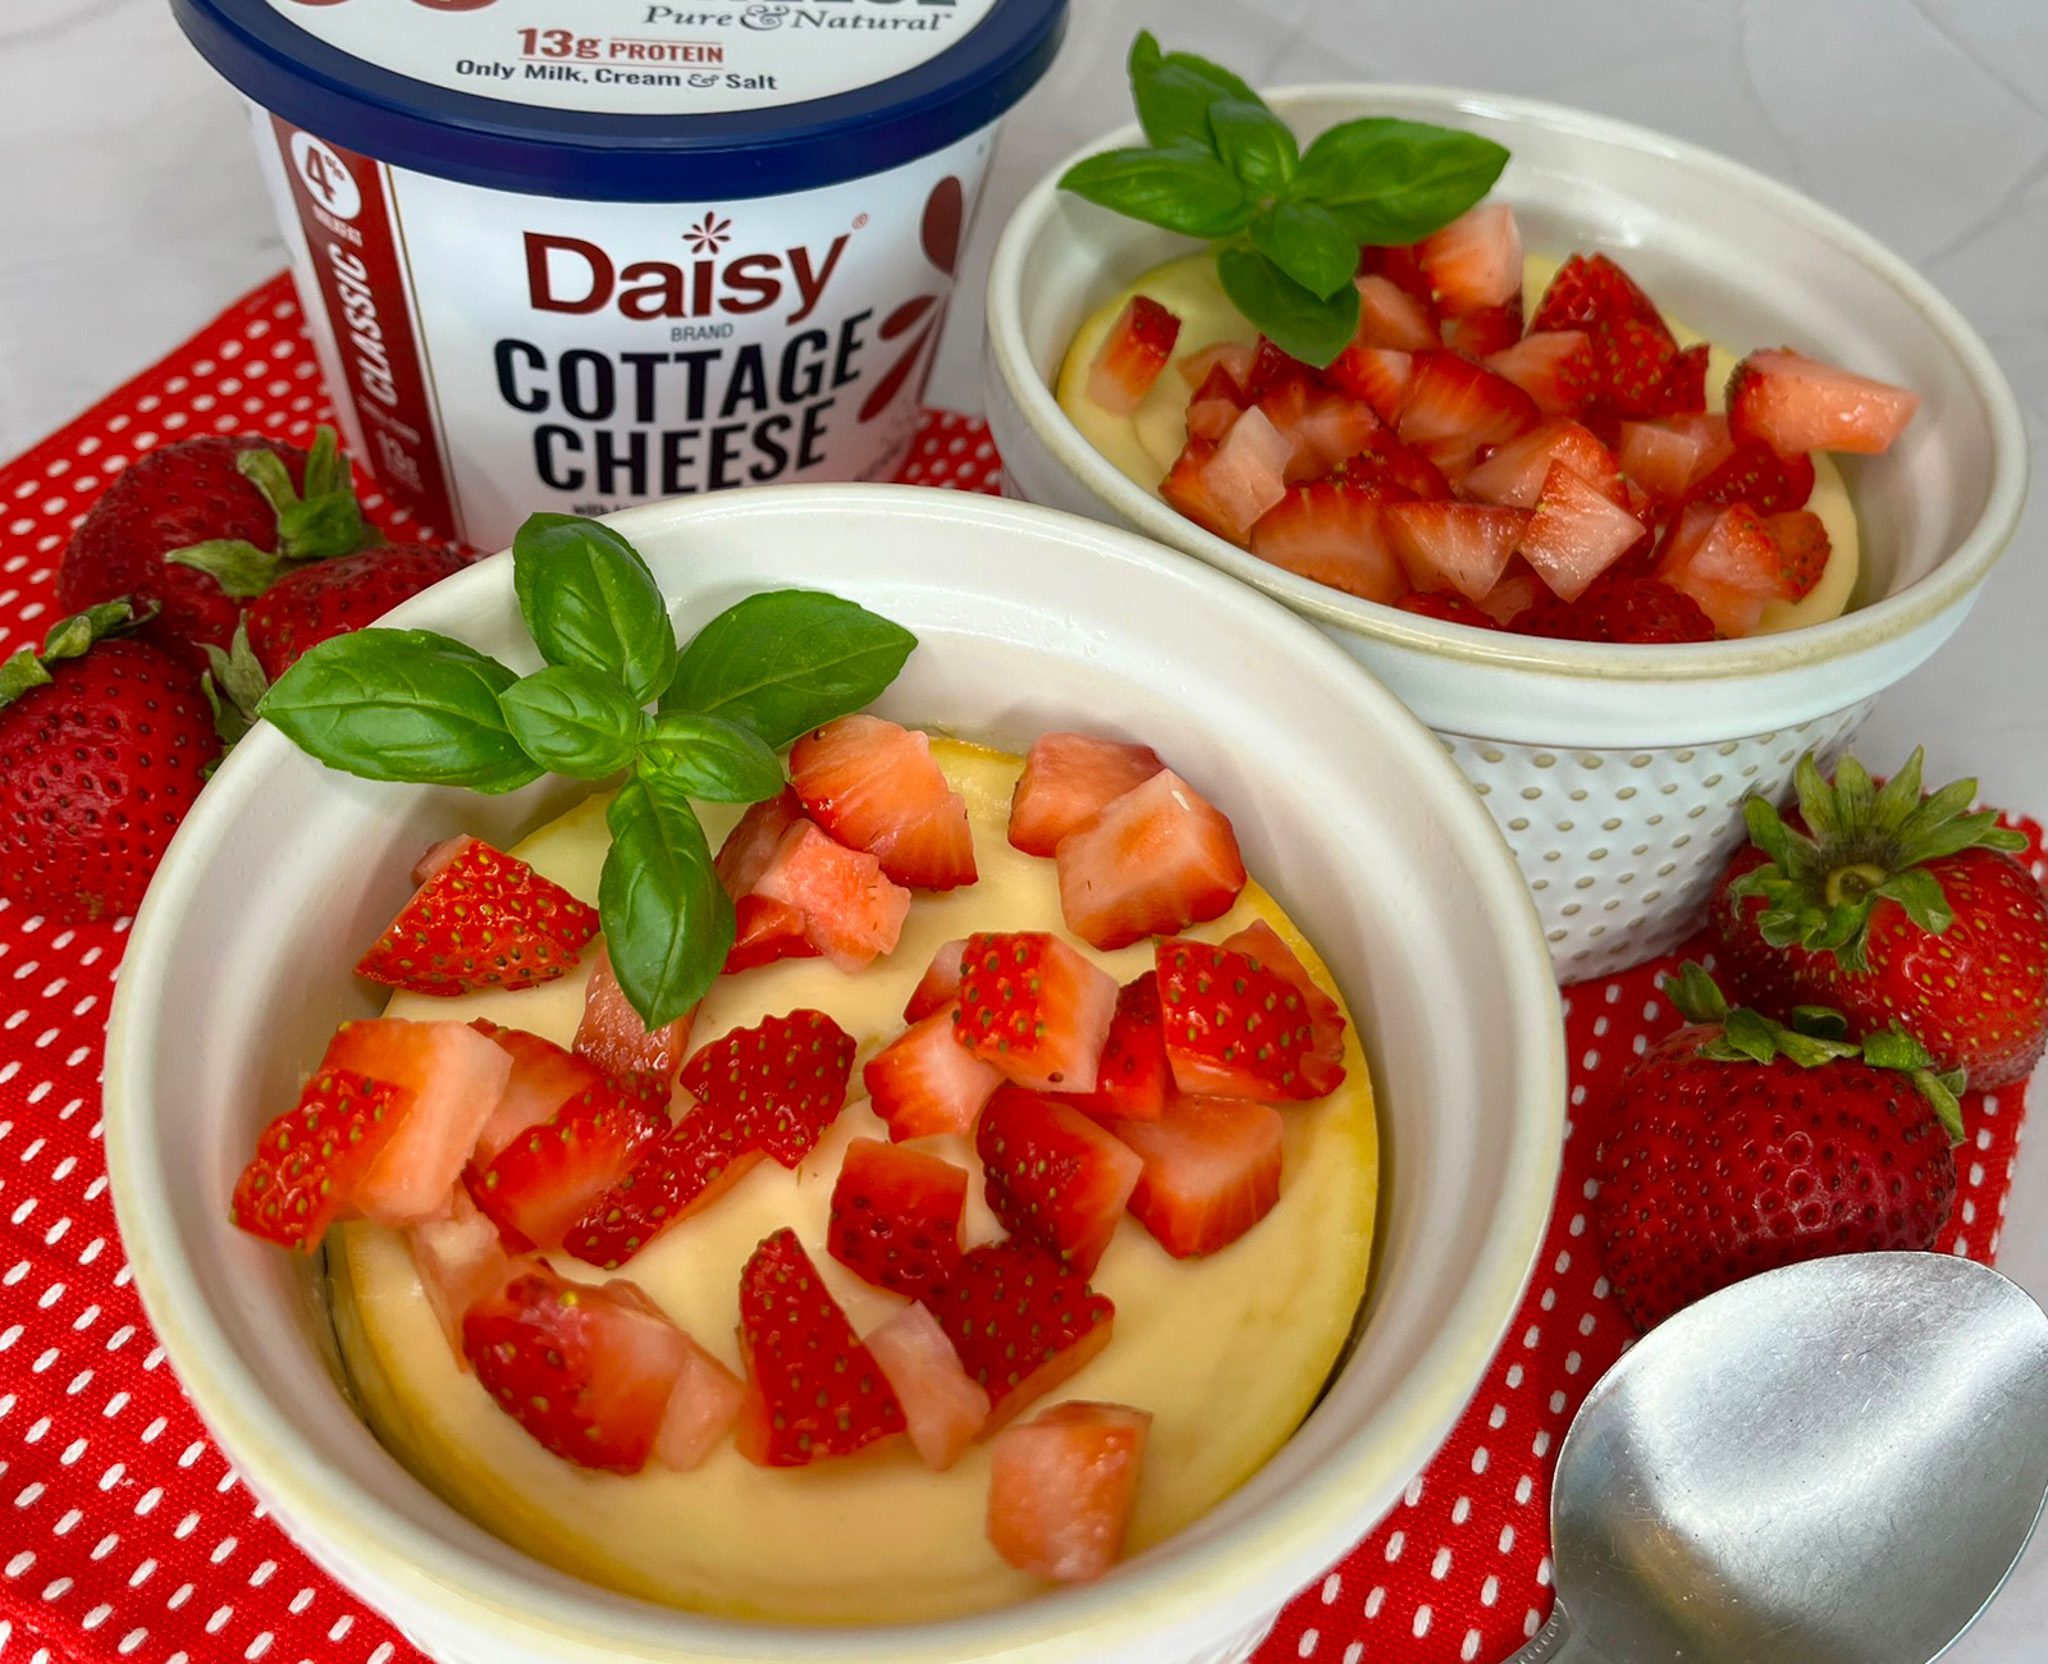
Mini Air Fryer Cheesecakes
Mini Air Fryer Cheesecakes
These Air Fryer Cheesecakes made with Daisy Cottage Cheese are a creamy, delicious twist on a classic dessert. Perfectly portioned and surprisingly easy to make, these mini cheesecakes deliver all the rich, velvety flavor you love with the added protein of Daisy Cottage Cheese.
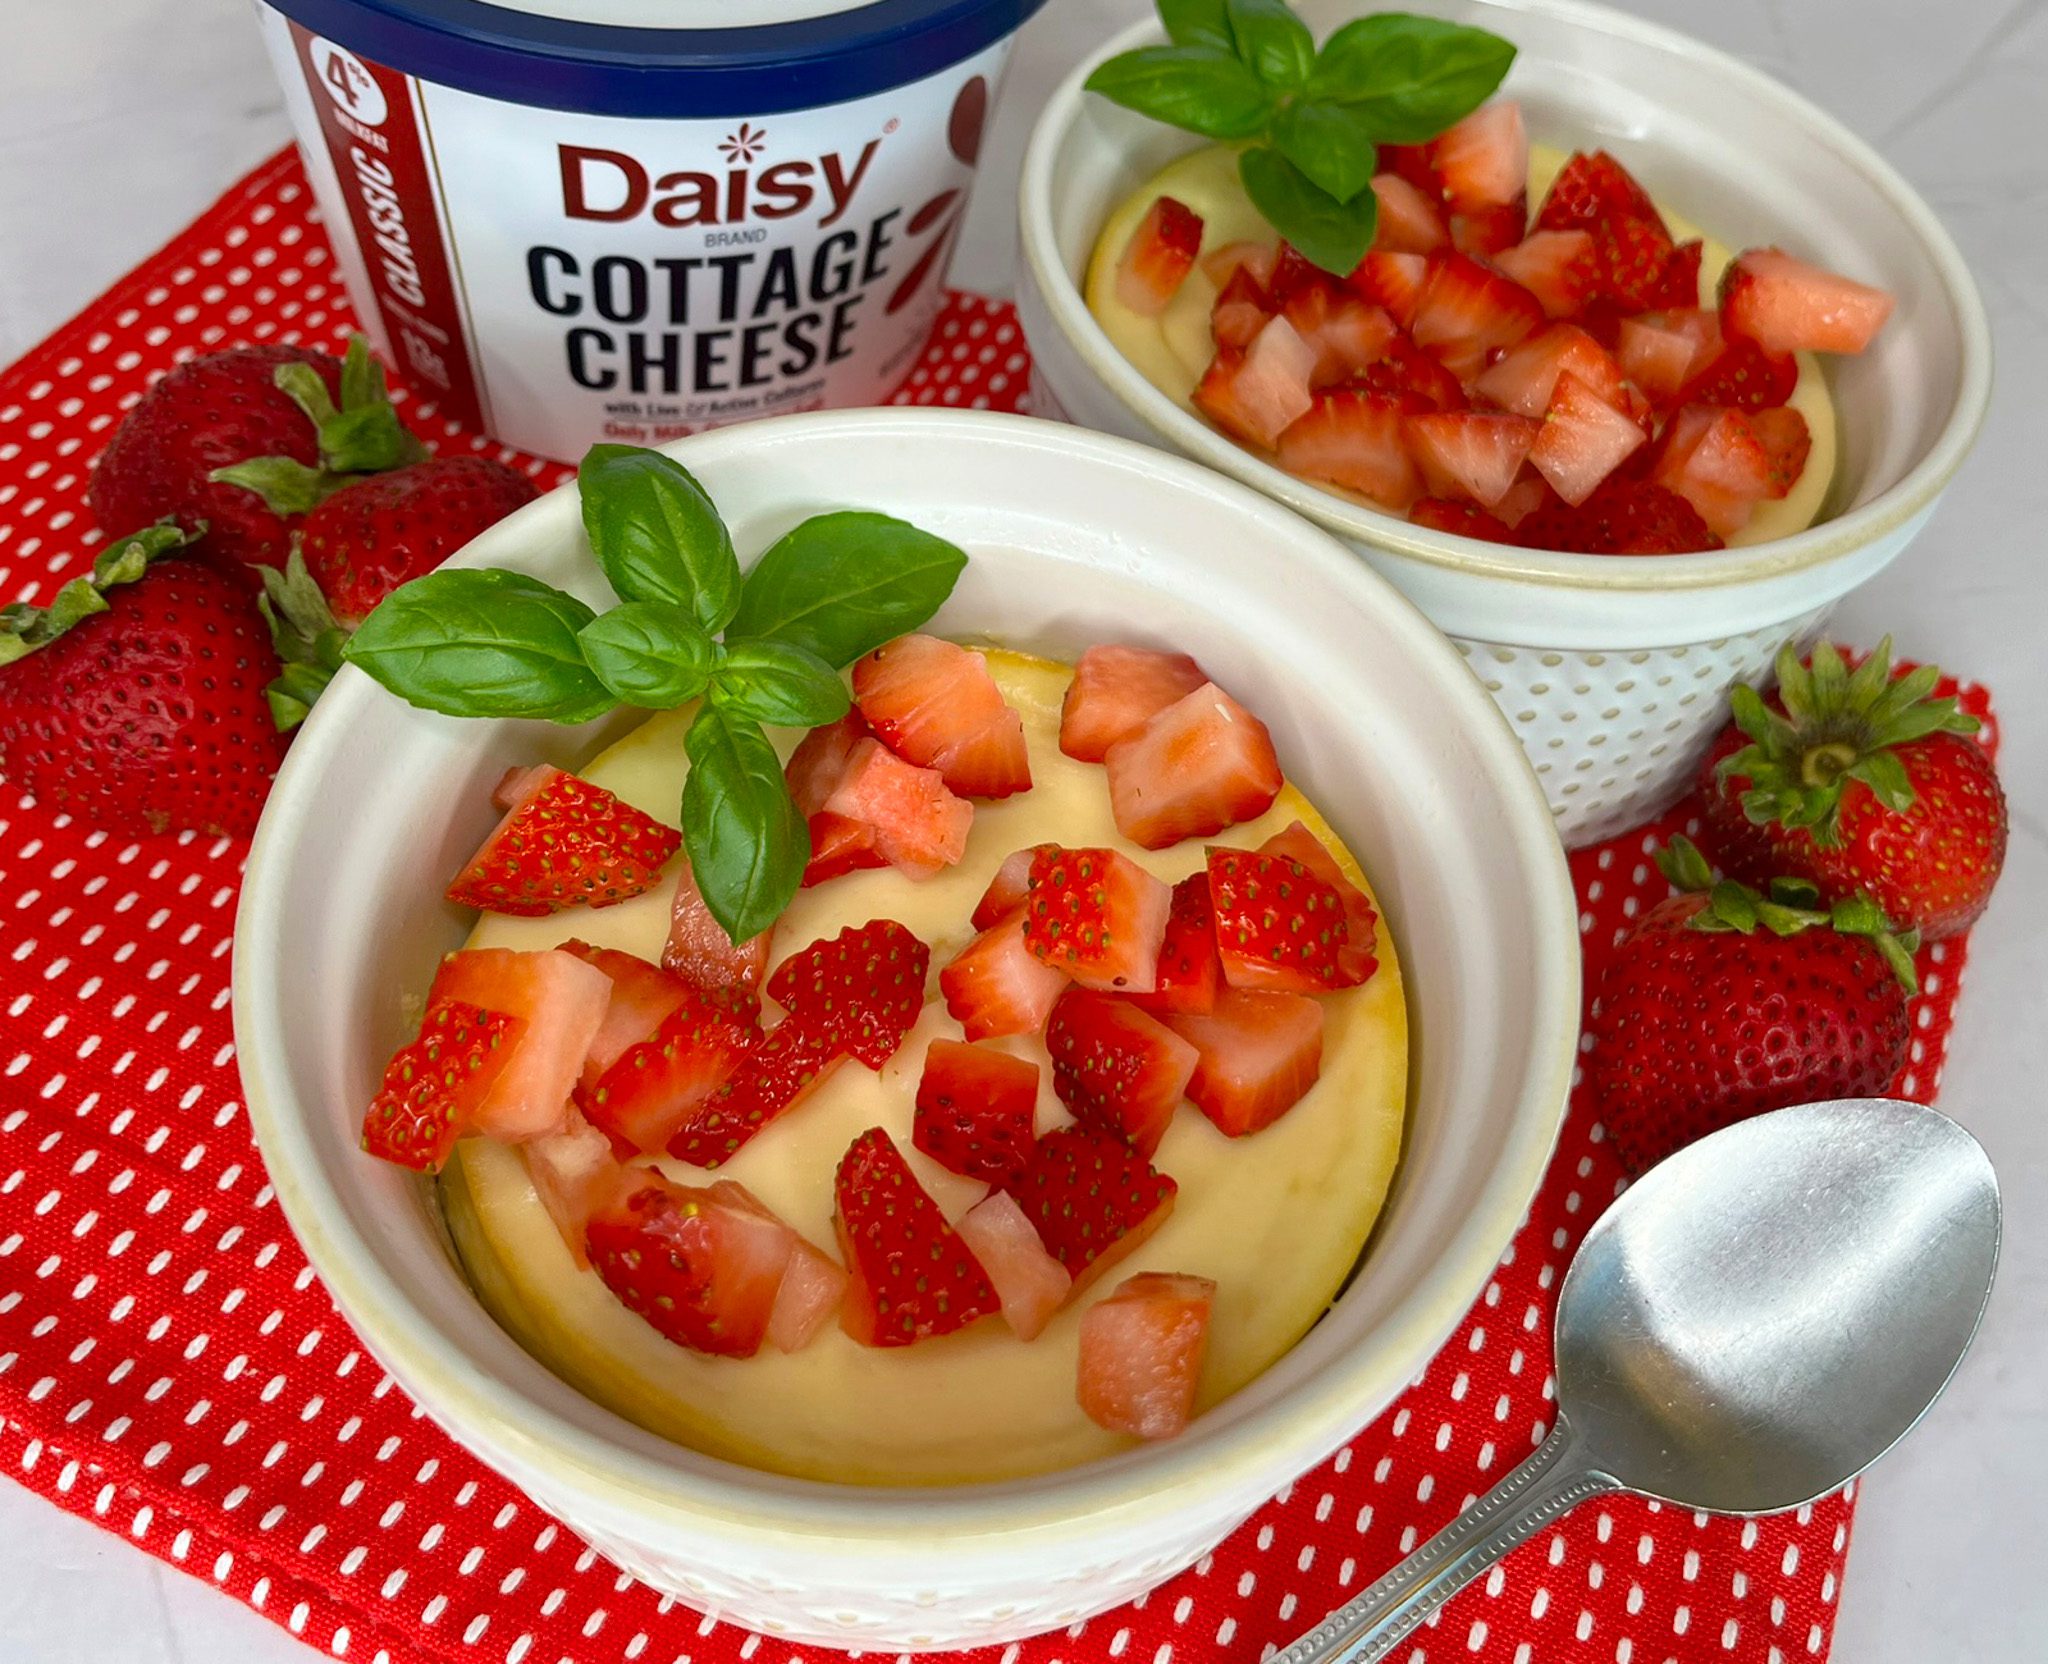
Blended until silky smooth, Daisy Cottage Cheese creates a luscious cheesecake filling that bakes beautifully in the air fryer. The result is a light yet indulgent dessert with a creamy center and perfectly set texture.
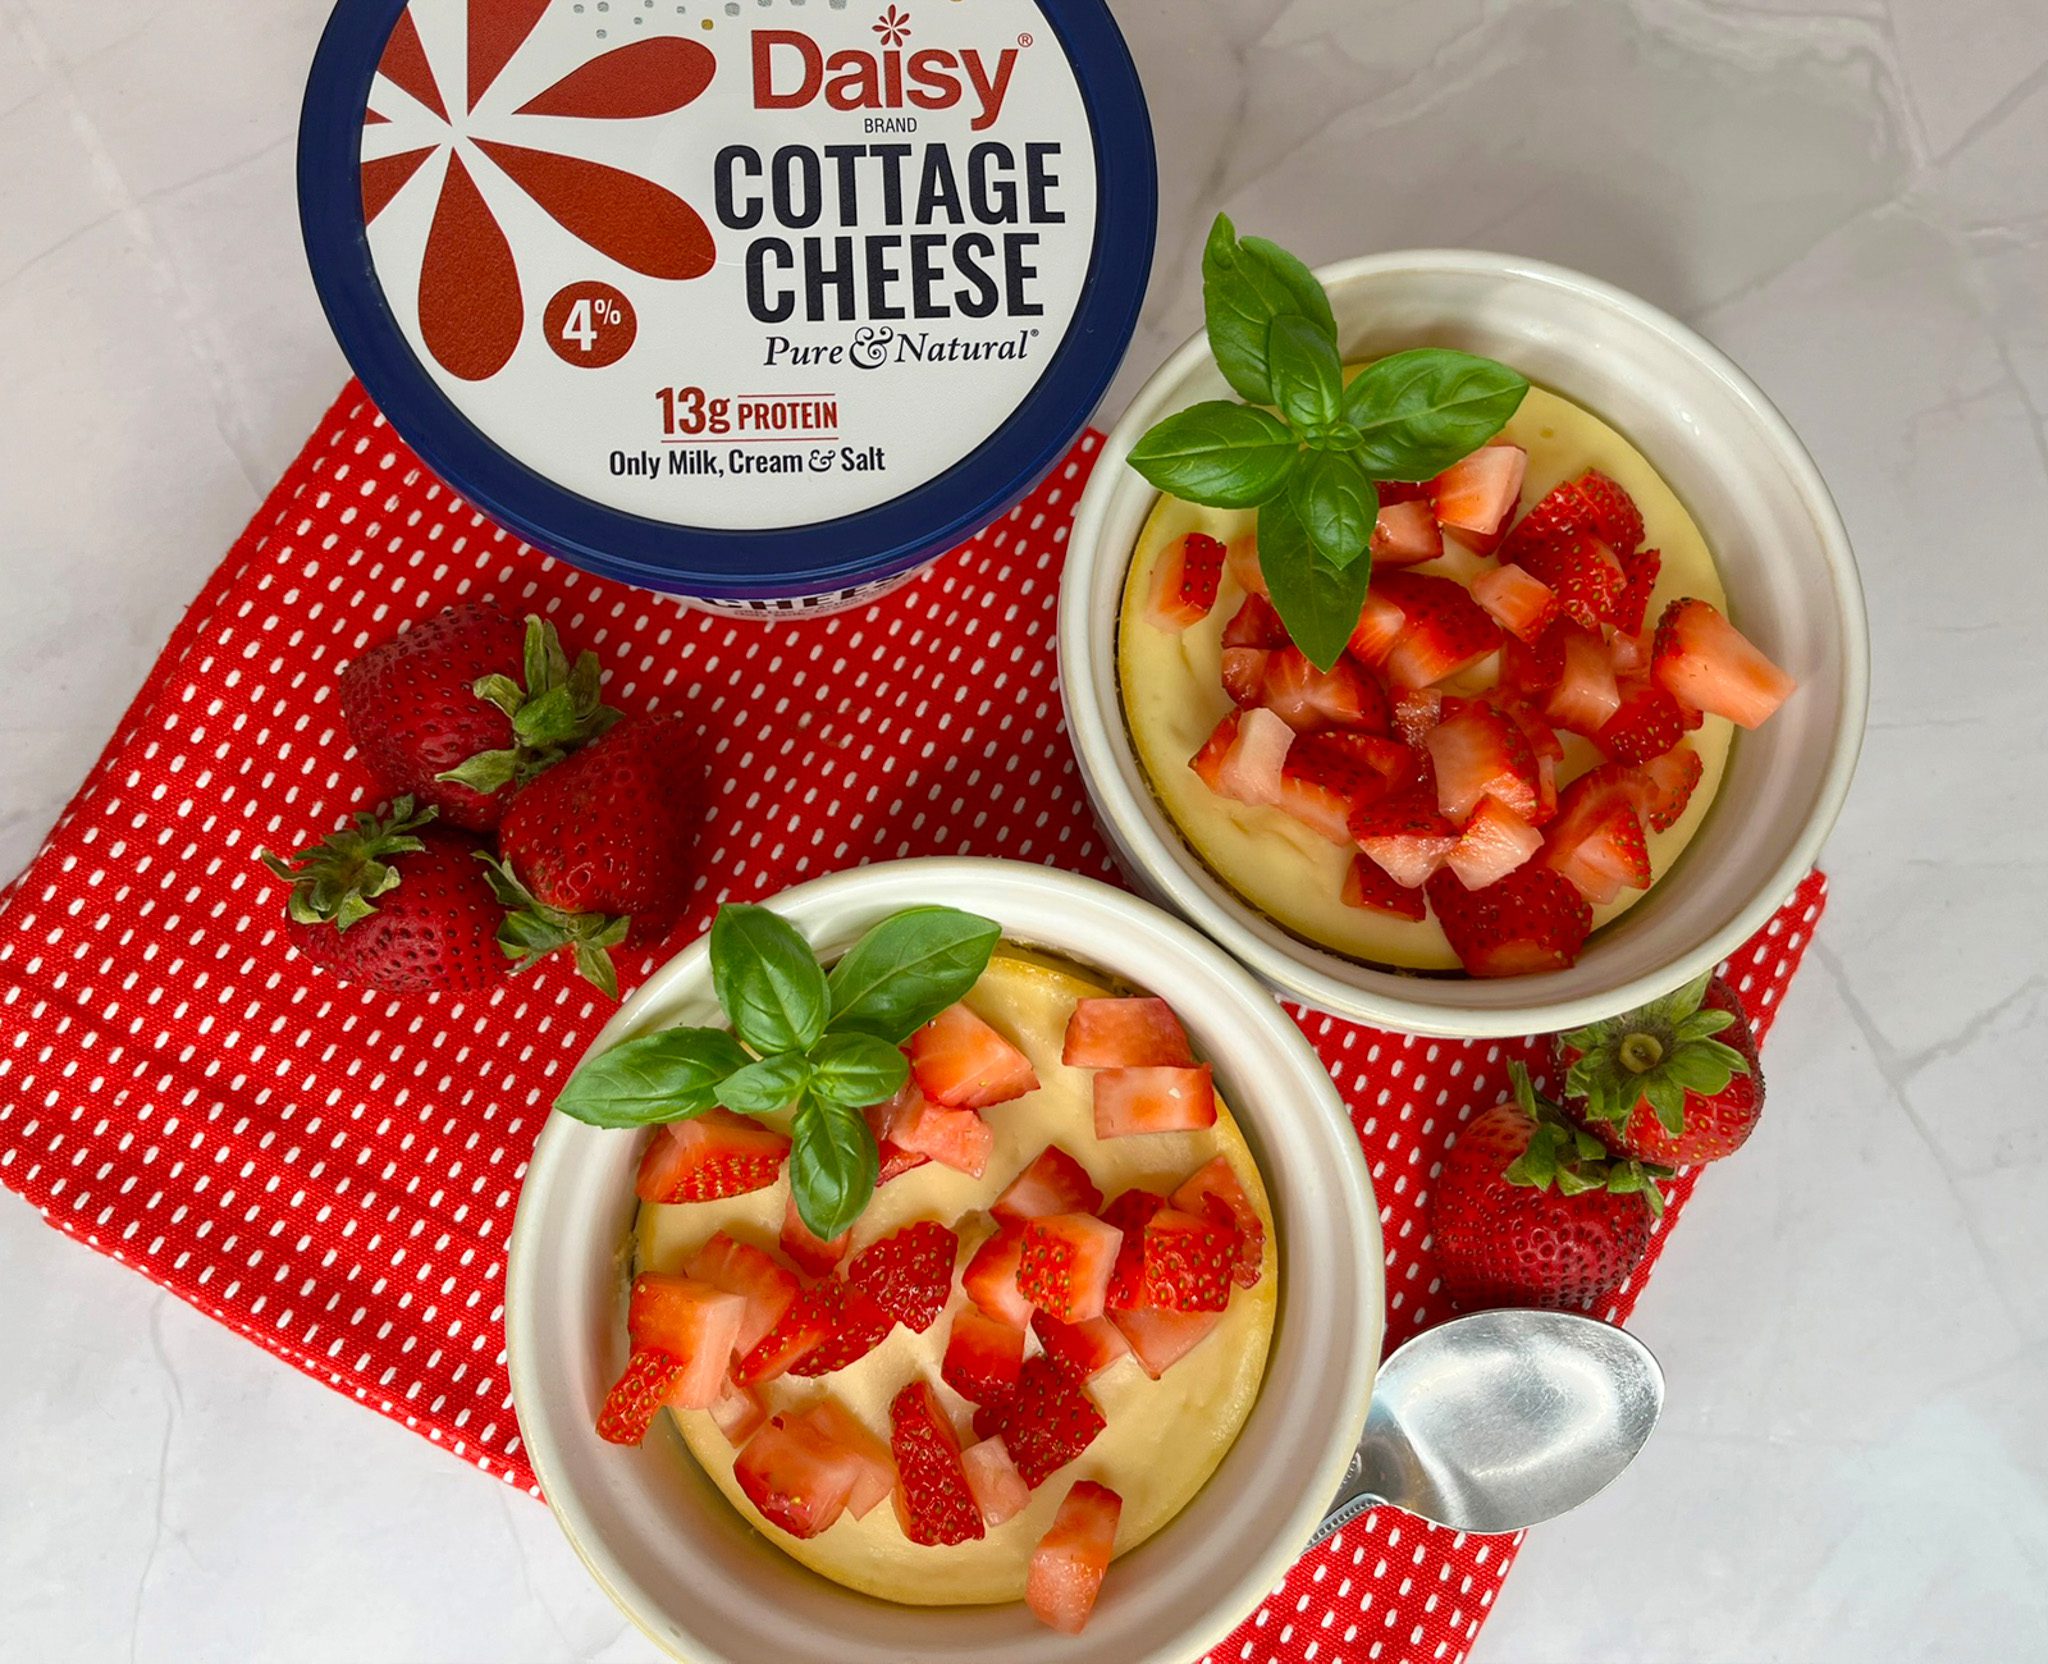
One of the best things about air fryer cheesecakes is how quickly they come together. The air fryer creates a gentle baking environment that helps produce a smooth, creamy cheesecake without heating up the entire kitchen. Plus, individual portions make serving easy and convenient.
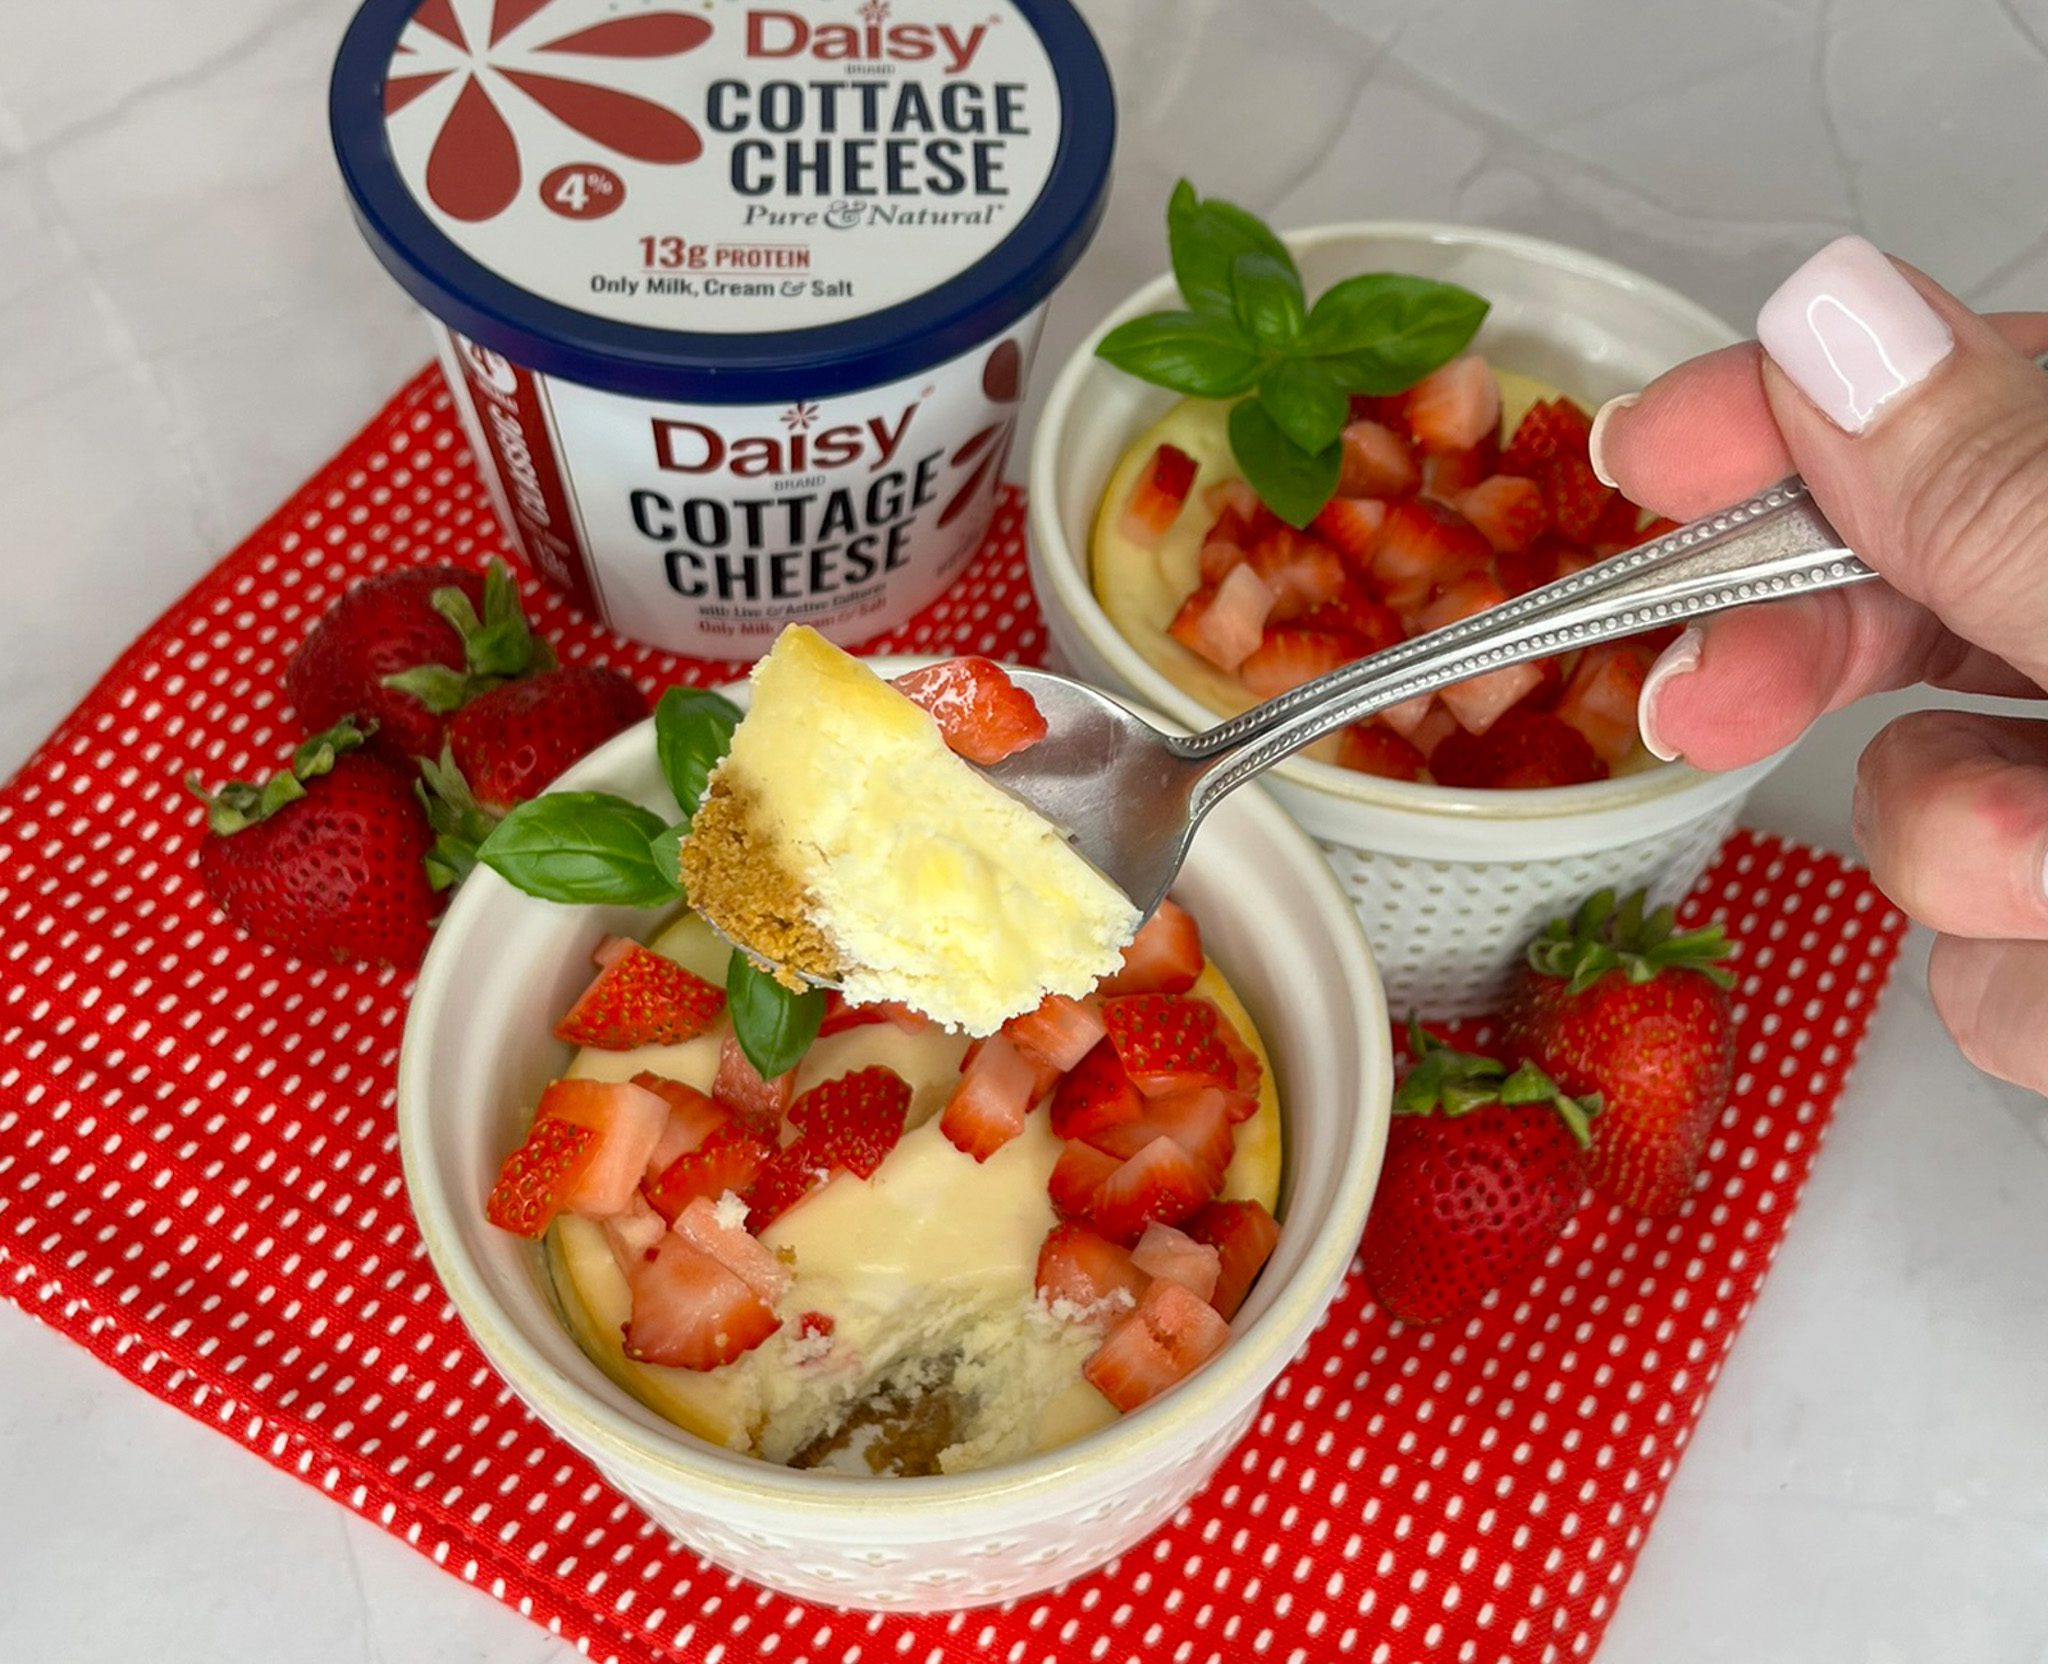
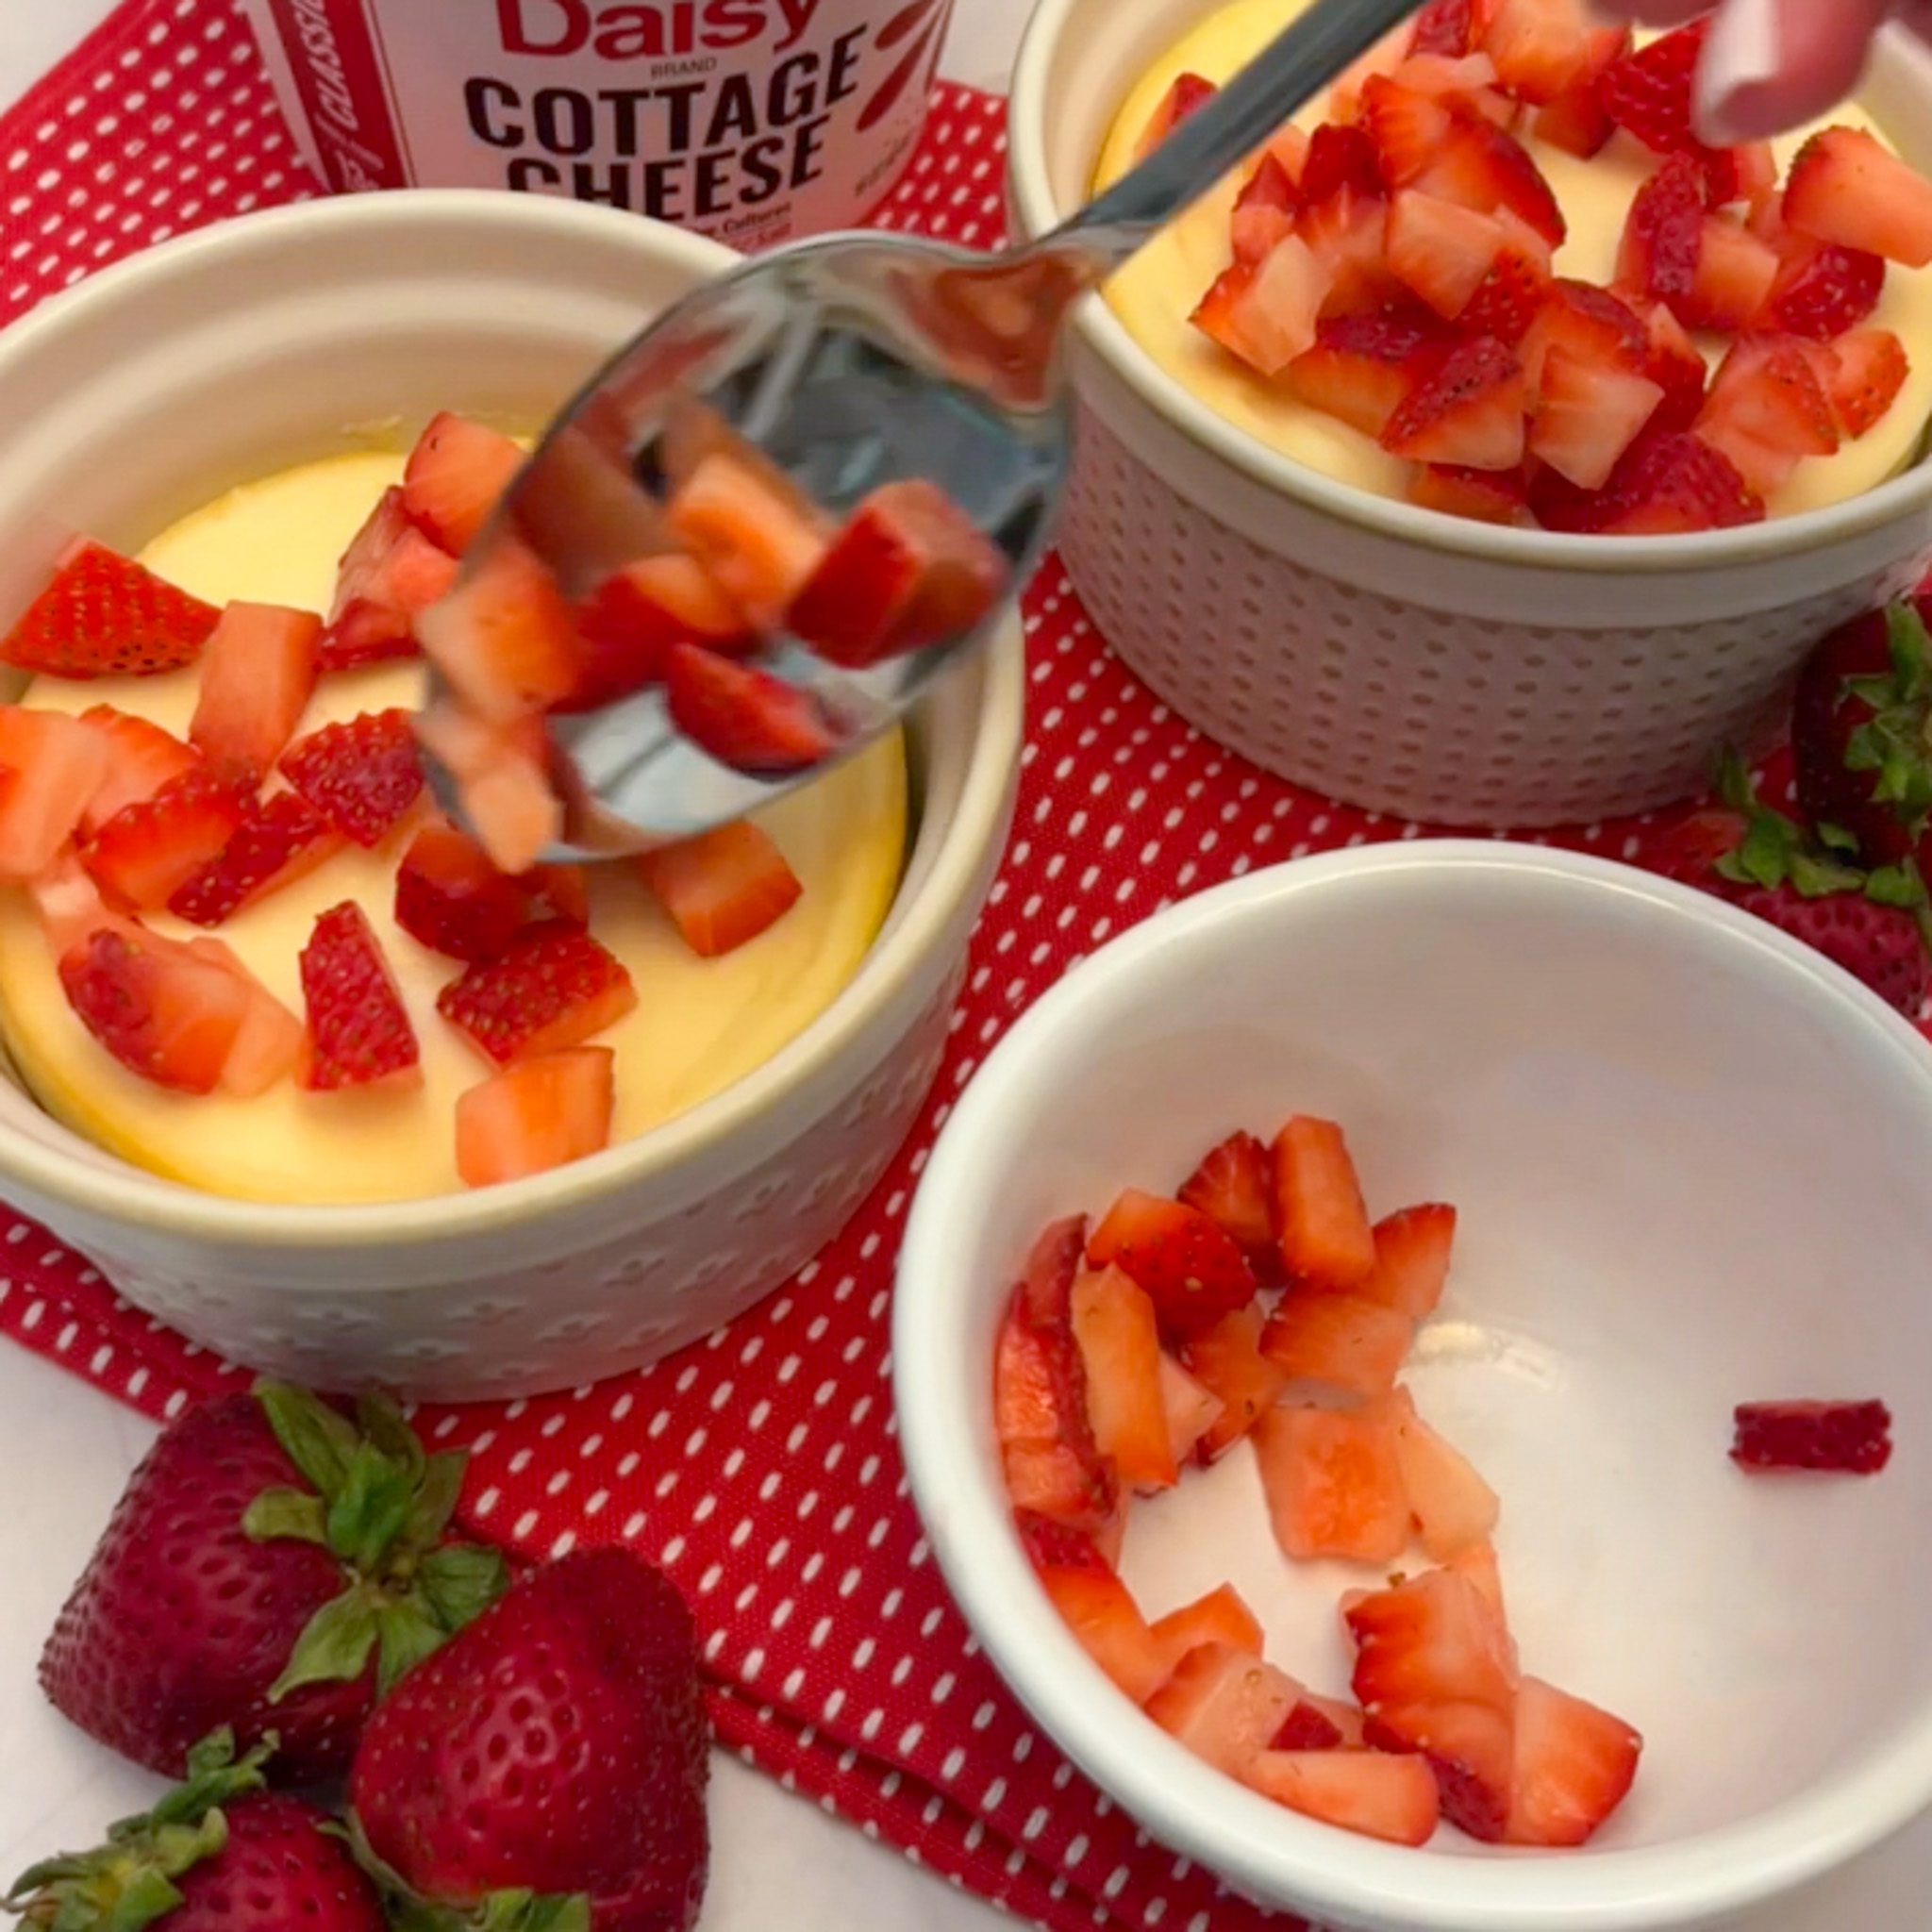
Customize your cheesecakes with your favorite toppings, from fresh berries and fruit compotes to chocolate drizzle, crushed cookies, or a spoonful of whipped cream.
Whether you’re making them for a special occasion, a weekend treat, or desserts throughout the week, these mini cheesecakes are sure to impress.
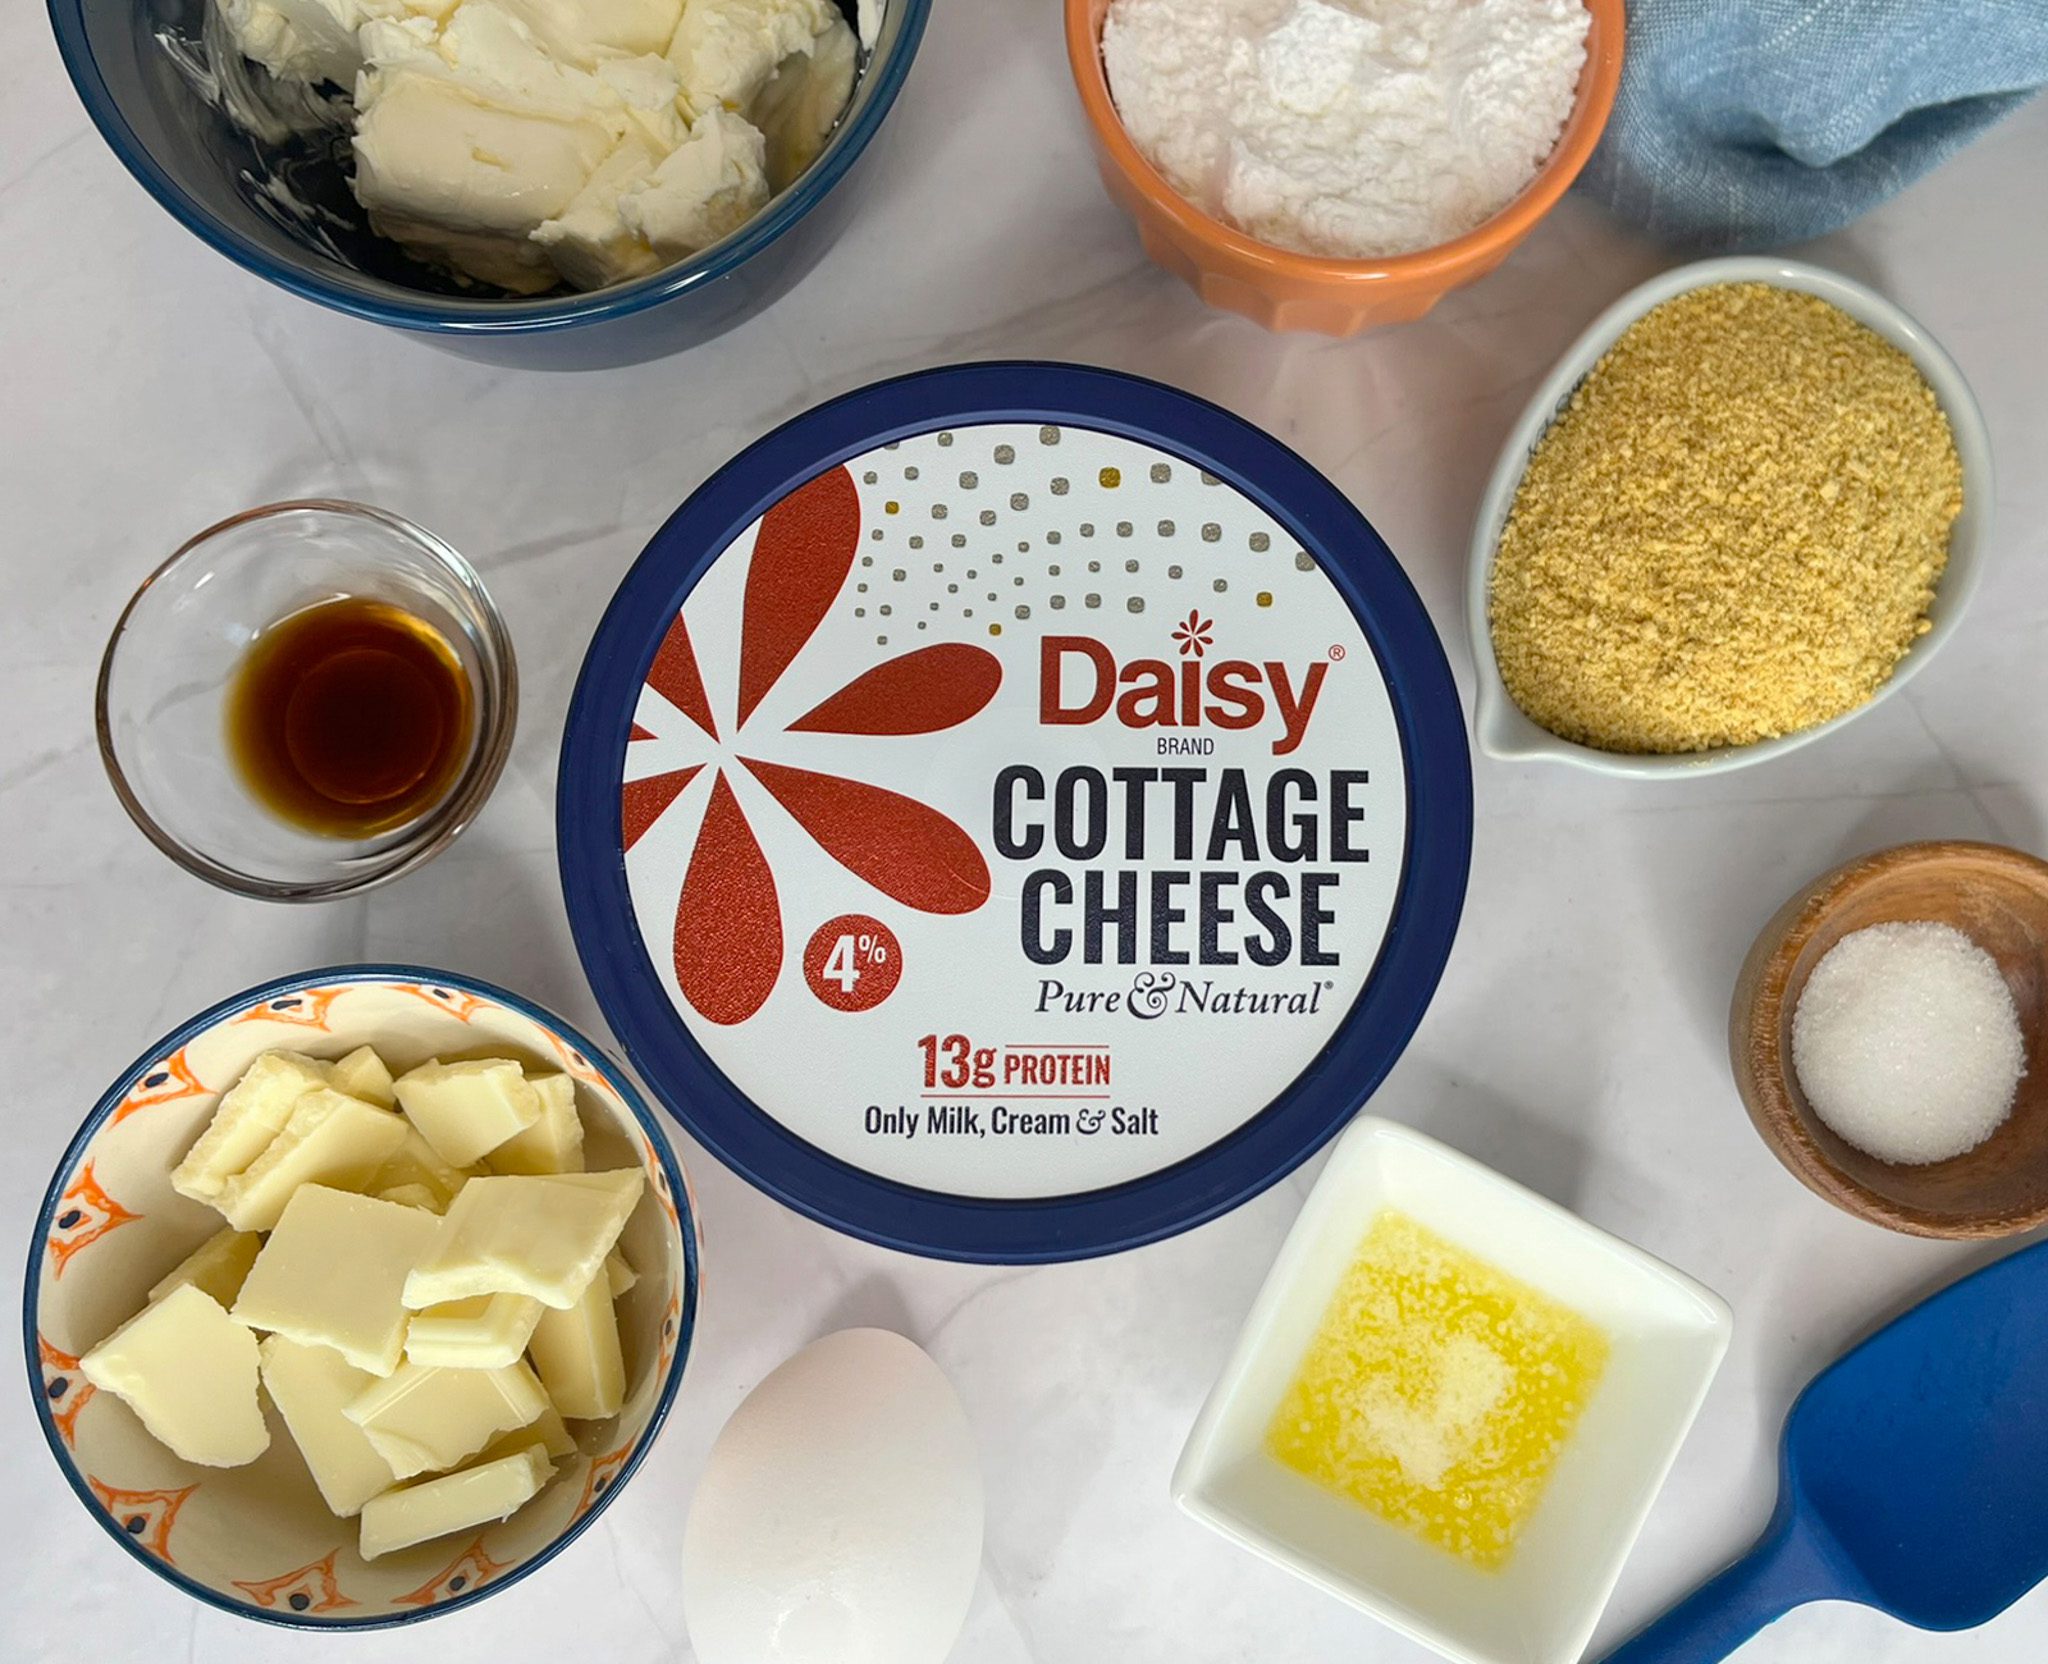
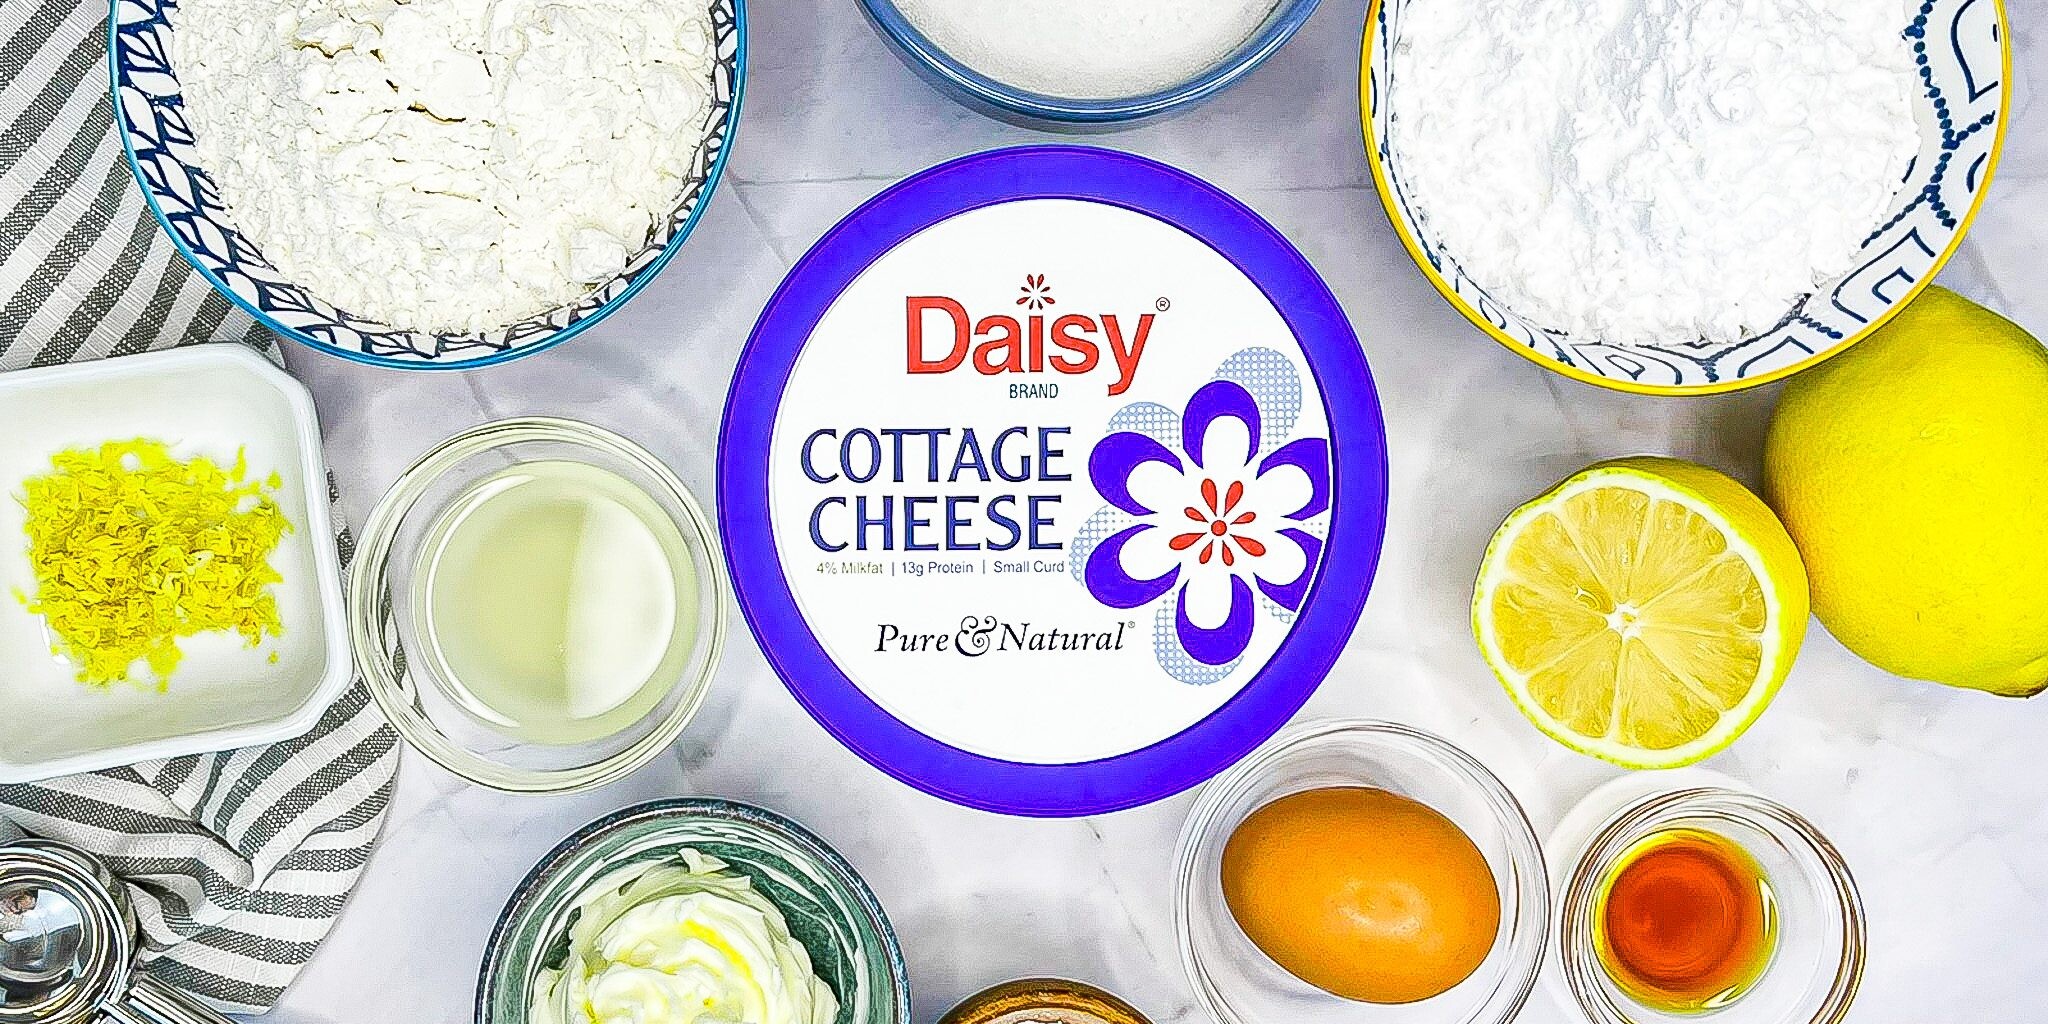
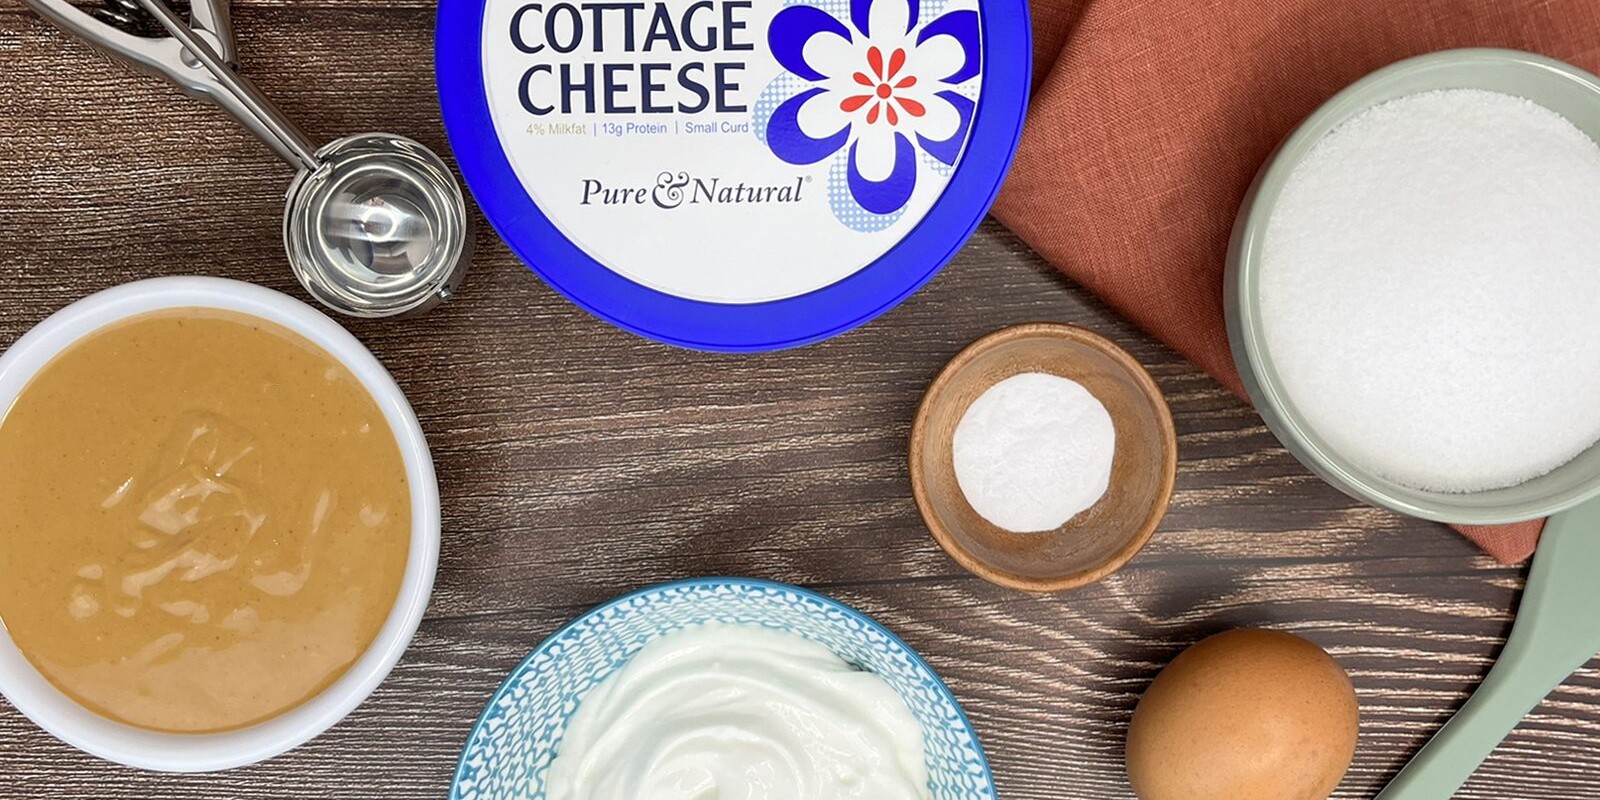
Air Fryer Cheesecake Ingredients
- Graham Cracker Crumbs (1/3 cup): Adds a light, sweet, crunchy texture that you know and love from classic cheesecake.
- Sugar (1 teaspoon): Adds a touch of sweetness to the crust.
- Melted Butter (1 ½ tablespoons): Adds a bit of flavor and holds the graham crackers together.
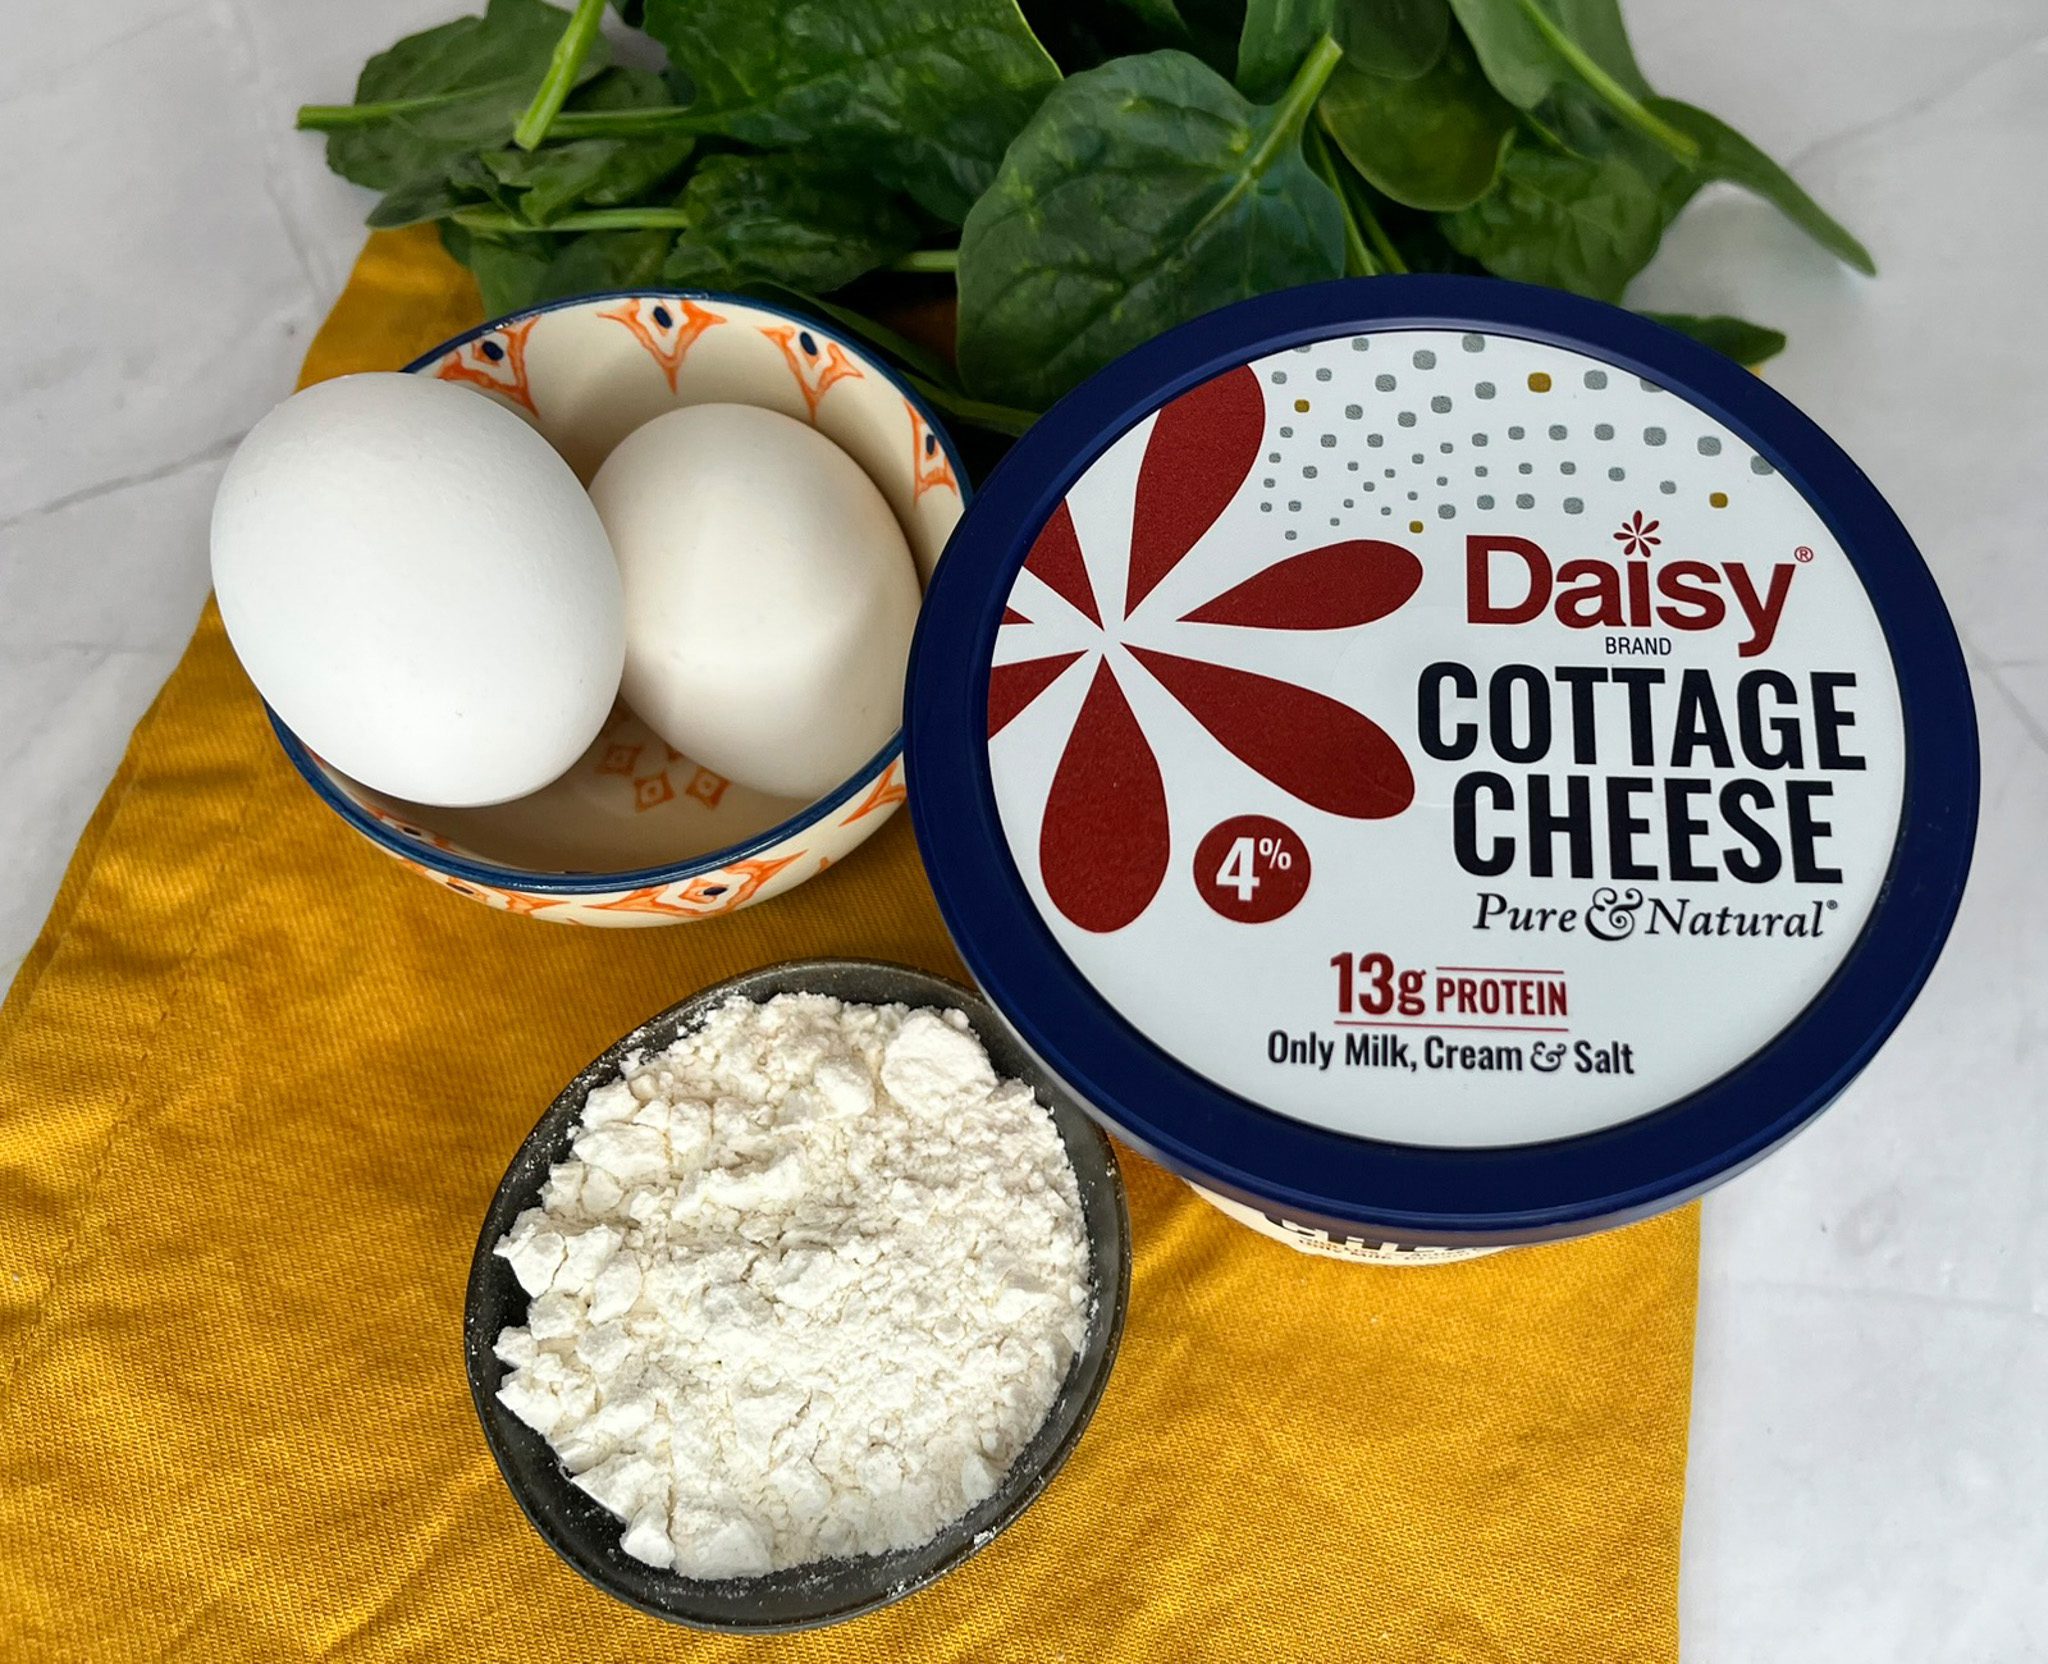
- Daisy Cottage Cheese (3/4 cup): The secret ingredient in these delicious cheesecakes. It lightens the cheesecakes, adds a bit of protein, and adds a silky, creamy texture that you love in cheesecake.
- Cream Cheese (6 ounces, softened): Provides structure and a rich texture with a mild tang.
- Powdered Sugar (1/3 cup): Adds a touch of sweetness to the cheesecake filling without adding grittiness.
- Large Egg (1, room temperature): Helps bind the other ingredients together and acts as a leavening agent.
- Vanilla Extract (1/2 teaspoon): Enhances the flavor of desserts.
- White Baking Chocolate (2 ounces, melted): Good quality white chocolate gives a sweet, buttery, slightly milky flavor to the cheesecakes and provides a bit of structure.
Substitutions, Variations, and Tips
- Animal Crackers, chocolate wafers, or gluten-free graham crackers can be used in place of traditional graham crackers.
- You can substitute coconut oil for butter, if desired. Note, that coconut oil has a slight coconut flavor.
- An immersion blender may be used in place of the food processor or blender to create the creamy, light, fluffy cheesecake filling.
- Chop the white chocolate bar into small even-sized pieces for best results before microwaving. Microwave in short time increments to avoid scorching.
- Semisweet chocolate may be used in place of white chocolate, with chocolate wafers in place of graham crackers.
- Make sure your ingredients are room temperature for best results. Cold ingredients tend to create lumpy batters.
- To quickly bring cream cheese to room temperature, cut into small pieces, or you can place the sealed block into a bowl of warm water for about 15 minutes.
- To quickly bring the egg to room temperature, place into a bowl of warm tap water for about 10-15 minutes.
- Lighter color ramekins are best for cheesecakes as dark pans conduct heat faster.
- Remove from the air fryer before the middle looks completely set. The cheesecakes will continue to solidify after removal from the air fryer. Overcooking will create a chalky texture.
- Allowing the cheesecakes to cool to room temperature before placing in the refrigerator will keep the cheesecake from cracking. Rapidly cooling may cause the top of the cheesecake to crack.
- Top the cheesecakes with fresh berries or crushed cookies, drizzle with caramel or chocolate sauce, spread with a layer of Daisy Cottage Cheese Single Serve Fruit Topping, or top a big spoonful of whipped cream.
How to Make Air Fryer Cheesecakes
- Preheat air fryer to 300°F on air fry mode.
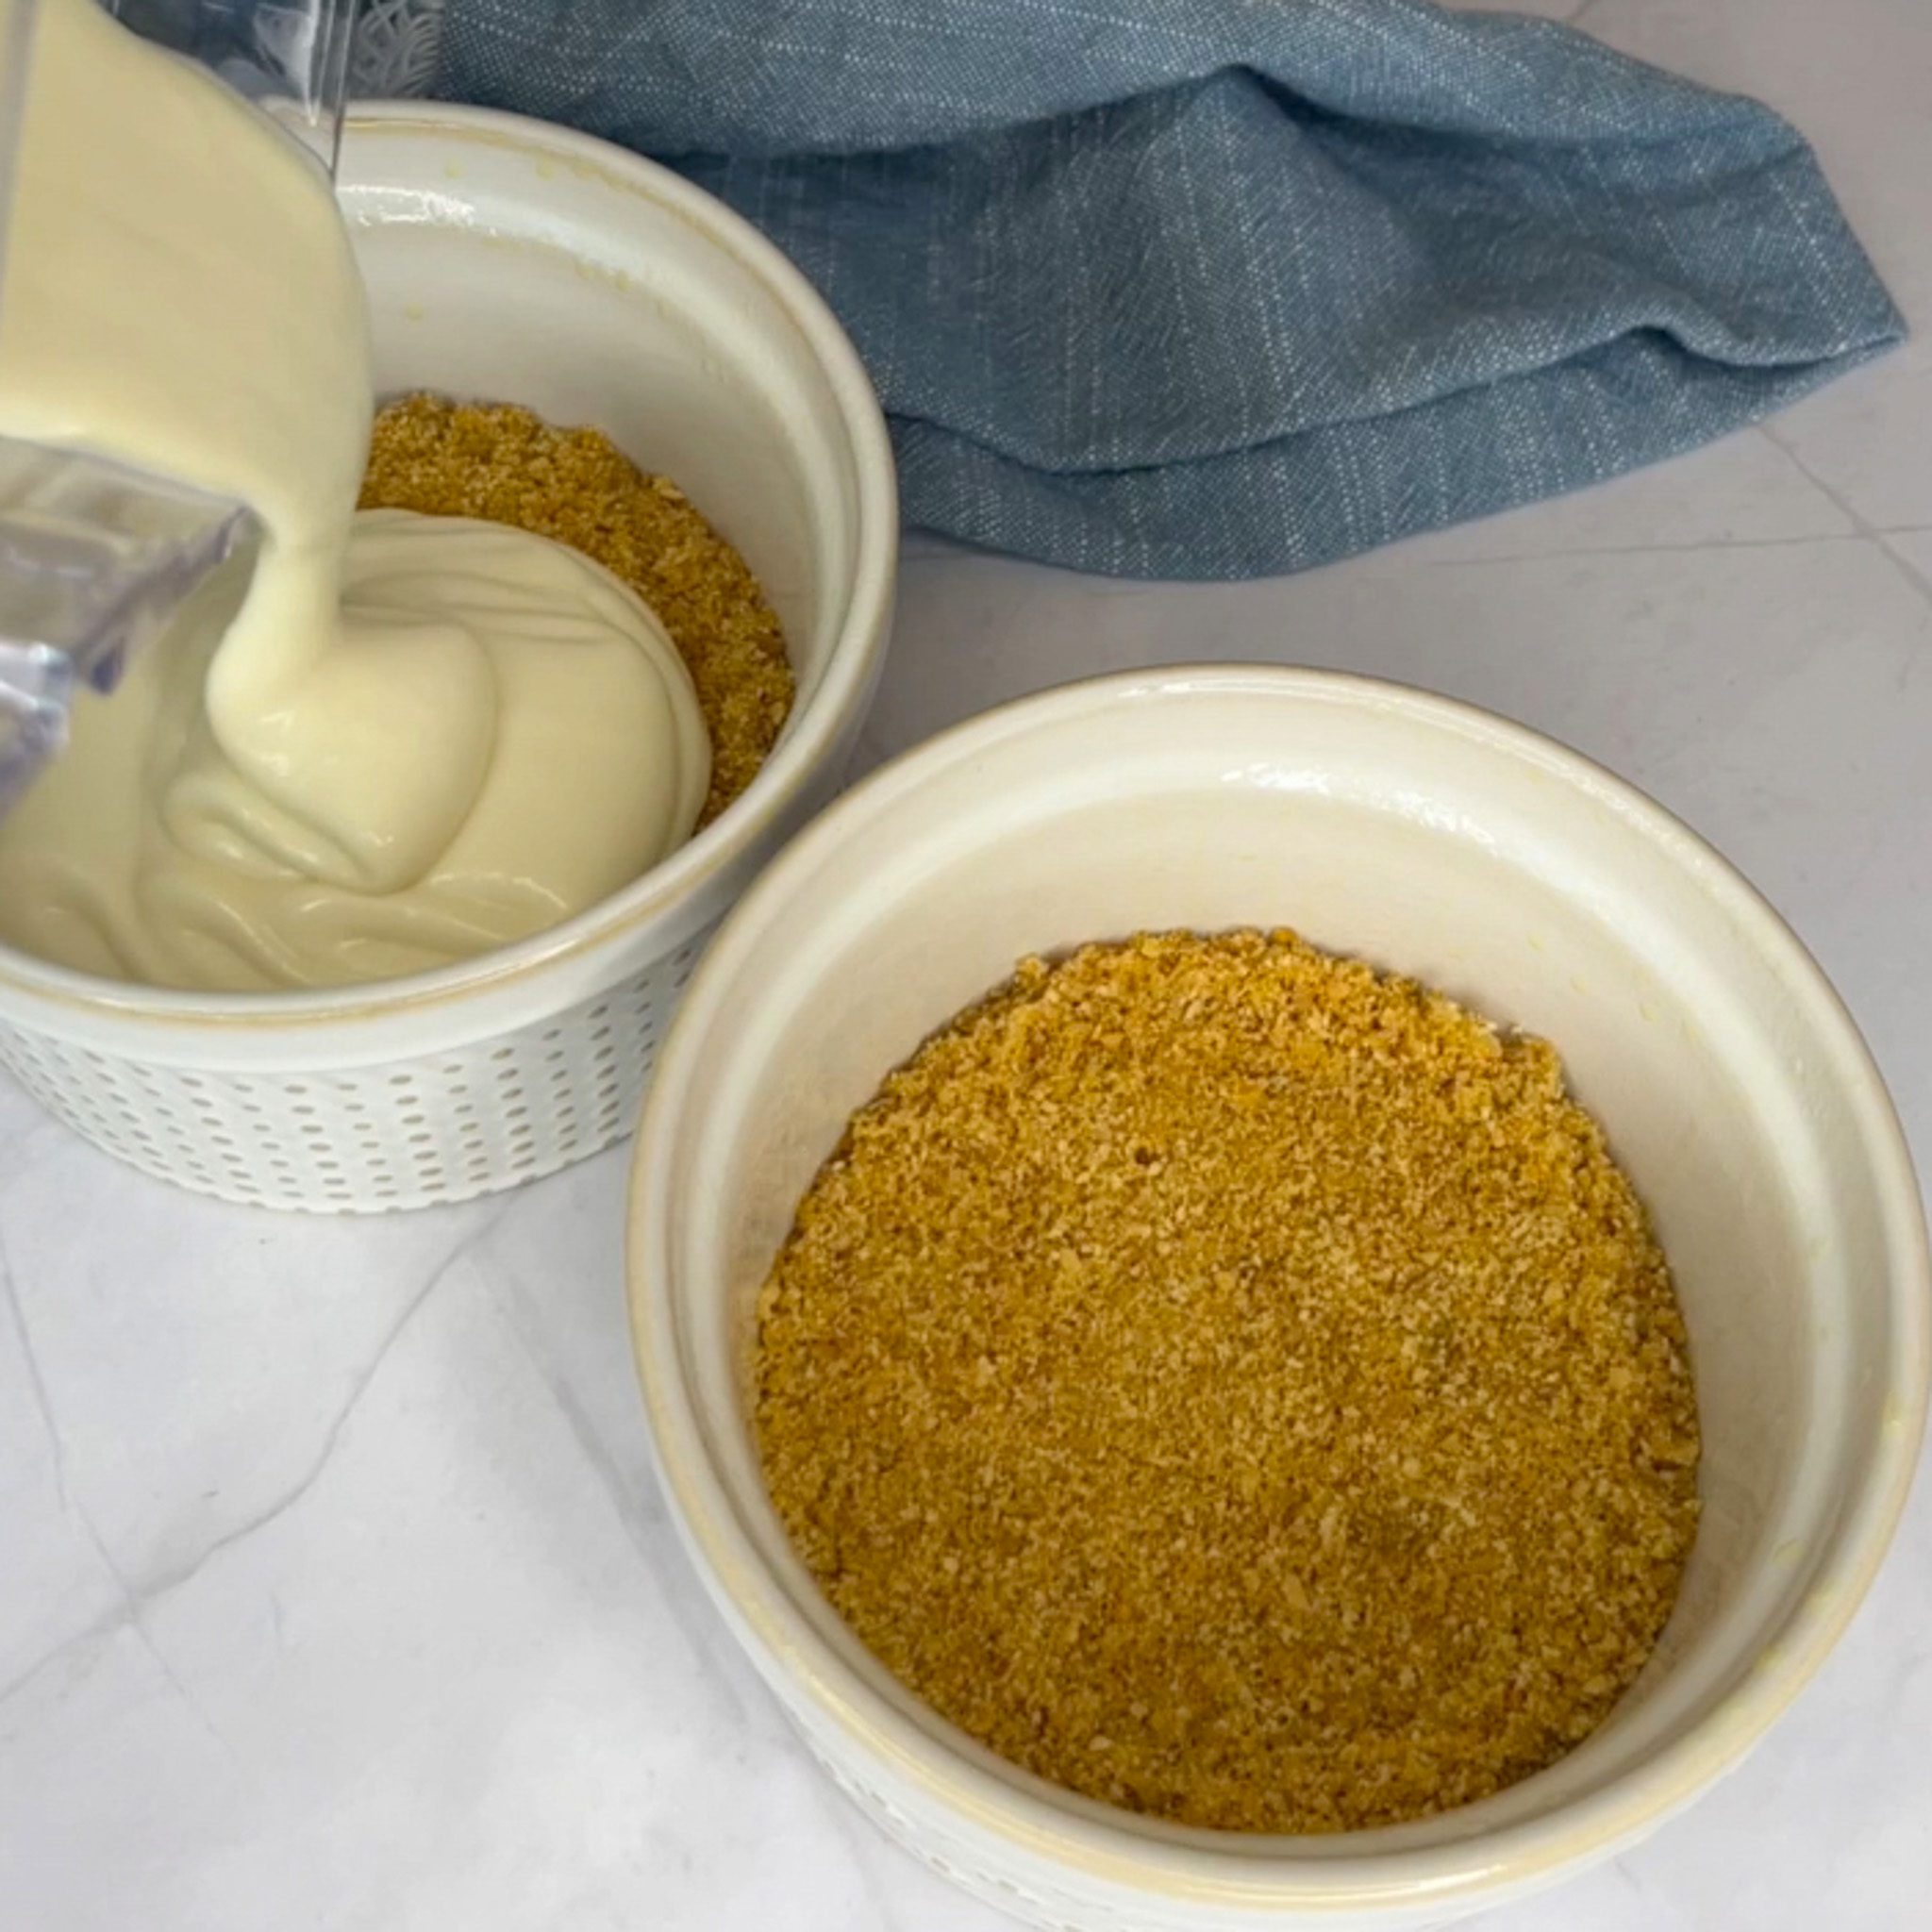
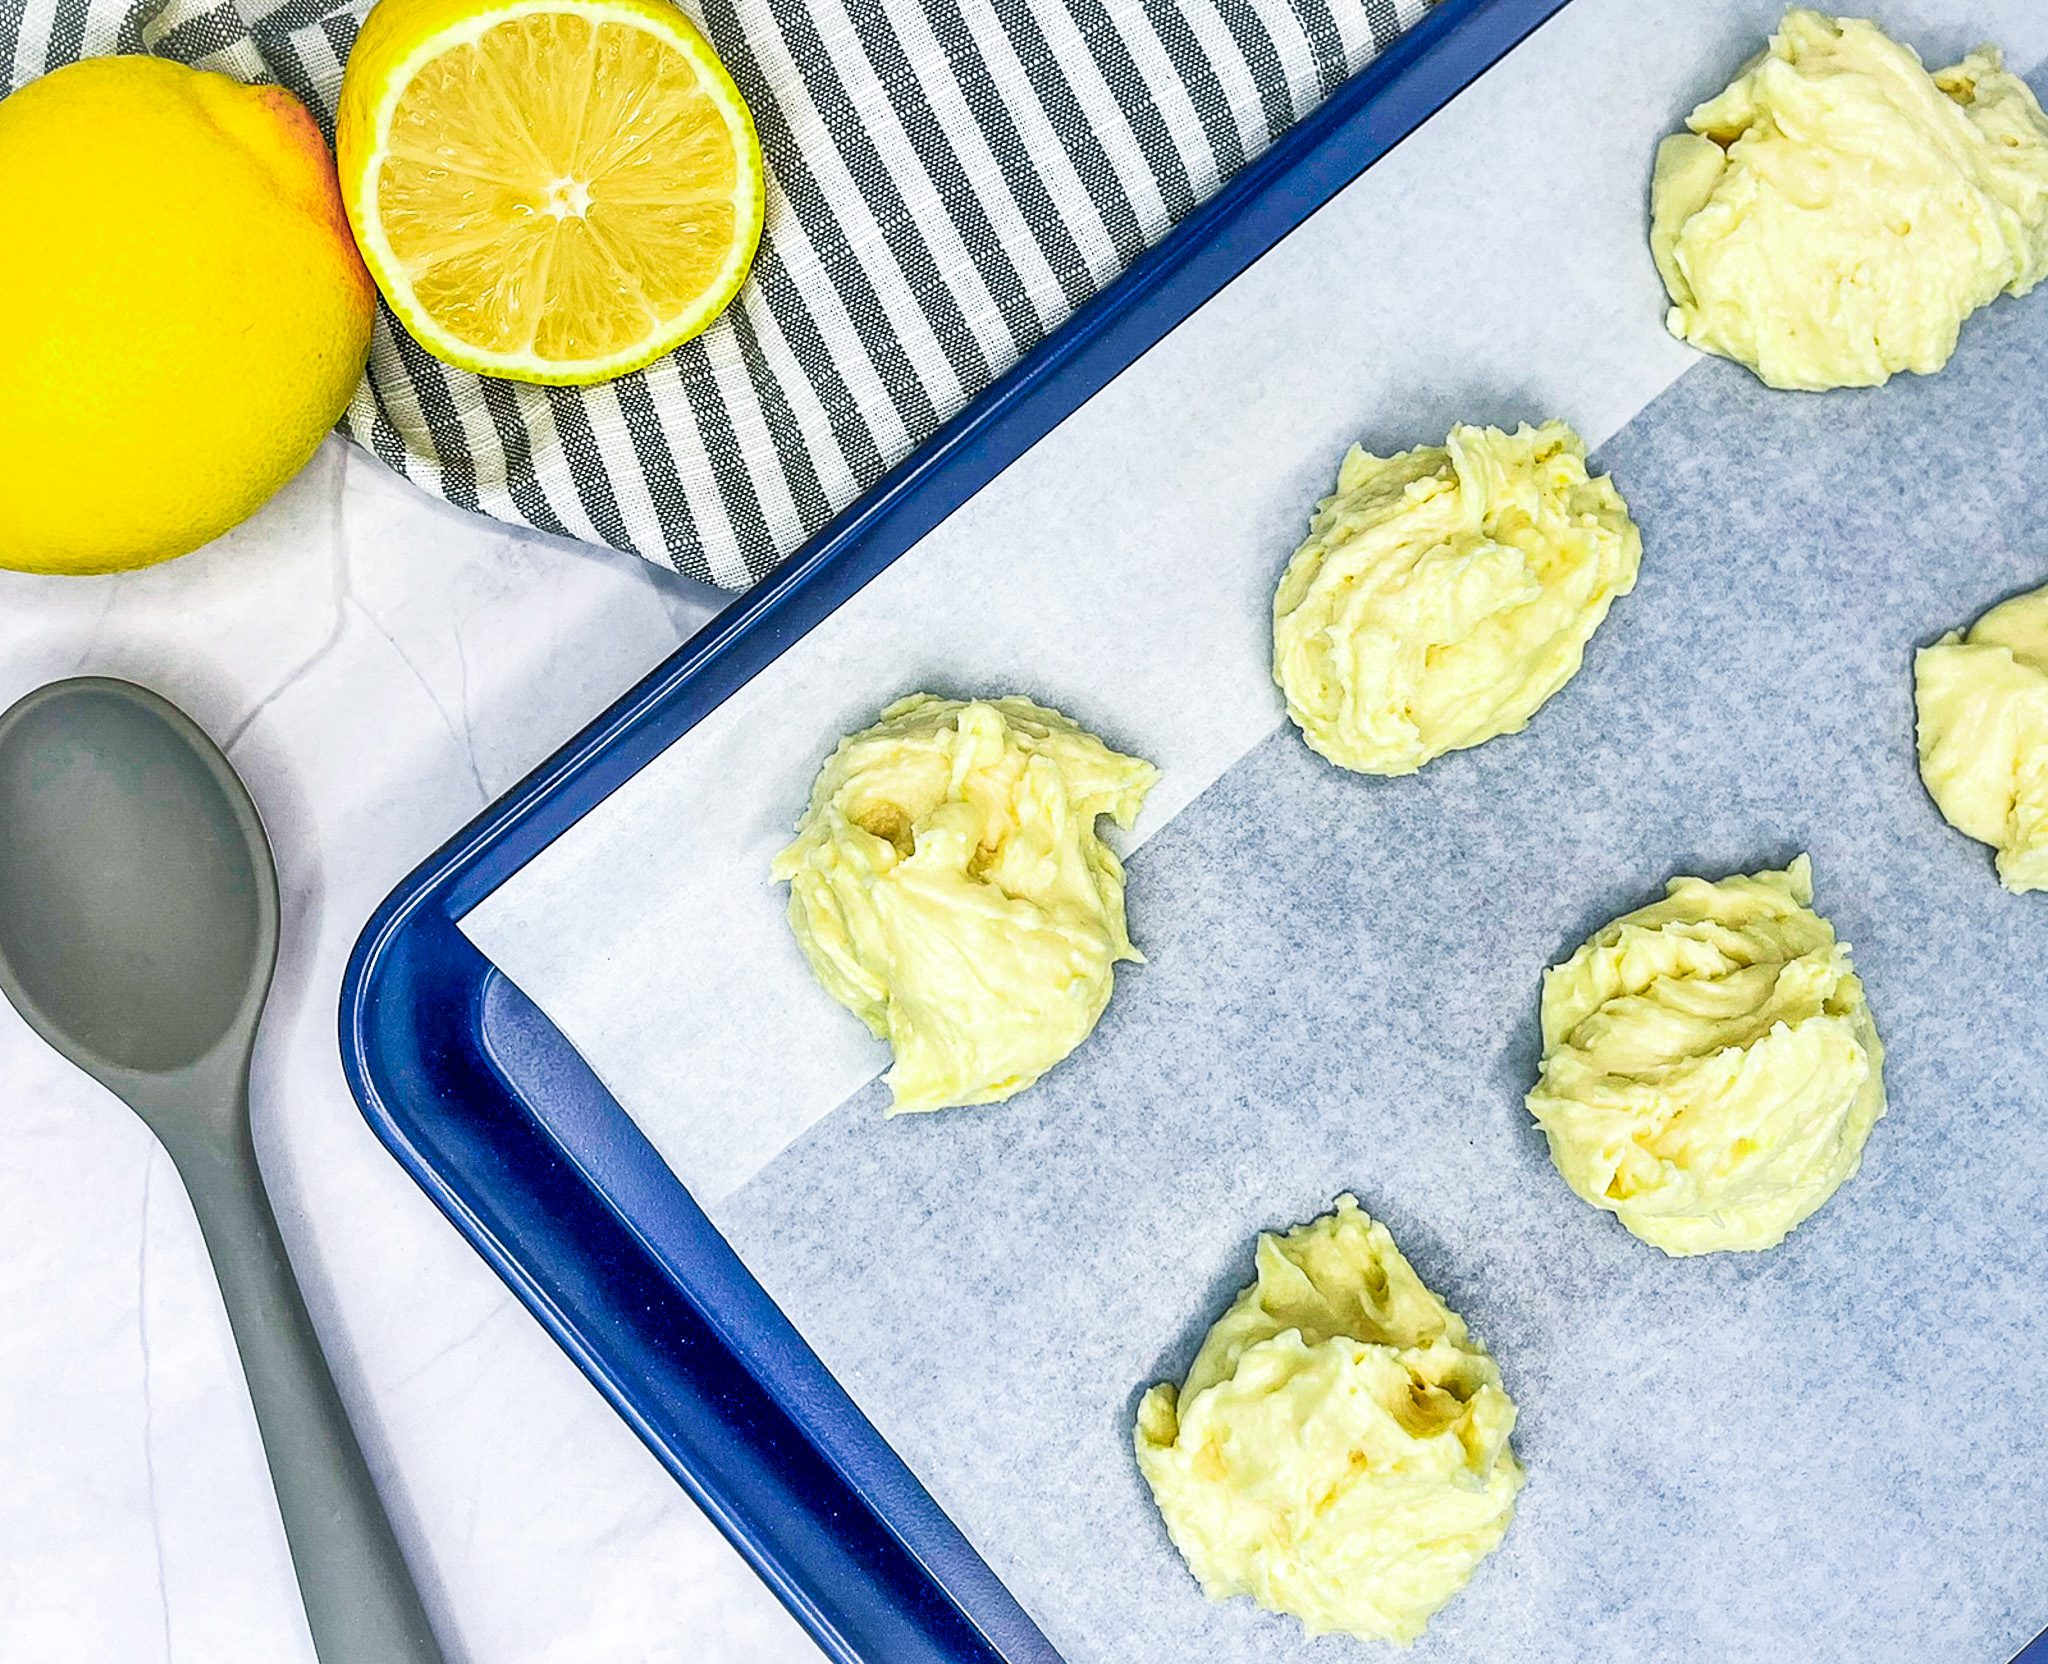
- Coat 3 individual 12 oz ramekins with nonstick spray. Mix graham cracker crumbs, sugar and melted butter. Press into the bottom of the ramekins.
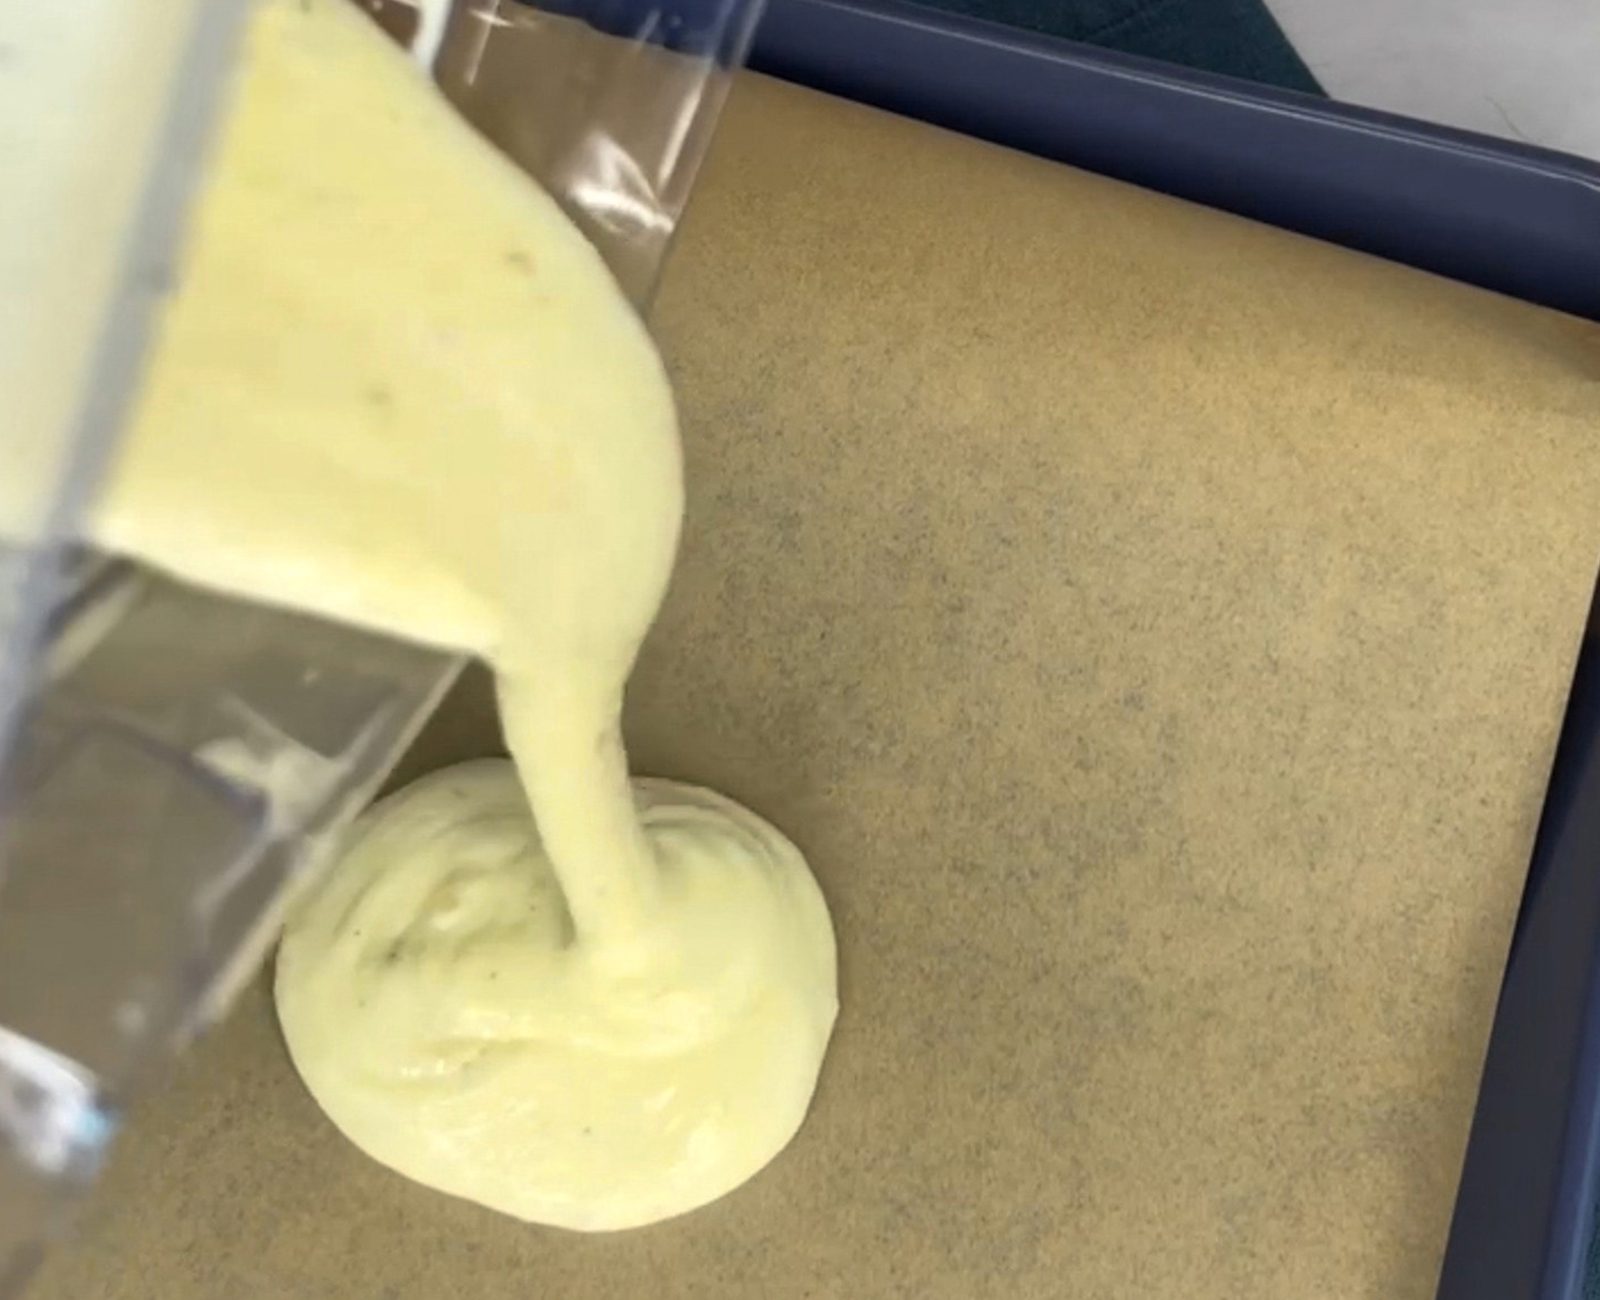
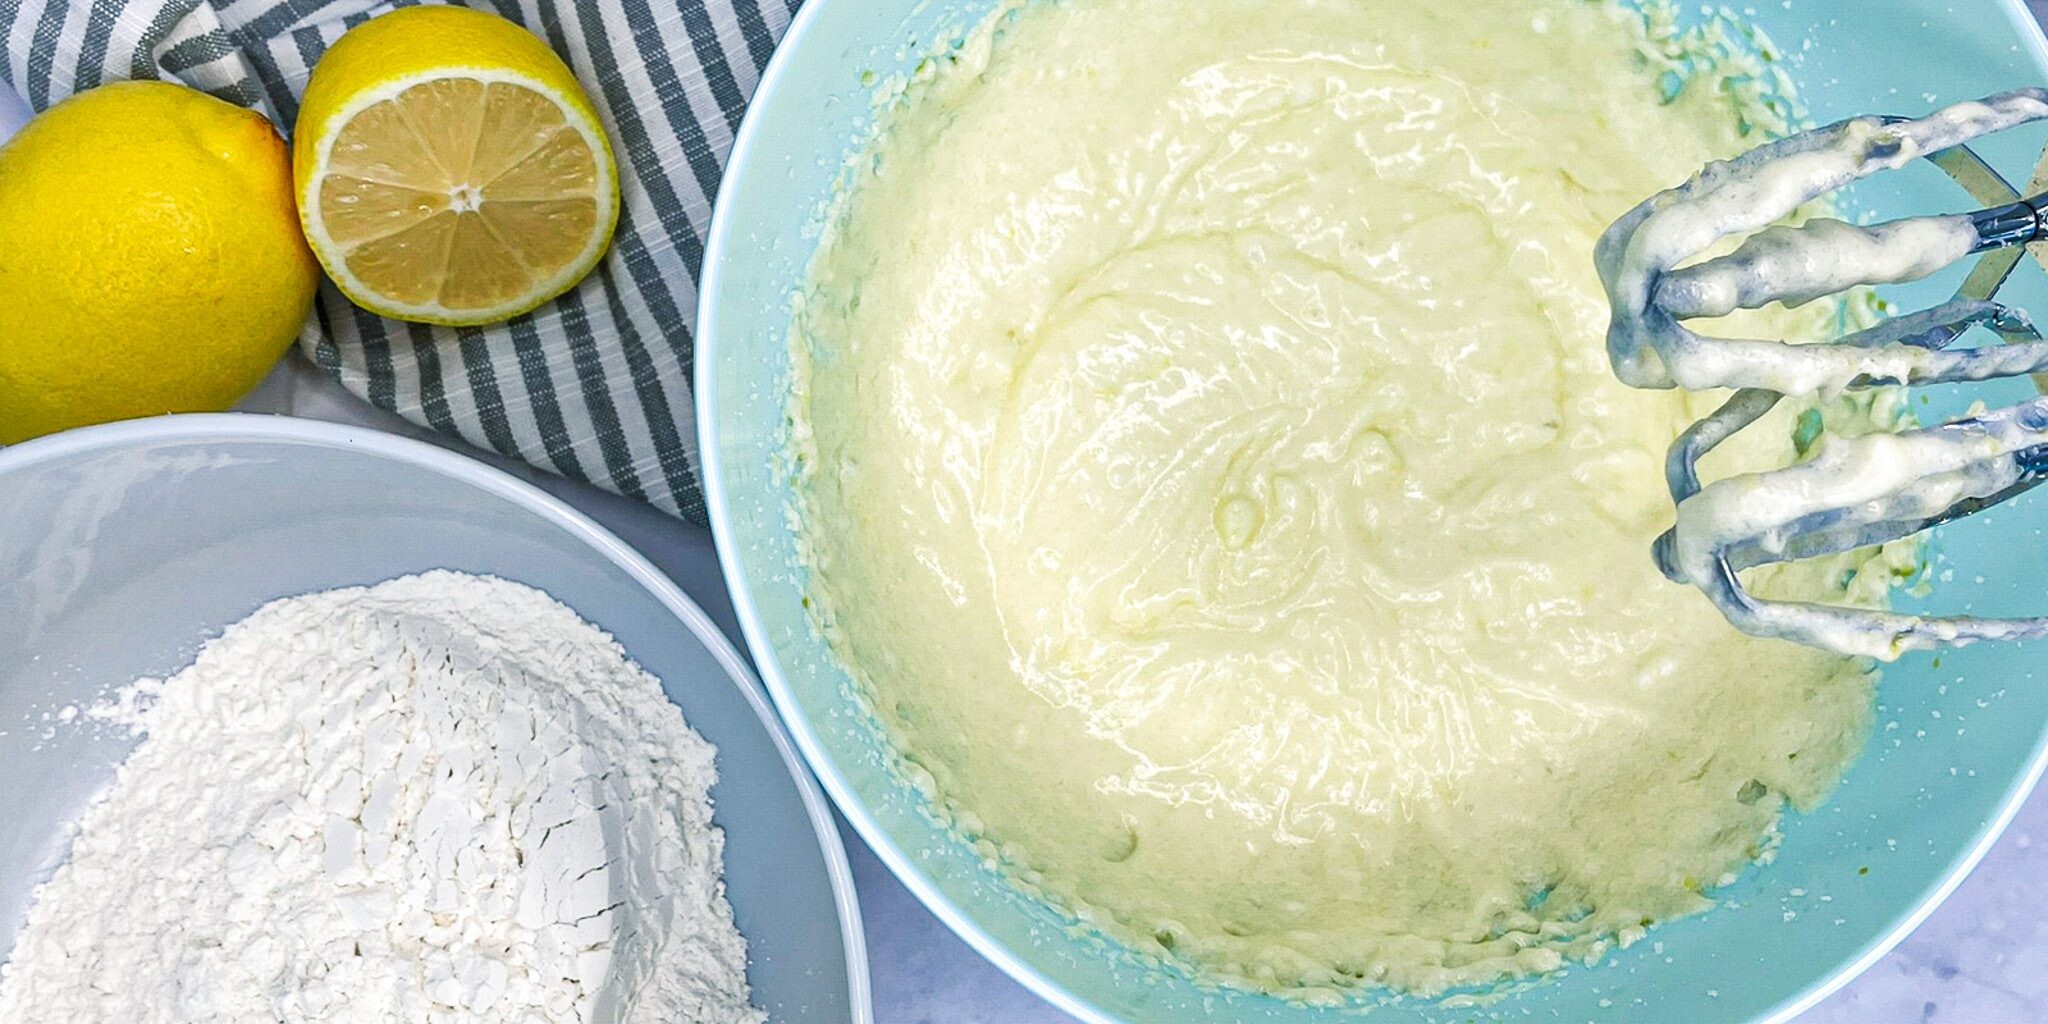
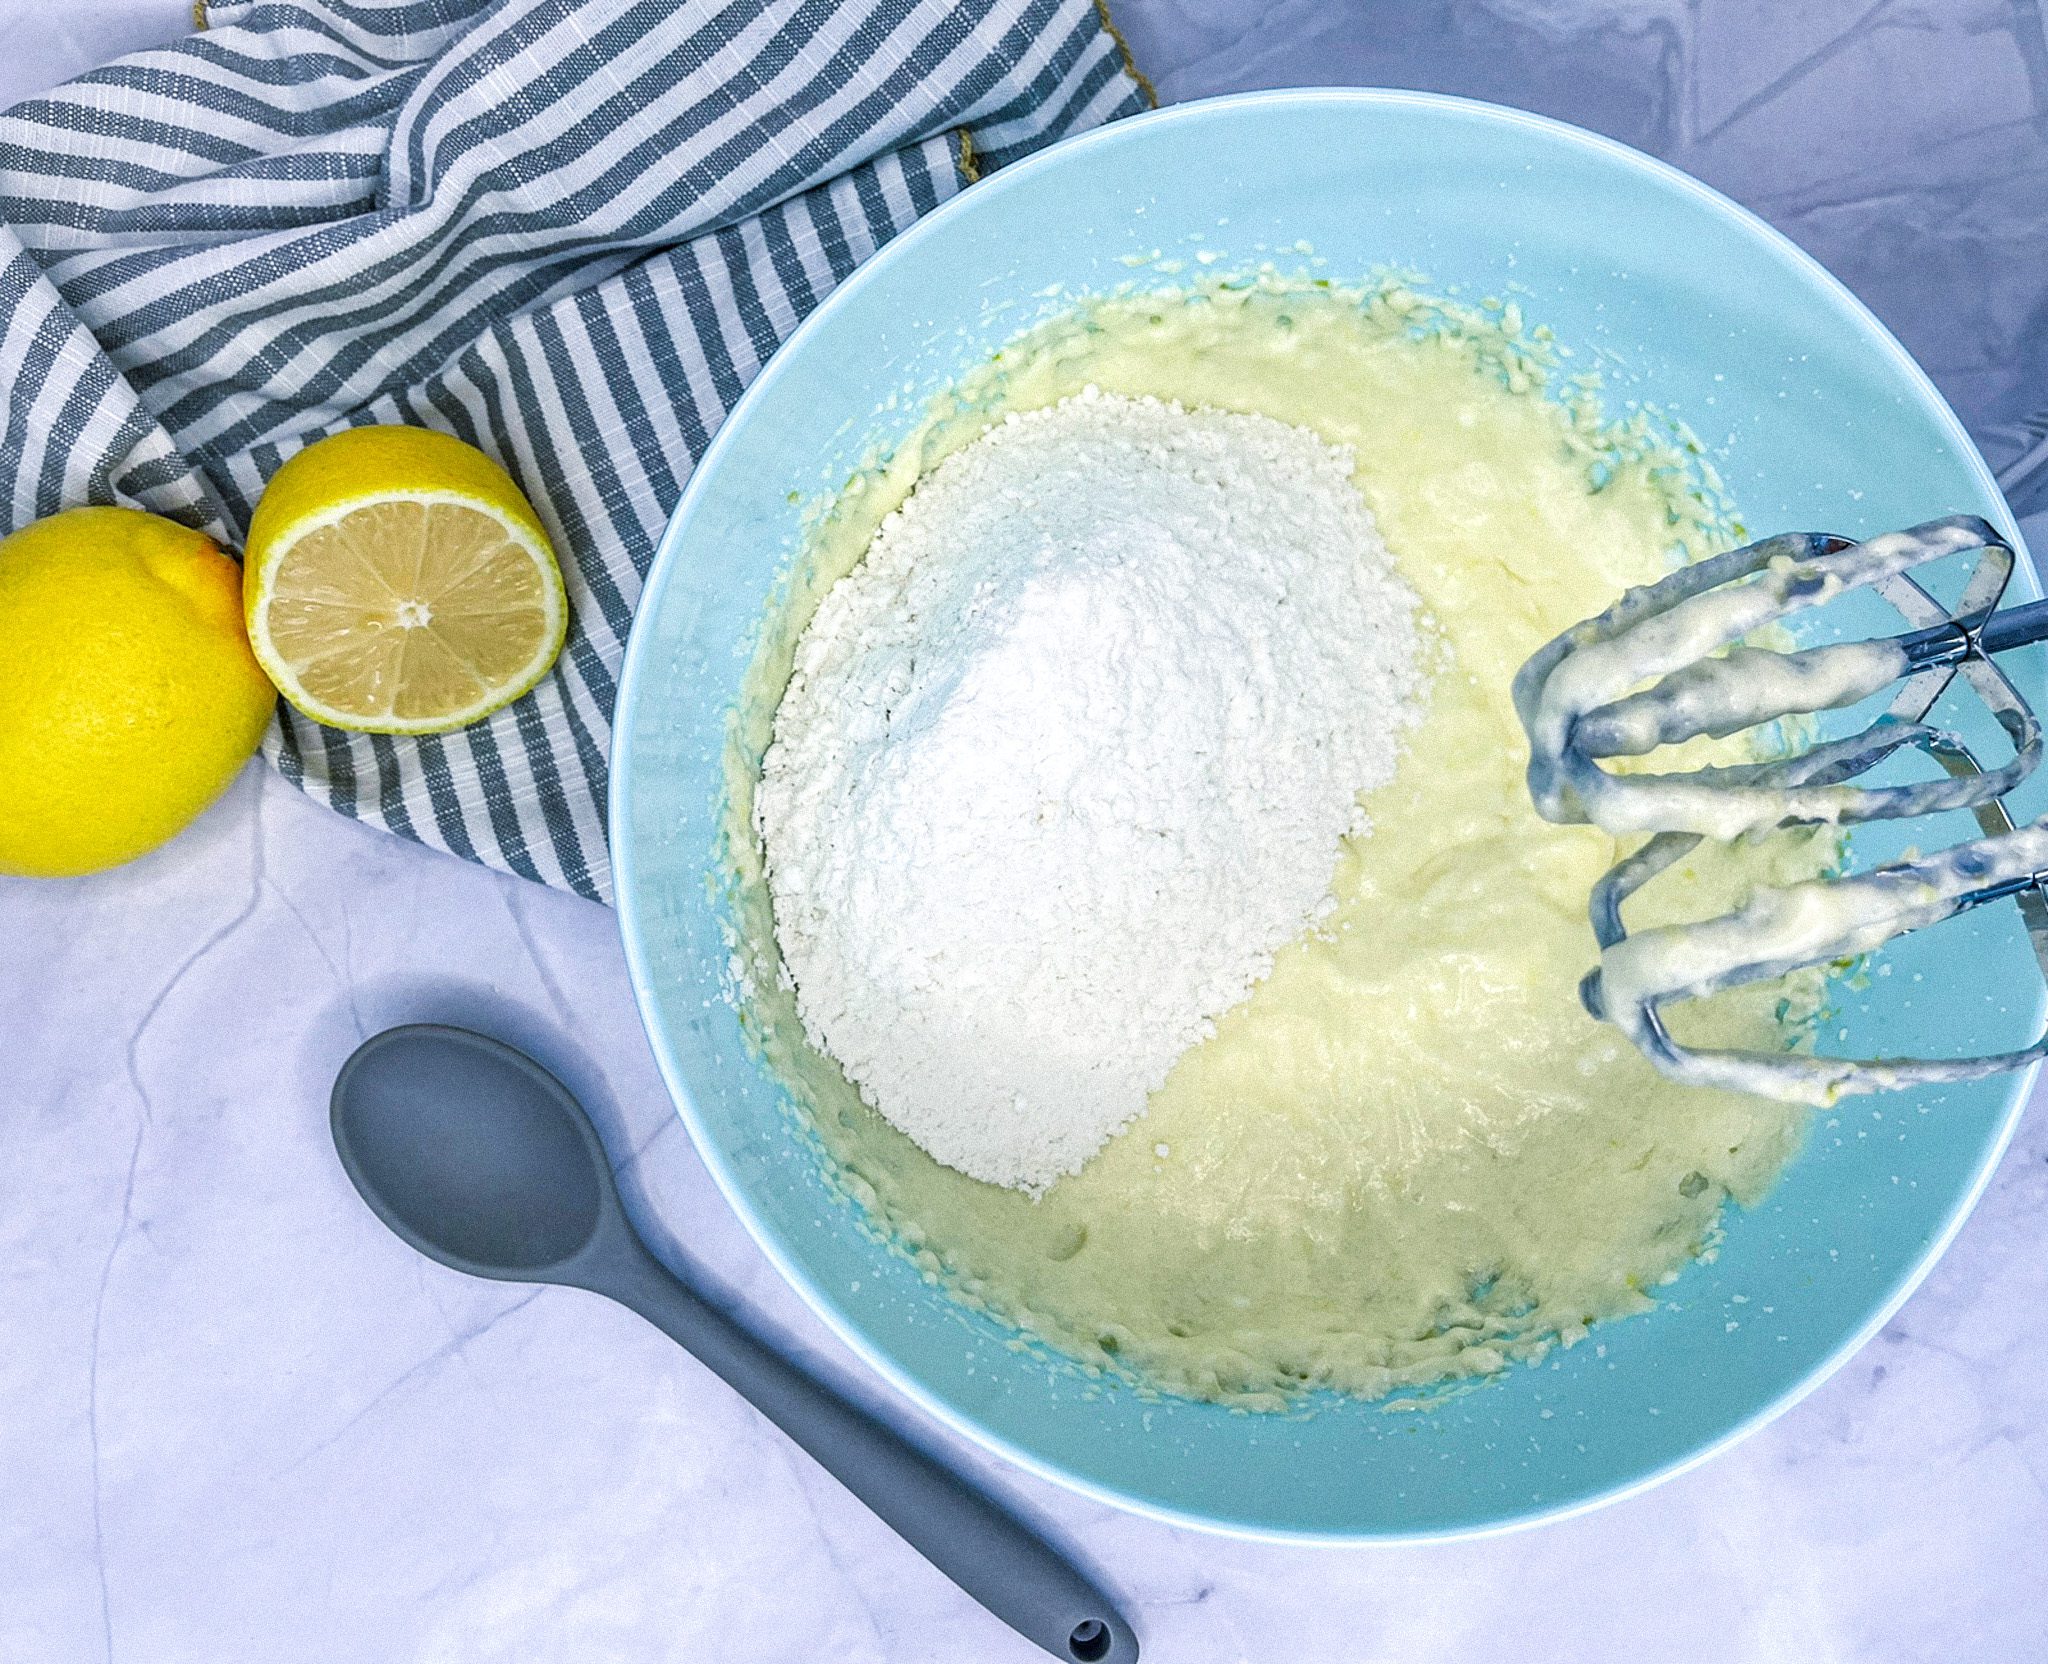
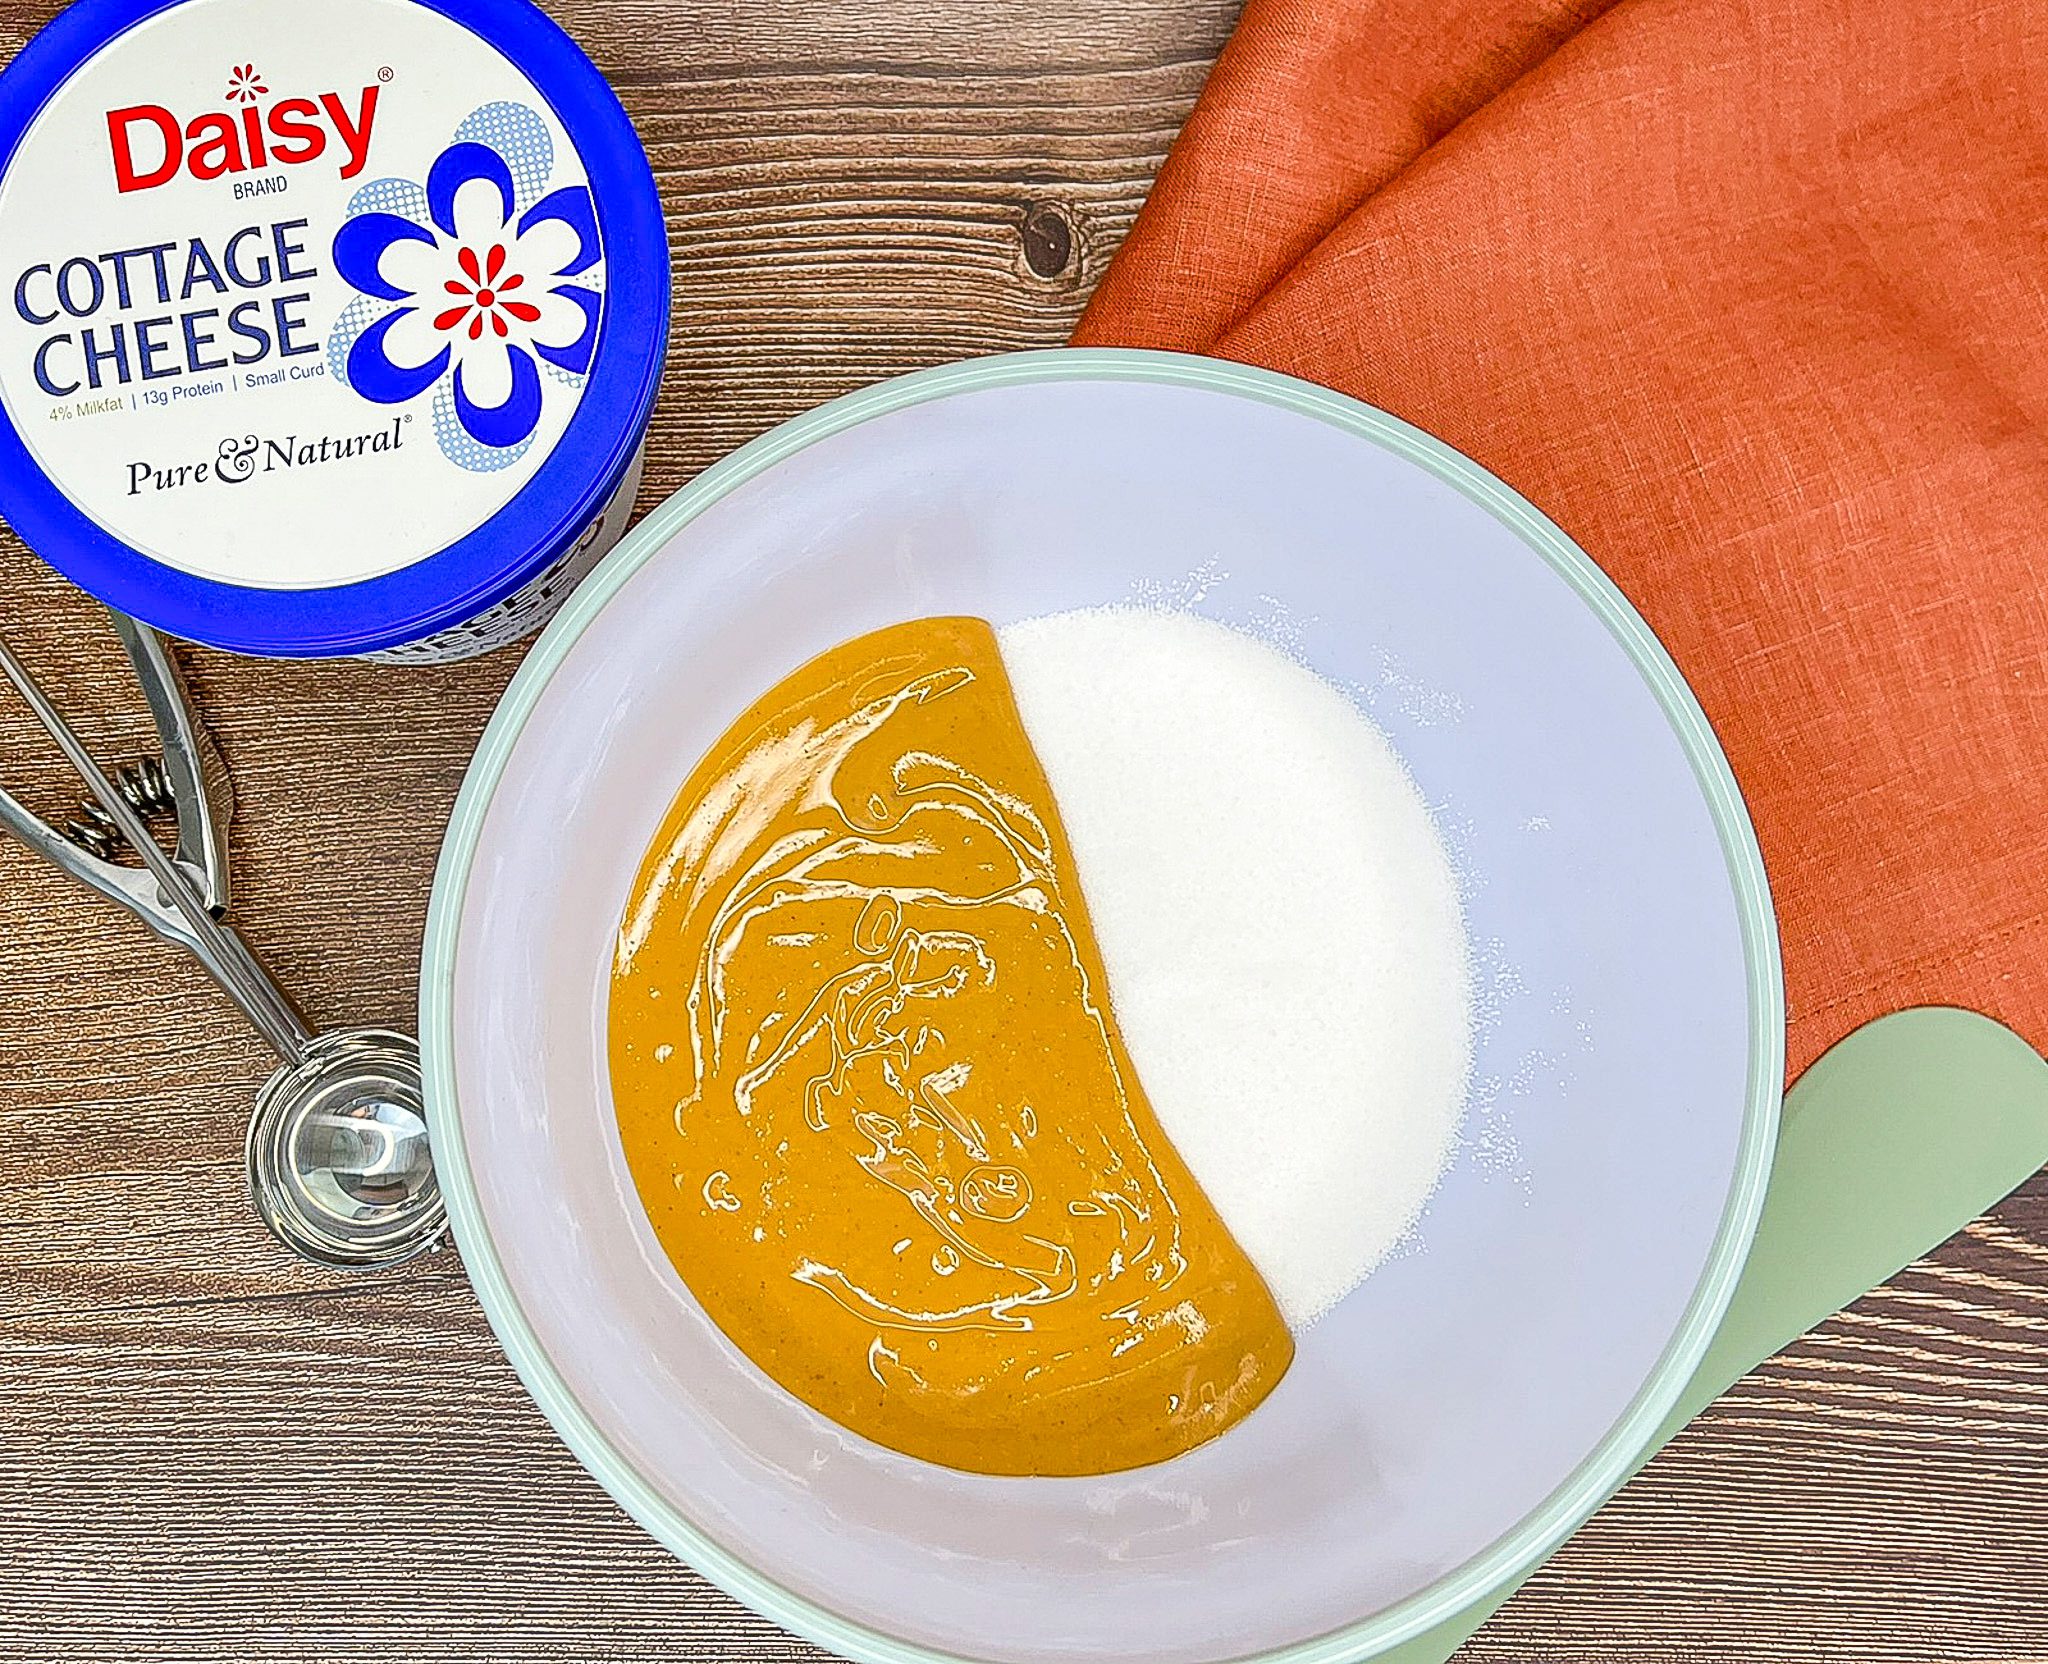
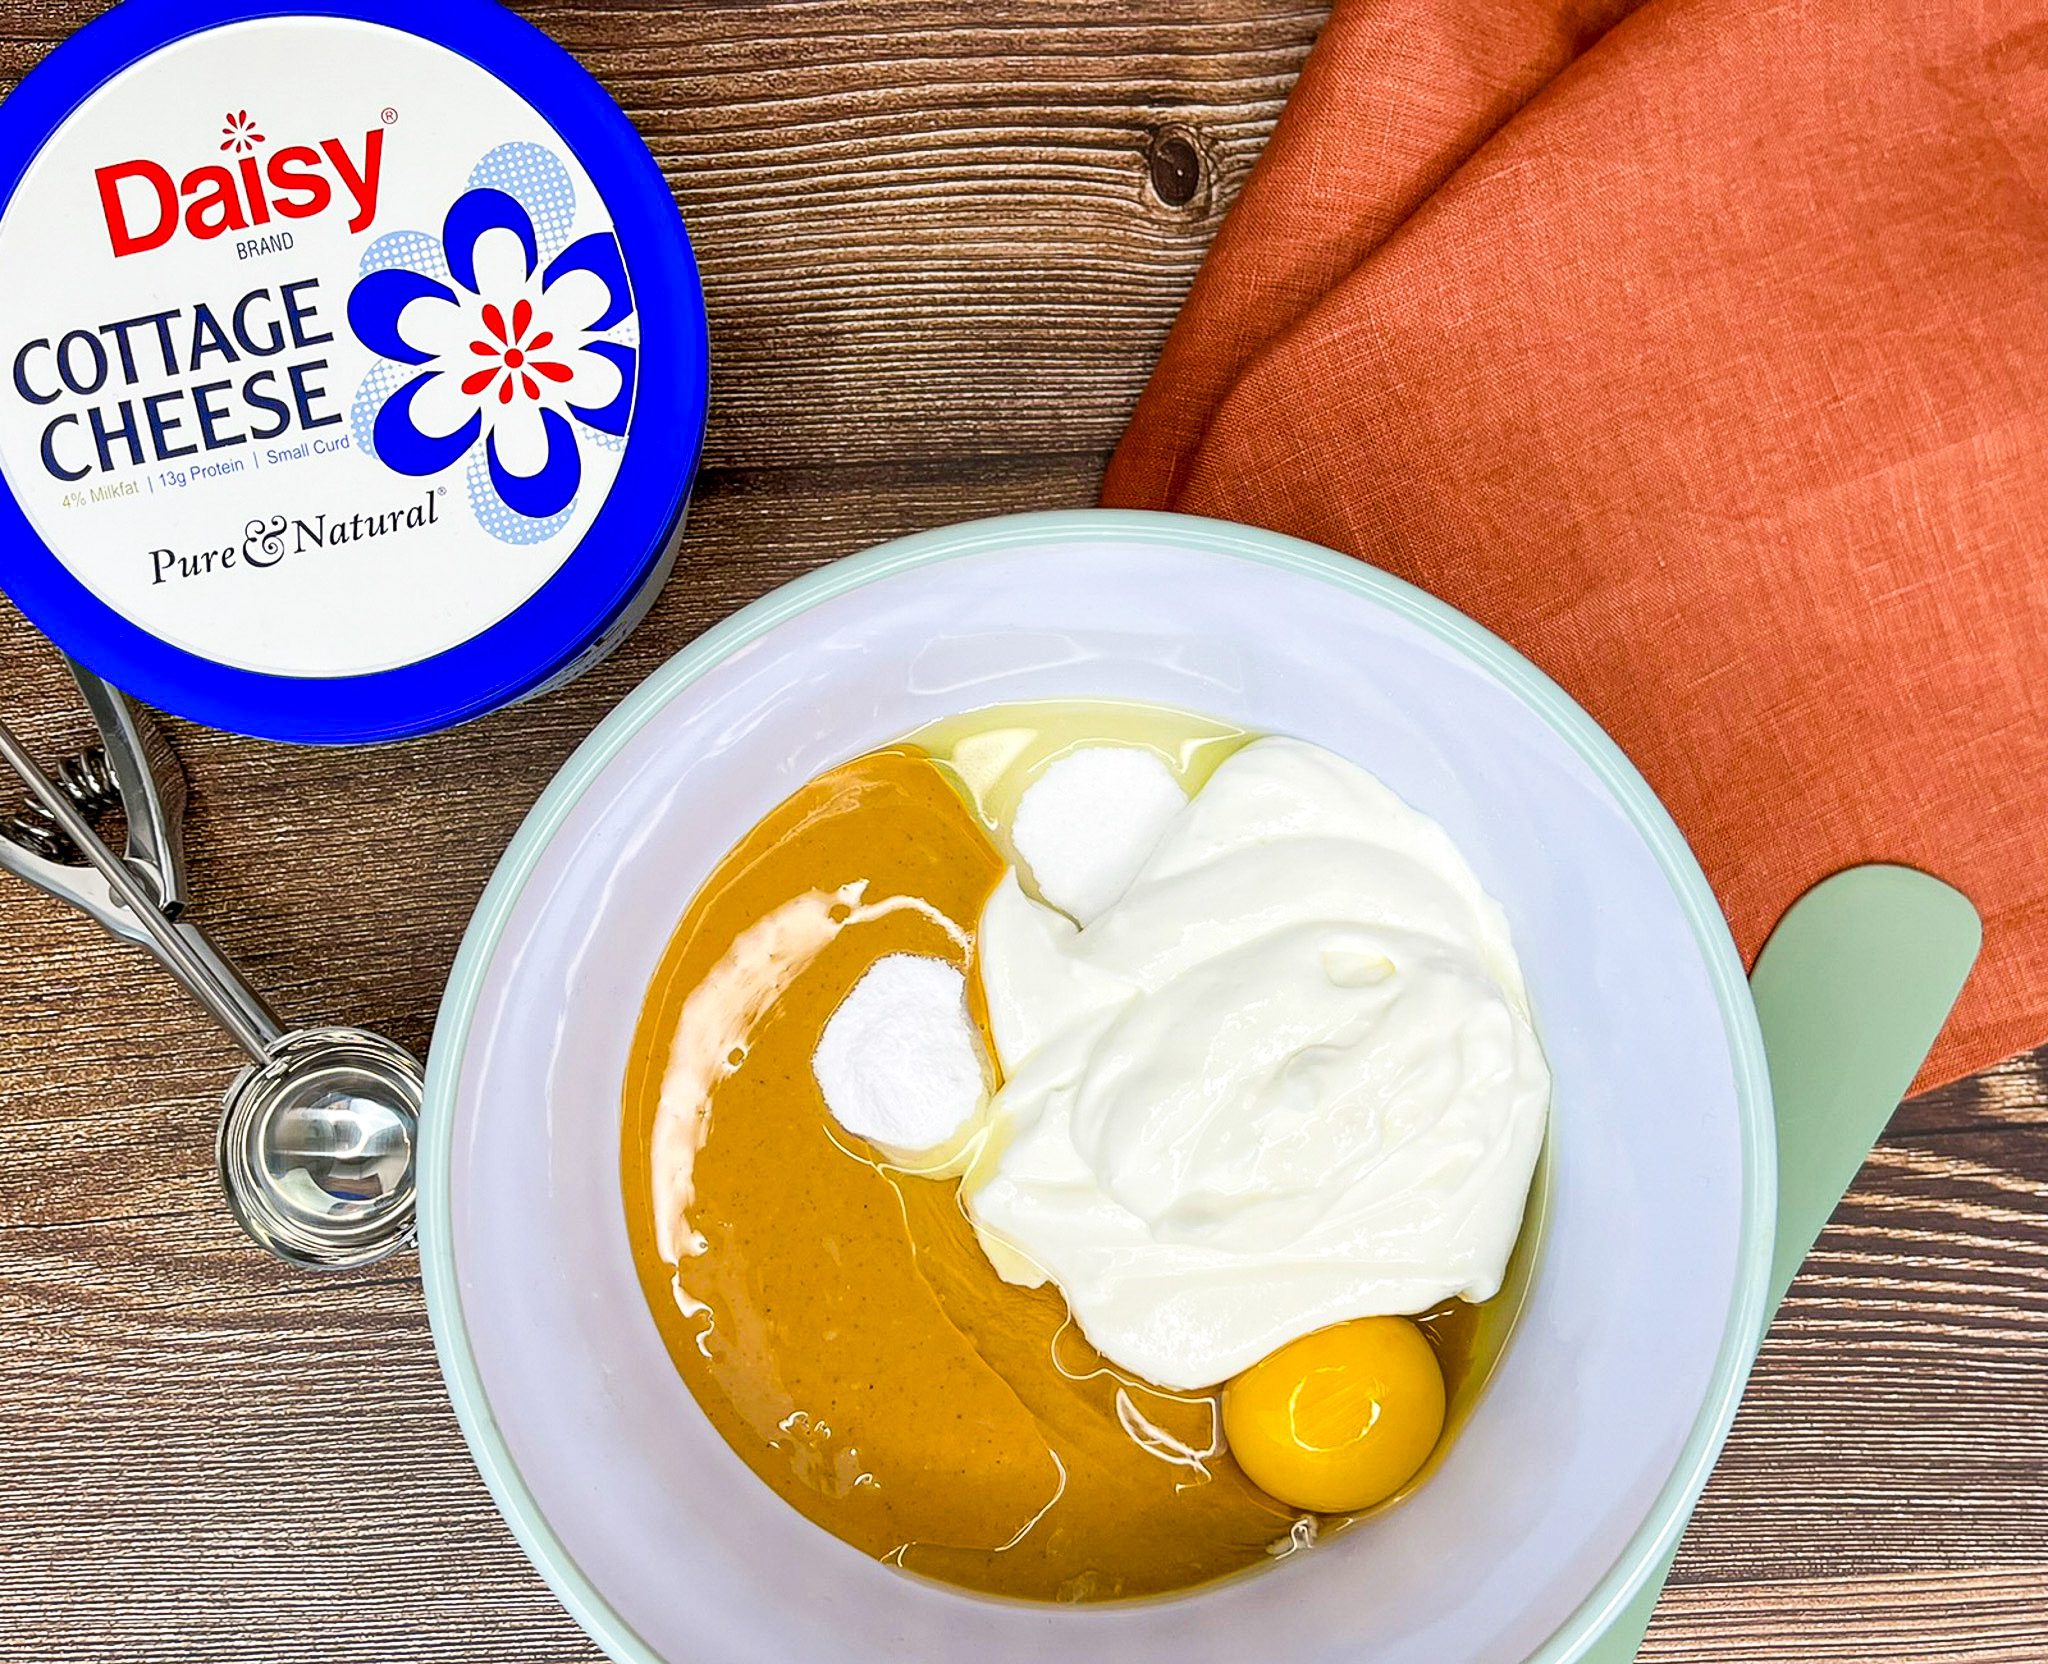
- Place cottage cheese, cream cheese and powdered sugar into food processor or blender. Process until completely smooth (about 1 minute).
- Melt white chocolate in microwave for 45 seconds on high power. Continue heating at 30 second intervals, stirring after each interval, until smooth and melted.
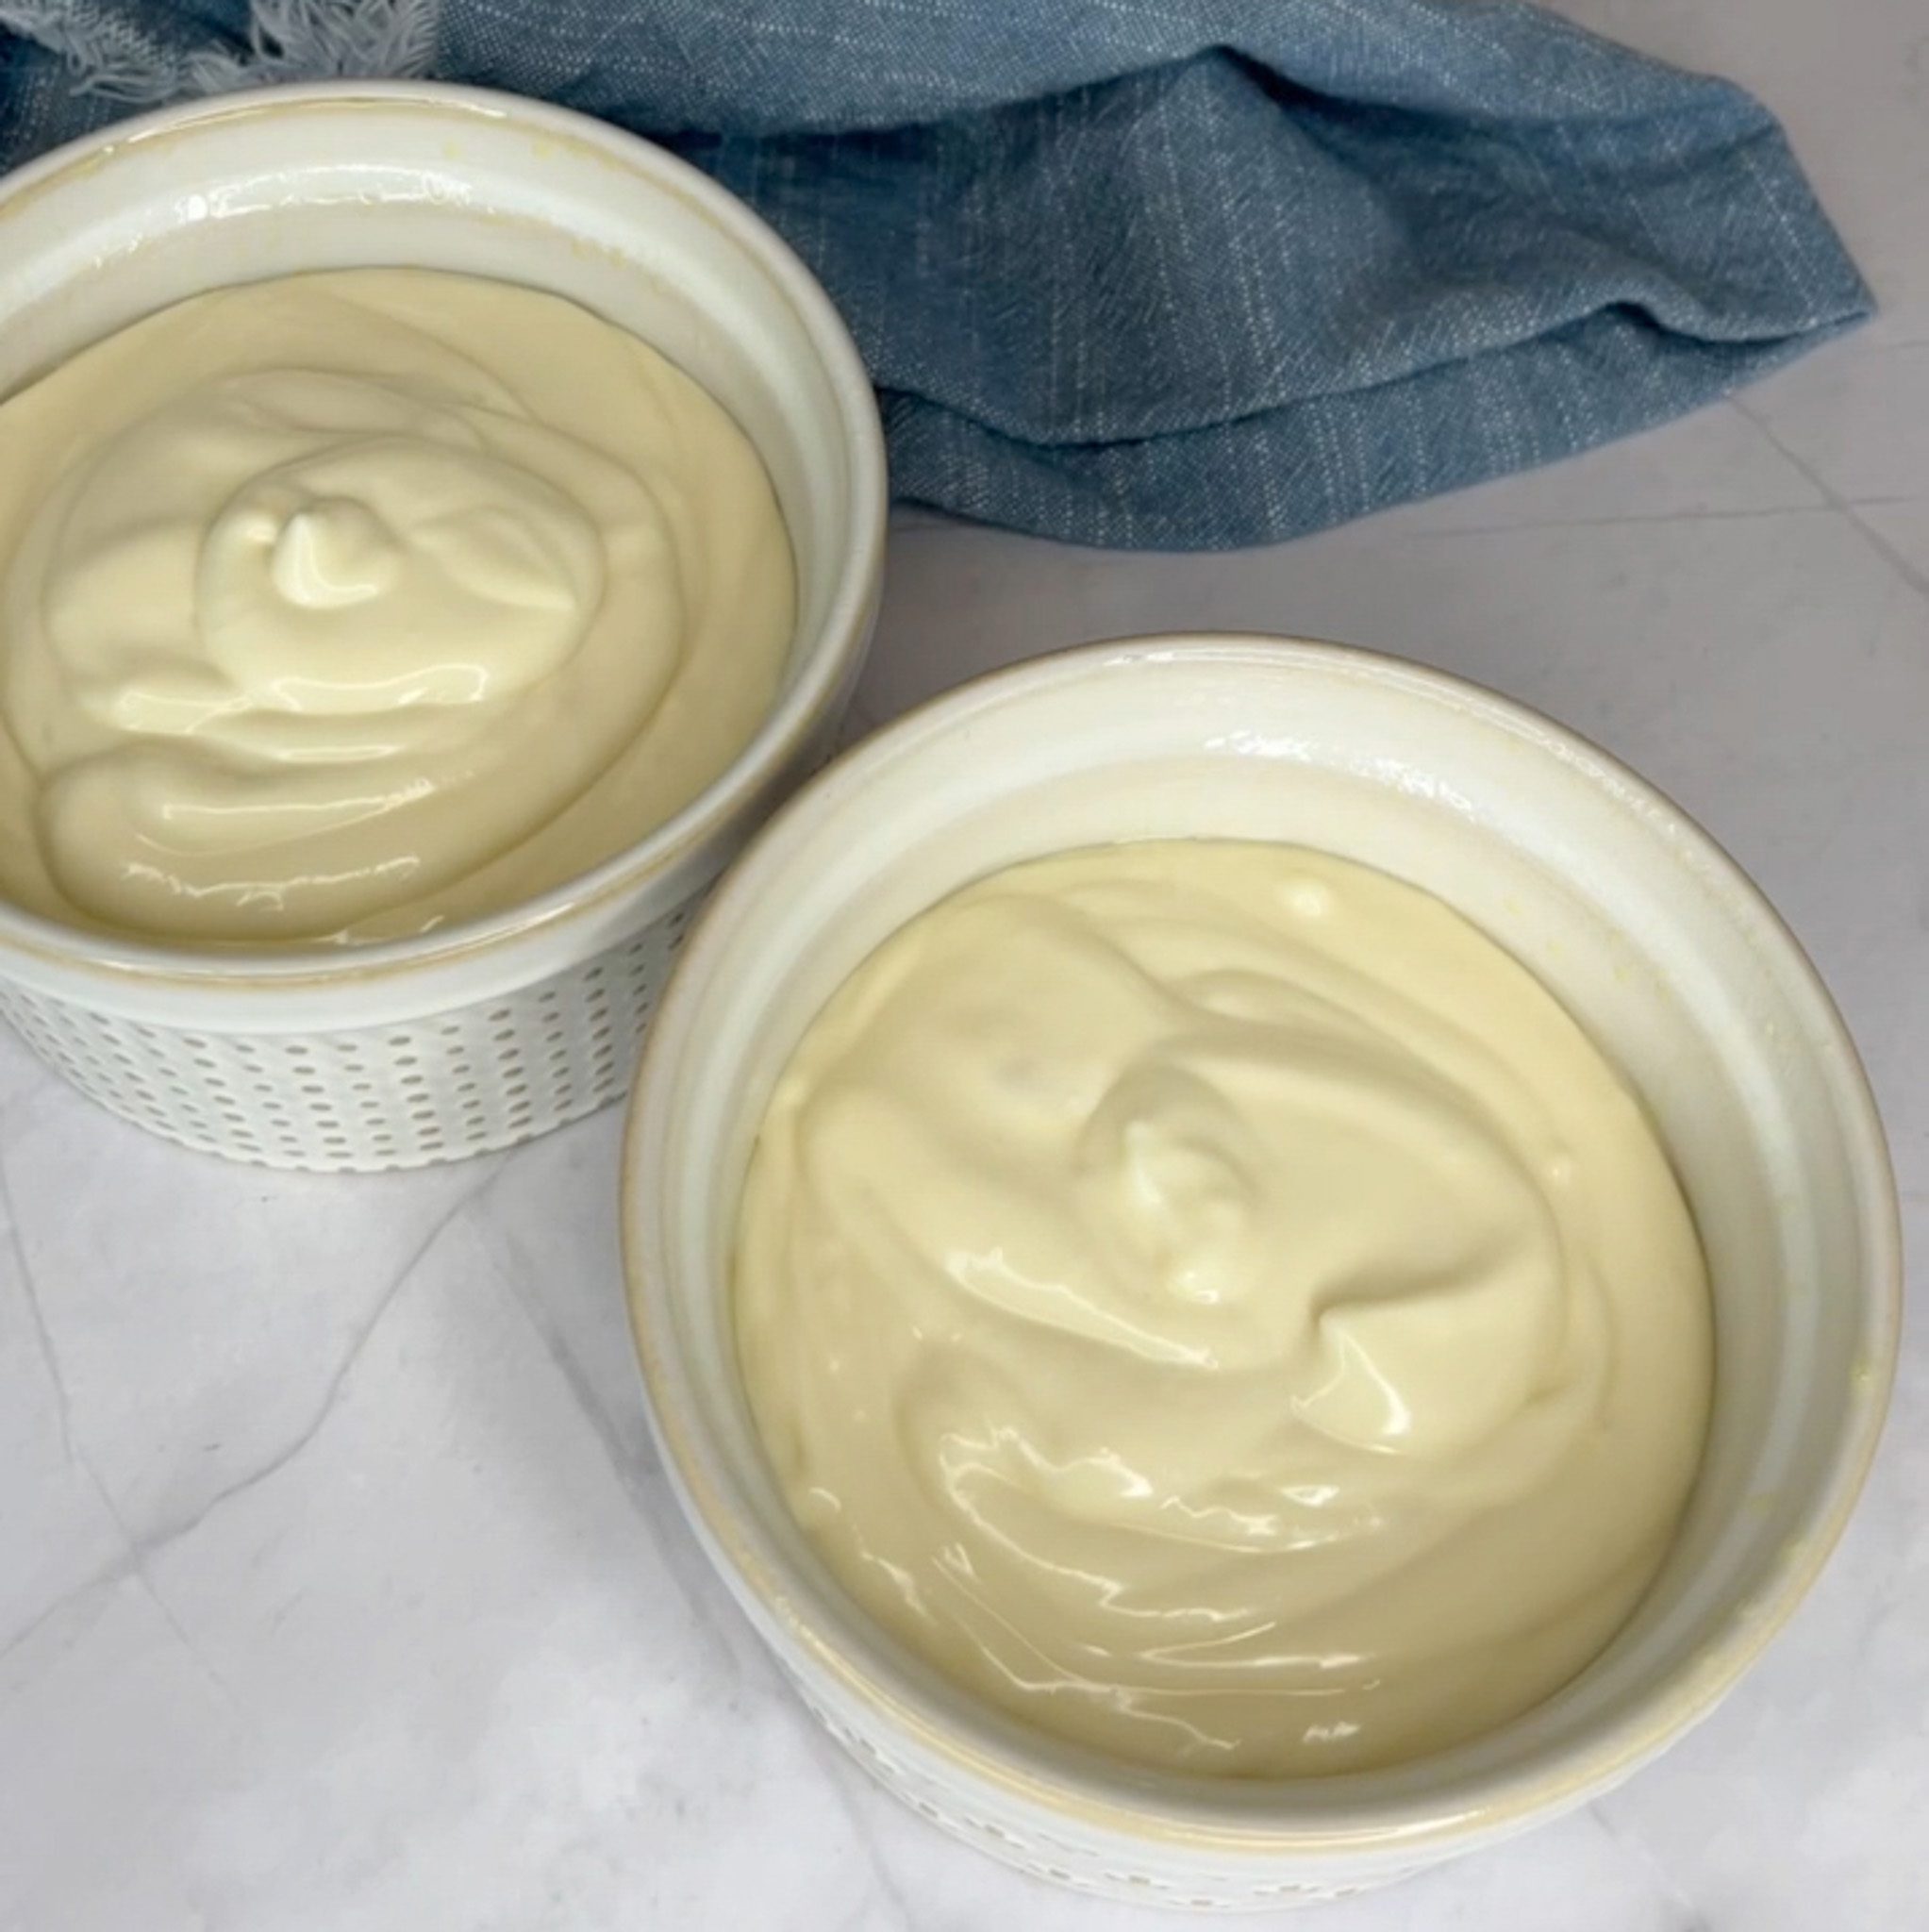
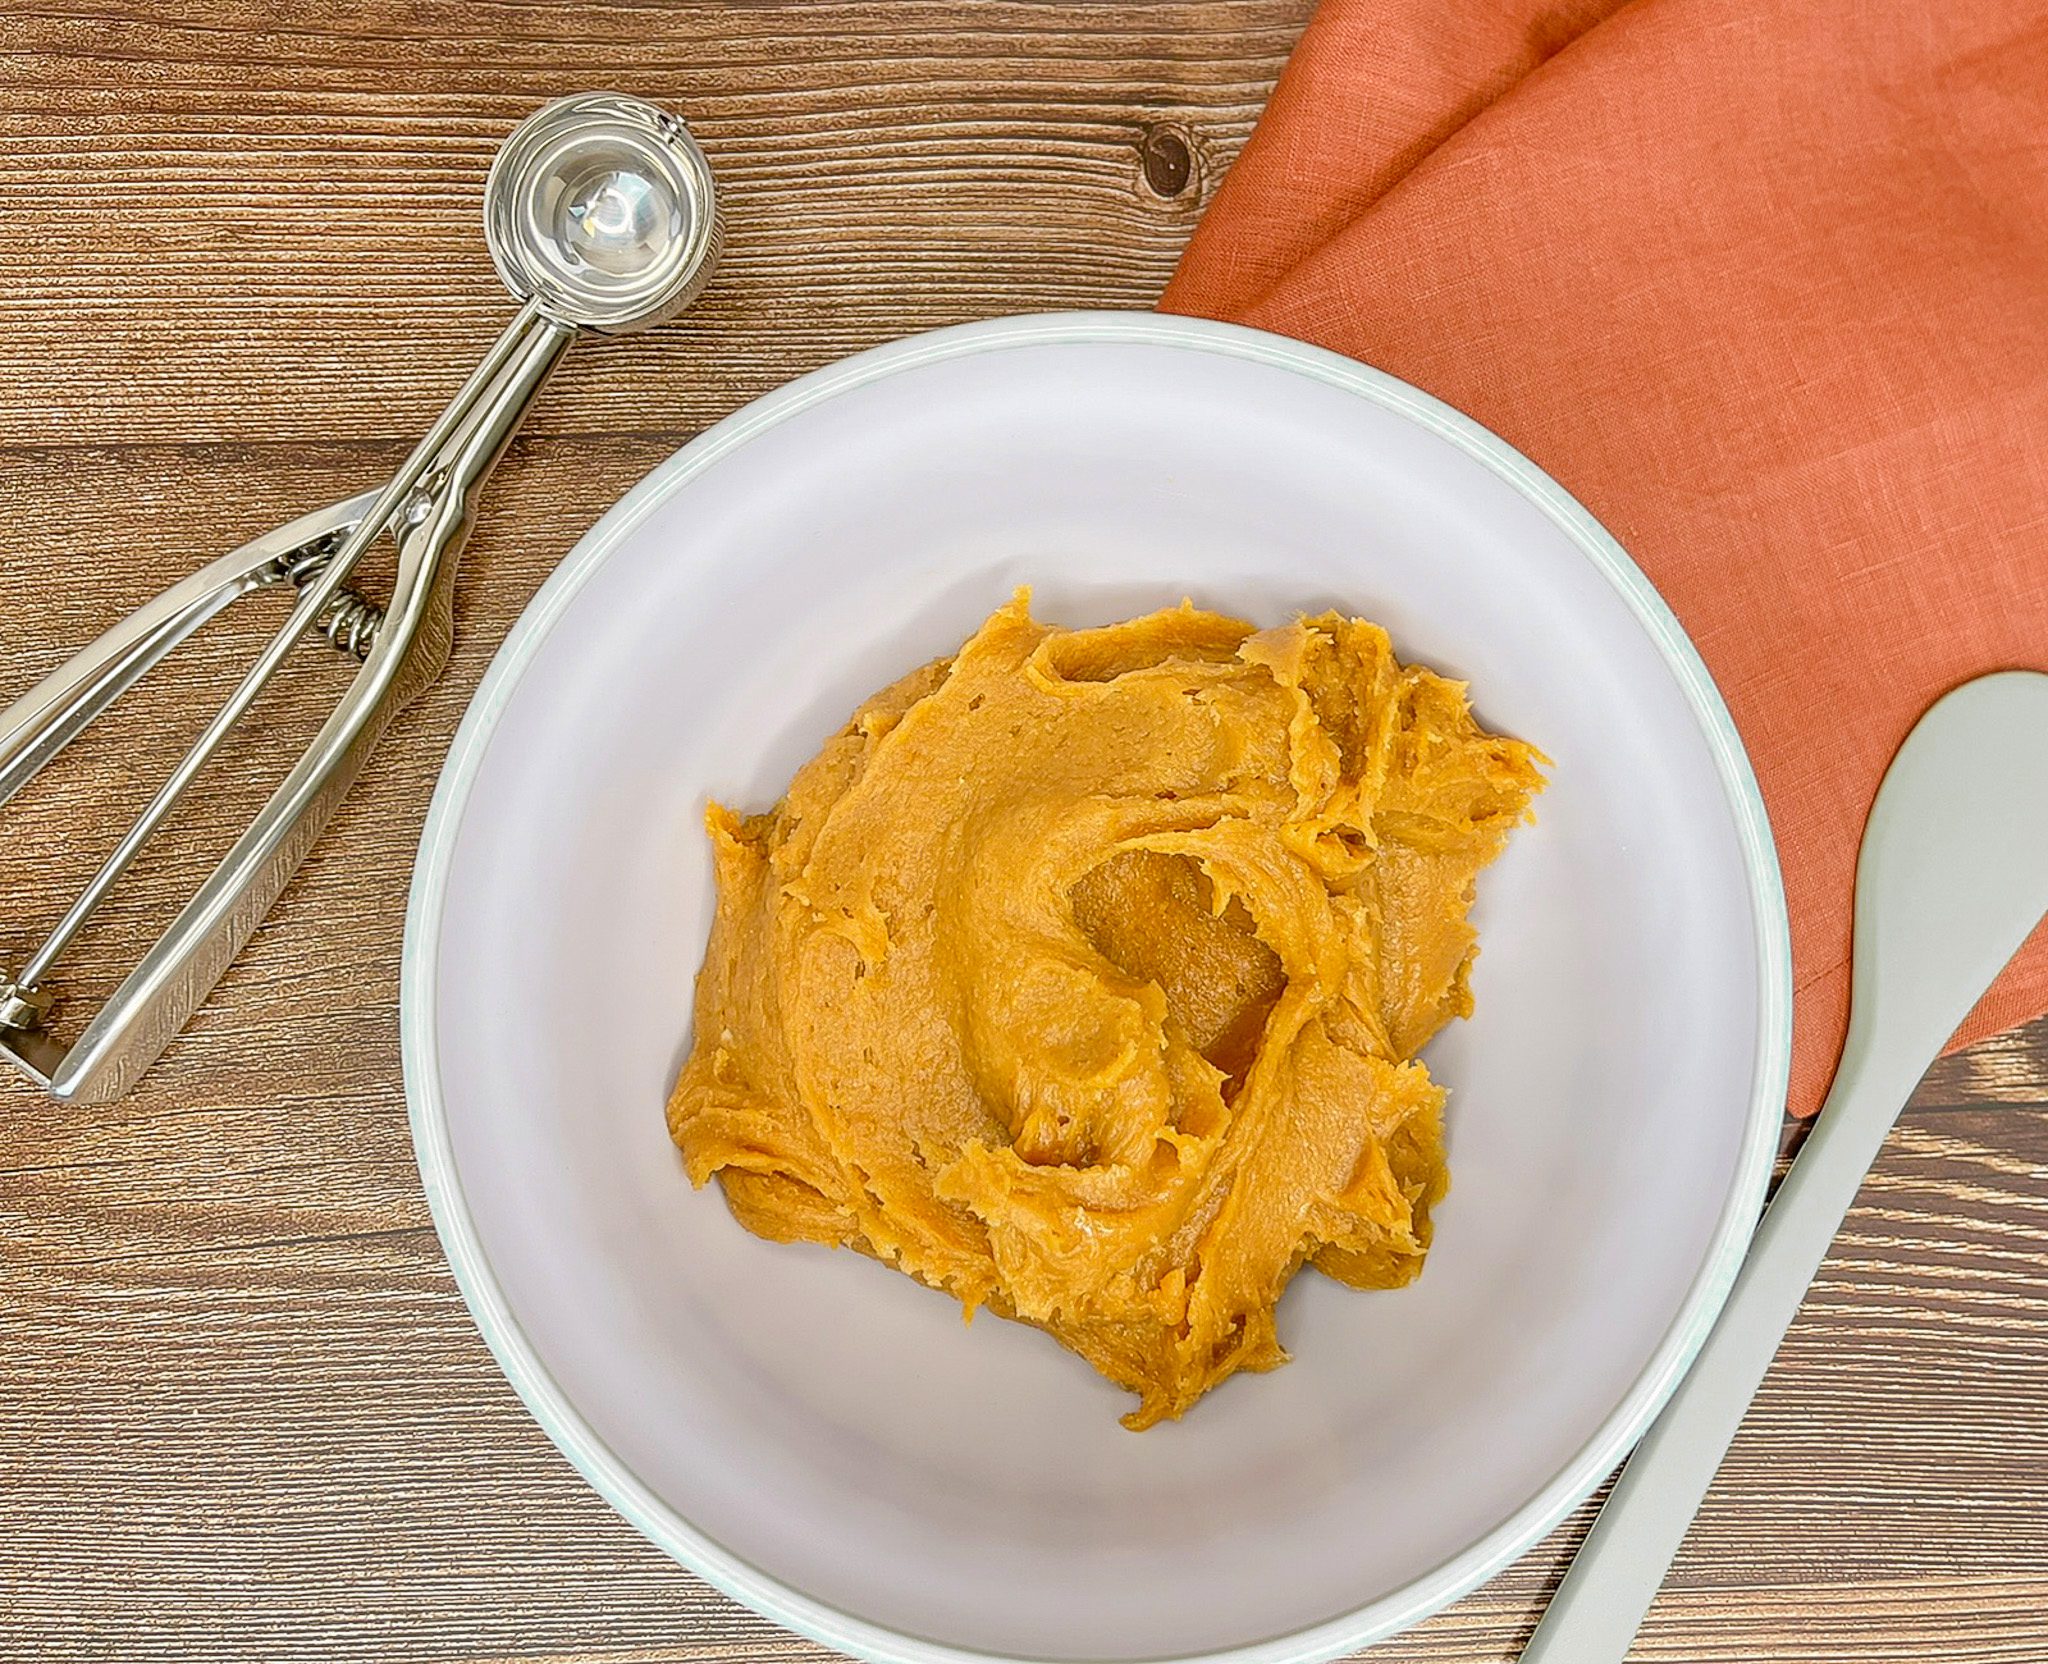
- Add the egg, vanilla and melted white chocolate to cheese and sugar mixture. Process until combined. Spoon into ramekins and lightly tap on the counter to remove air bubbles.
- Place ramekins in the air fryer. Cook for 16-18 minutes, until the tops puff up and the edges start to turn golden. Allow to cool a few minutes in air fryer before removing to a large plate. Cool for about an hour and then cover and place in the refrigerating for a minimum of 2 hours (or overnight).
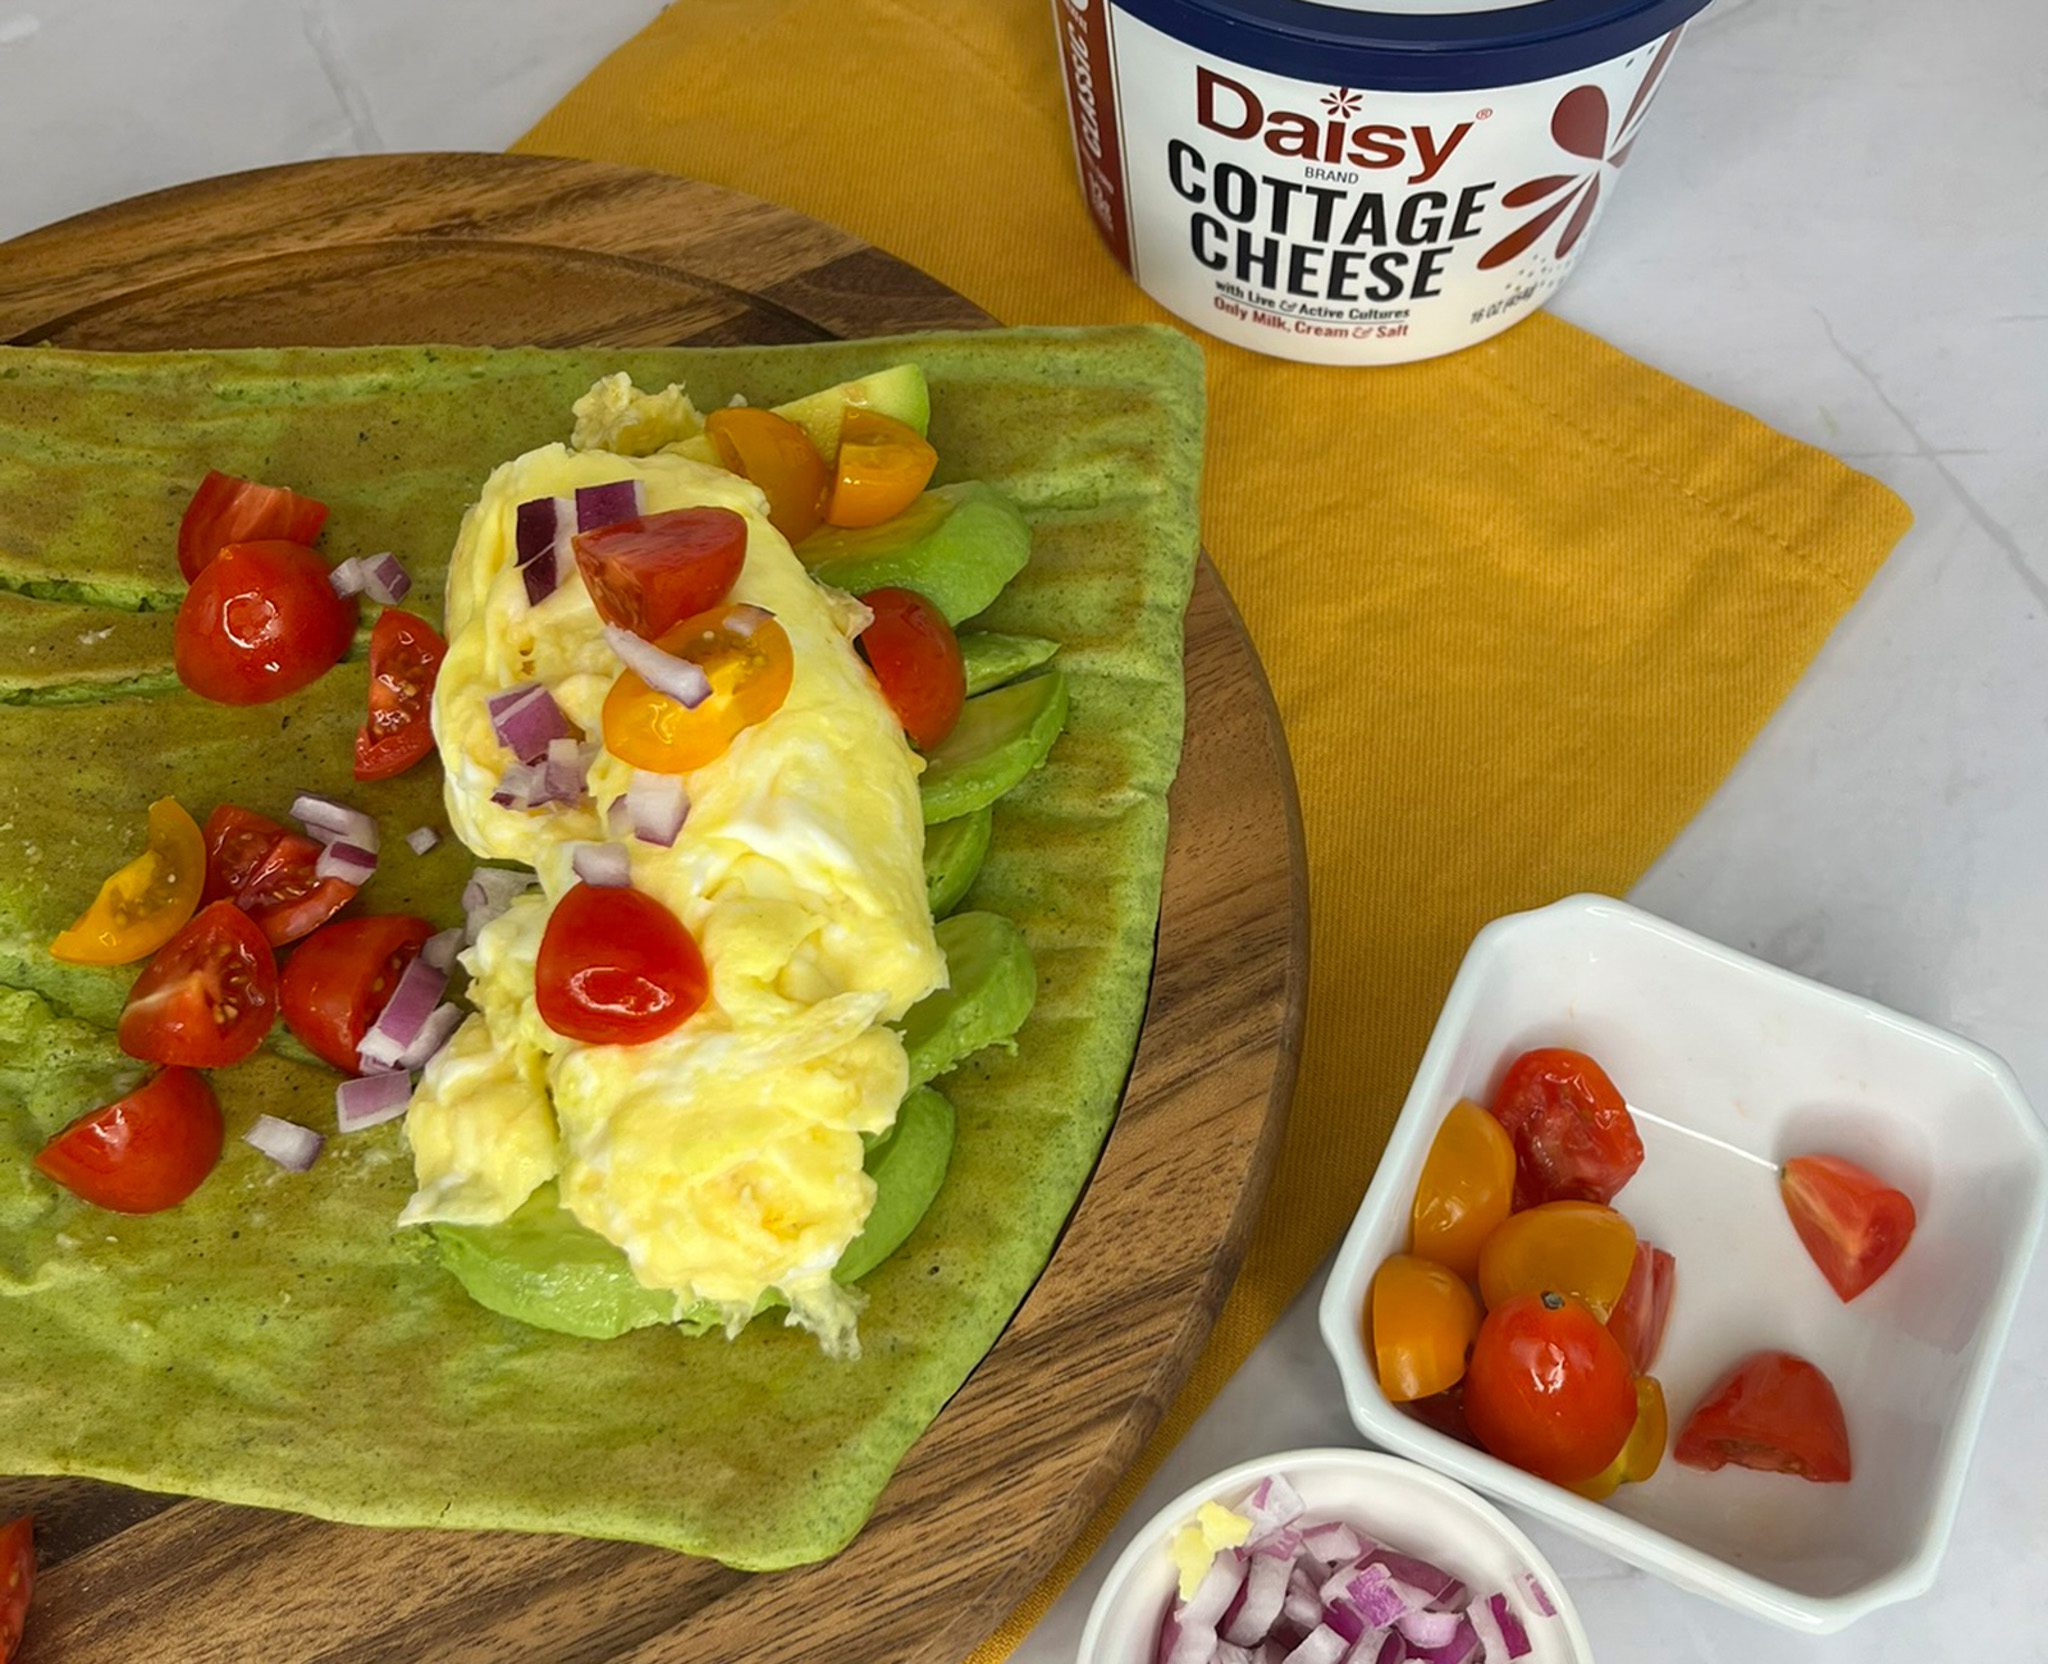
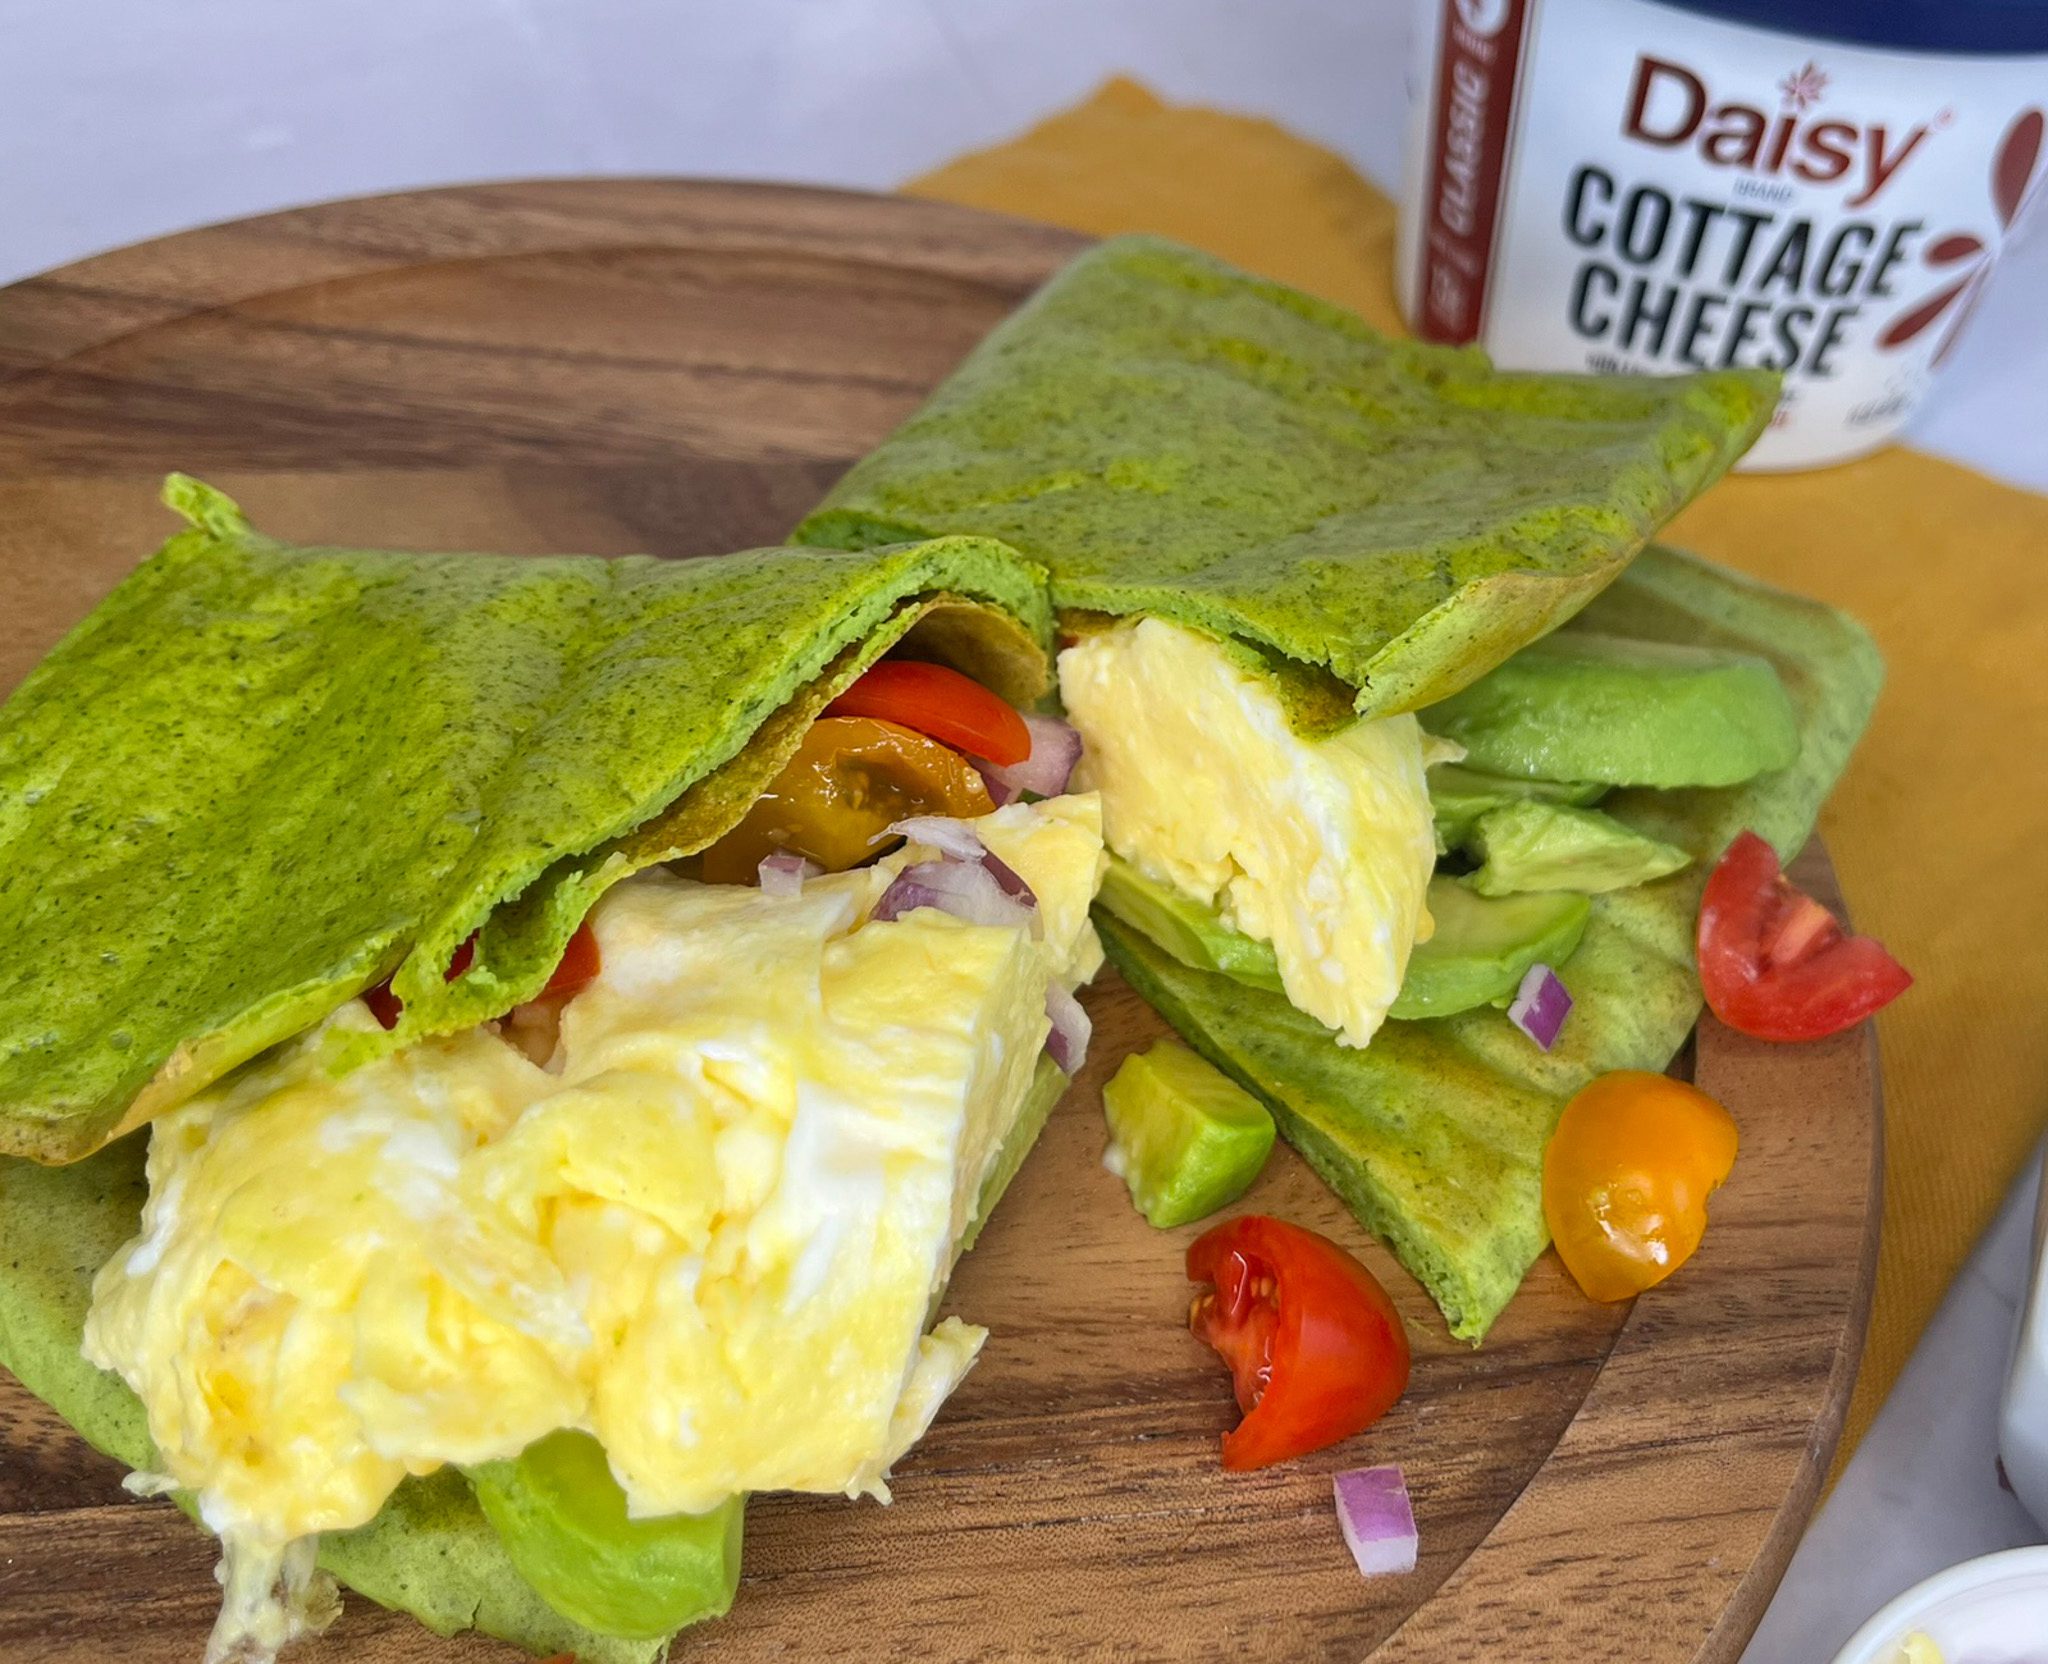
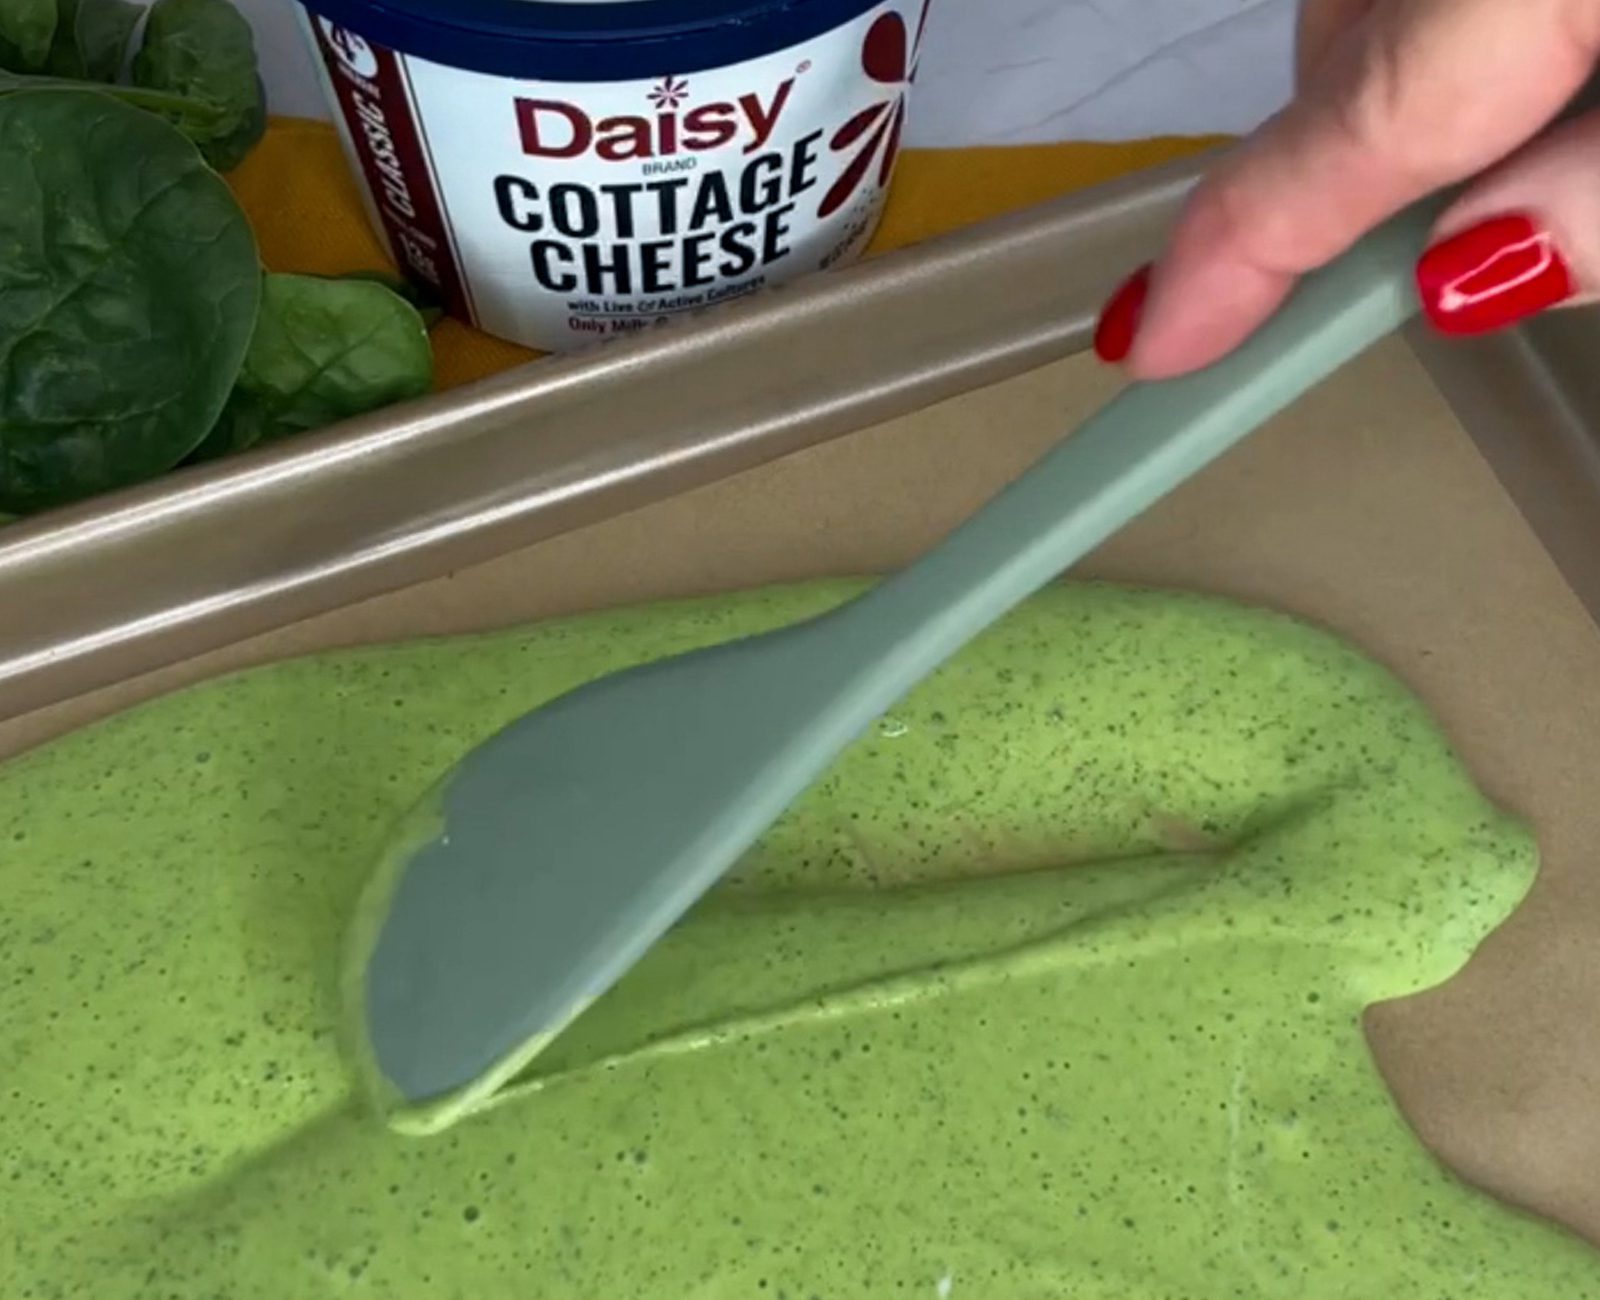
Cottage Cheese Flatbreads
Cottage Cheese Flatbreads
Soft, flavorful flatbreads are a simple and delicious way to add more protein to your everyday meals. With its rich texture and fresh taste, Daisy Cottage Cheese helps create tender, satisfying flatbreads that work perfectly for wraps, pizzas, sandwiches, or dipping alongside your favorite soups and salads.
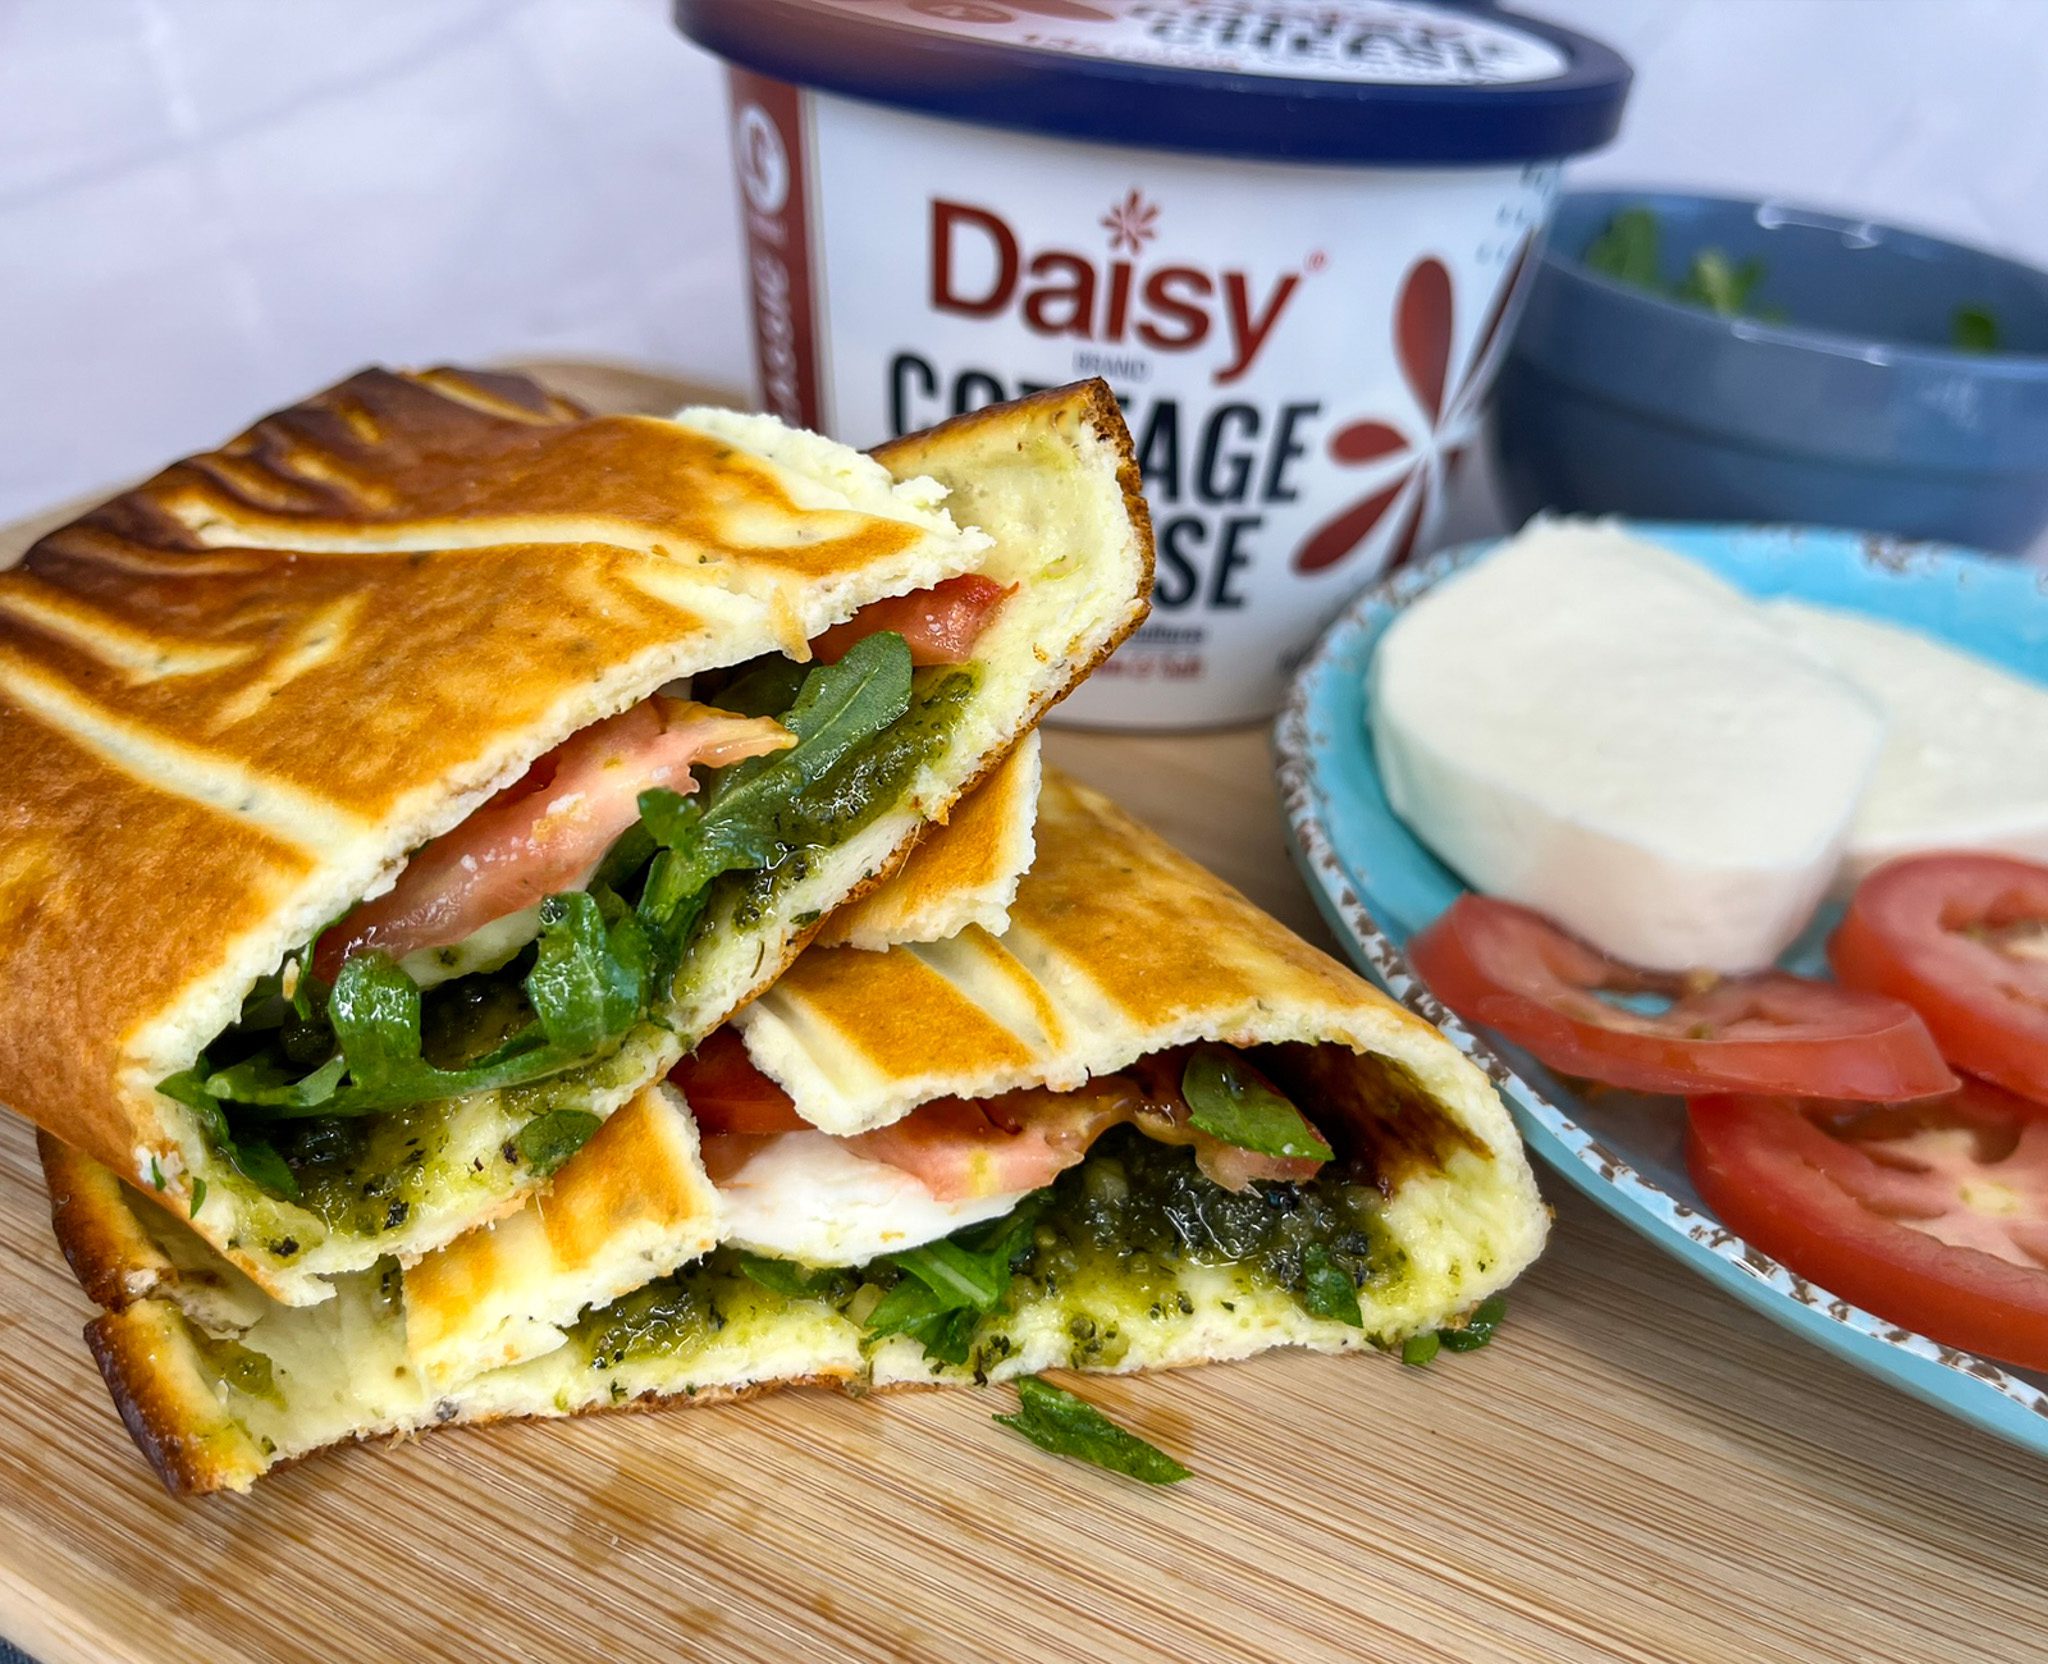
Easy to prepare and endlessly versatile, these homemade flatbreads are ideal for busy weeknights, meal prep, or quick lunches. Whether topped with fresh veggies, grilled meats, or savory spreads, these flatbreads deliver wholesome flavor and satisfying texture in every bite.
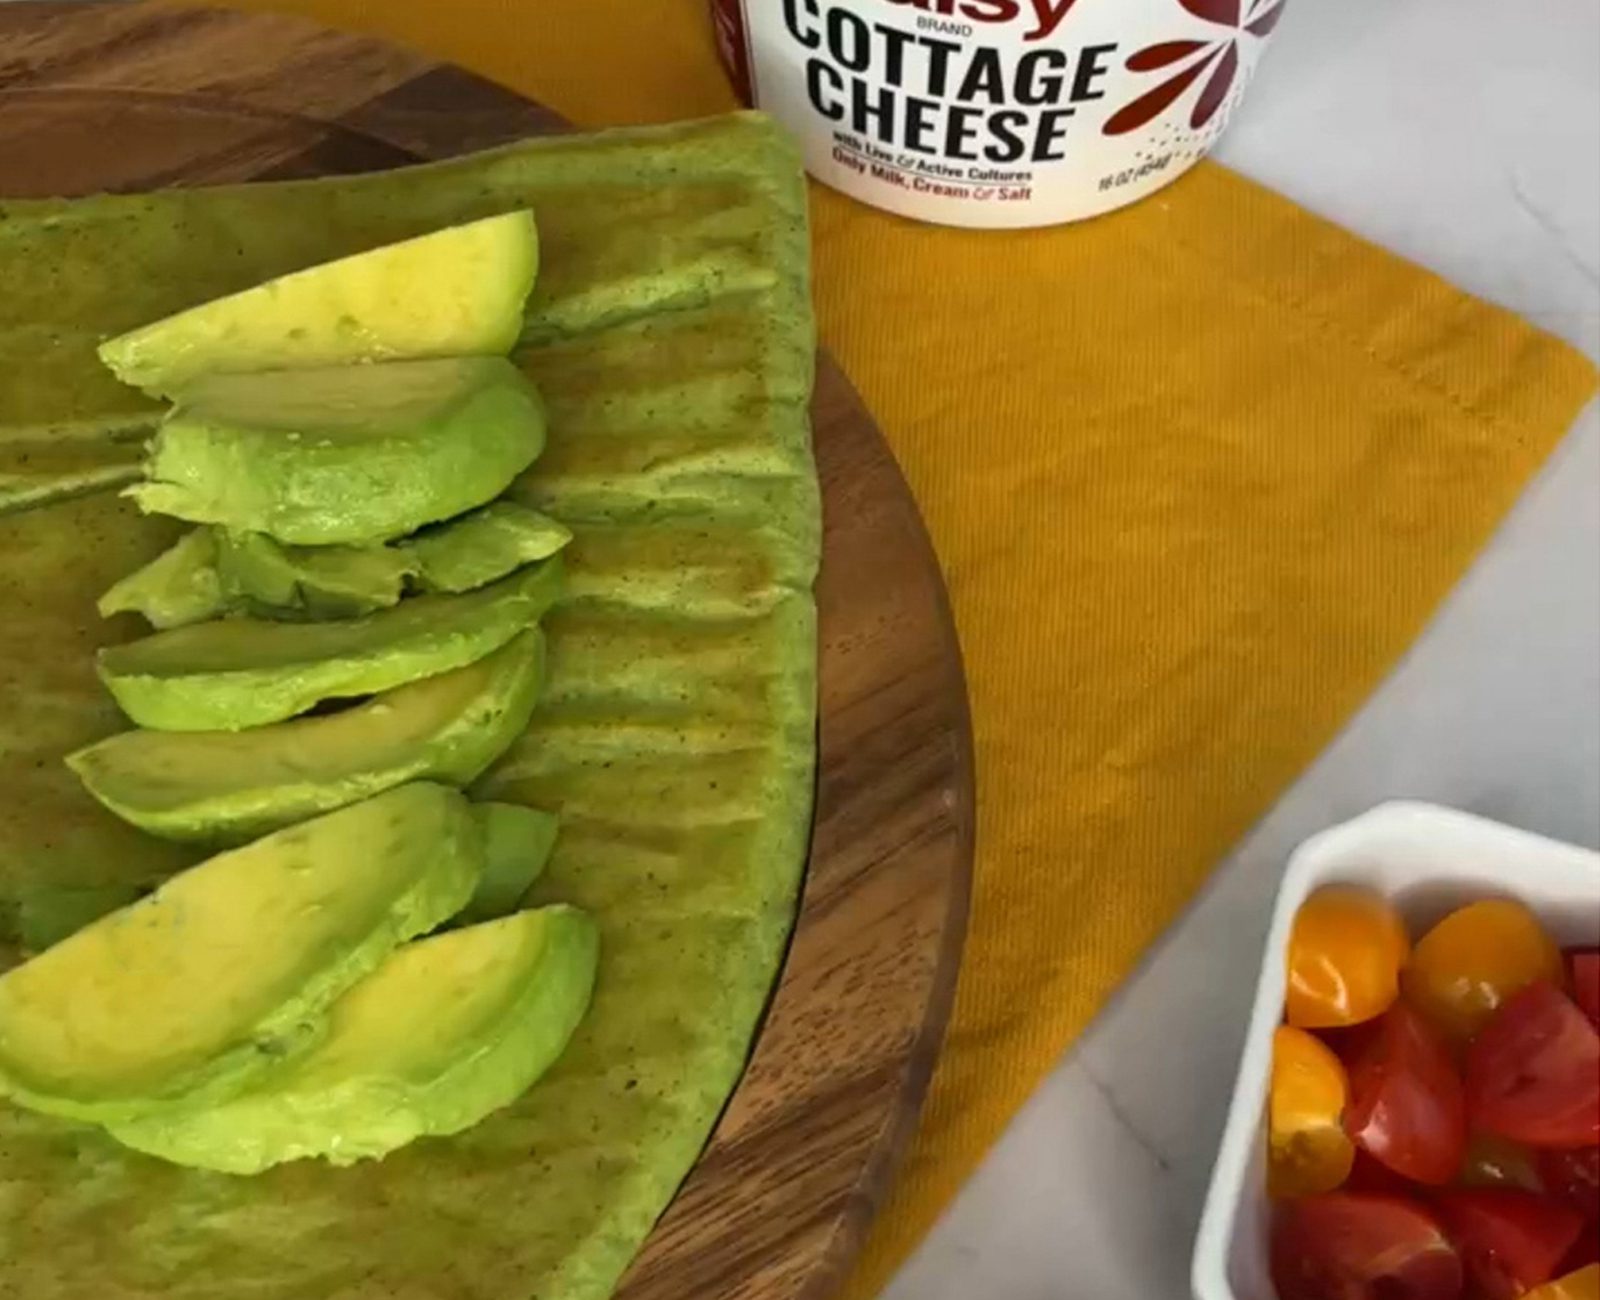
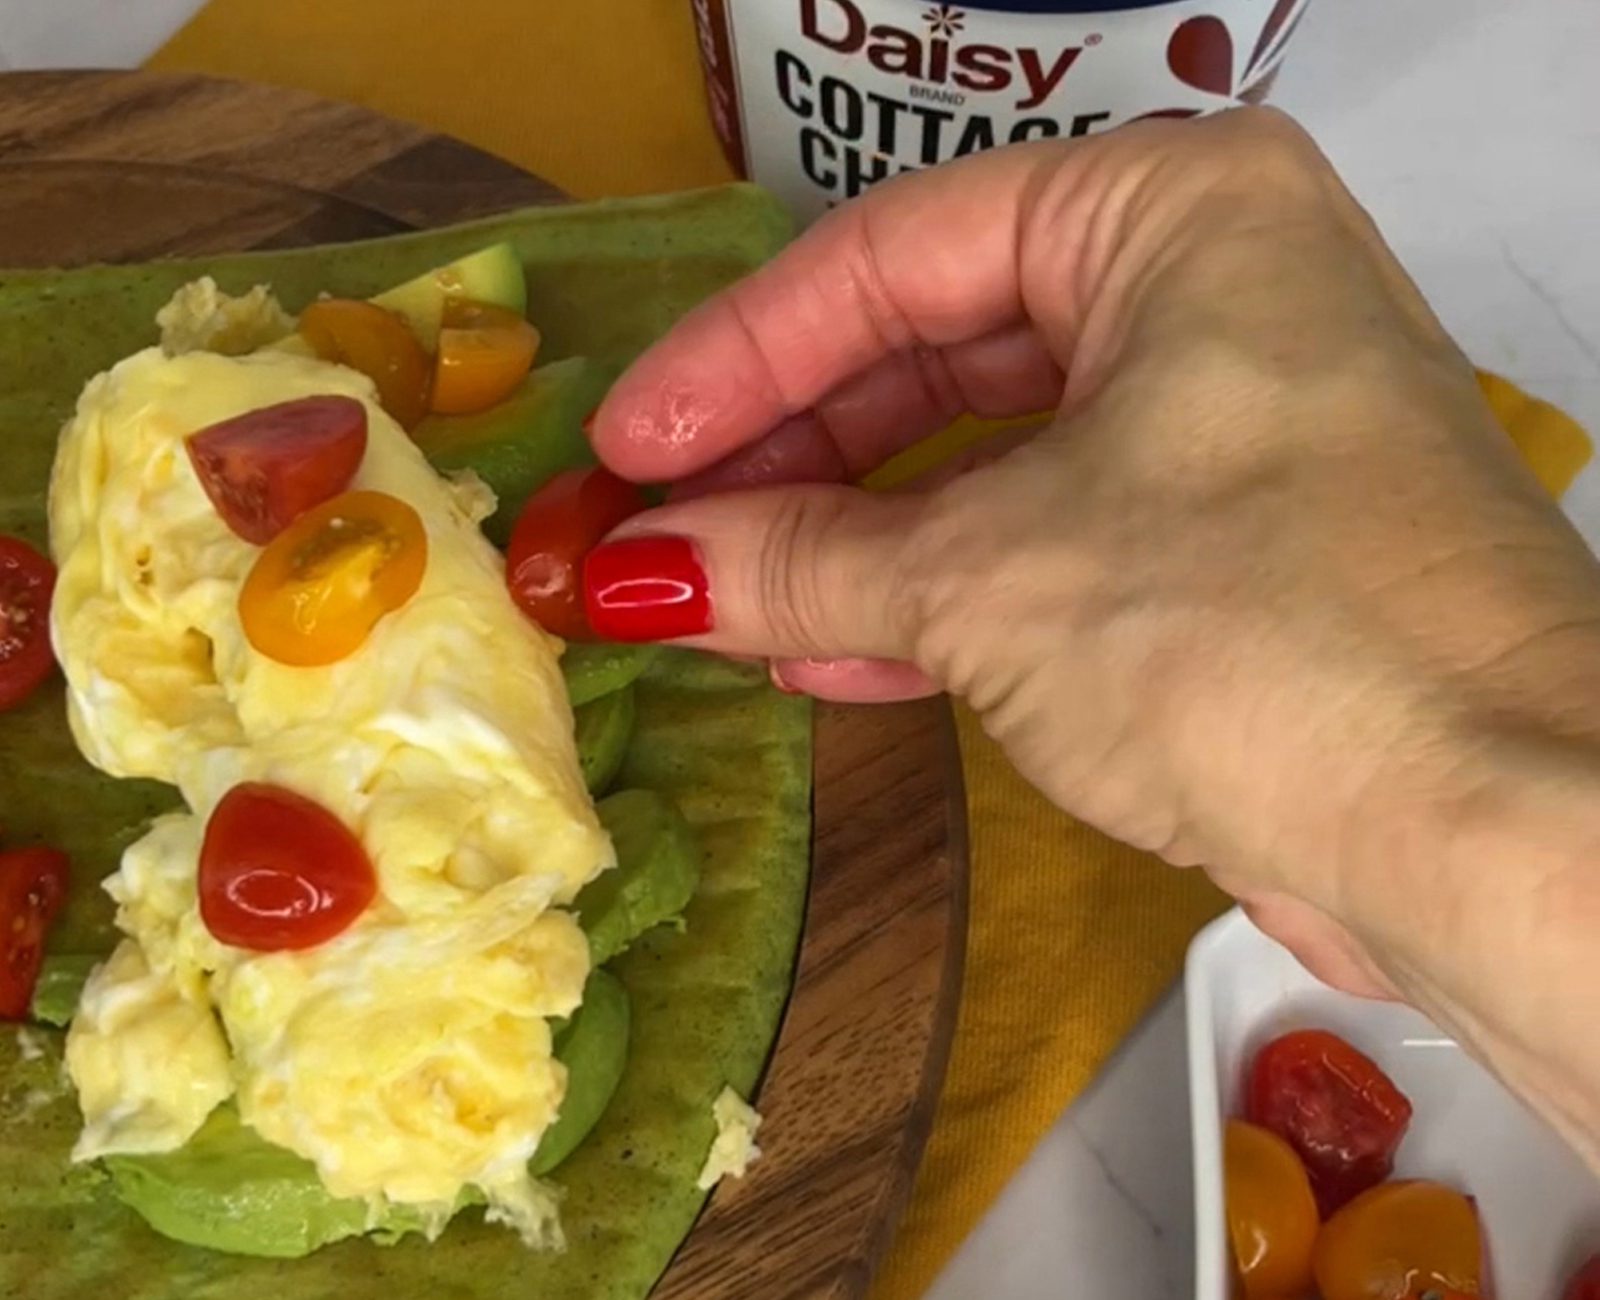
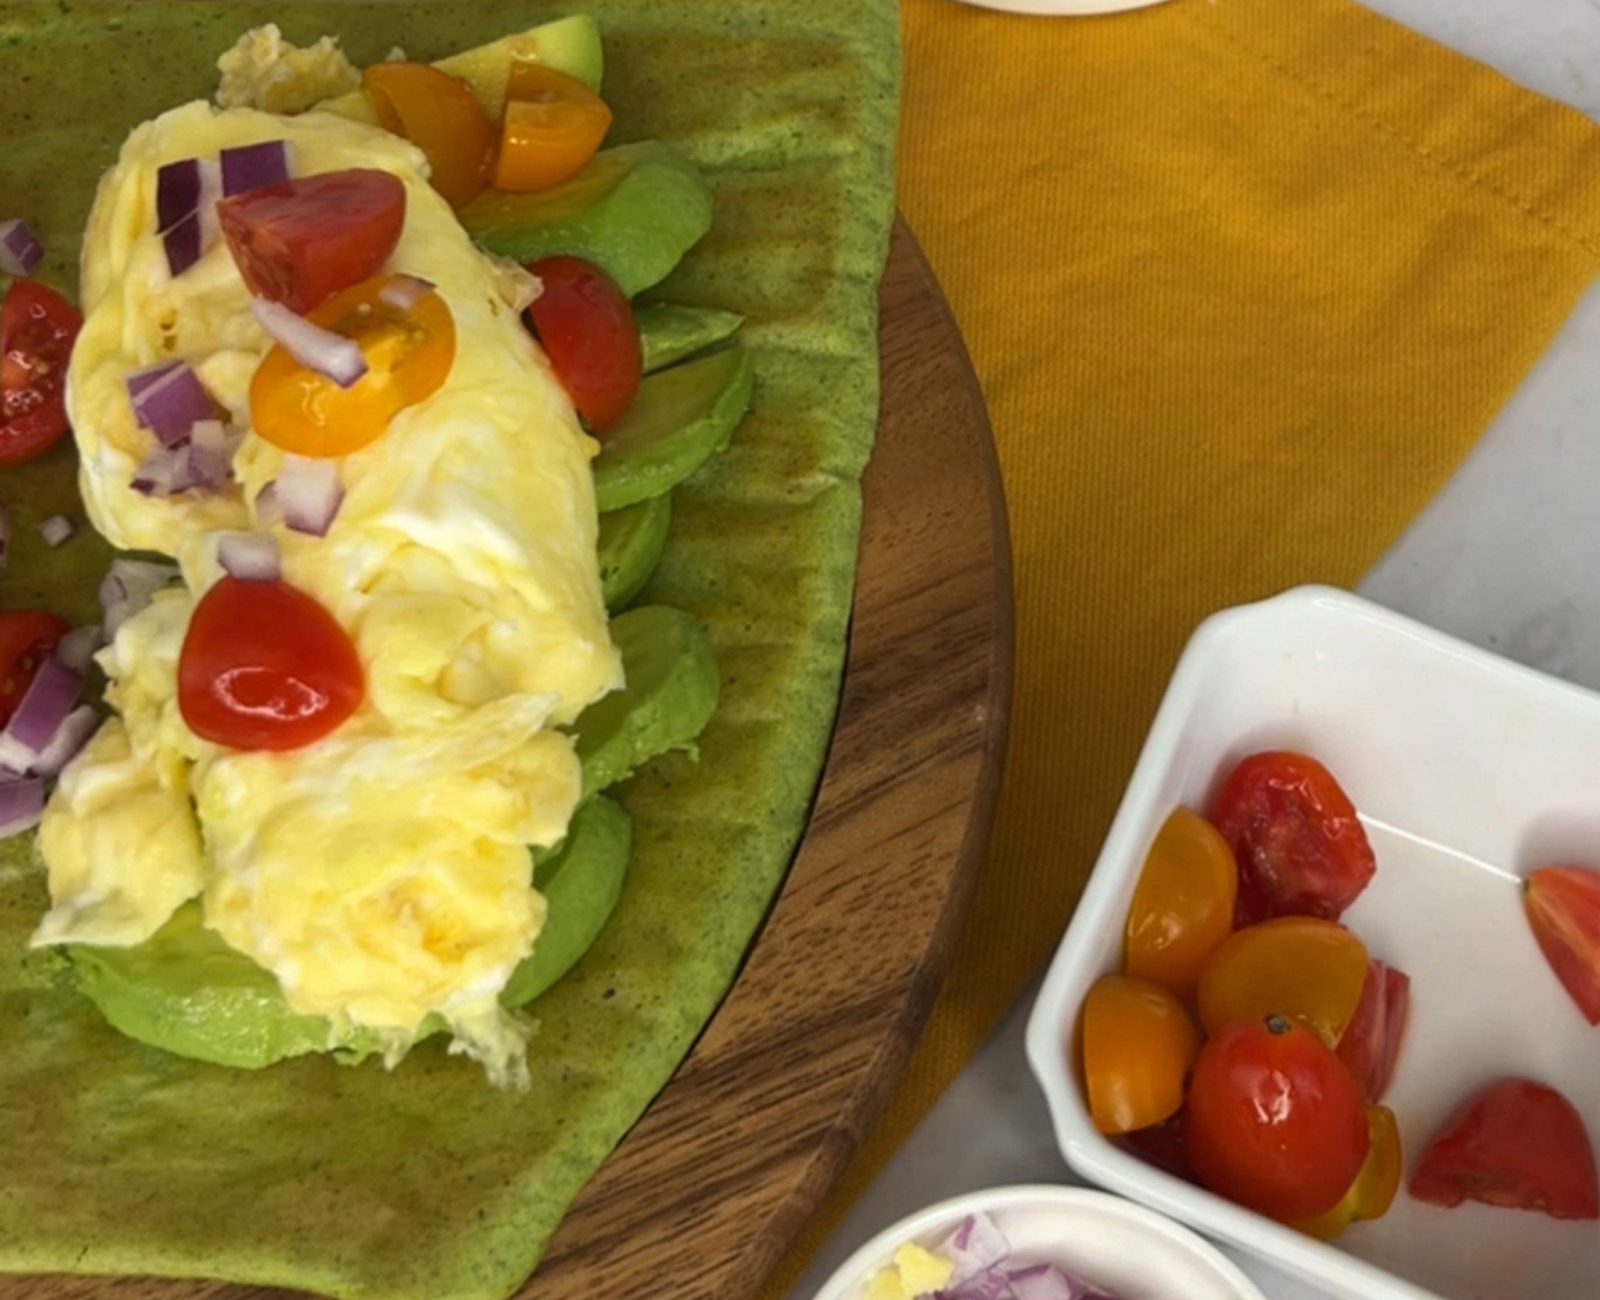
Start your morning with a fresh and satisfying Breakfast Spinach Wrap made with creamy Daisy Cottage Cheese. Packed with fluffy eggs, avocado, and tomatoes, and onions, this easy breakfast wrap is the perfect way to fuel busy mornings without sacrificing flavor.
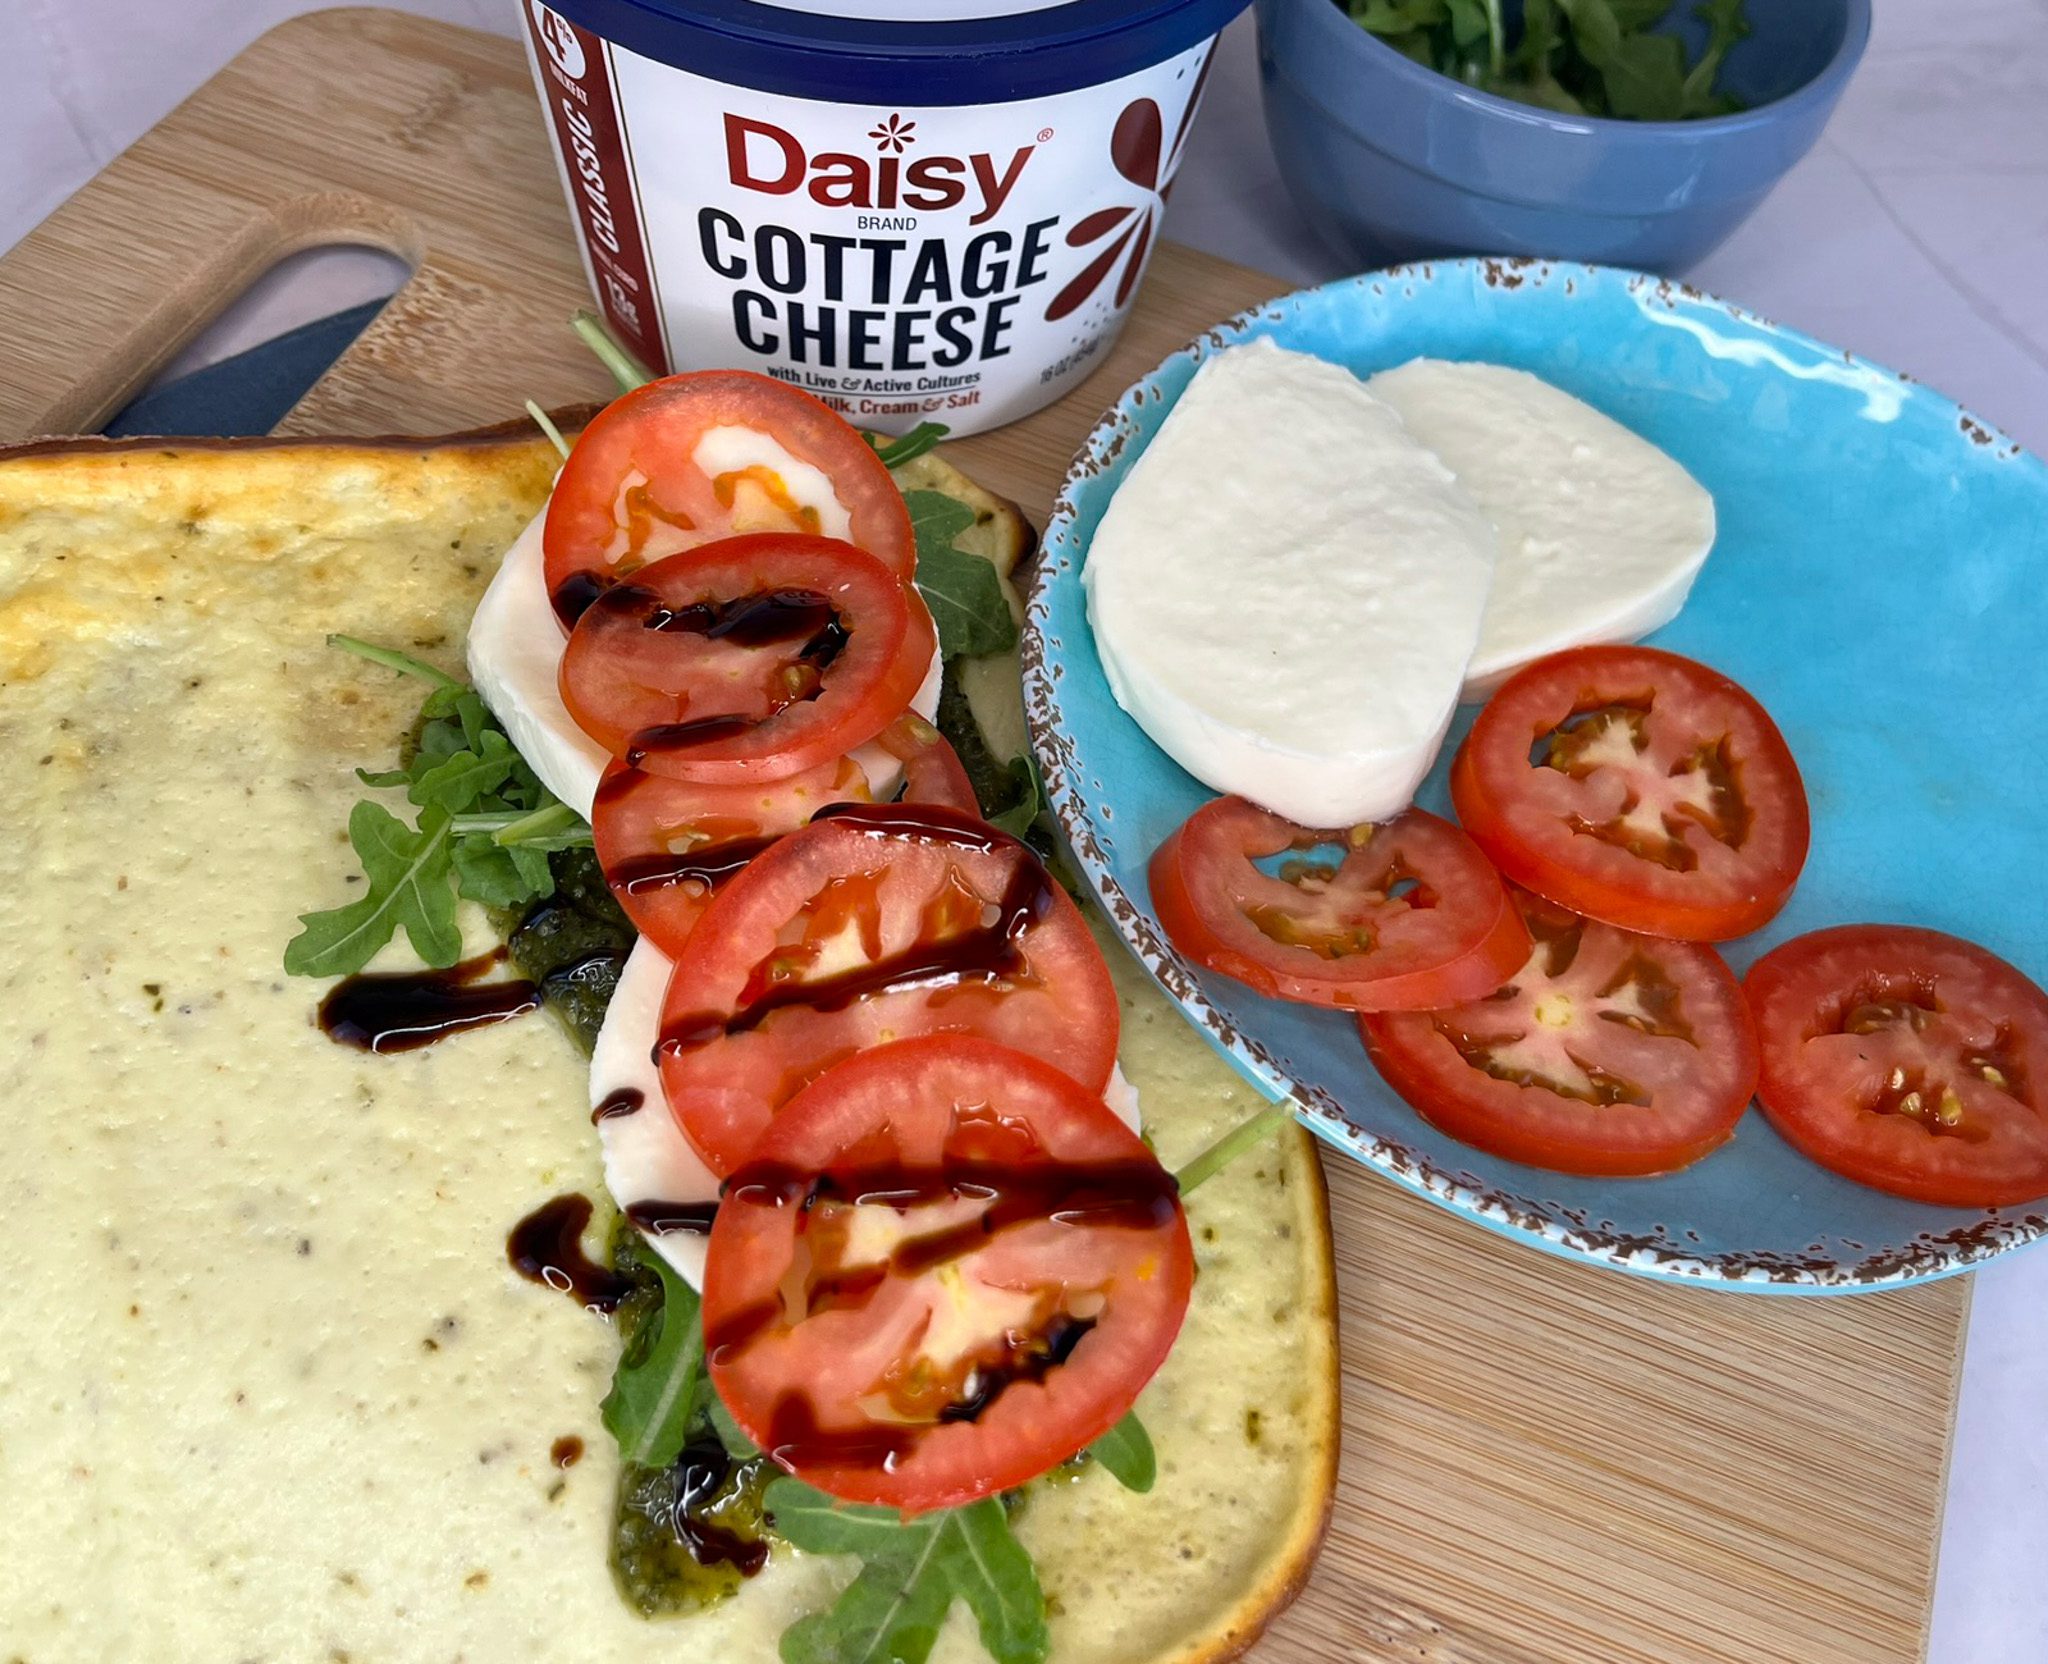
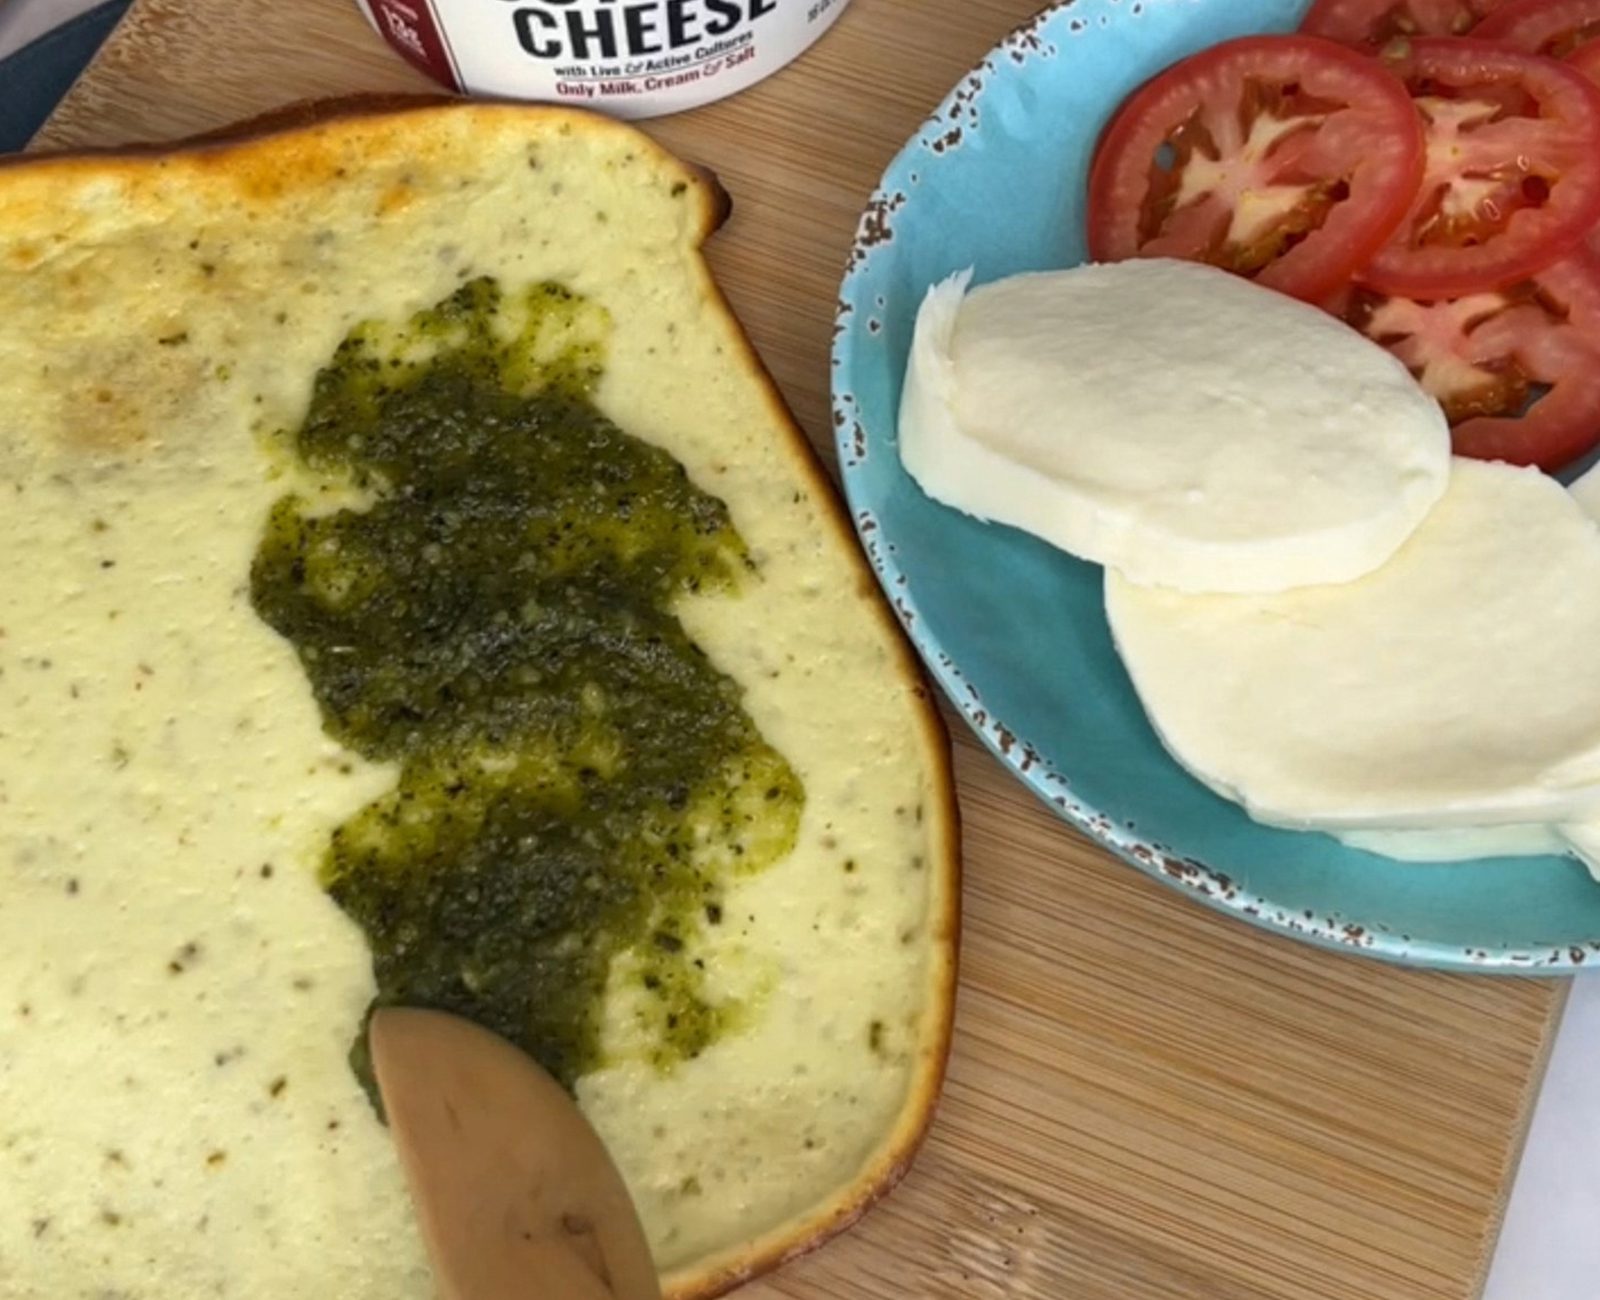
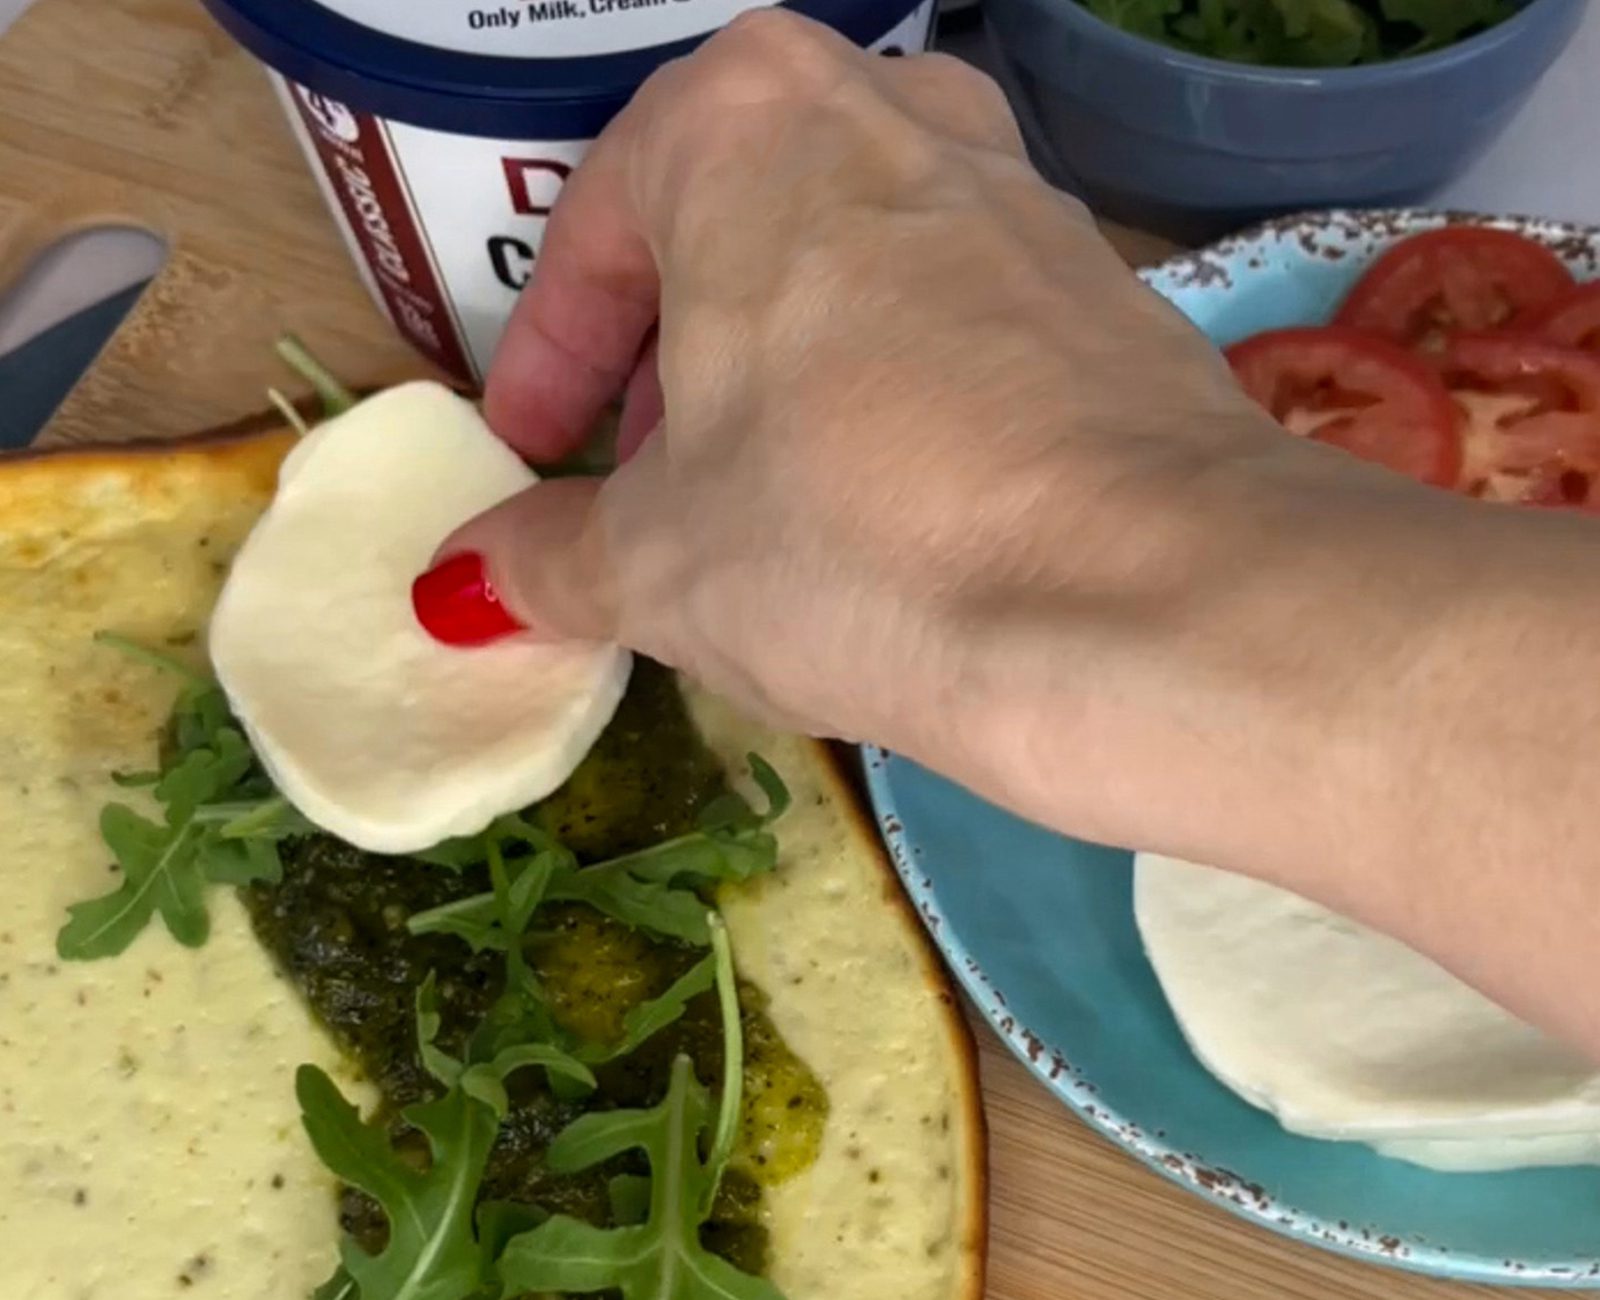
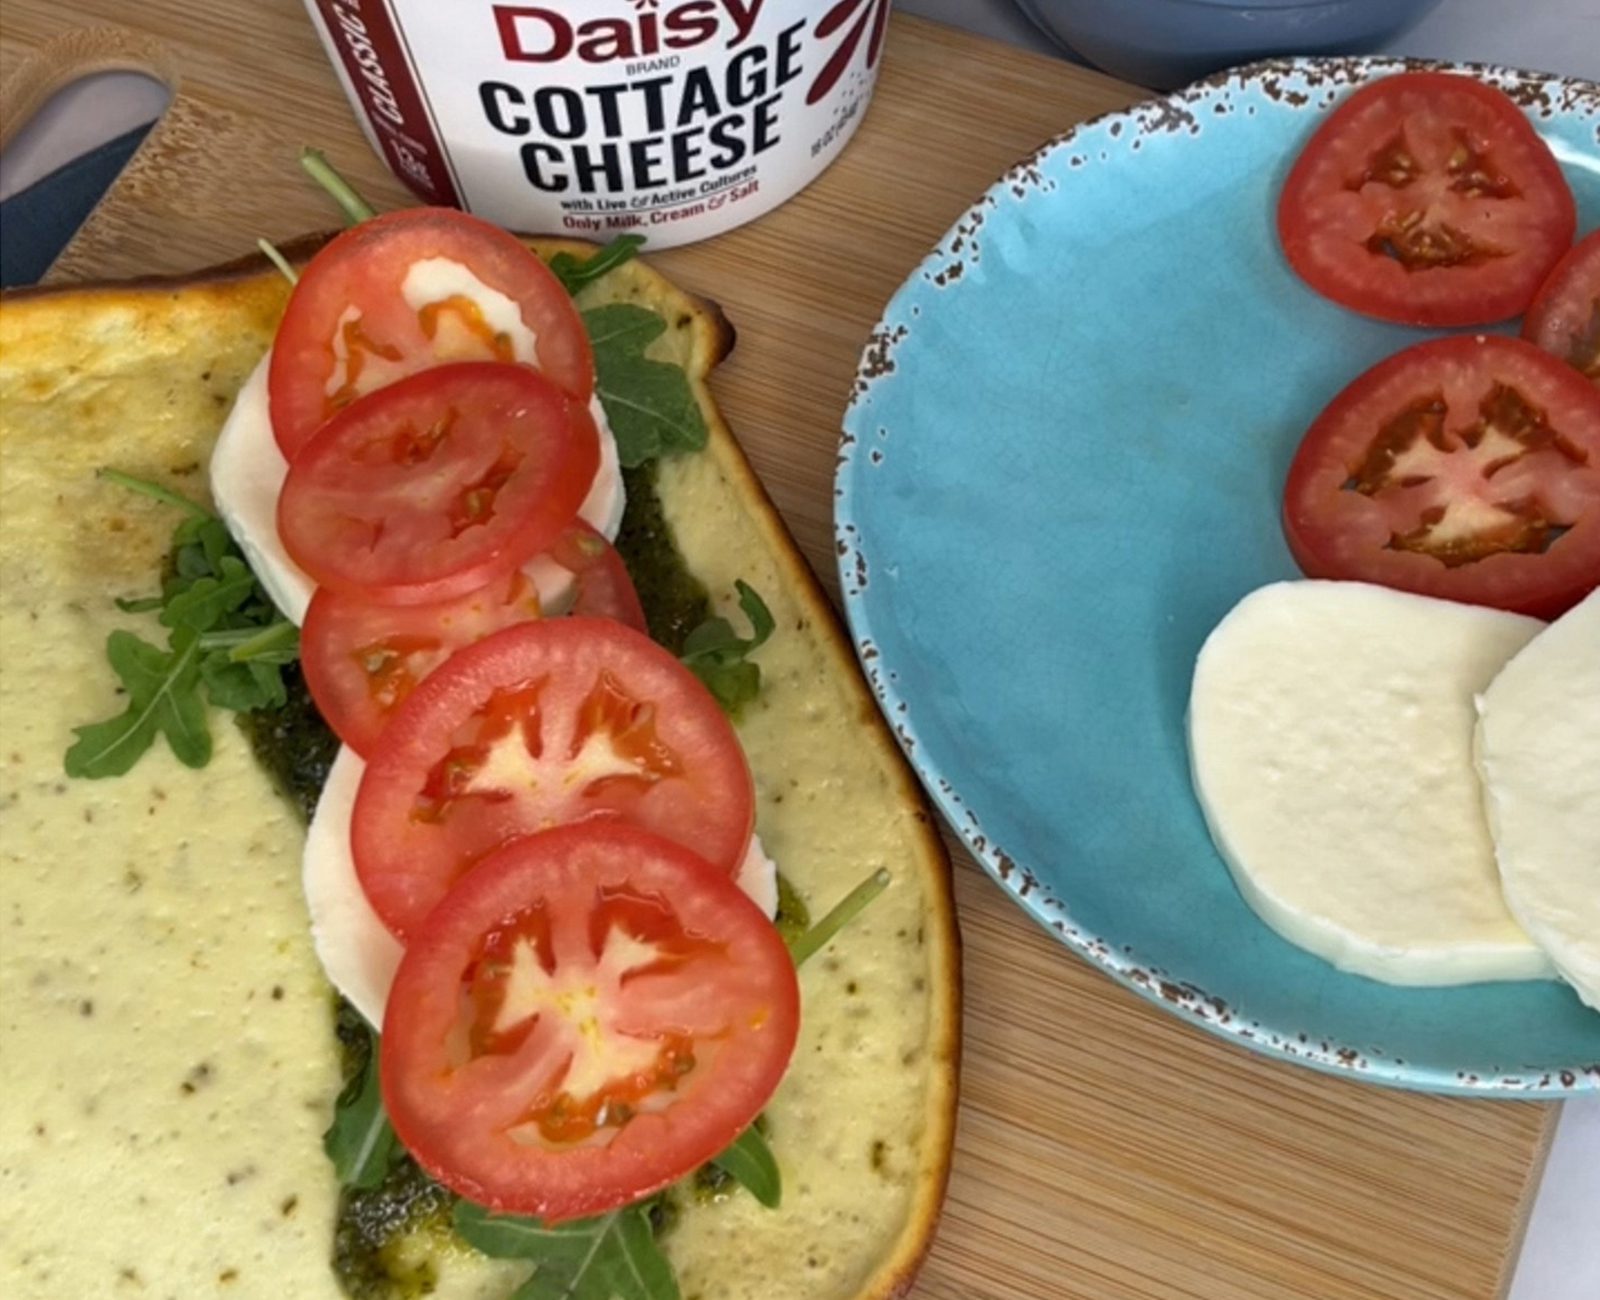
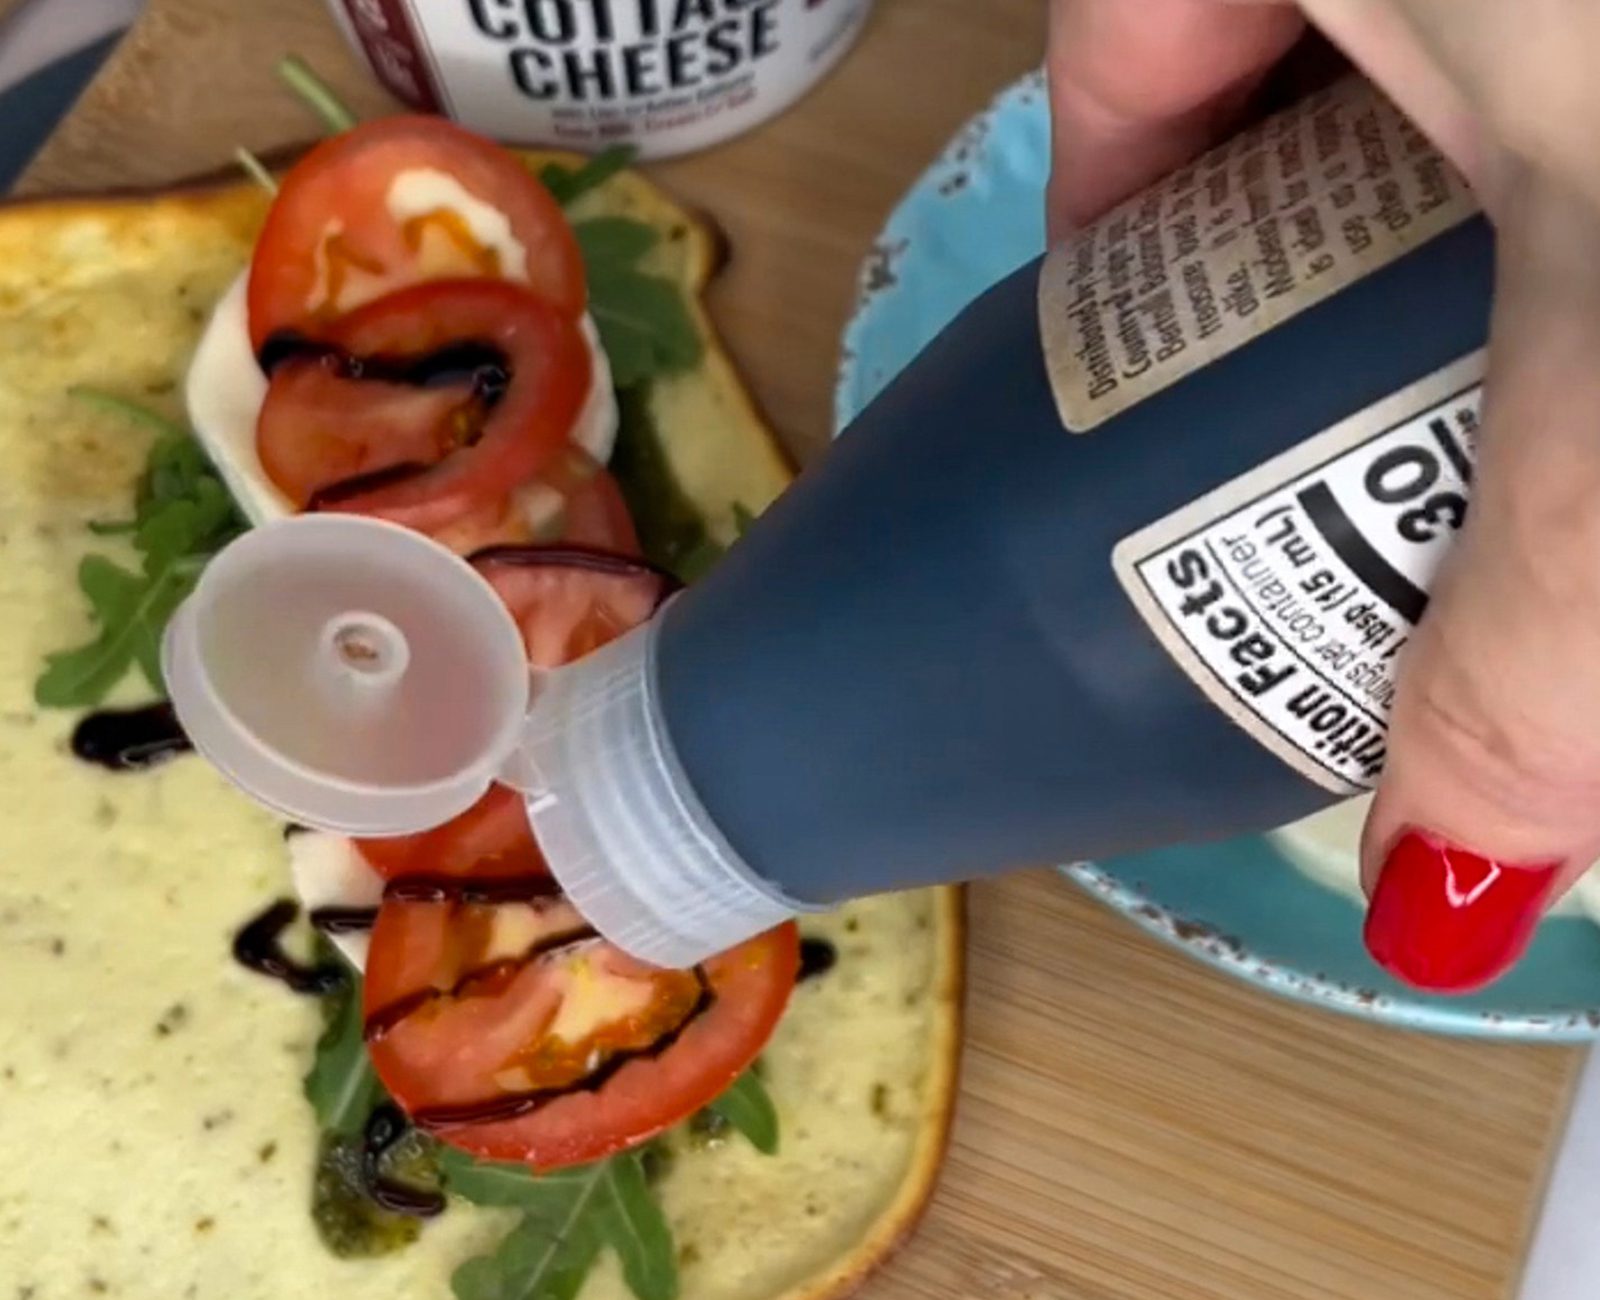
Fresh, flavorful, and easy to make, this lunch wrap made with Daisy Cottage Cheese pairs perfectly with fresh mozzarella, juicy Roma tomatoes, peppery arugula, savory pesto, and a drizzle of balsamic glaze for the perfect midday meal. Packed with protein and vibrant ingredients, this wrap delivers a delicious balance of creamy, fresh, and tangy flavors in every bite.
Spinach Flatbread Ingredients
- Baby Spinach (1 1/2 cups): A powerhouse vegetable full of vitamins and minerals, vibrant color, and earthy flavor.
- All-Purpose Flour (2 tablespoons): Helps thicken the batter. Feel free to use gluten-free flour or omit it entirely, if desired.
- Daisy Cottage Cheese (1/2 cup): Creates a high-protein, low-carb bread alternative. It pairs with eggs and spinach to create a flexible flatbread perfect for sandwiches and pizza.
- Eggs (2 large): Provide additional protein and binds the other ingredients together.
Gluten-Free Flatbread Ingredients
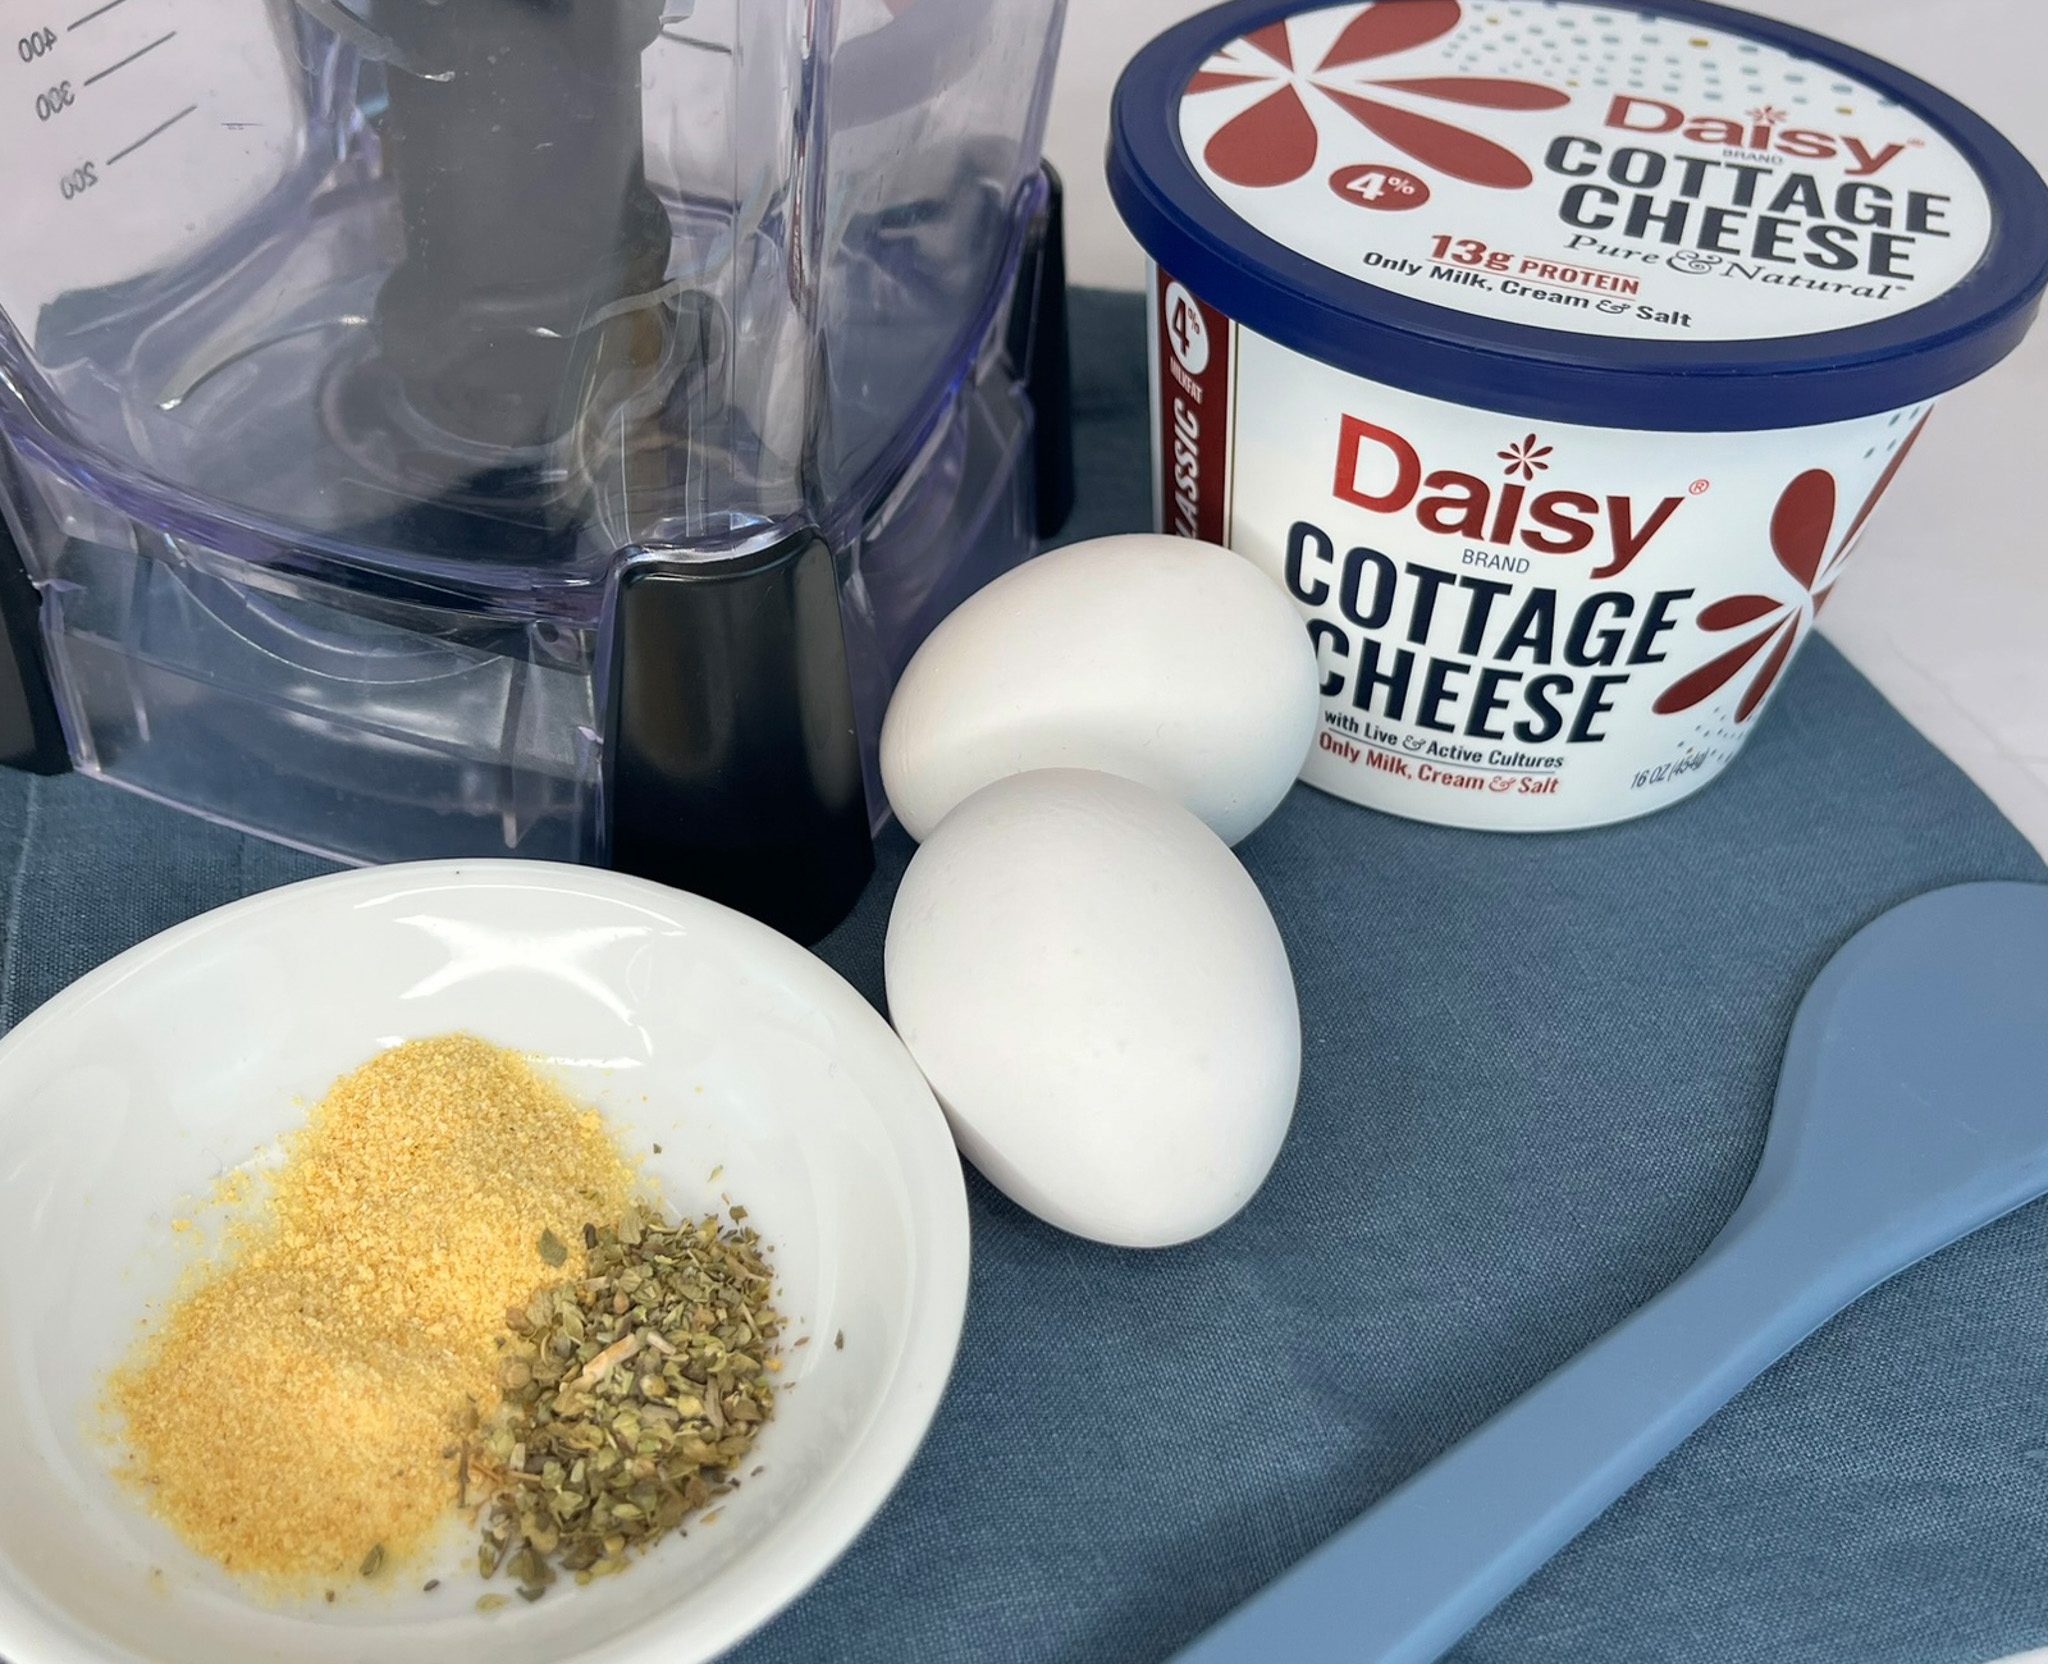
- Daisy Cottage Cheese (1 cup): Creates a high-protein, low-carb bread alternative. It pairs with eggs to create a flexible flatbread perfect for sandwiches and pizza.
- Eggs (2 large): Provide additional protein and binds the other ingredients together.
- Optional Seasonings (1 teaspoon each): Garlic powder, onion powder, Italian seasoning, season salt, and lemon pepper are all great choices to add flavor to the batter.
How to Make Cottage Cheese Flatbreads
- Preheat oven to 350° Line a sheet pan with parchment paper.
- Add all ingredients into a blender and process until smooth (about 2 minutes).
- Pour the batter onto the parchment paper and spread into a rectangle shape.
- Bake for 25-30 minutes, or until the flatbread starts to brown around the edges. Cut in half to use as a wrap or use whole as a pizza base.
Alternative Cooking Method: Heat a large skillet over medium heat. Pour 1/3 cup batter per flatbread. Cook for 2 minutes until the bottom has set. Flip and cook additional 1-2 minutes until cooked through.
Wrap Ideas: For breakfast try creamy scrambled eggs, sliced avocado, sliced grape tomatoes, diced red onion, and a sprinkle of cracked black pepper wrapped in half the spinach flatbread.

For lunch or a snack, try pesto, fresh sliced mozzarella, juicy tomatoes, peppery arugula, and a drizzle of balsamic on half the plain flatbread flavored with Italian seasoning.
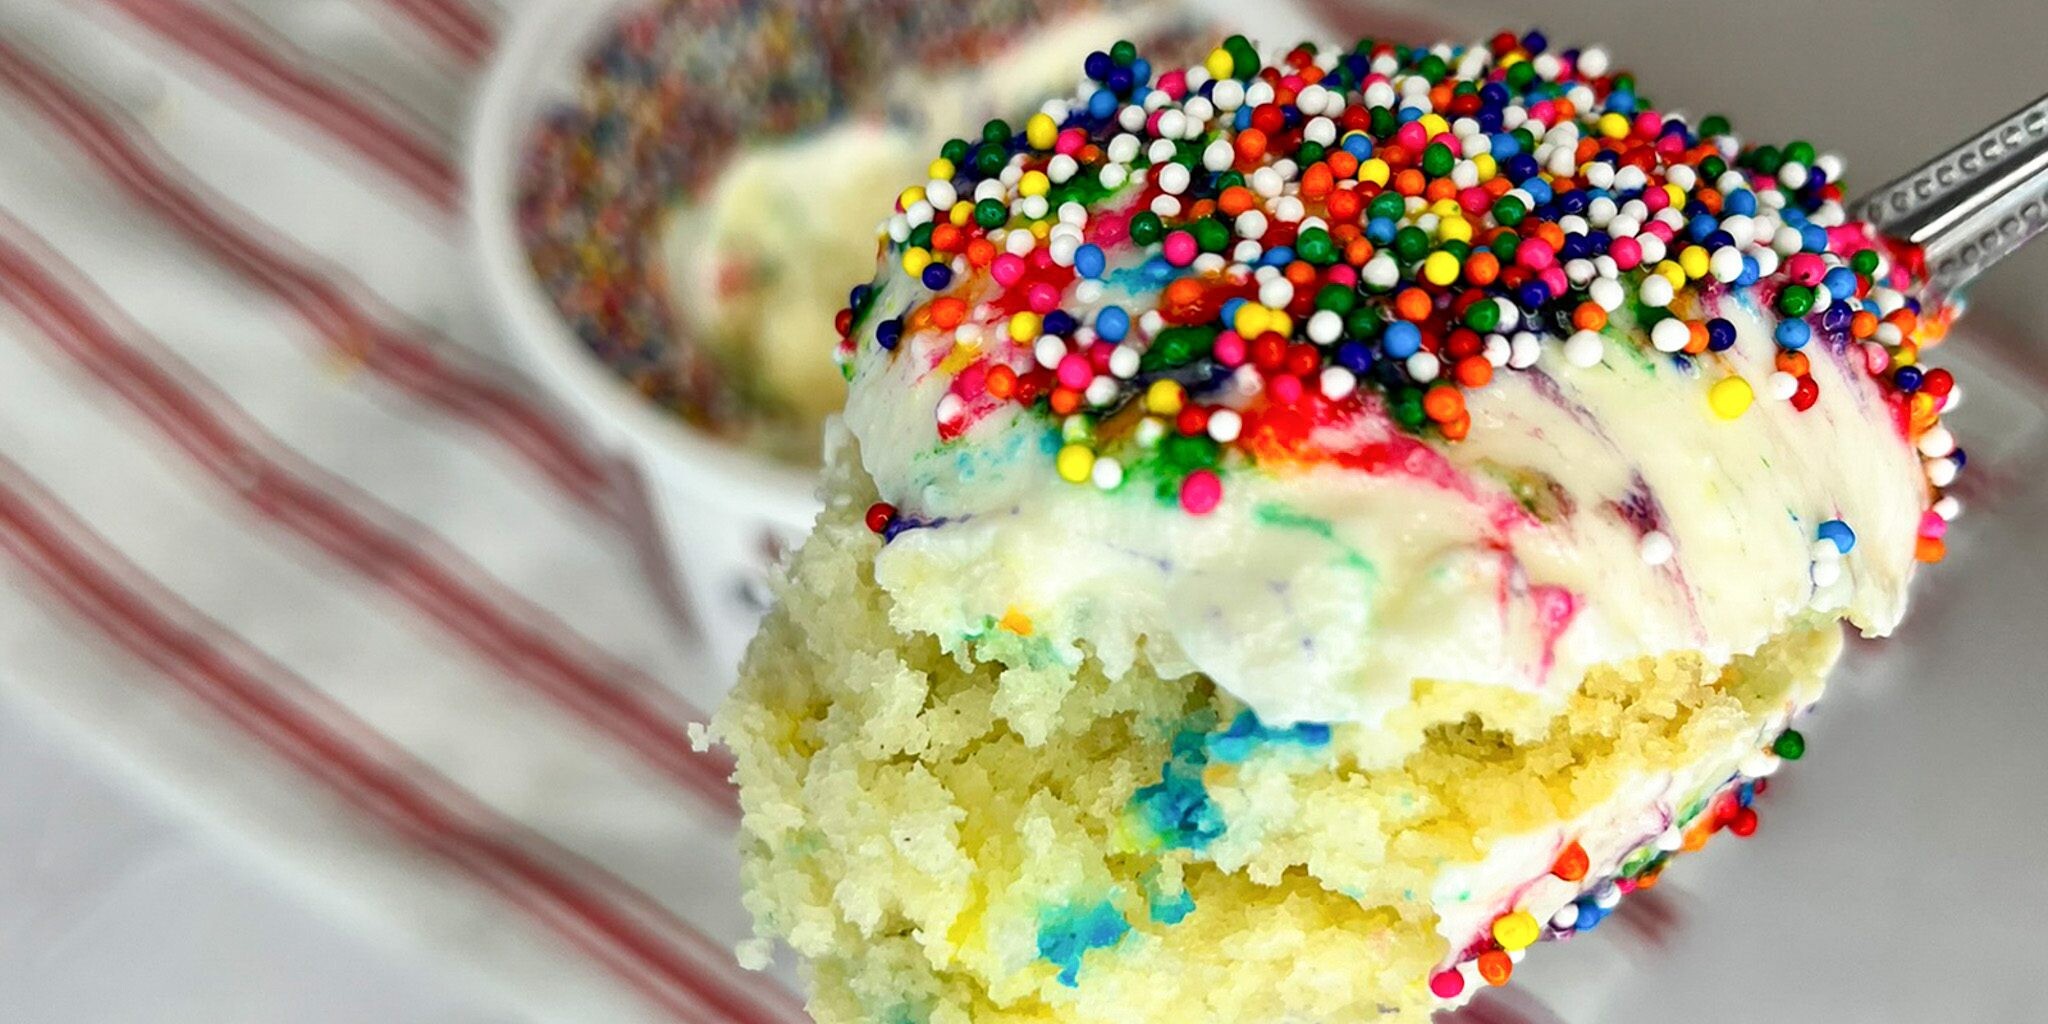
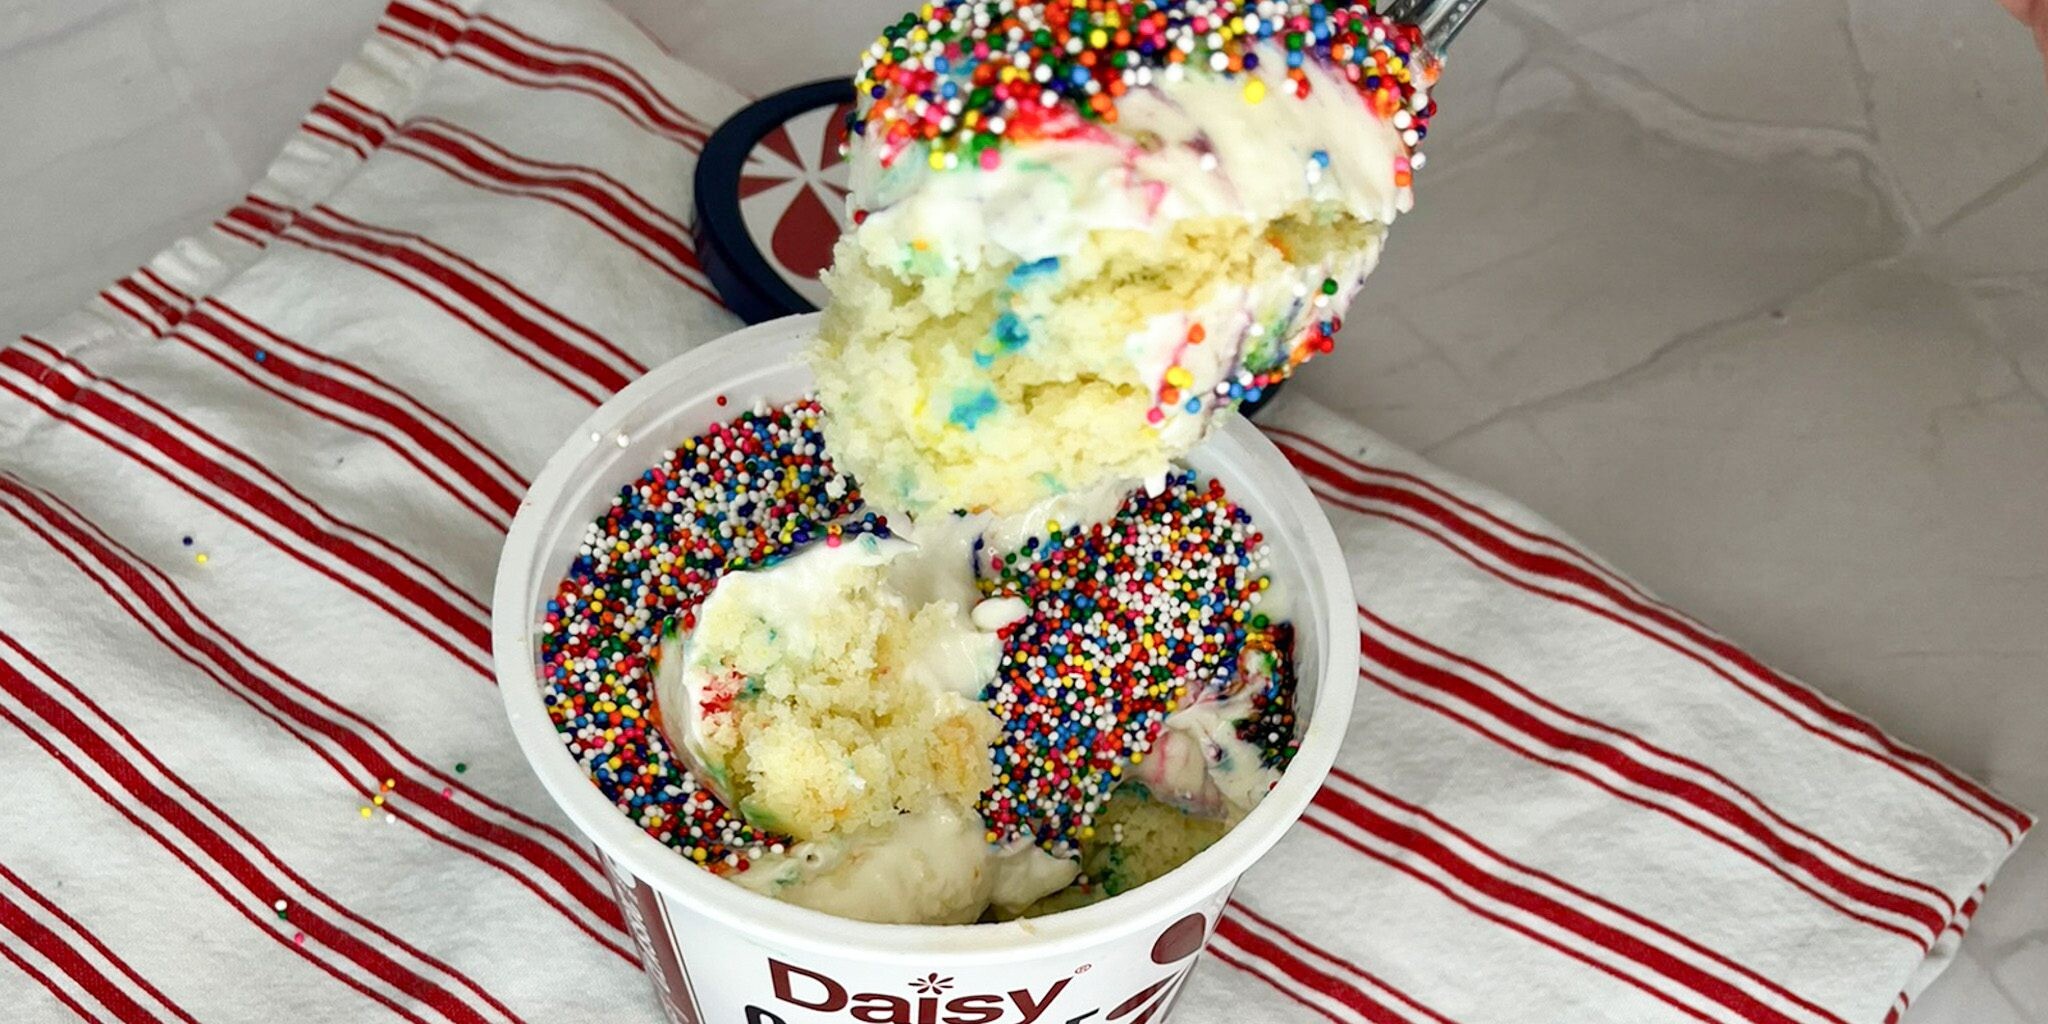
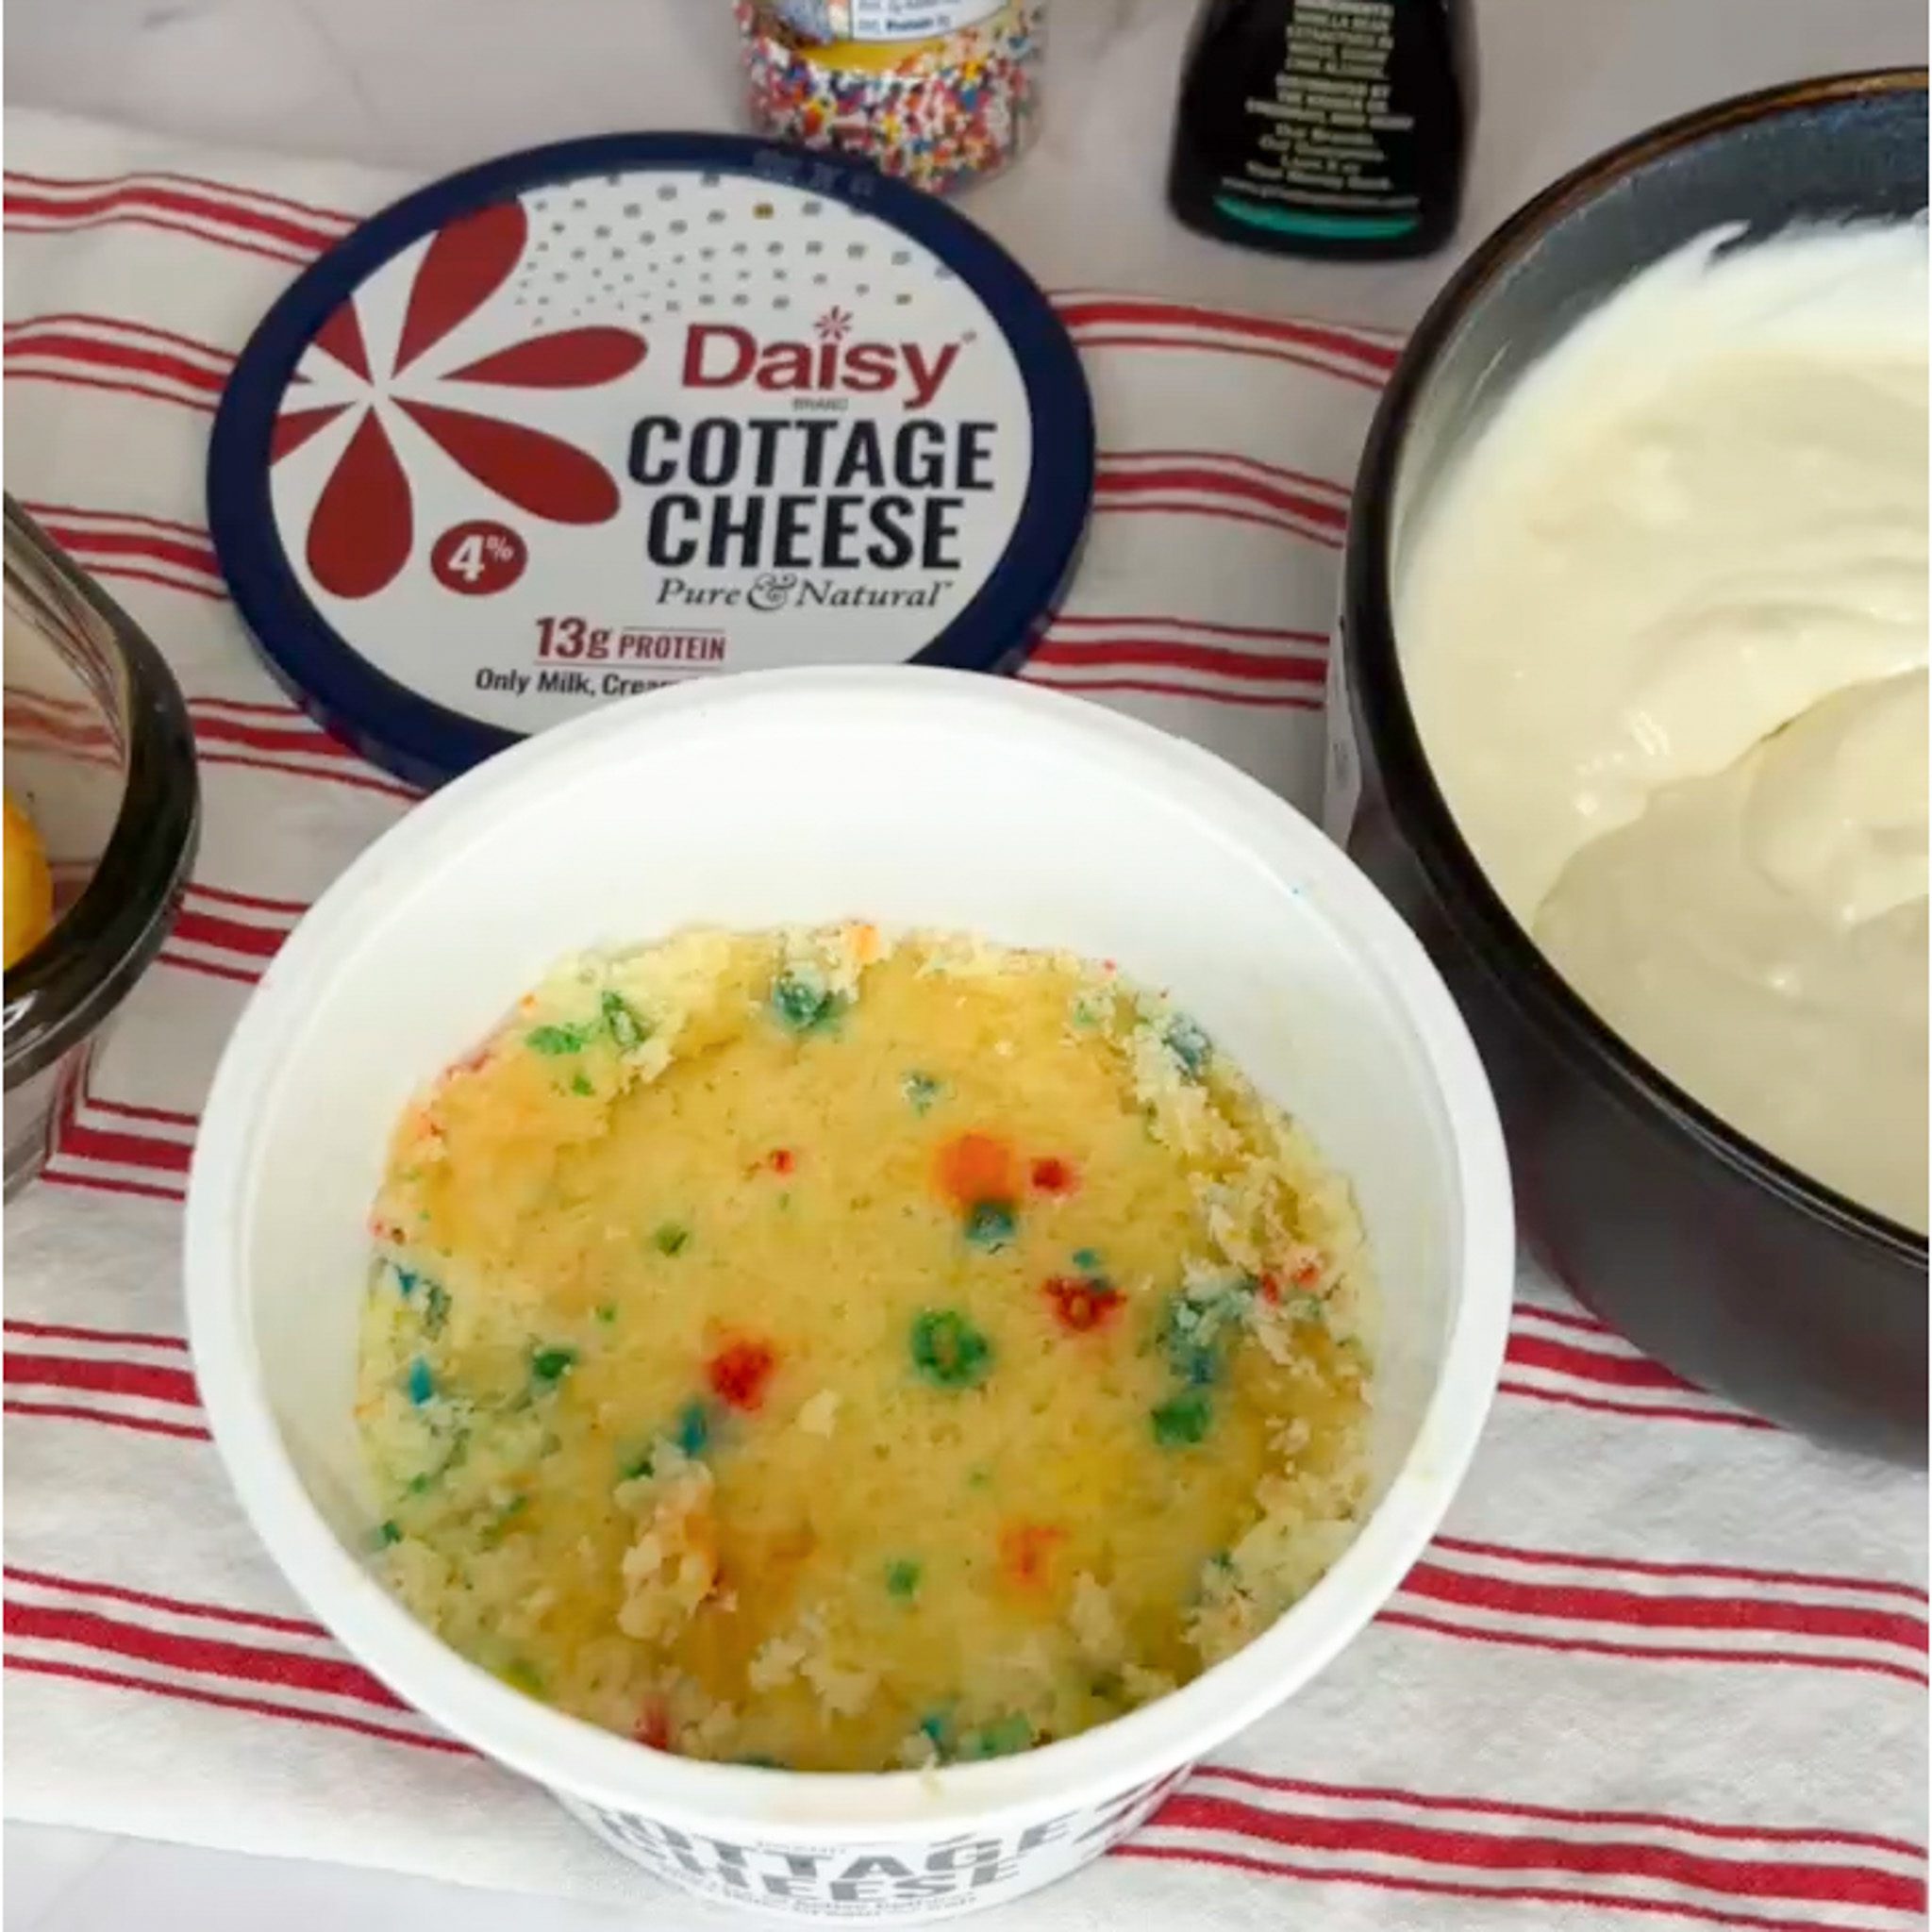
Dot Cakes
Dot Cakes
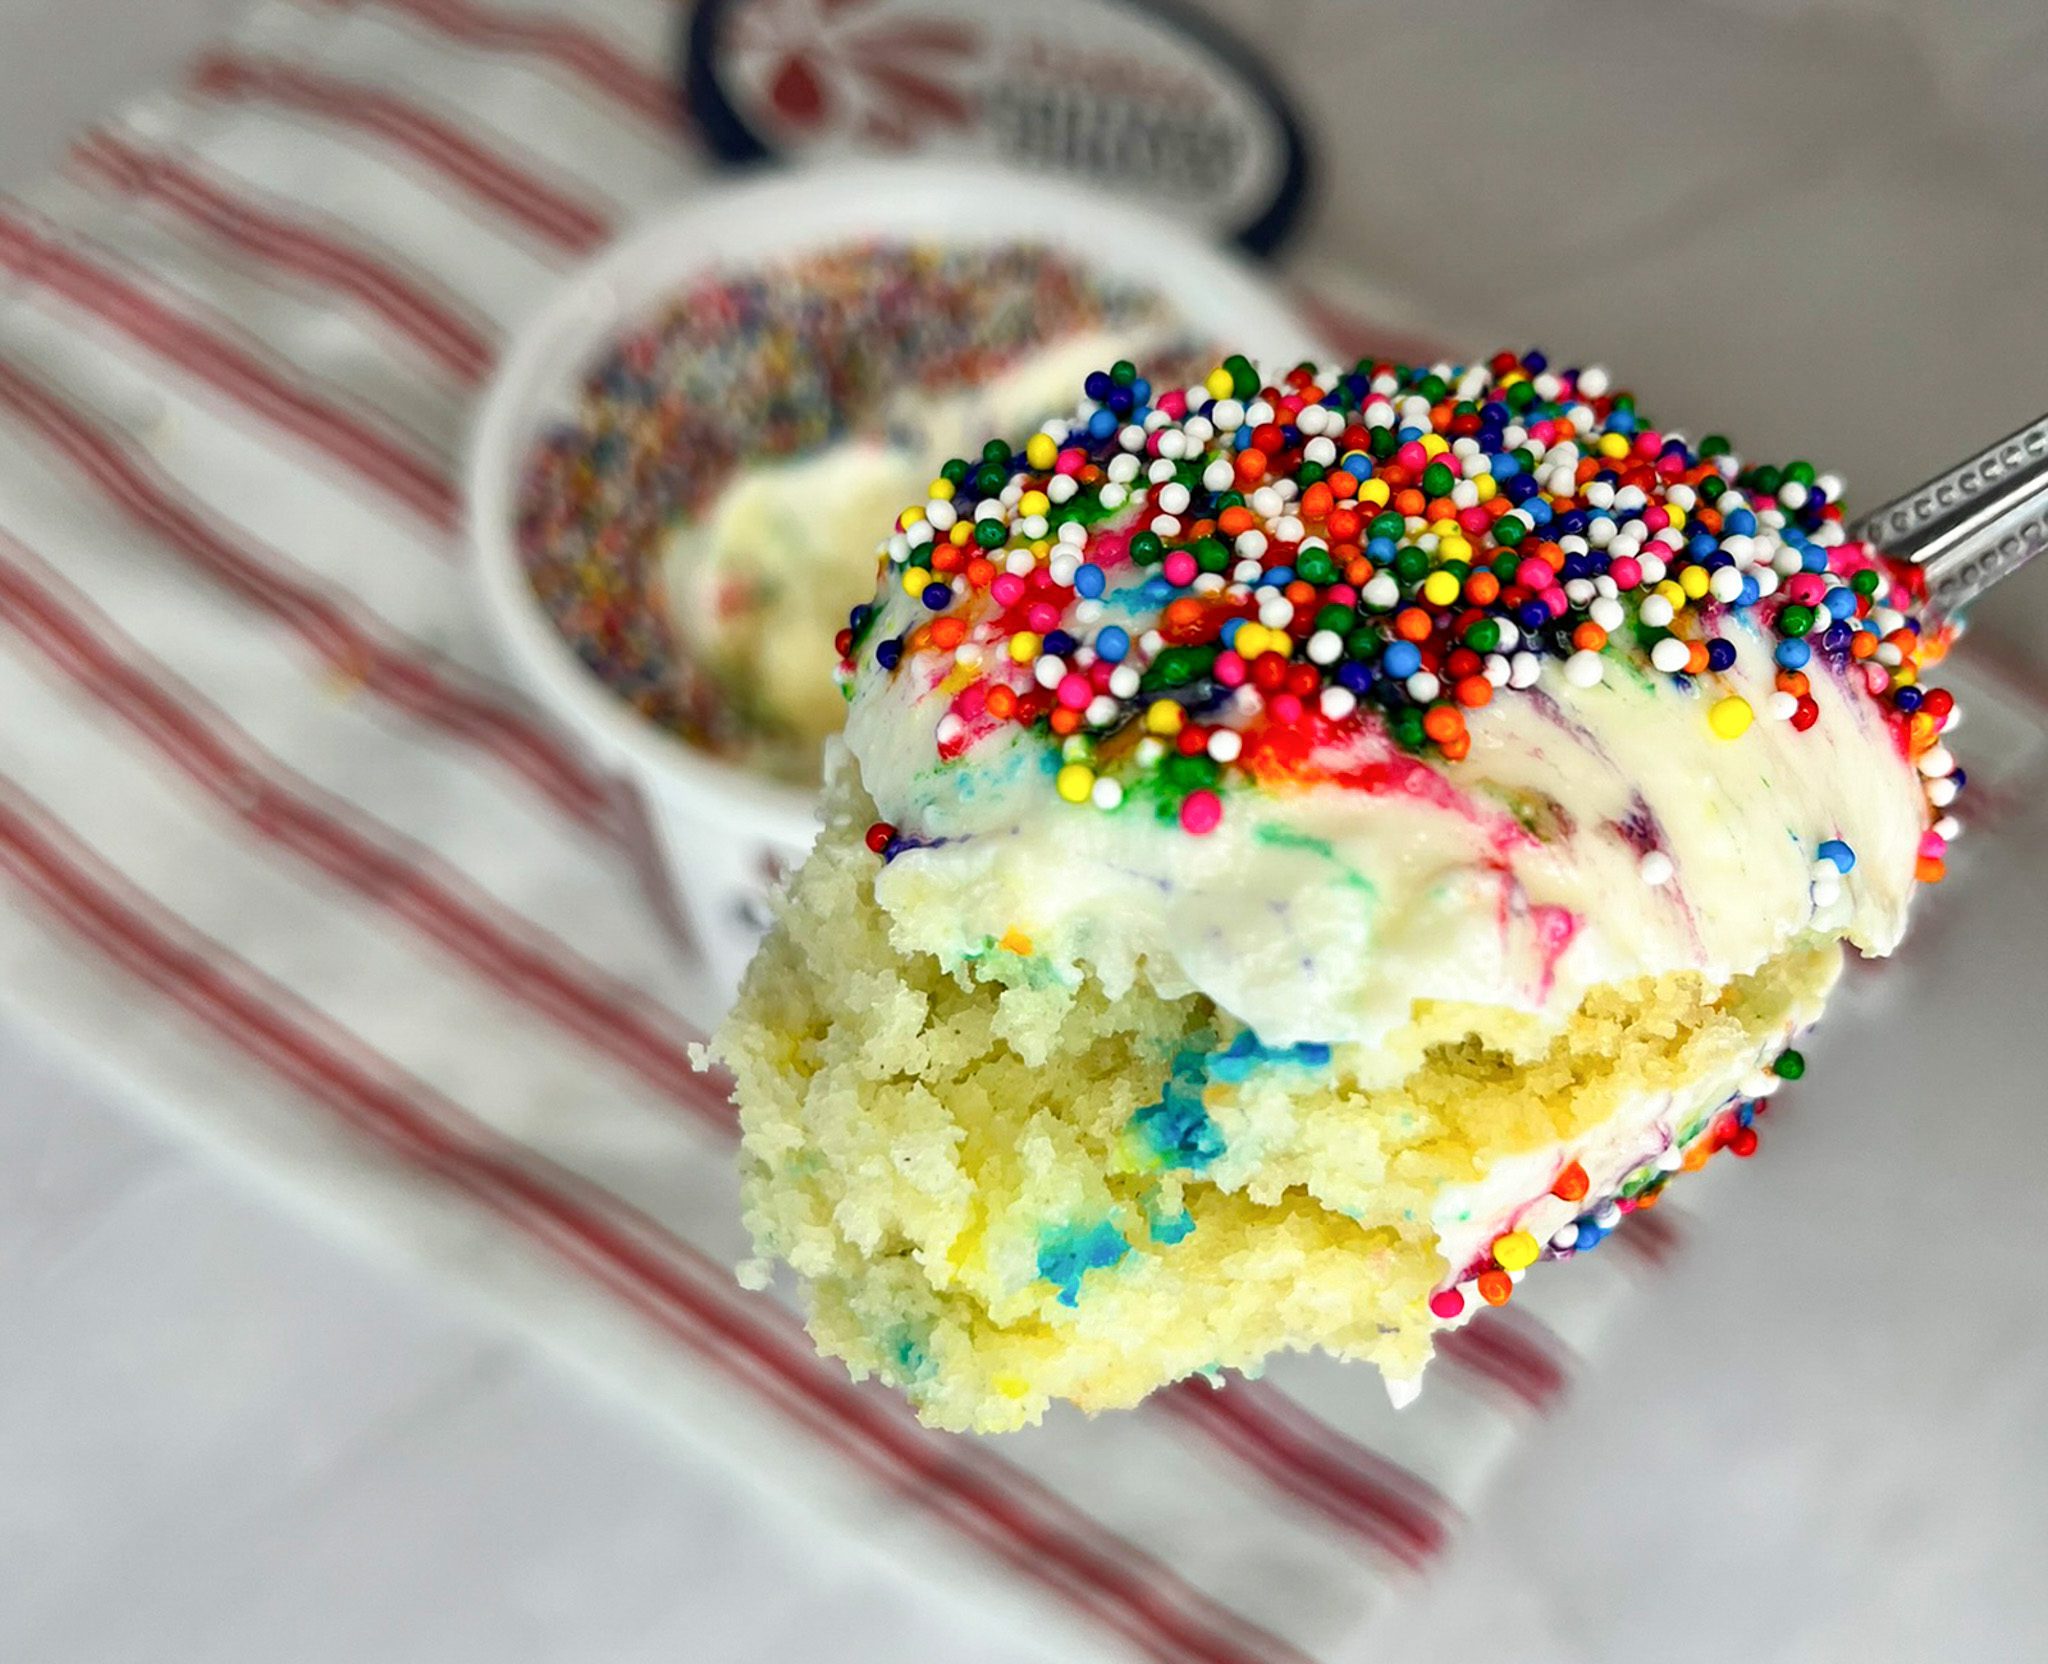
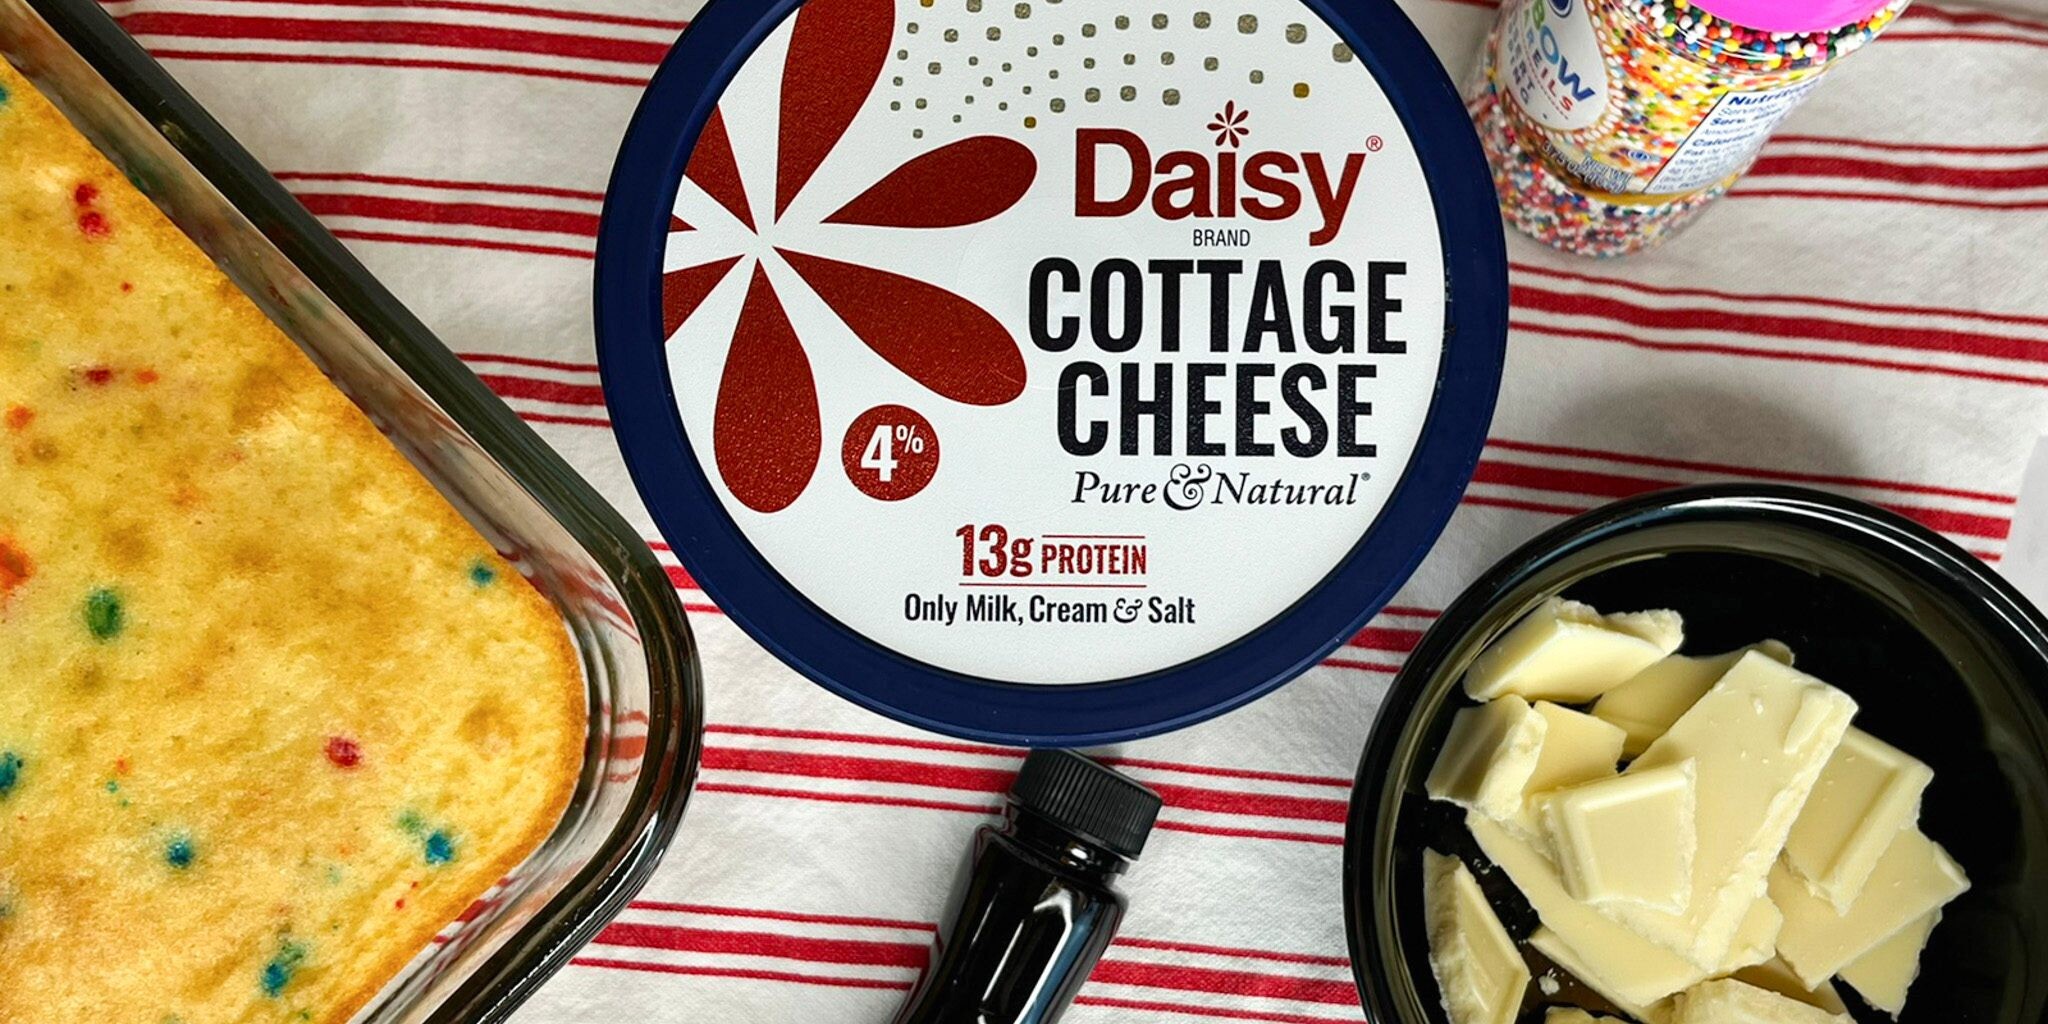
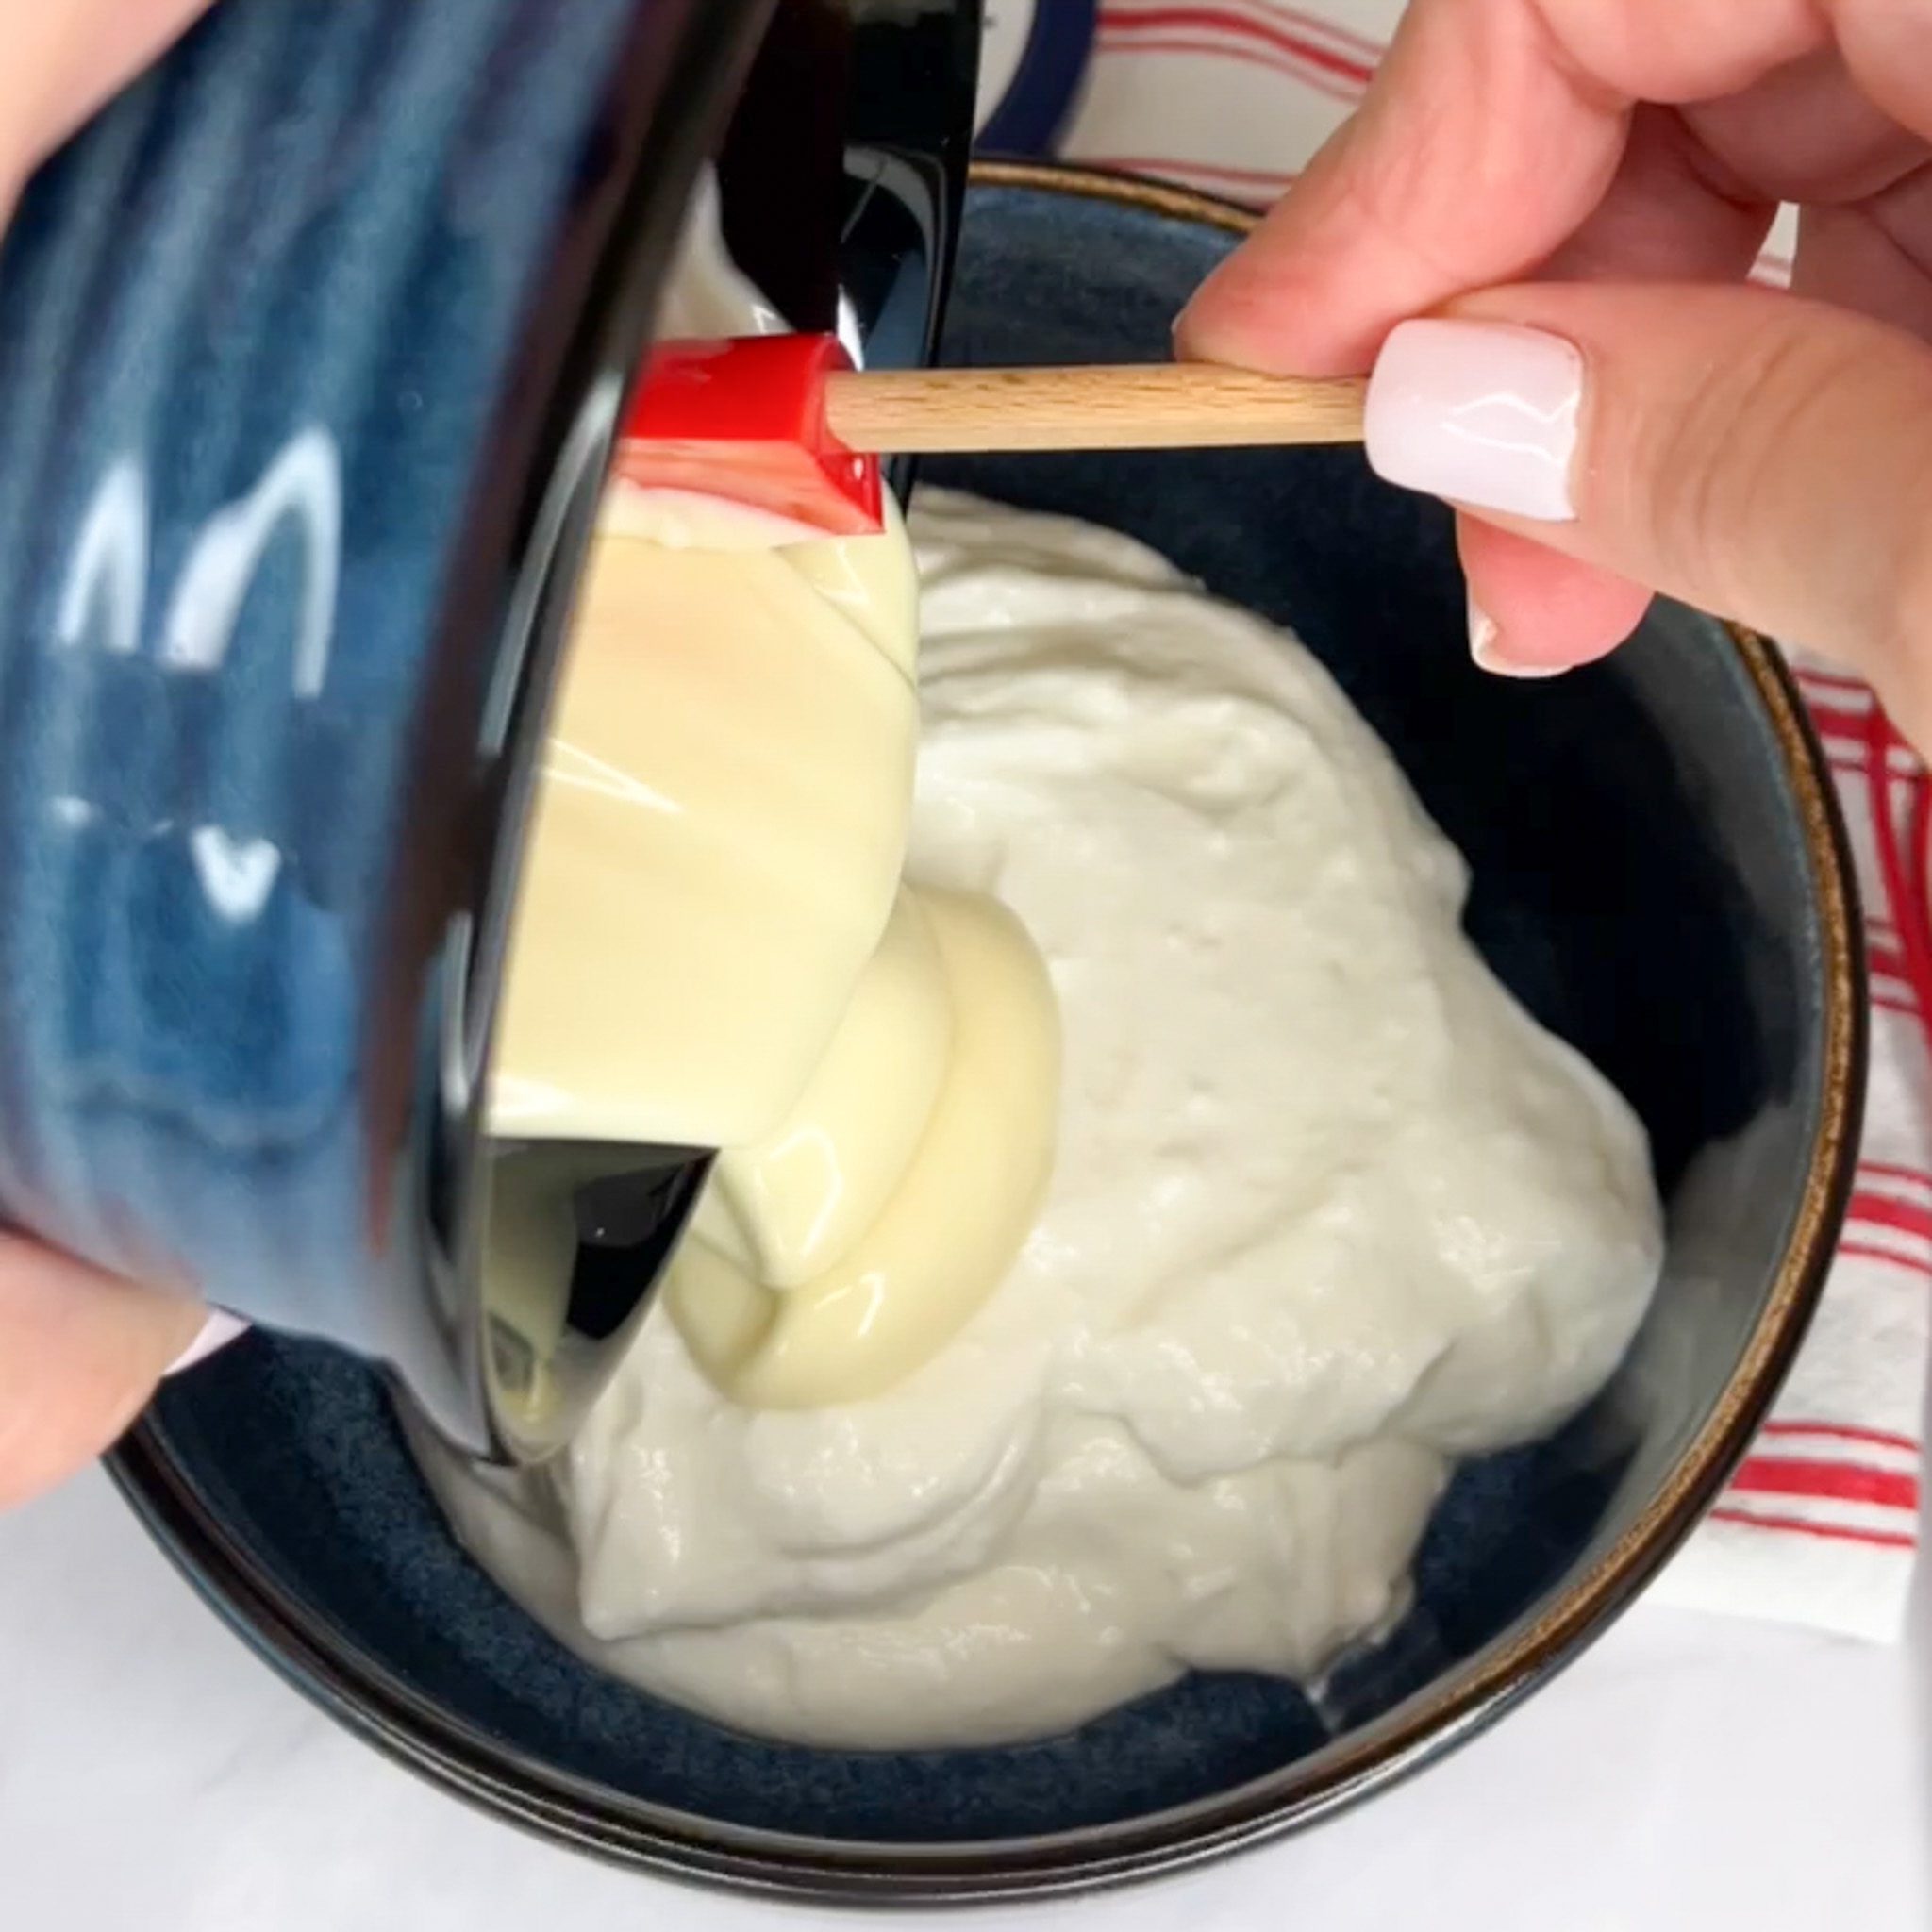
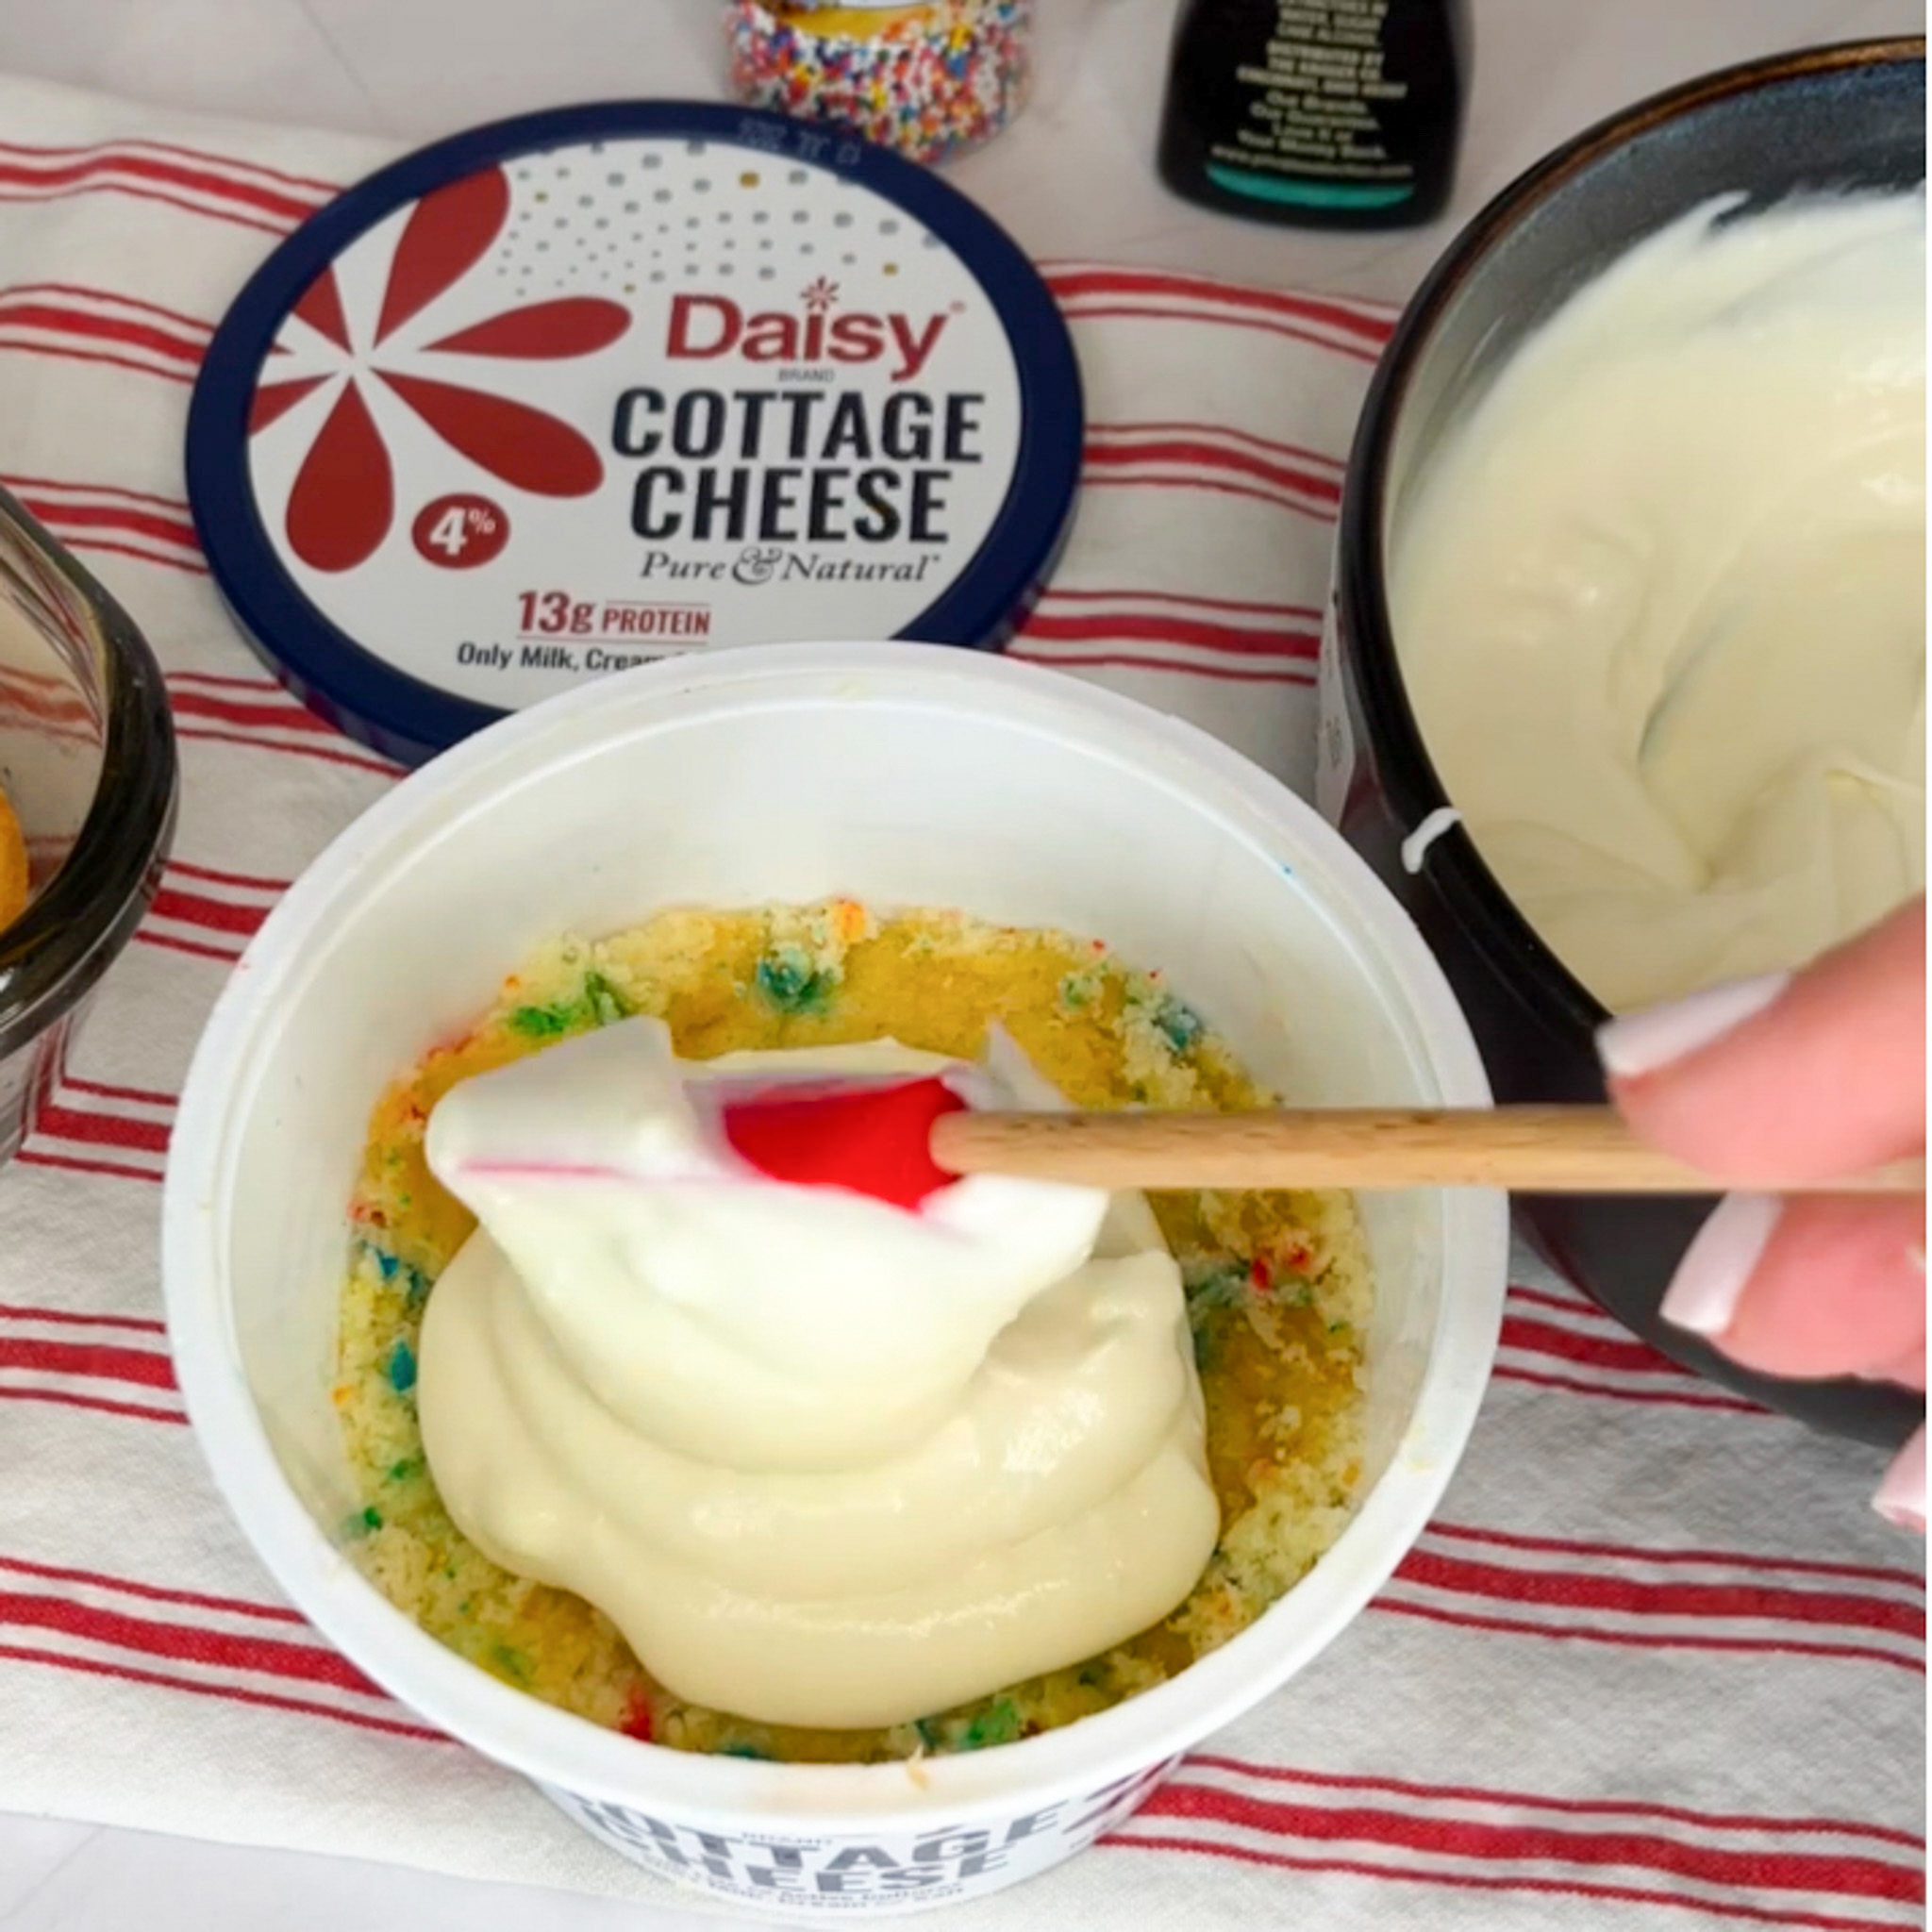
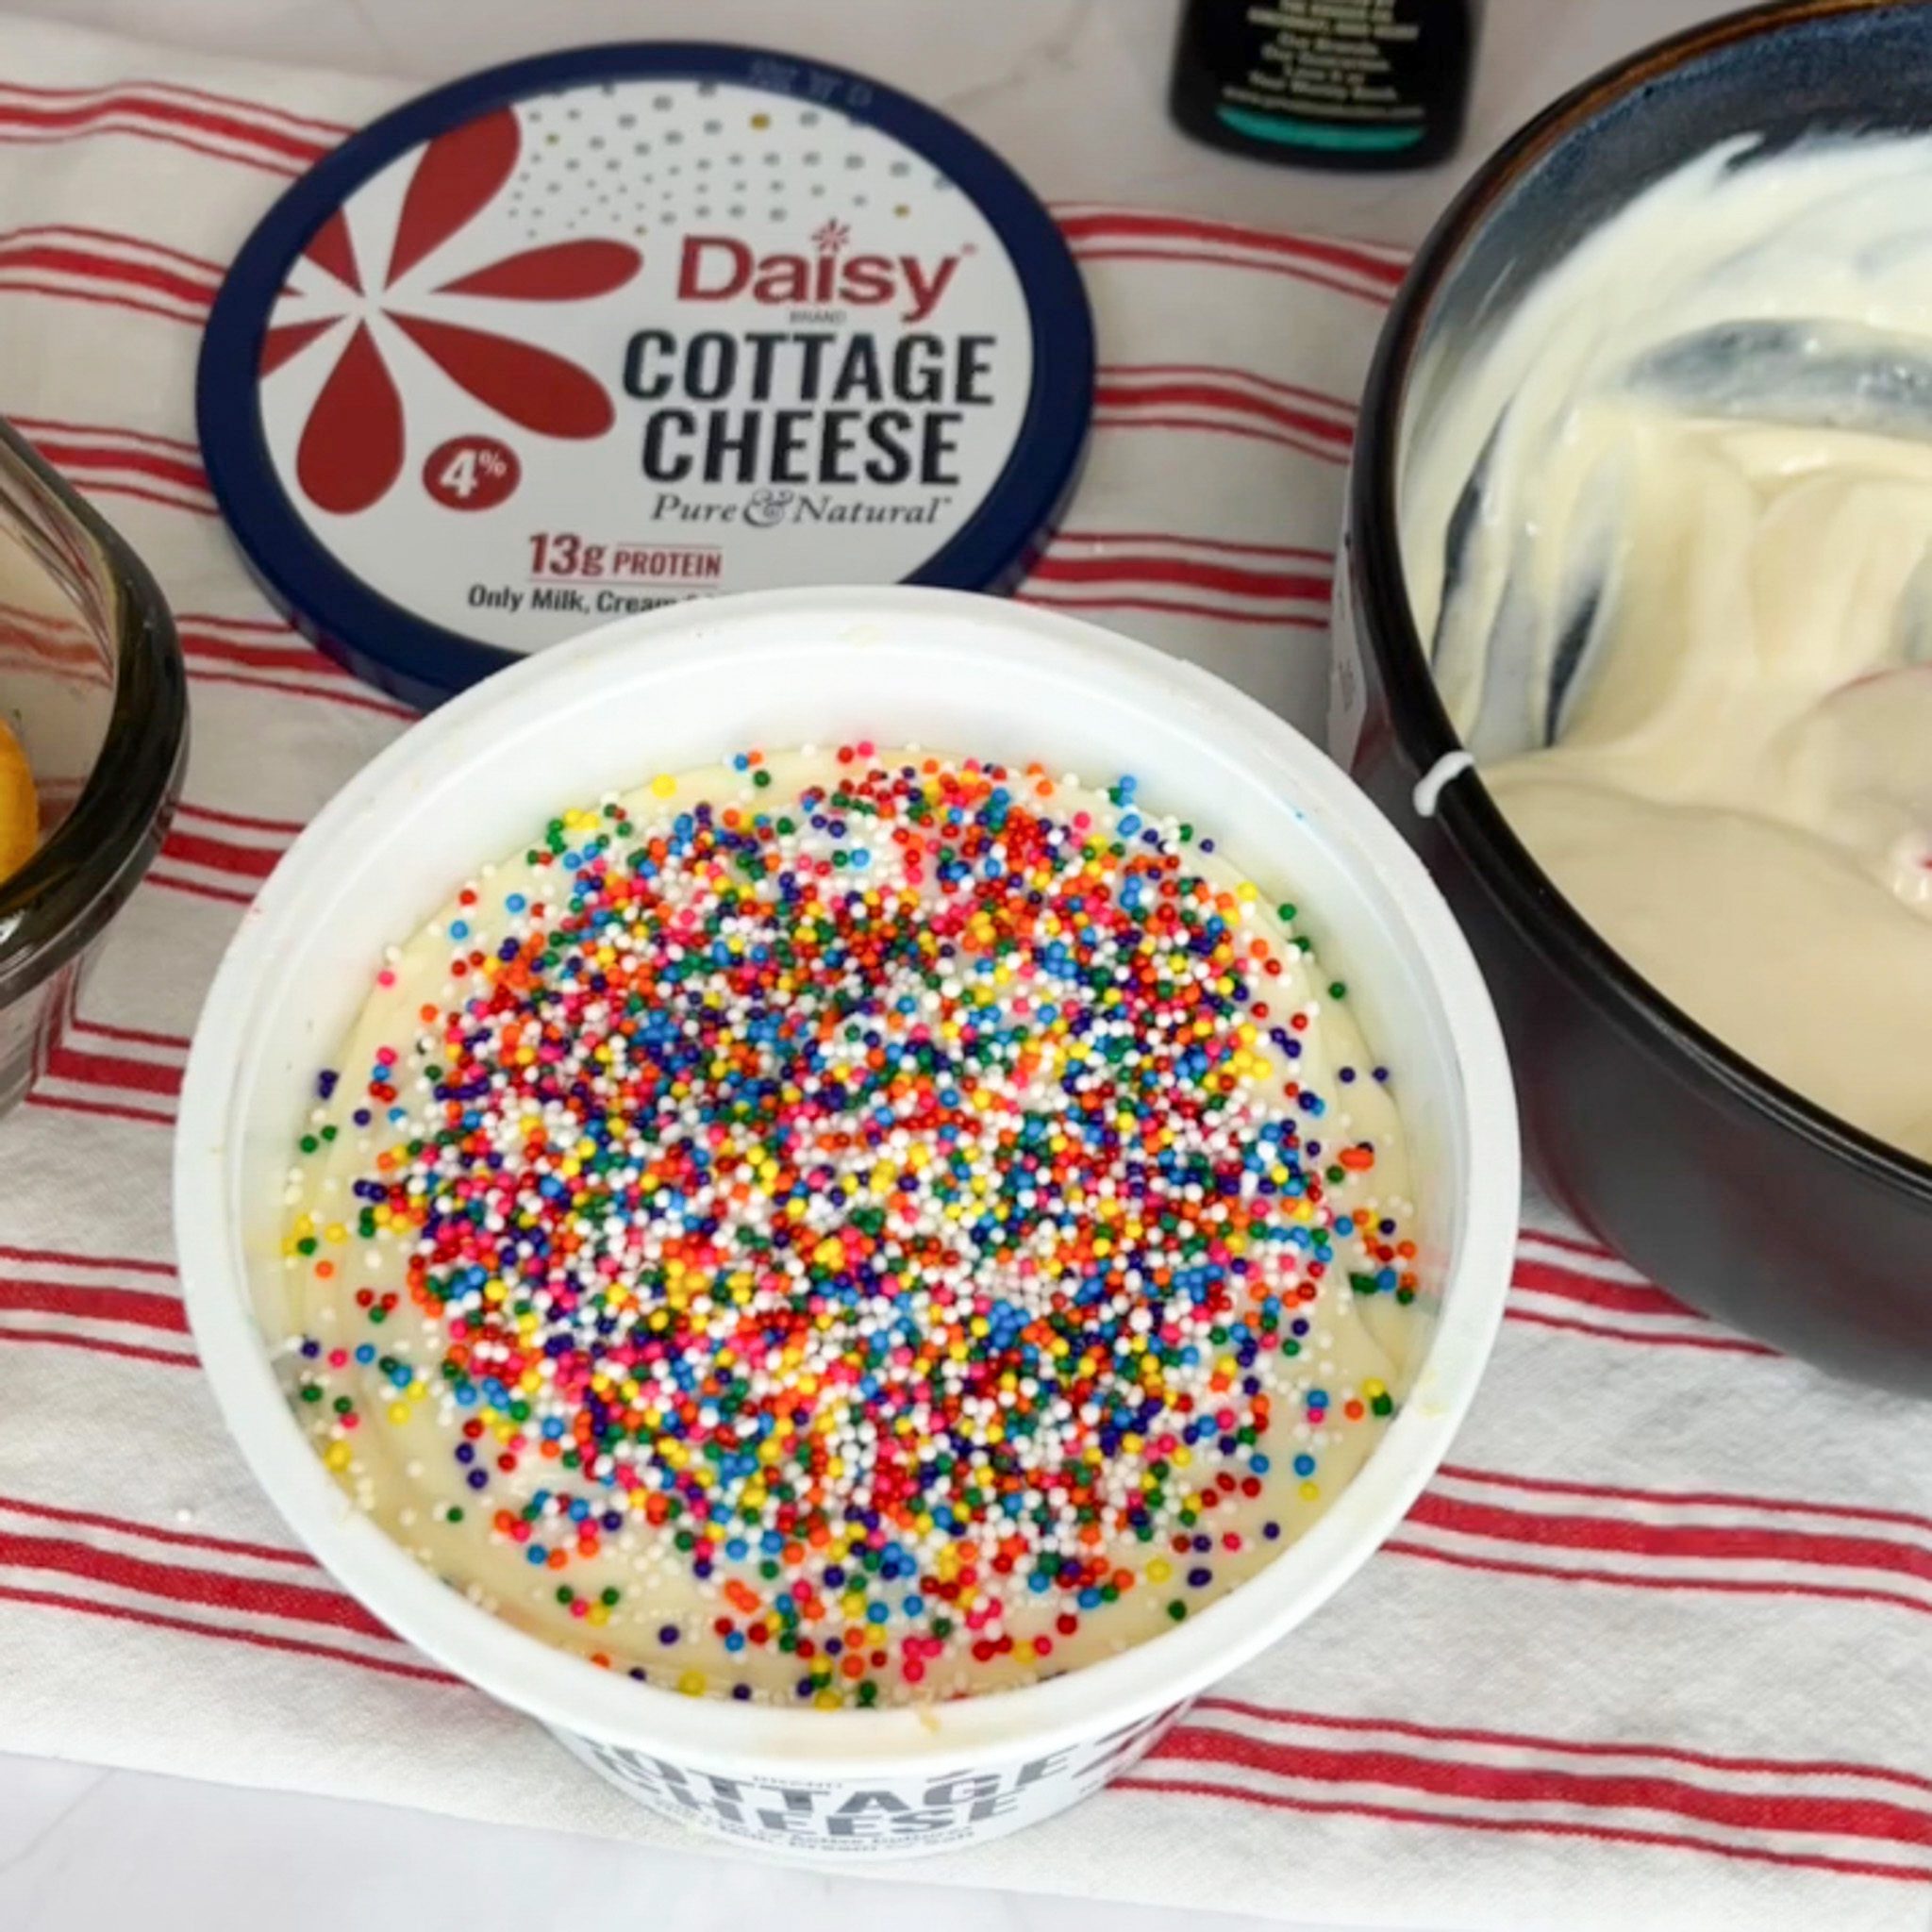
If you’re looking for a fun, colorful dessert that’s easy to make and guaranteed to impress, this Confetti Dot Cake with Daisy Cottage Cheese Cheesecake Topping is the perfect treat. Combining the nostalgic flavor of confetti cake with a rich, creamy cheesecake-inspired topping made with Daisy Cottage Cheese, this recipe delivers the best of both worlds. It’s light, festive, and packed with protein, making it a delicious twist on a classic celebration cake.
The magic of this recipe is in the smooth and creamy topping. Made with Daisy Cottage Cheese, it blends into a velvety cheesecake layer that adds richness and tangy flavor without feeling overly heavy. The colorful dot sprinkles create a beautiful for any occasion worth celebrating.
One of the best things about this Confetti Dot Cake is how simple it is to prepare. Using a confetti cake mix as the base keeps things easy, while the homemade cheesecake topping elevates the dessert into something truly special. Daisy Cottage Cheese provides a creamy texture and protein-packed goodness, helping create a topping that’s both satisfying and delicious.
This Dot Cake with Daisy Cottage Cheese Cheesecake Topping is a fun, family-friendly dessert that brings smiles with every bite. Easy to make, beautiful to serve, and irresistibly delicious, it’s a recipe you’ll want to make again and again.
Dot Cake Ingredients
- Daisy Cottage Cheese (1 ¼ cups, blended): Creates the high-protein, creamy base for the cheesecake topping layer.
- White Chocolate (4 ounces, melted): Adds flavor and structure for the cheesecake topping.
- Vanilla Extract (1/2 teaspoon): Adds a touch of flavor to the cheesecake topping.
- Prepared Confetti Cake (4” round): The colorful cake base of the Dot Cake.
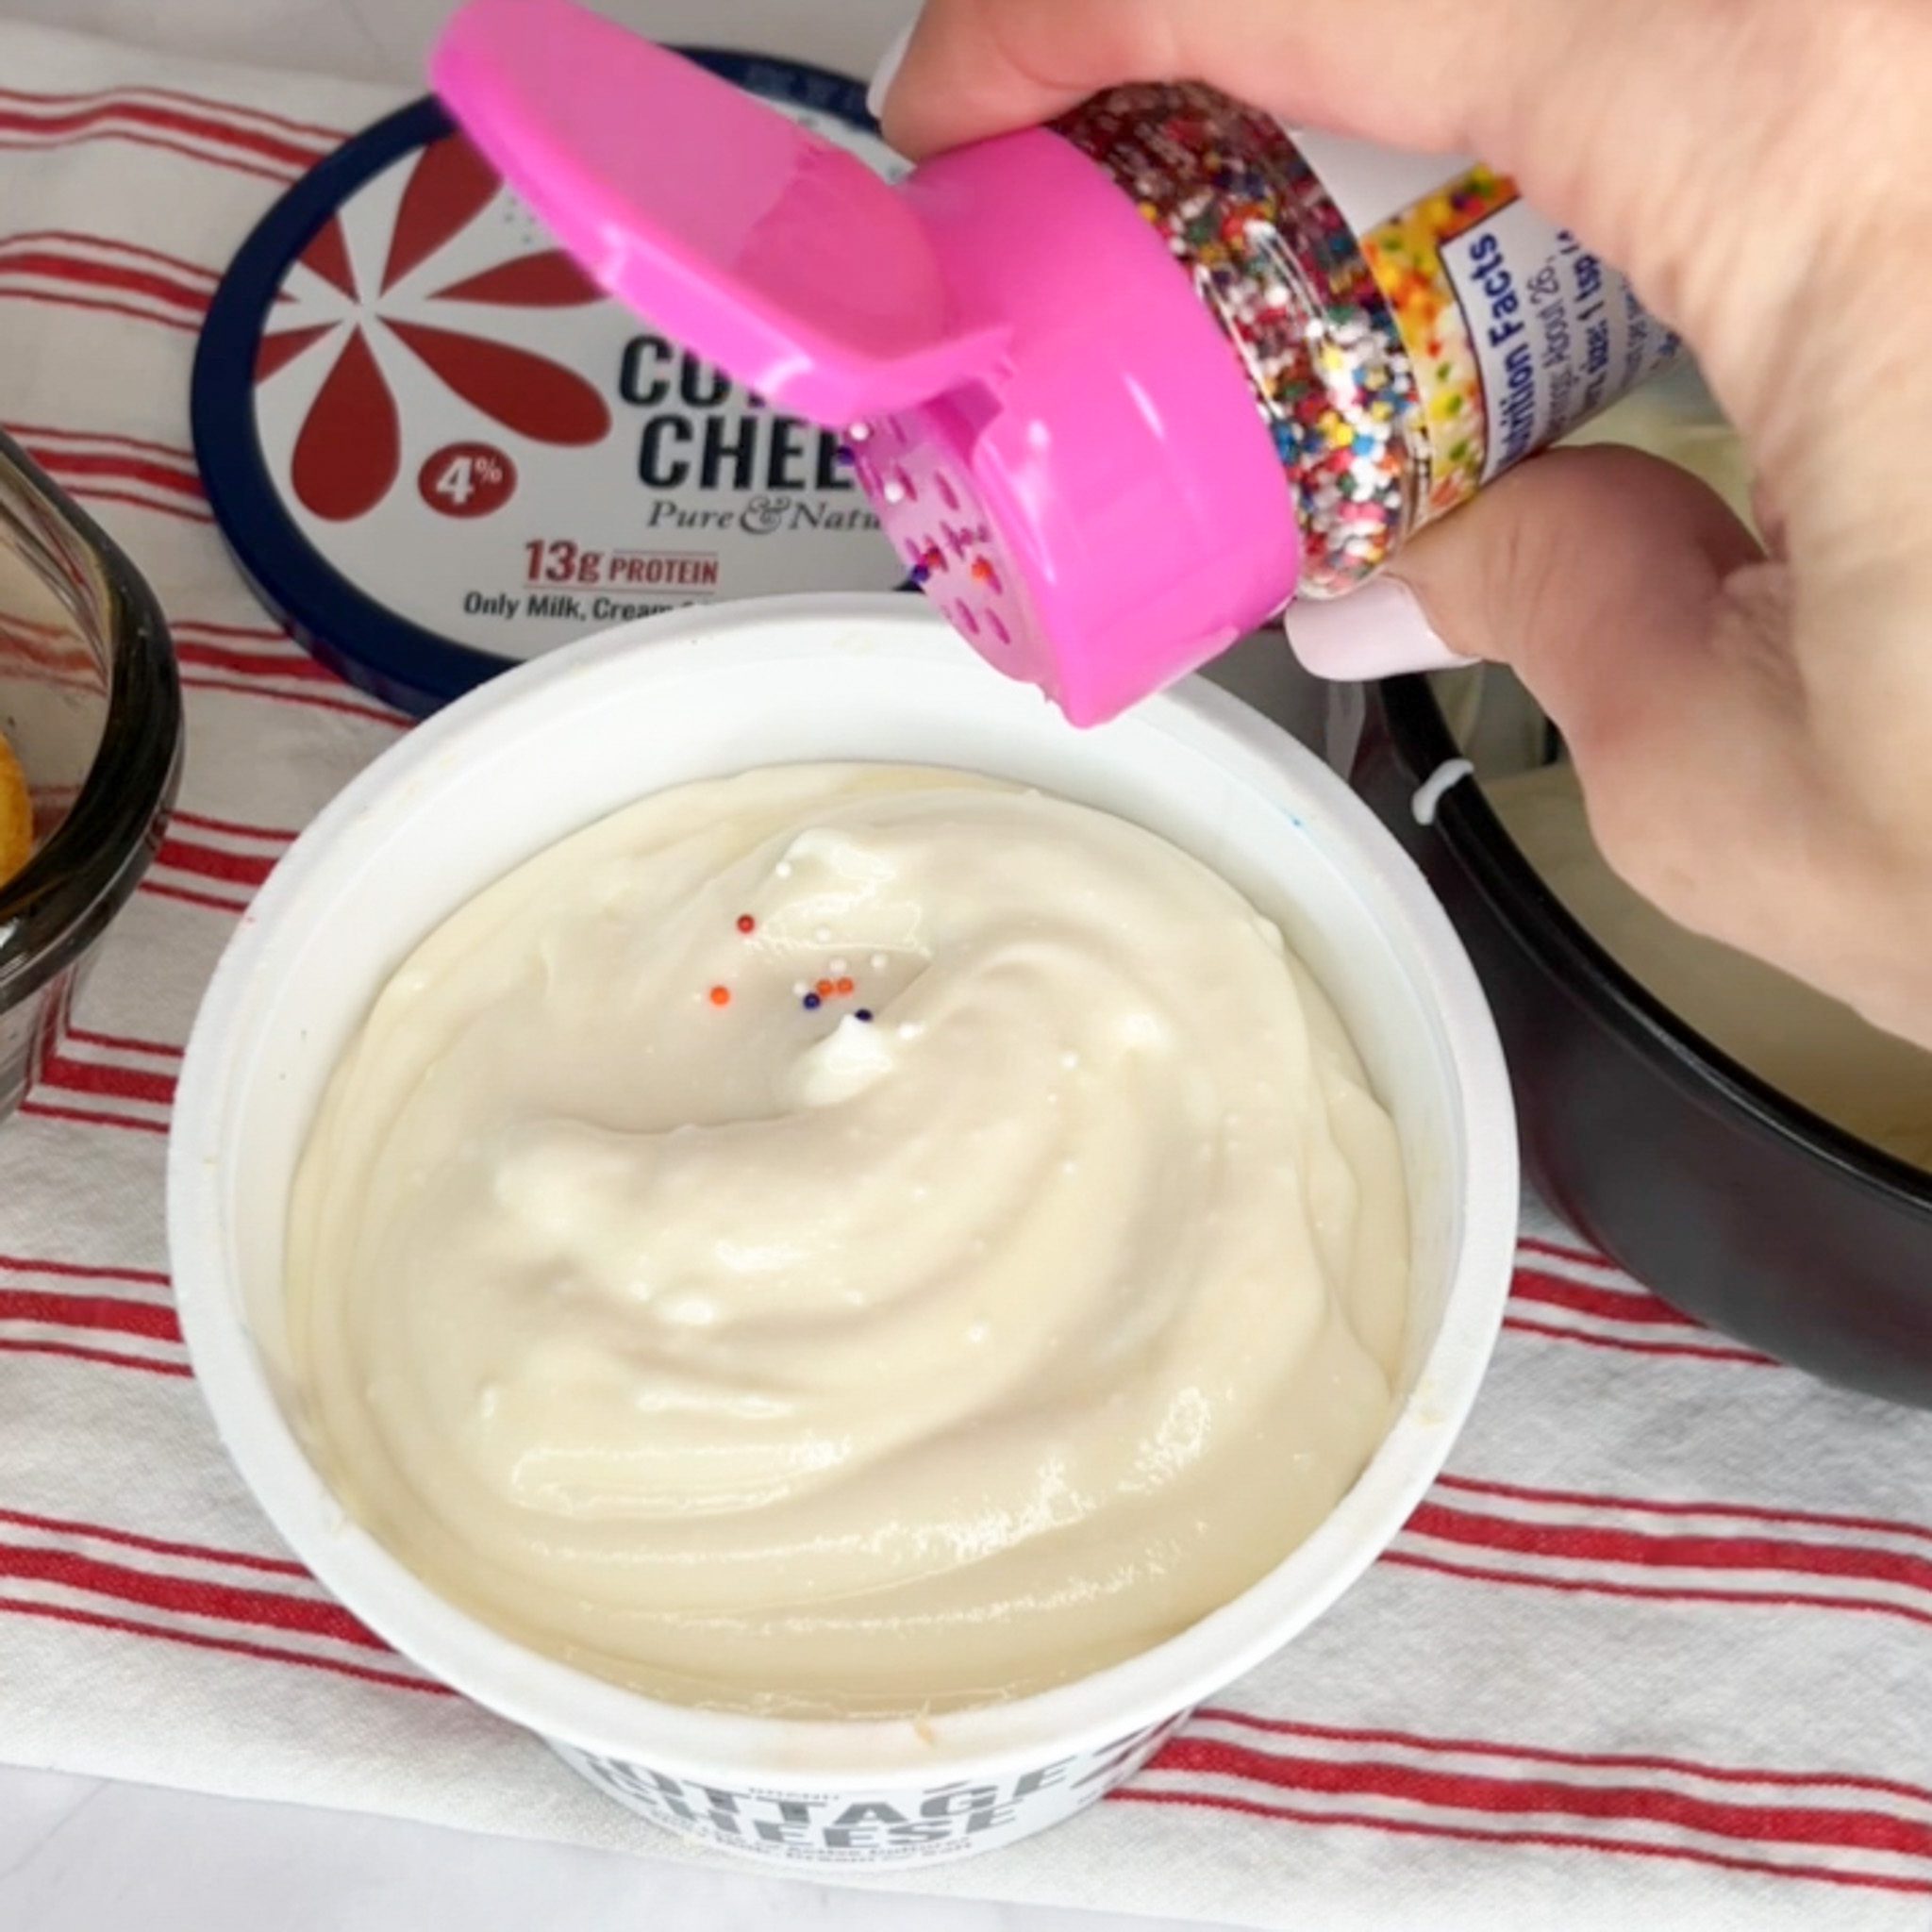
- Dot Sprinkles (about 2 tablespoons): The fun candy topping that gives the Dot Cake it’s signature look.

How to Make Dot Cakes
- Mix blended cottage cheese, white chocolate and vanilla.
- Spoon onto the top of the cake round.
- Top with dot sprinkles and enjoy.
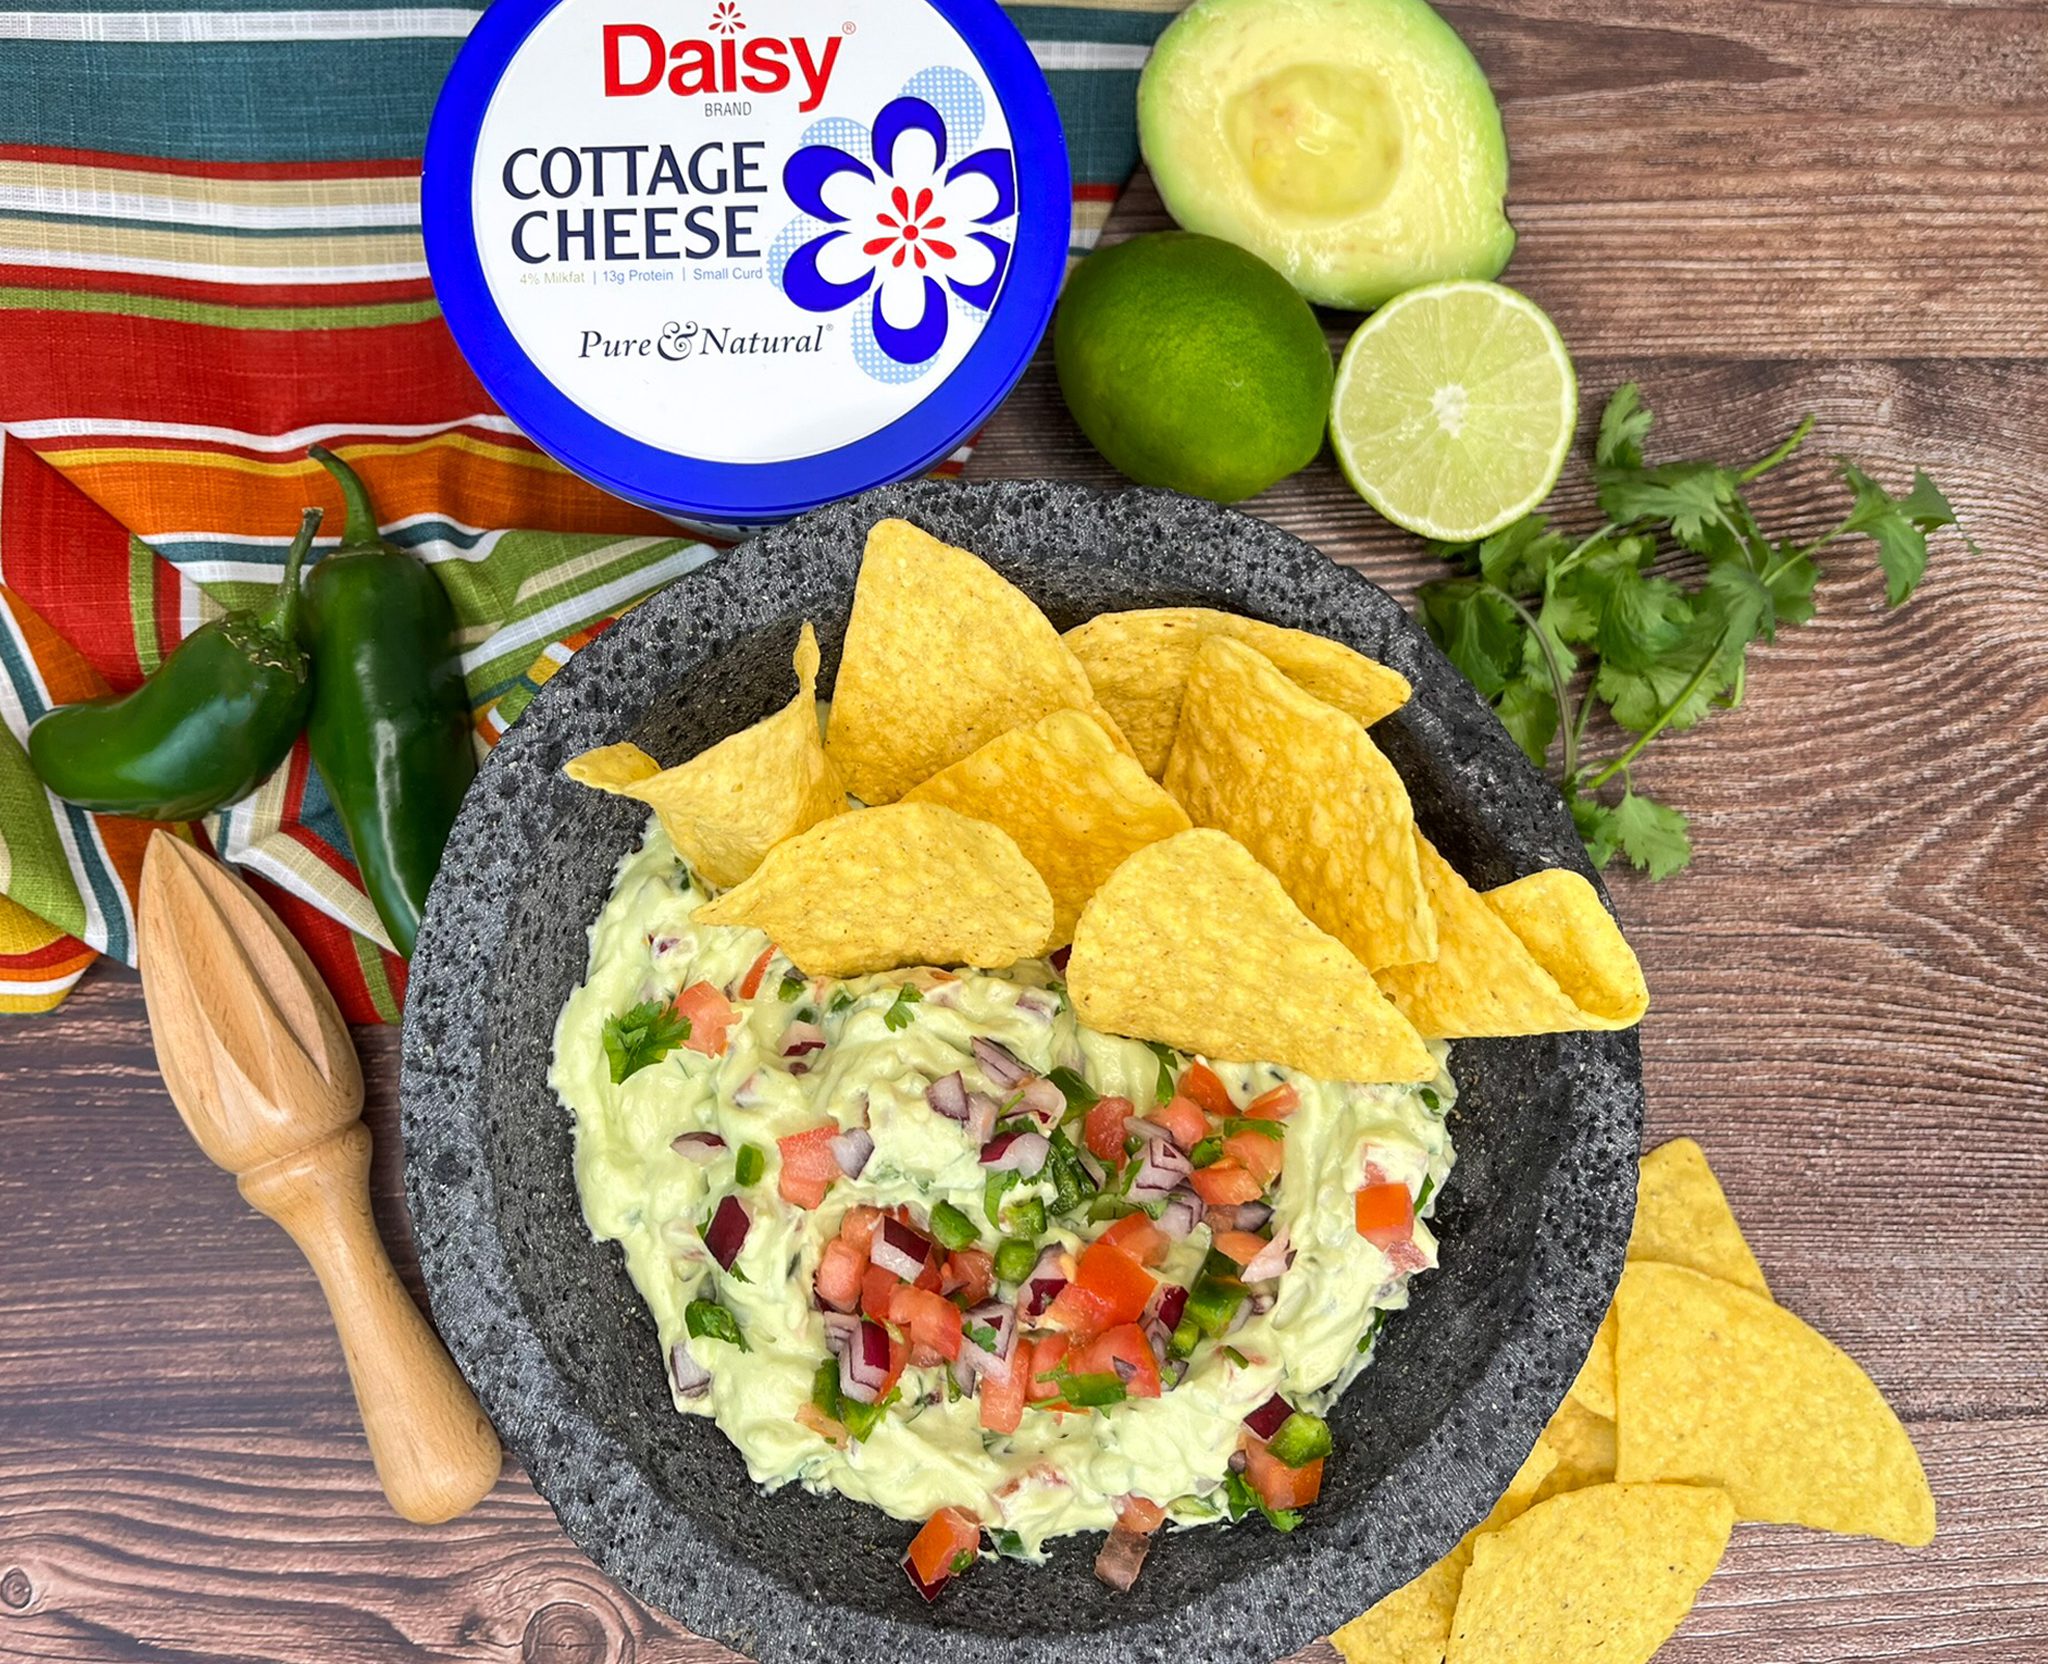
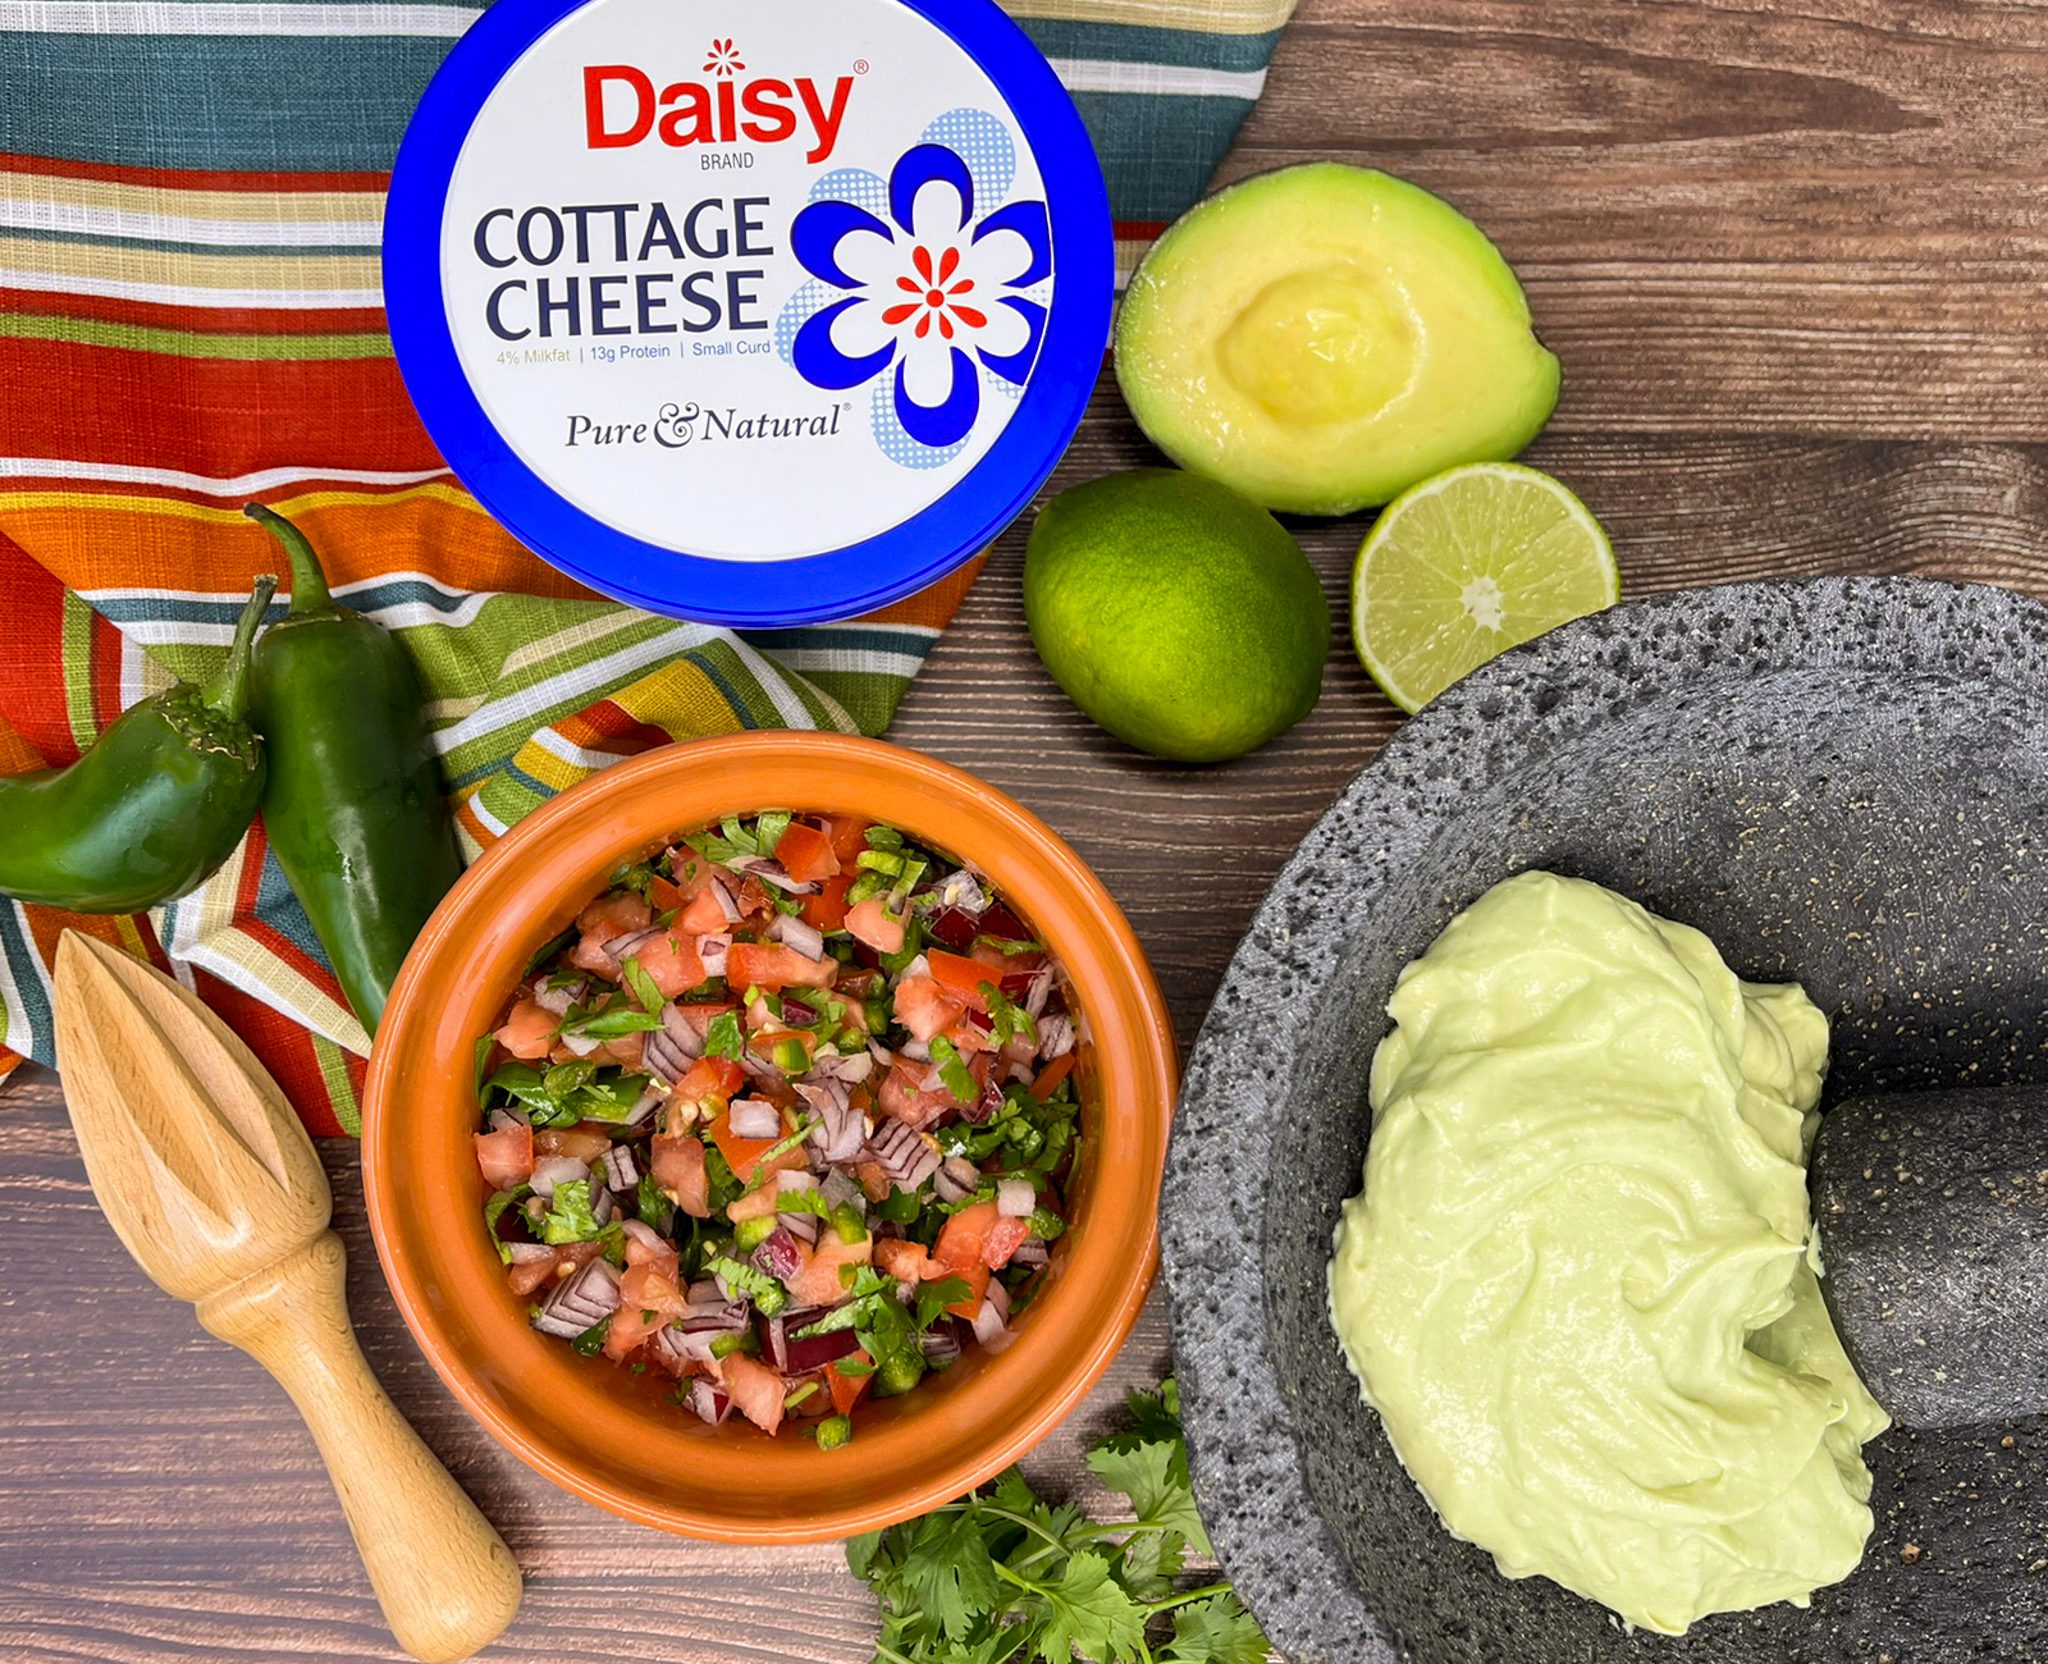
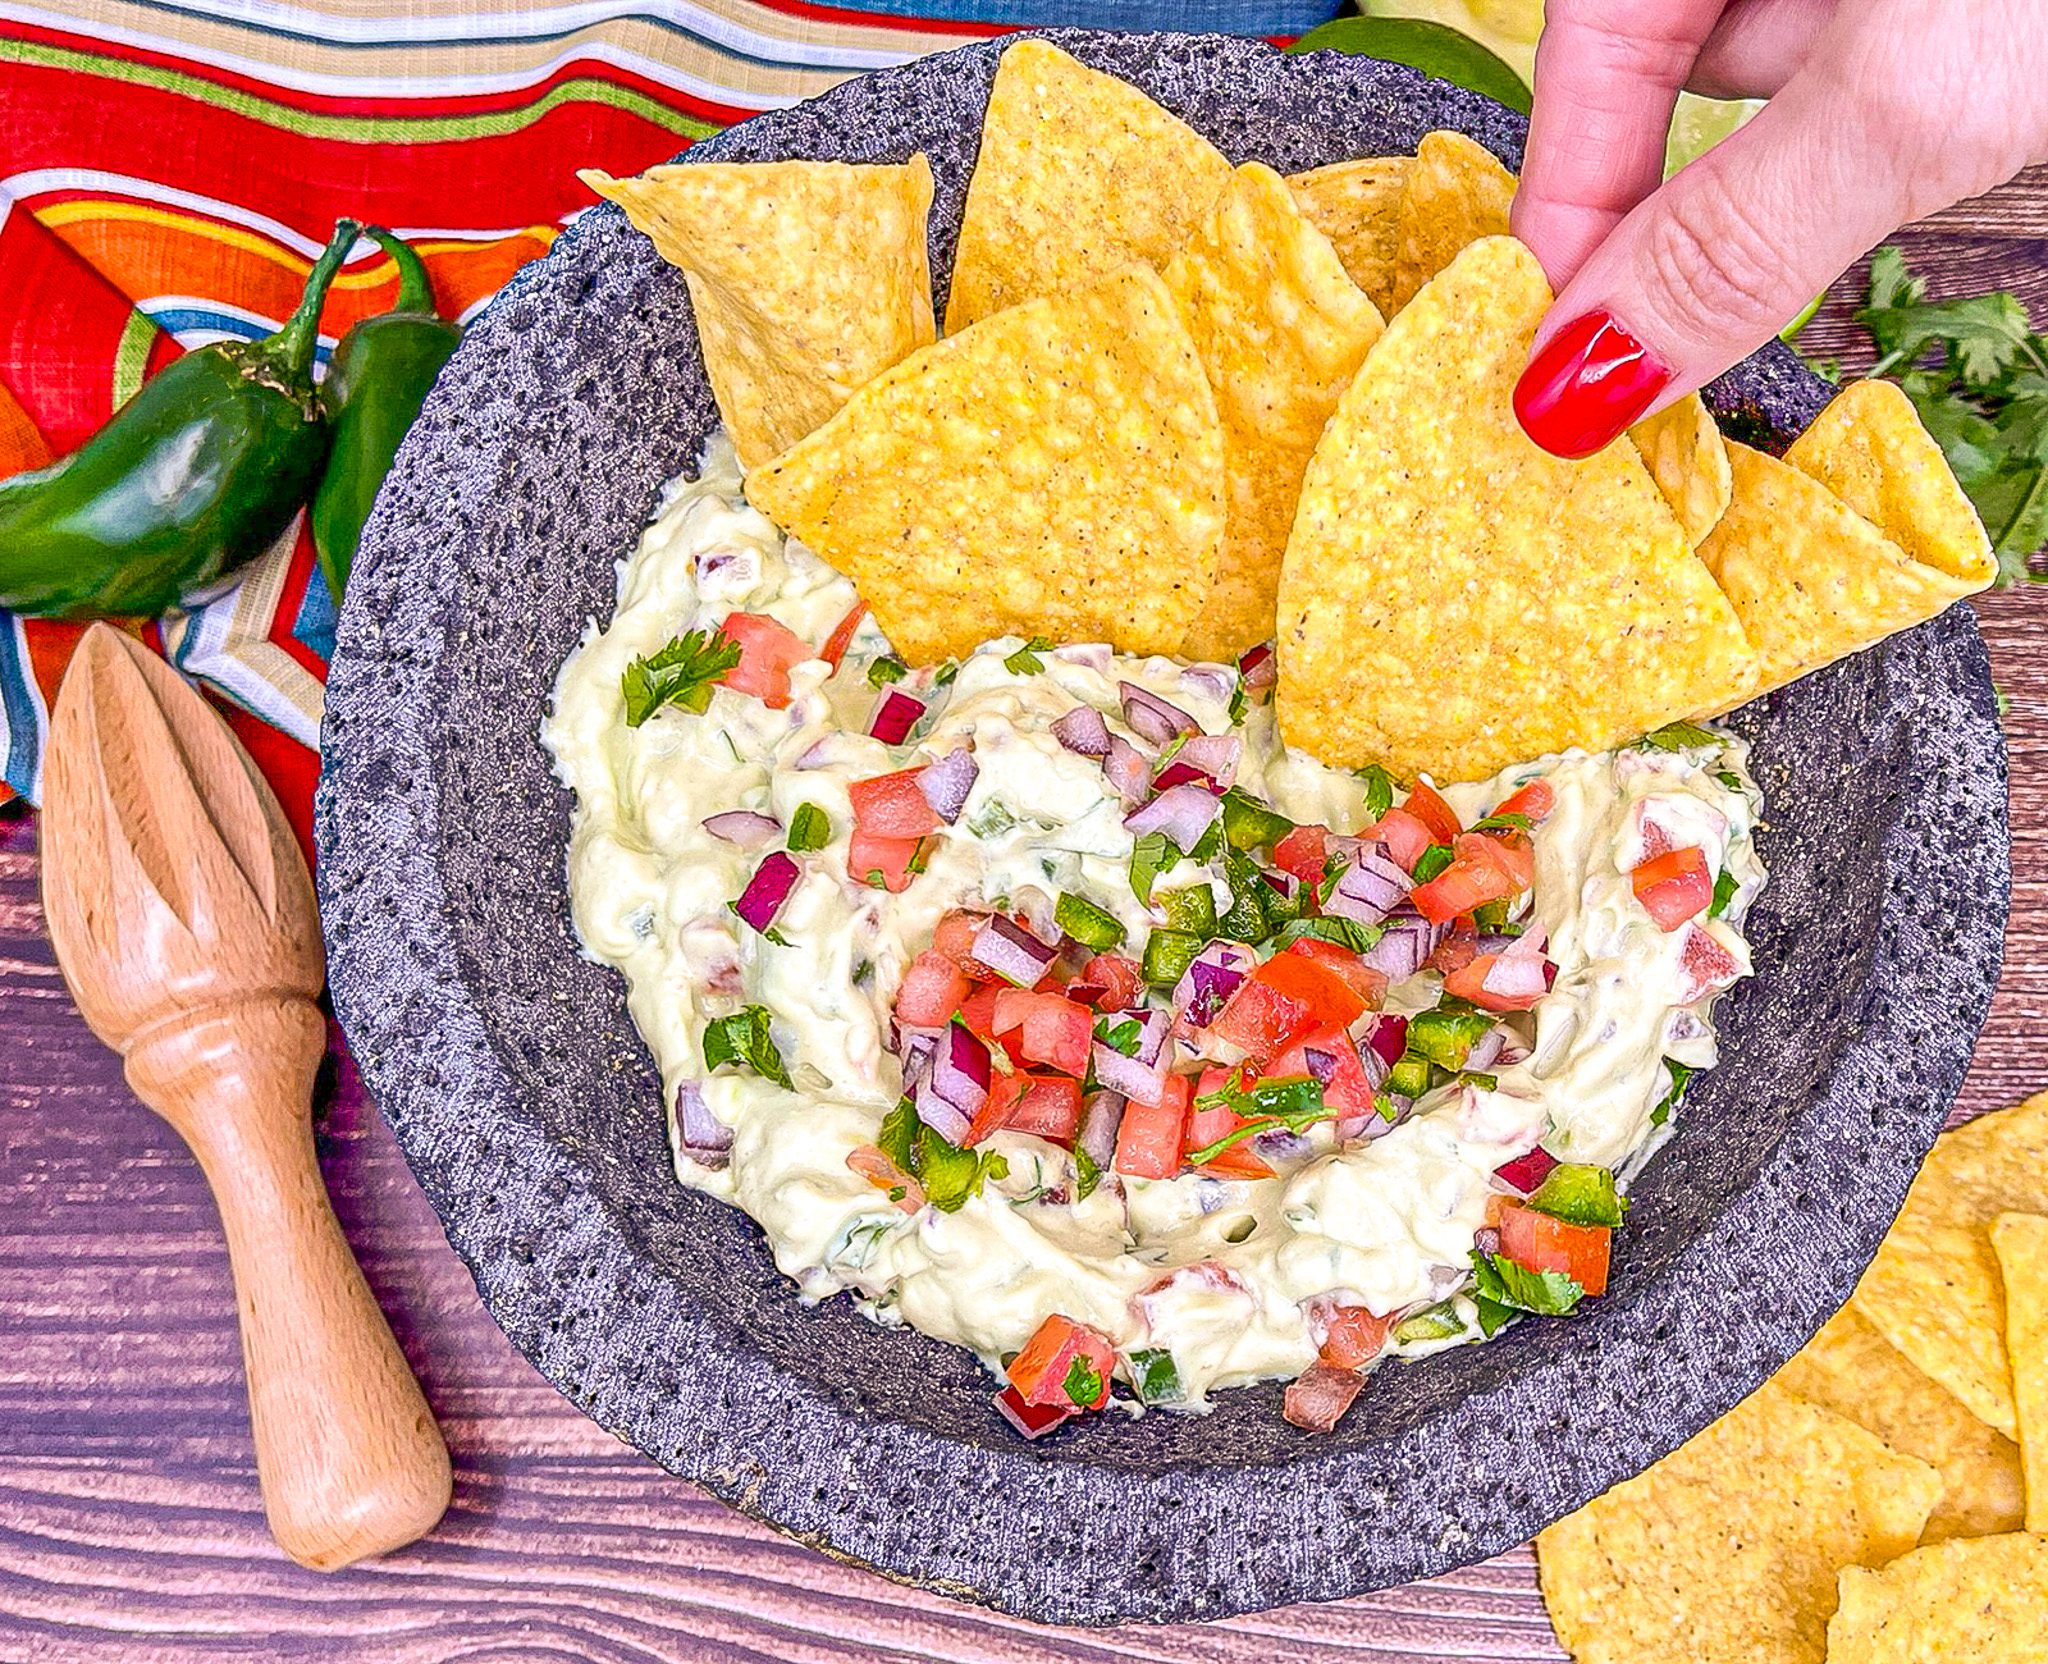
Creamy Guacamole with Cottage Cheese
Creamy Guacamole with Cottage Cheese
Great for game days, this creamy and delicious dip comes together in mere minutes and will be the hit of the party! It’s versatile, creamy, and a bit lighter than most party snacks, making it a must at your next get-together.
Guacamole is an awesome accompaniment to Mexican dishes and a must for Taco Tuesdays! It’s perfect with chips, tacos, nachos, burritos, fajitas, quesadillas, and enchiladas. It also works great as a spread — try it on a salad, with toast, or in a grain bowl.
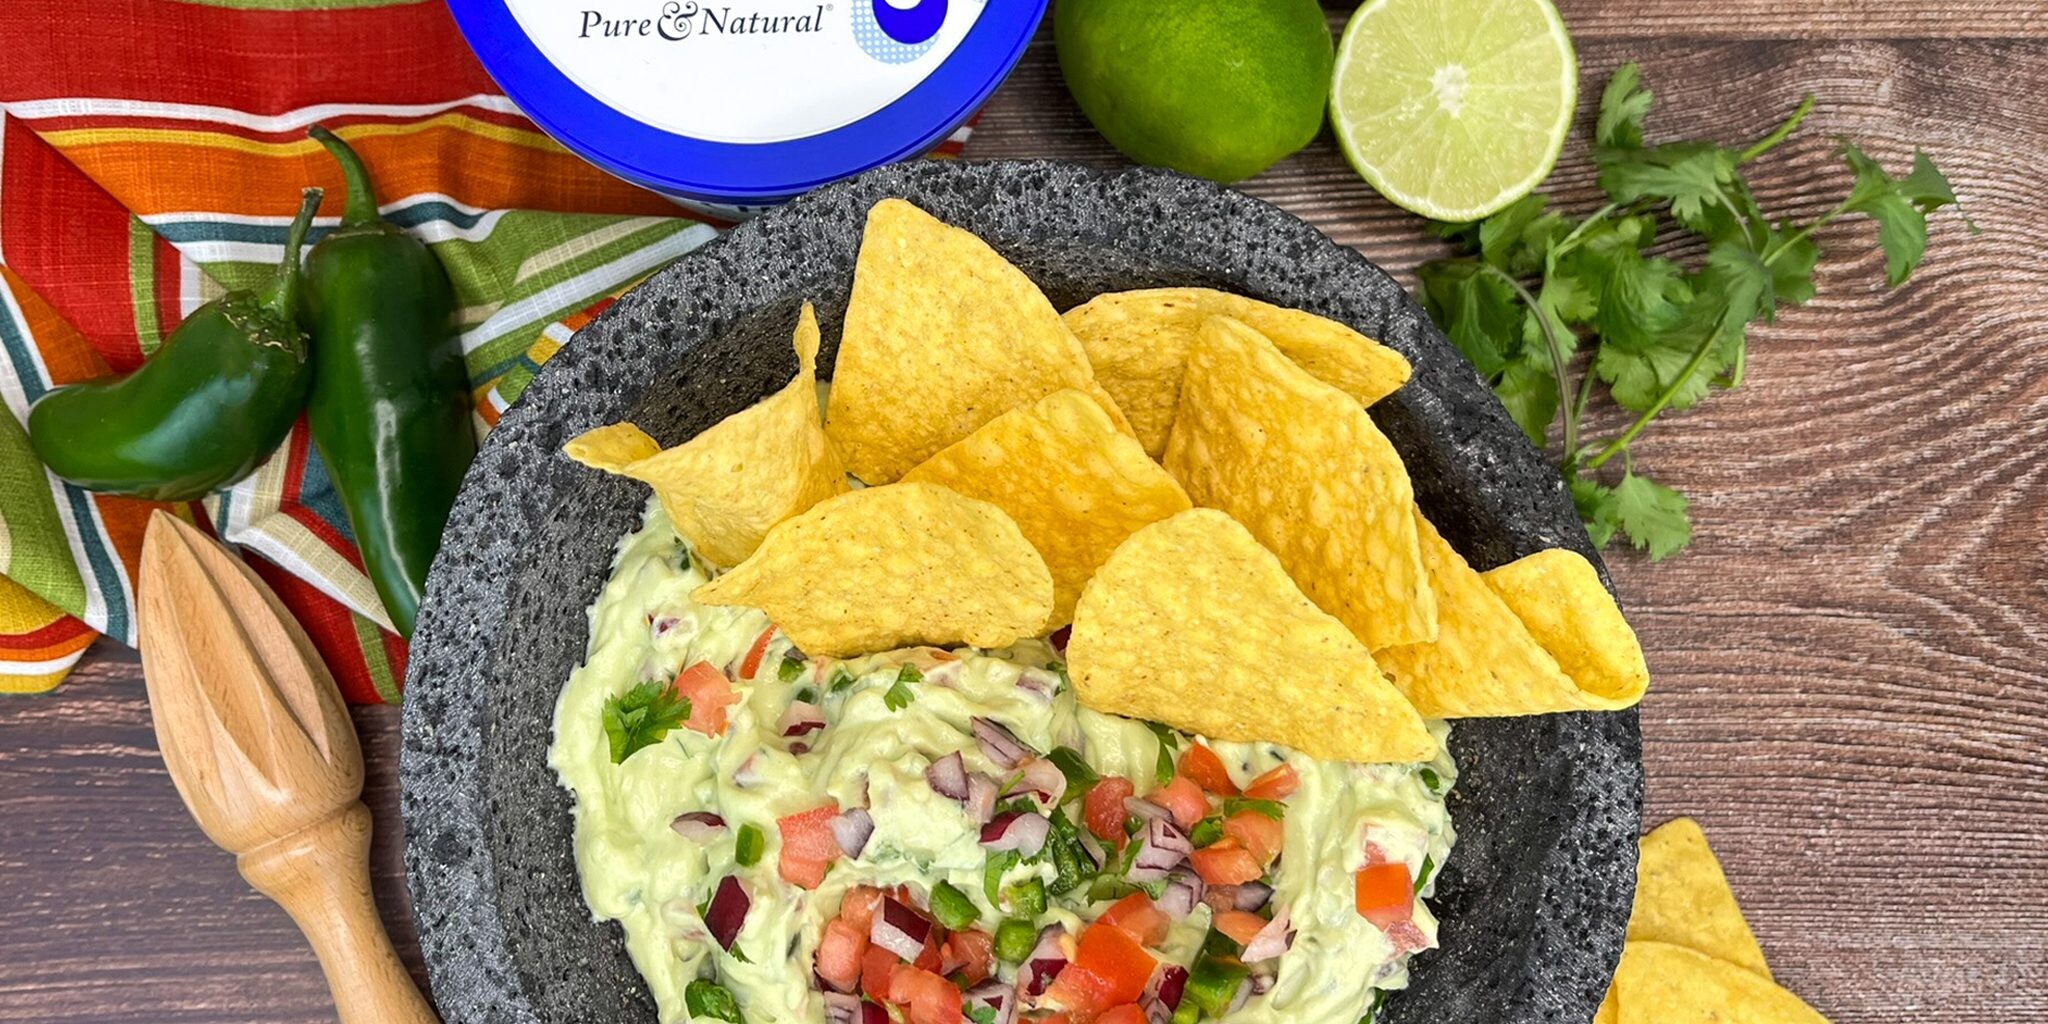
This creamy guacamole is packed with healthy fats and fiber from the avocado, and protein from the cottage cheese. It’s creamy, decadent, and big on flavor — without the empty calories.
Creamy Guacamole Ingredients
- Avocado (1 medium, ripe): Available year-round, avocados have a nutty flavor and buttery texture.
- Daisy Cottage Cheese (1/2 cup): Creamy and slightly salty, it adds cheesy goodness and a boost of protein to every scoop.
- Salt (1/2 teaspoon): Enhances the flavors in savory dishes.
- Lime Juice (1 teaspoon): Adds a touch of acidity to cut the richness of the guacamole.
- Pico de Gallo (1/2 cup): A classic Southwest mix of tomatoes, onions, jalapeño, lime juice, cilantro, and a touch of salt. It adds freshness and acidity. You can find fresh pico de gallo in the produce section of most grocery stores or make your own.

Substitutions, Variations, and Tips
- How to pick ripe avocados: Look for ones that feel slightly firm when gently pressed — not hard, but not mushy. The skin should darken slightly as the fruit ripens.
- How to halve an avocado: Run a knife around the perimeter of the avocado, cutting until you hit the pit. Twist the two halves apart. To remove the pit, carefully press your knife into it, give a slight twist, and lift it out.
- Use fresh lime juice: Bottled lime juice often contains preservatives that can affect the flavor.
- Lemon juice alternative: You can substitute fresh lemon juice if lime isn’t available.
- Make your own pico de gallo: Mix 4 diced Roma tomatoes, ½ cup diced onion, ½ cup chopped cilantro, ½ to 1 finely diced jalapeño, 2 tablespoons fresh lime (or lemon) juice, and a pinch of salt. Make ahead of time to allow flavors to develop. Store tightly sealed in the fridge.
- Swap in salsa: Strained salsa or picante sauce can be used instead of pico de gallo.
- Like it spicy? Add a dash of hot sauce or some finely chopped jalapeños or serrano peppers to turn up the heat.
How to Make Creamy Guacamole
- Slice the avocado in half and remove the pit. Scoop the flesh into a blender or food processor.
- Add cottage cheese, salt, and lime juice. Process until completely smooth.
- Transfer to a serving bowl. Fold in the pico de gallo. Adjust seasoning to taste and serve with your favorite dippers.
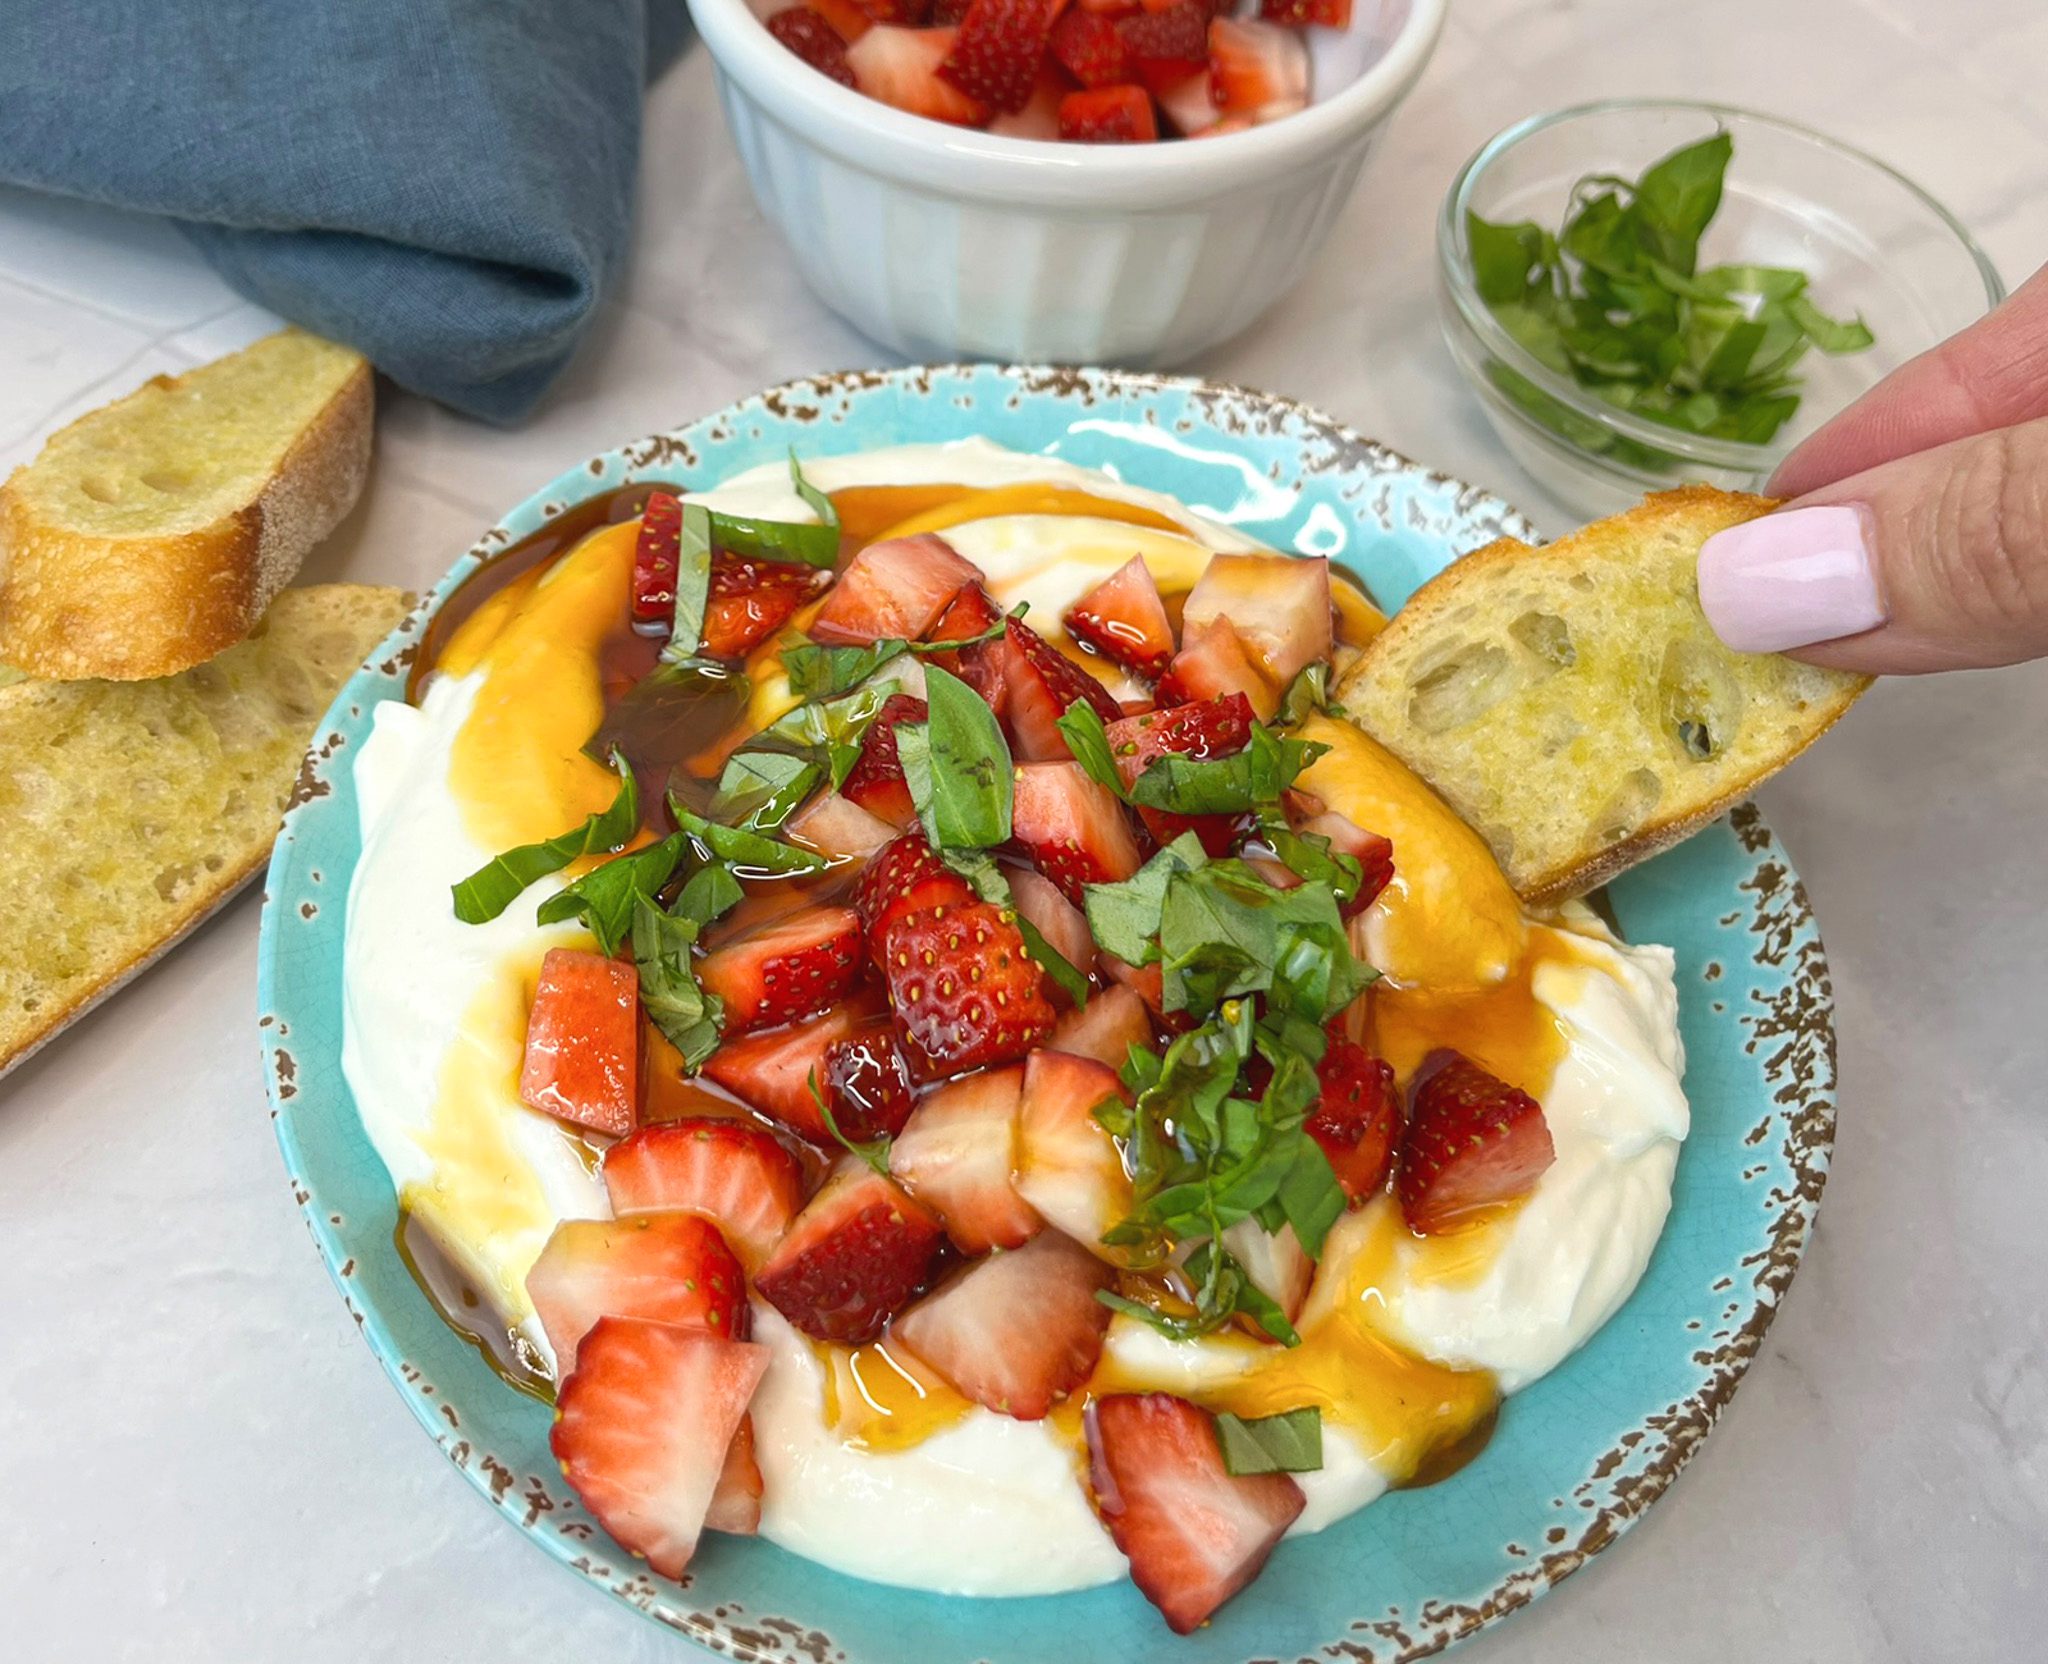
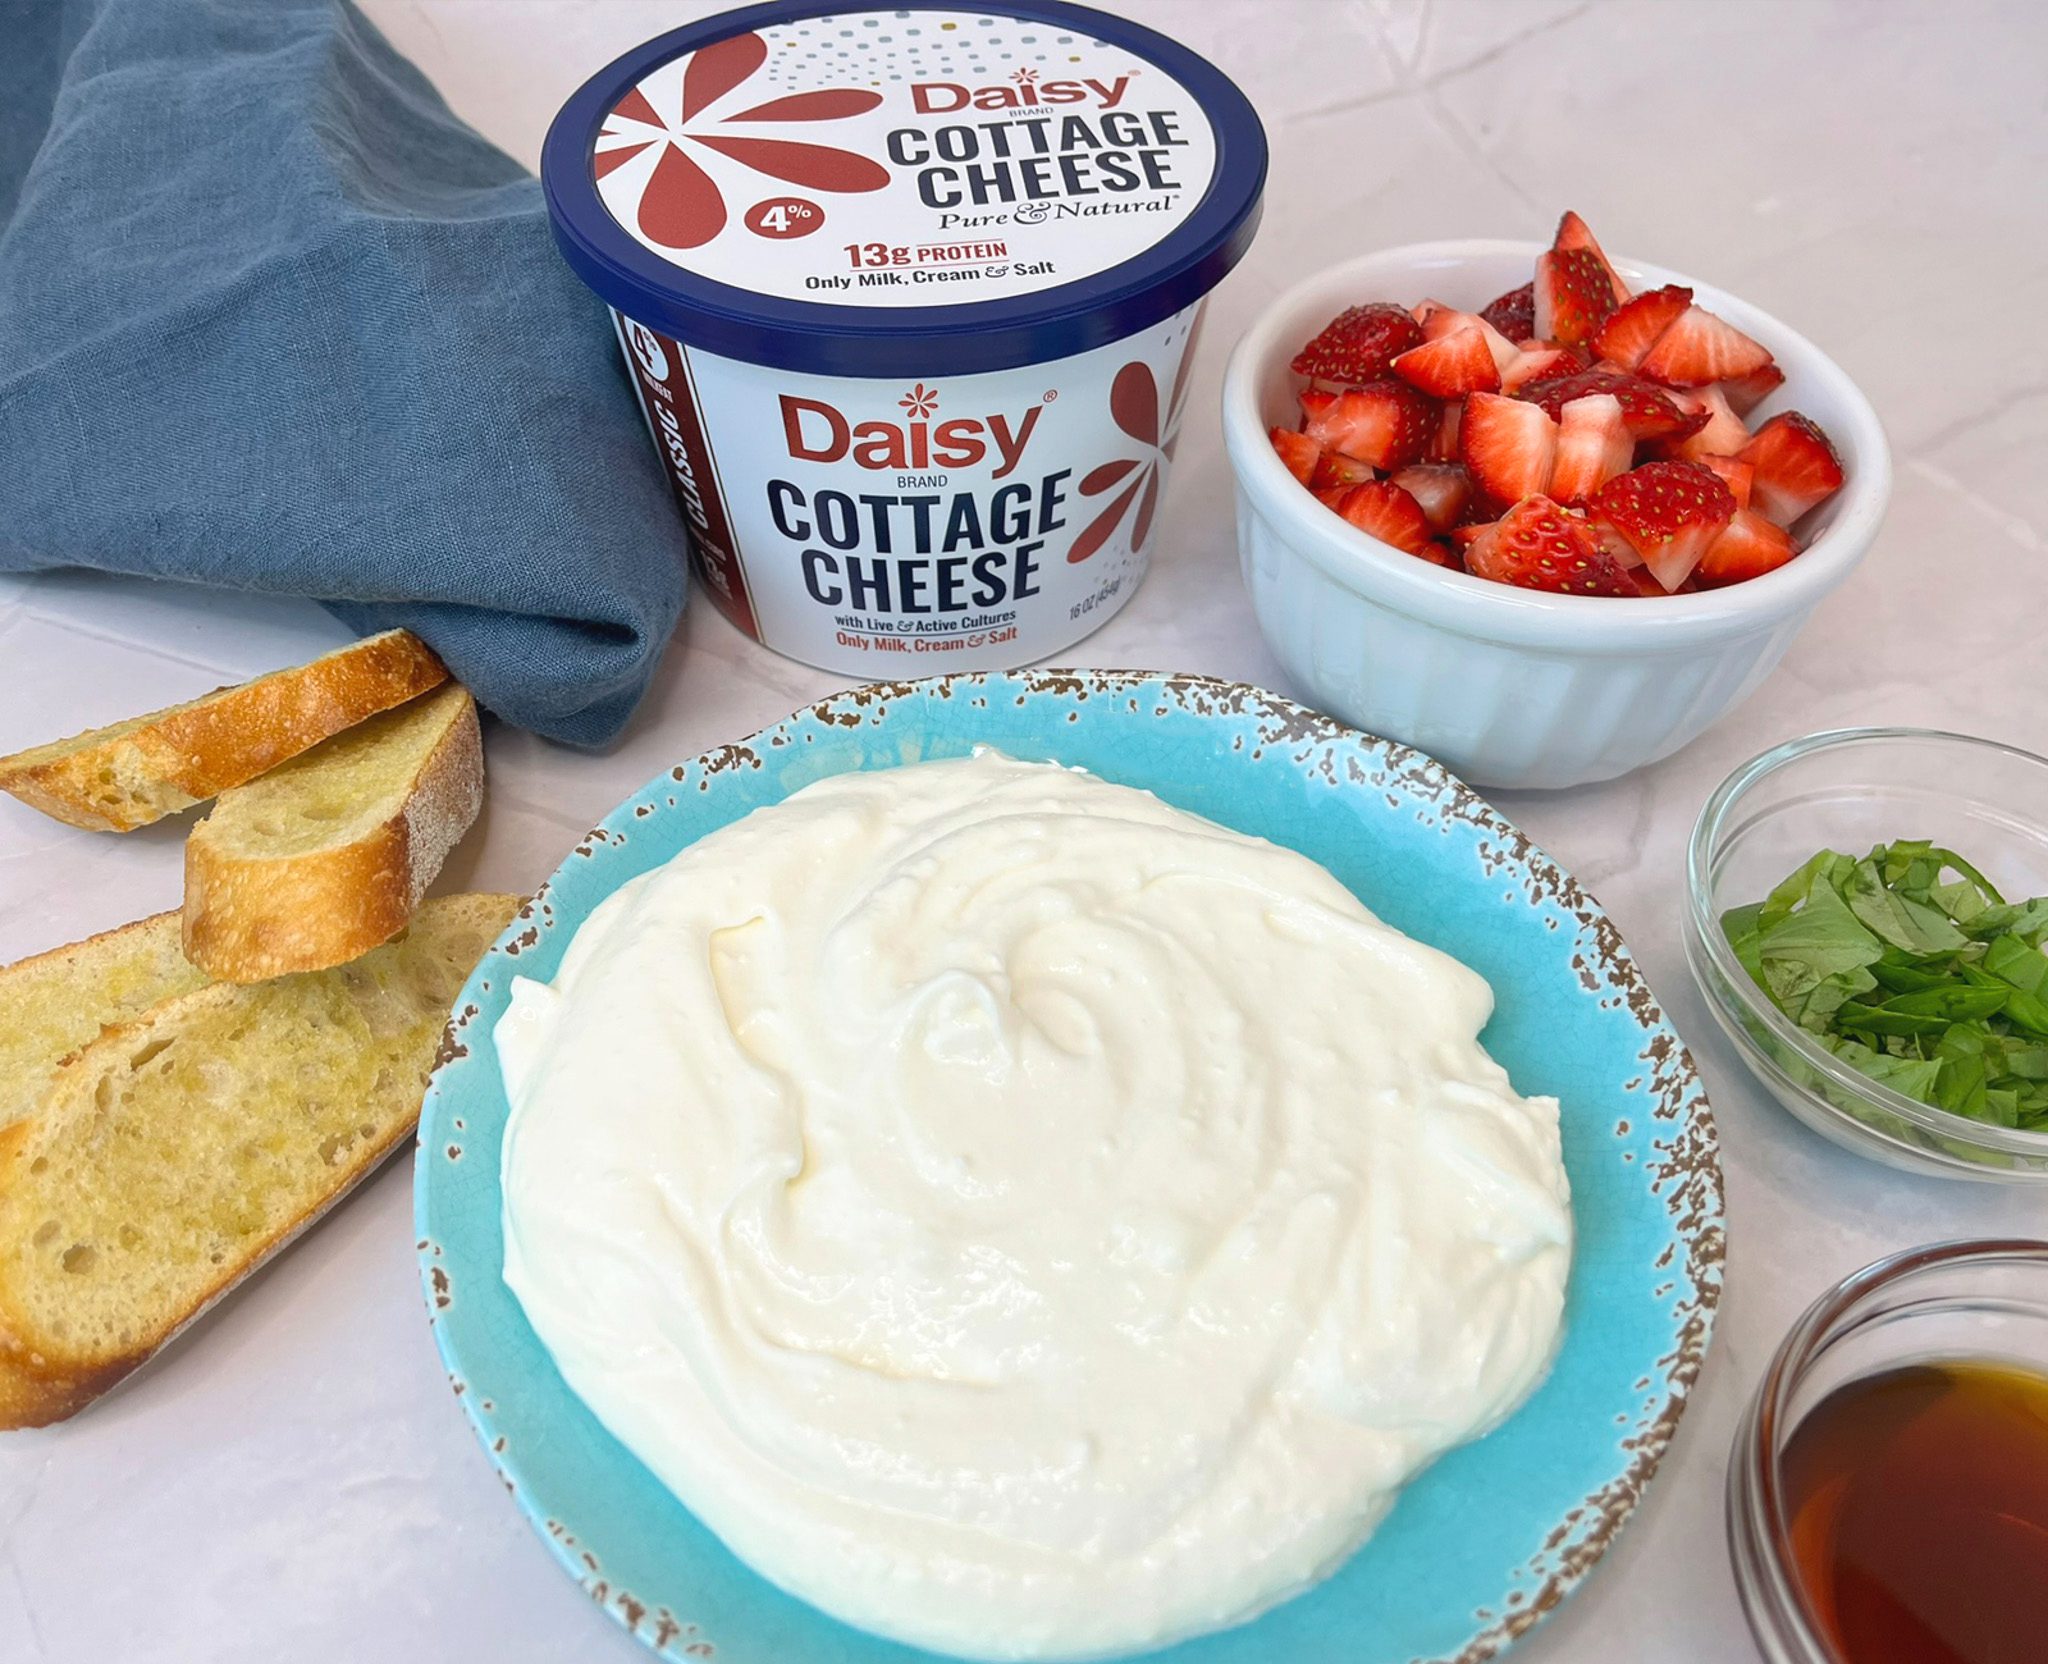
Whipped Cottage Cheese with Strawberry Bruschetta
Whipped Cottage Cheese with Strawberry Bruschetta
Looking for a fresh, feel-good appetizer that’s as beautiful as it is delicious? This Whipped Daisy Cottage Cheese with Fresh Strawberry Bruschetta is the perfect balance of creamy and bright. Smooth, velvety whipped cottage cheese creates a rich, high-protein base, while juicy strawberries, fresh basil, and a hint of sweetness bring a vibrant, summery twist.
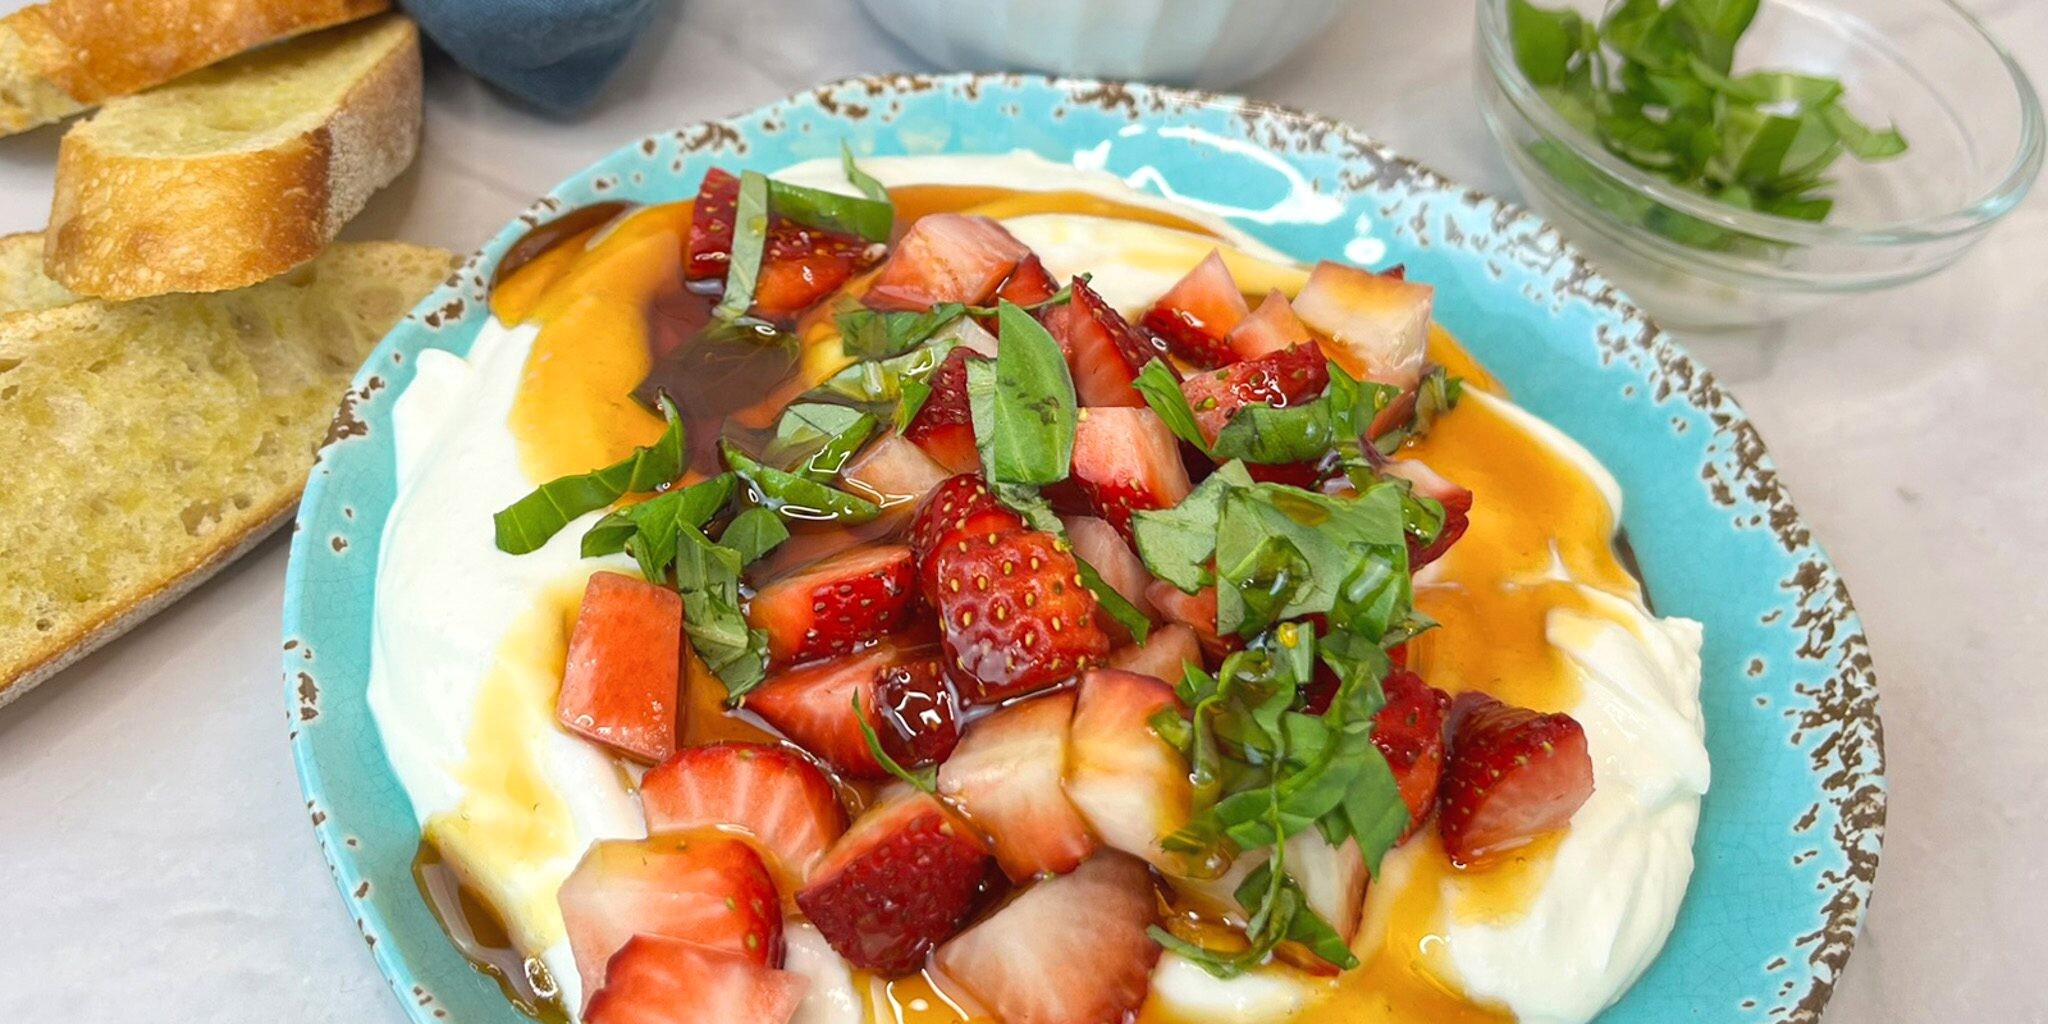
Each bite delivers a contrast of textures and flavors—light and airy, sweet and slightly tangy, with a refreshing finish that keeps you coming back for more. Serve it over toasted baguette slices for an easy bruschetta-style appetizer, or enjoy it as a dip with your favorite crackers.
Whether you’re entertaining guests or treating yourself to something special, this simple yet elevated dish comes together quickly and makes a lasting impression.
Whipped Cottage Cheese with Strawberry Bruschetta Ingredients
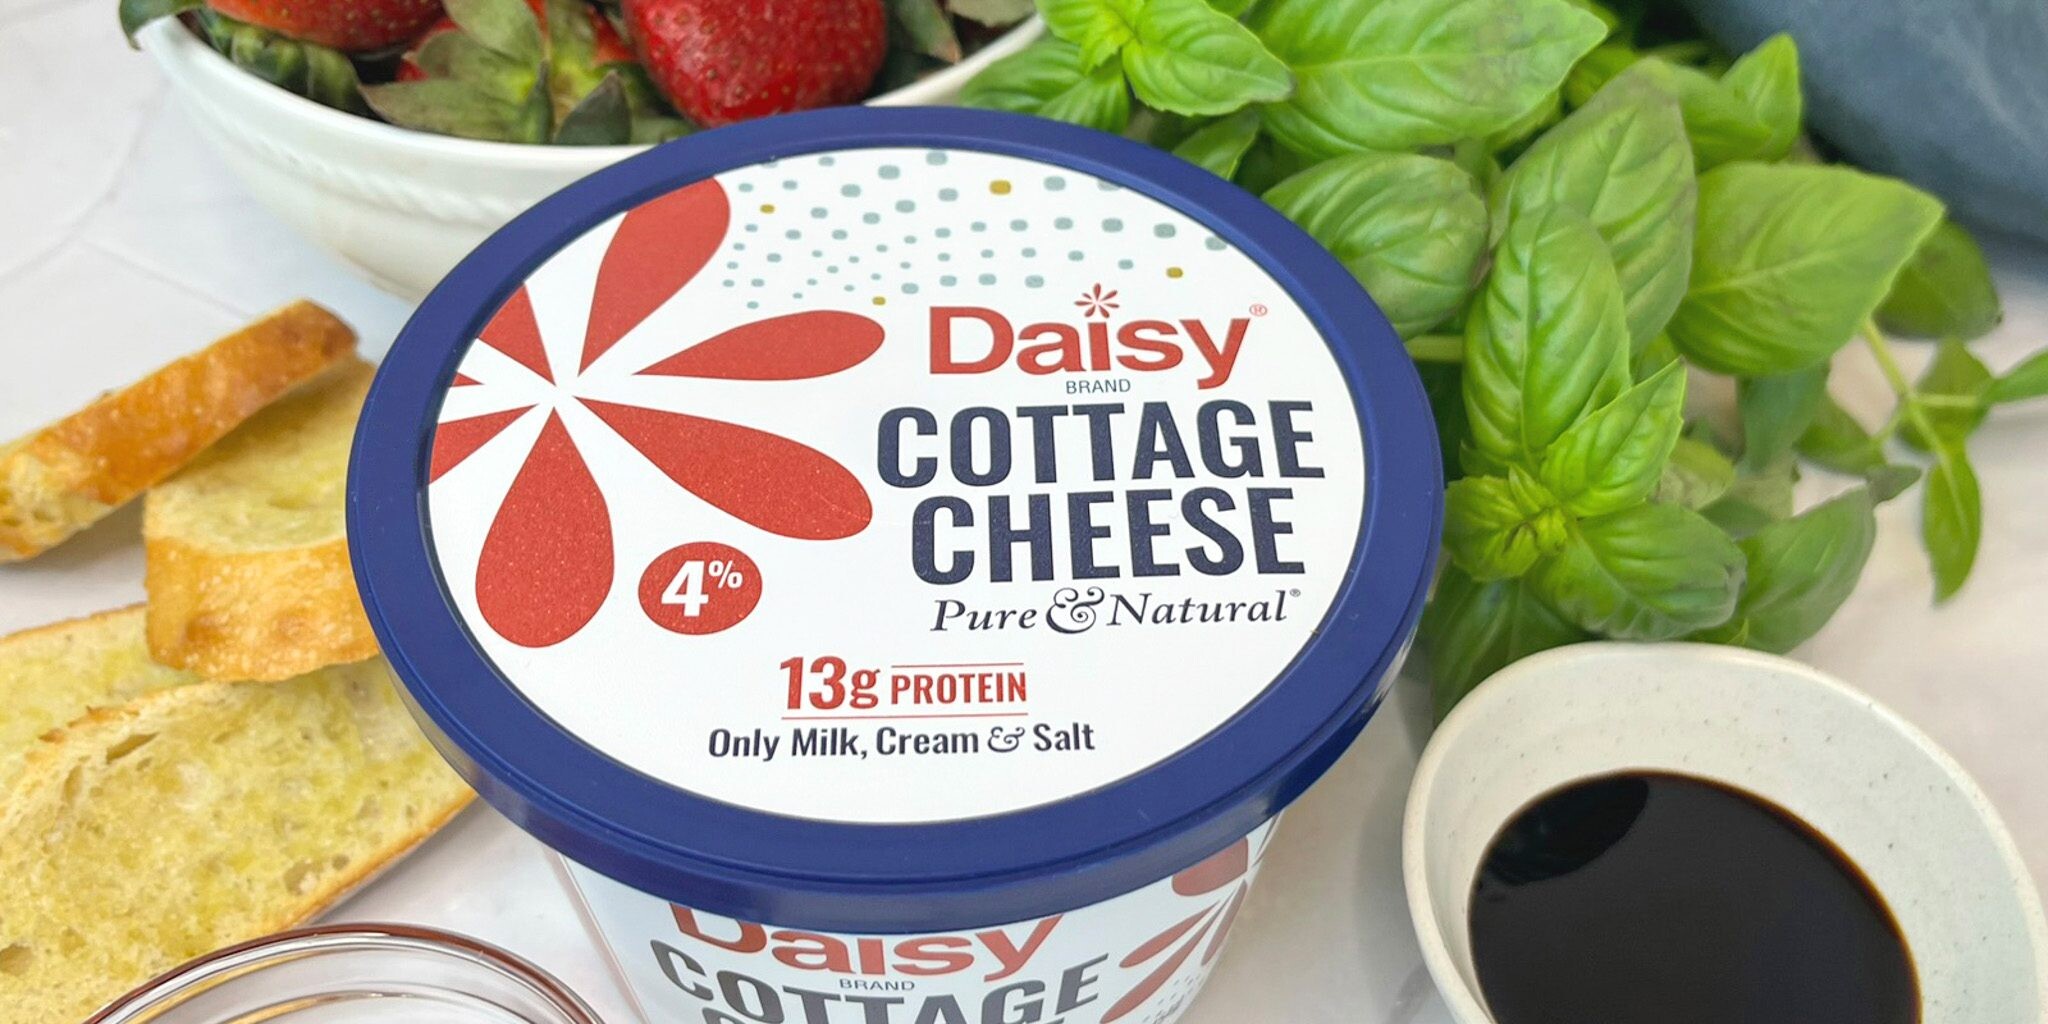
- Daisy Cottage Cheese (1 cup, whipped): The protein-packed base, whipped to silky, creamy, slightly salty perfection.
- Diced Strawberries (1/2 cup): Perfectly balancing sweet and tart, strawberries are irresistibly juicy, packed with antioxidants, low in calories, and high in Vitamin C.
- Fresh Basil (1 tablespoon, sliced into thin ribbons): Provides a fresh, herby, aromatic, and slightly sweet flavor that complements the strawberries.
- Honey (1 tablespoon): Adds the perfect touch of natural sweetness.

Substitutions, Variations, and Tips
- The easiest way to whip cottage cheese is with an emersion blender or food processor. A high-powered blender may also be used. Store any additional whipped cottage cheese in a tightly sealed container in the refrigerator for later use (use within a week once whipped).
- Picking the perfect strawberries: look for firm, plump, and bright red berries with fresh, green stems attached. Avoid berries with green or white spots.
- Any type of fresh fruit or frozen fruit may be used in place of strawberries. Blueberries, blackberries, raspberries, cherries, peaches, or melons make great choices.
- Balsamic Glaze may be used in place of honey. The balsamic would add a tangy, sweet, and acidic contrast that balances the strawberries.
- The best way to chiffonade (thinly slice) basil is to stack washed, dry leaves (largest to smallest), roll them tightly into a cigar shape, and slice crosswise into thin ribbons with a sharp knife to avoid bruising.
- Serve with crusty, toasted, rustic bread, crackers, or shortbread cookies.
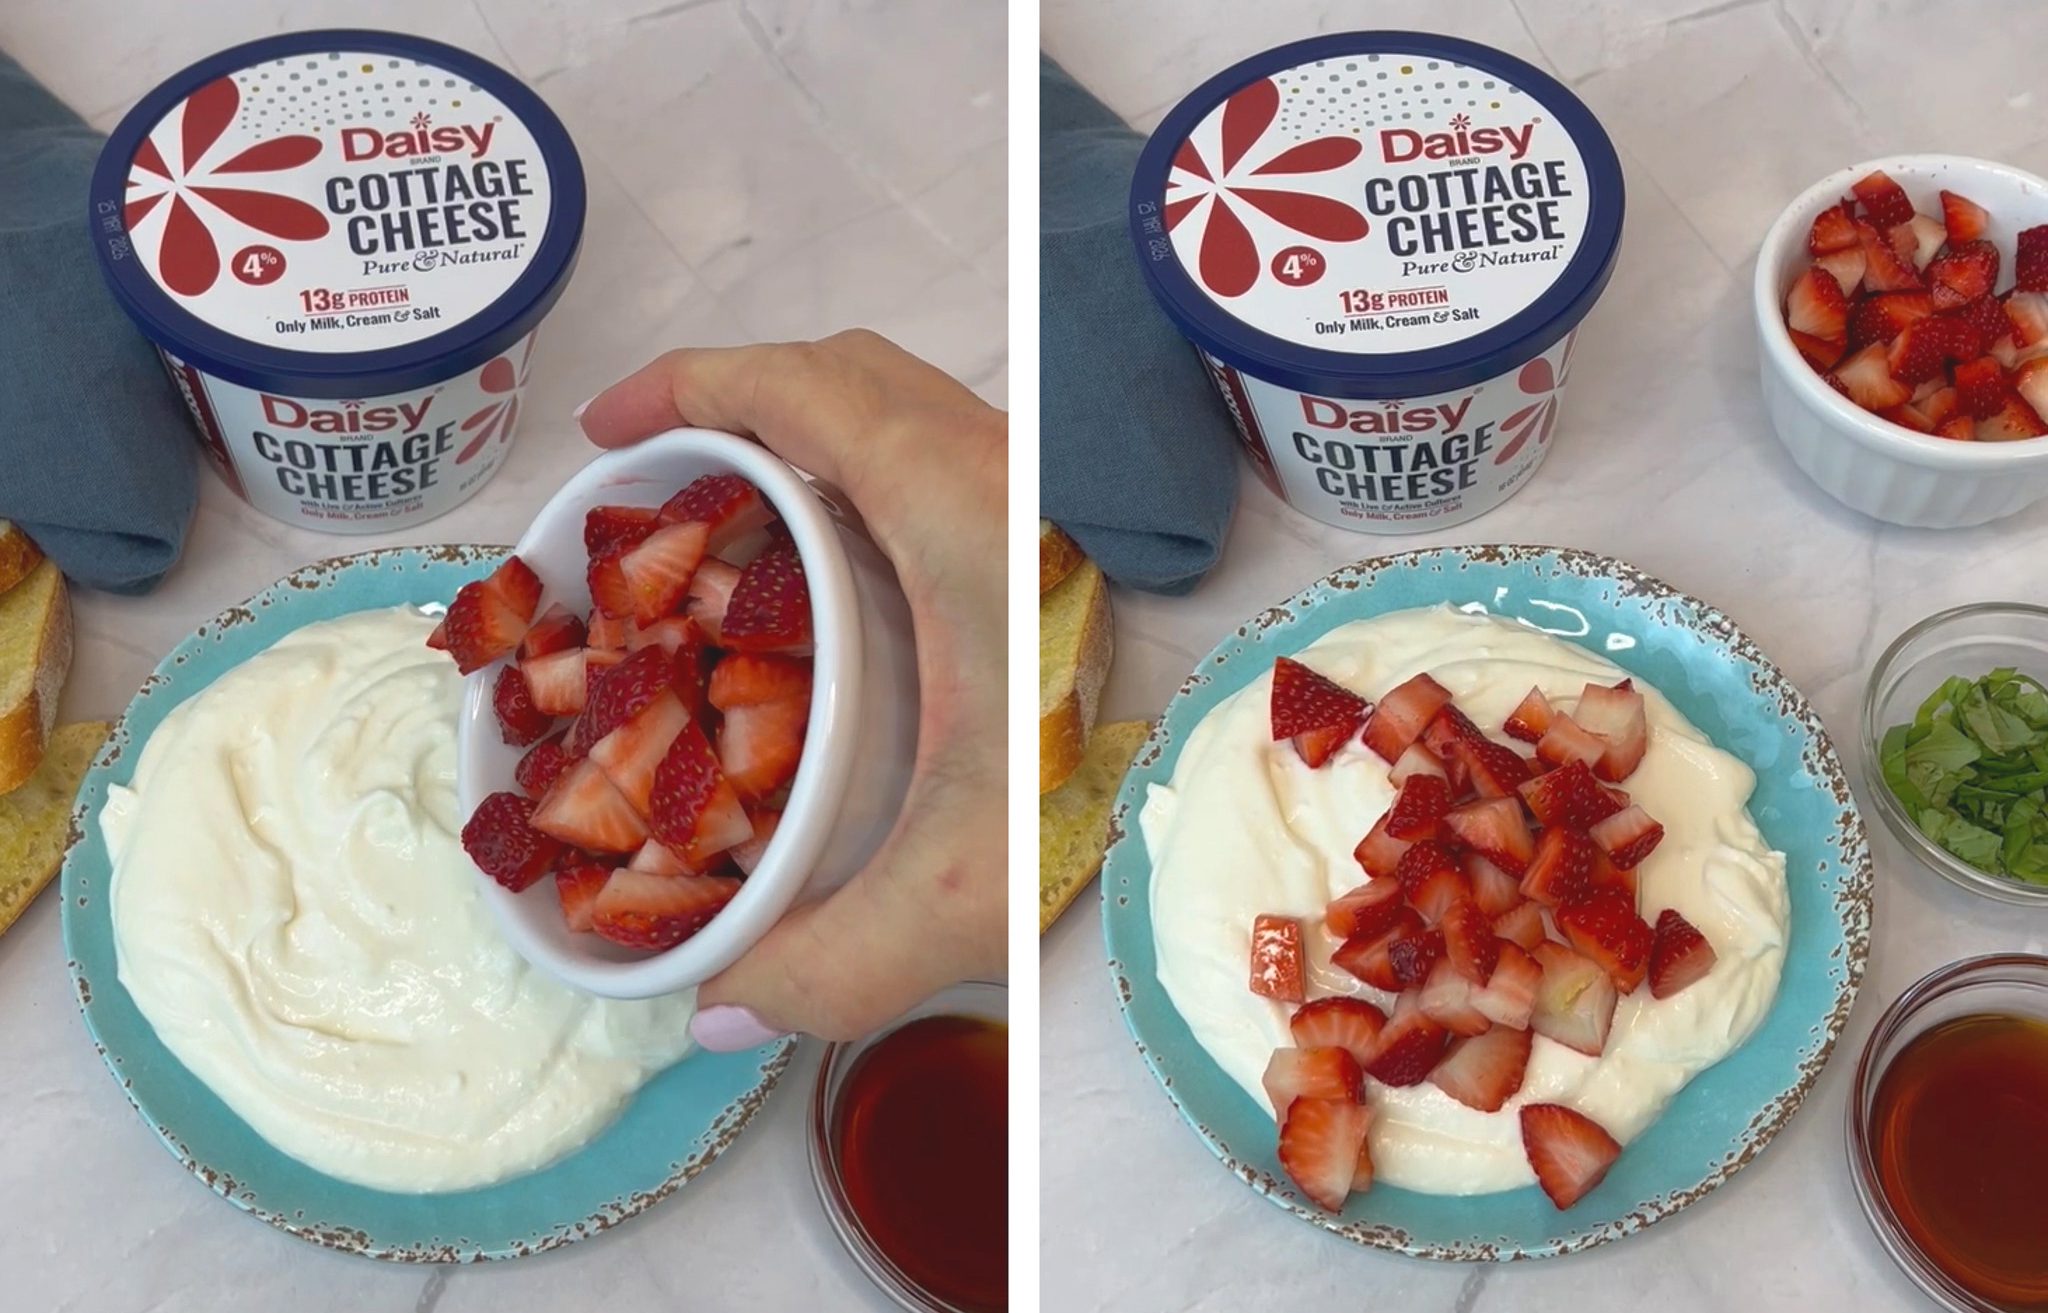
How to make Whipped Cottage Cheese with Strawberry Bruschetta
- Spread whipped cottage cheese onto small plate.
- Top with strawberries, basil and a drizzle of honey or balsamic glaze.
- Serve with your favorite dippers.
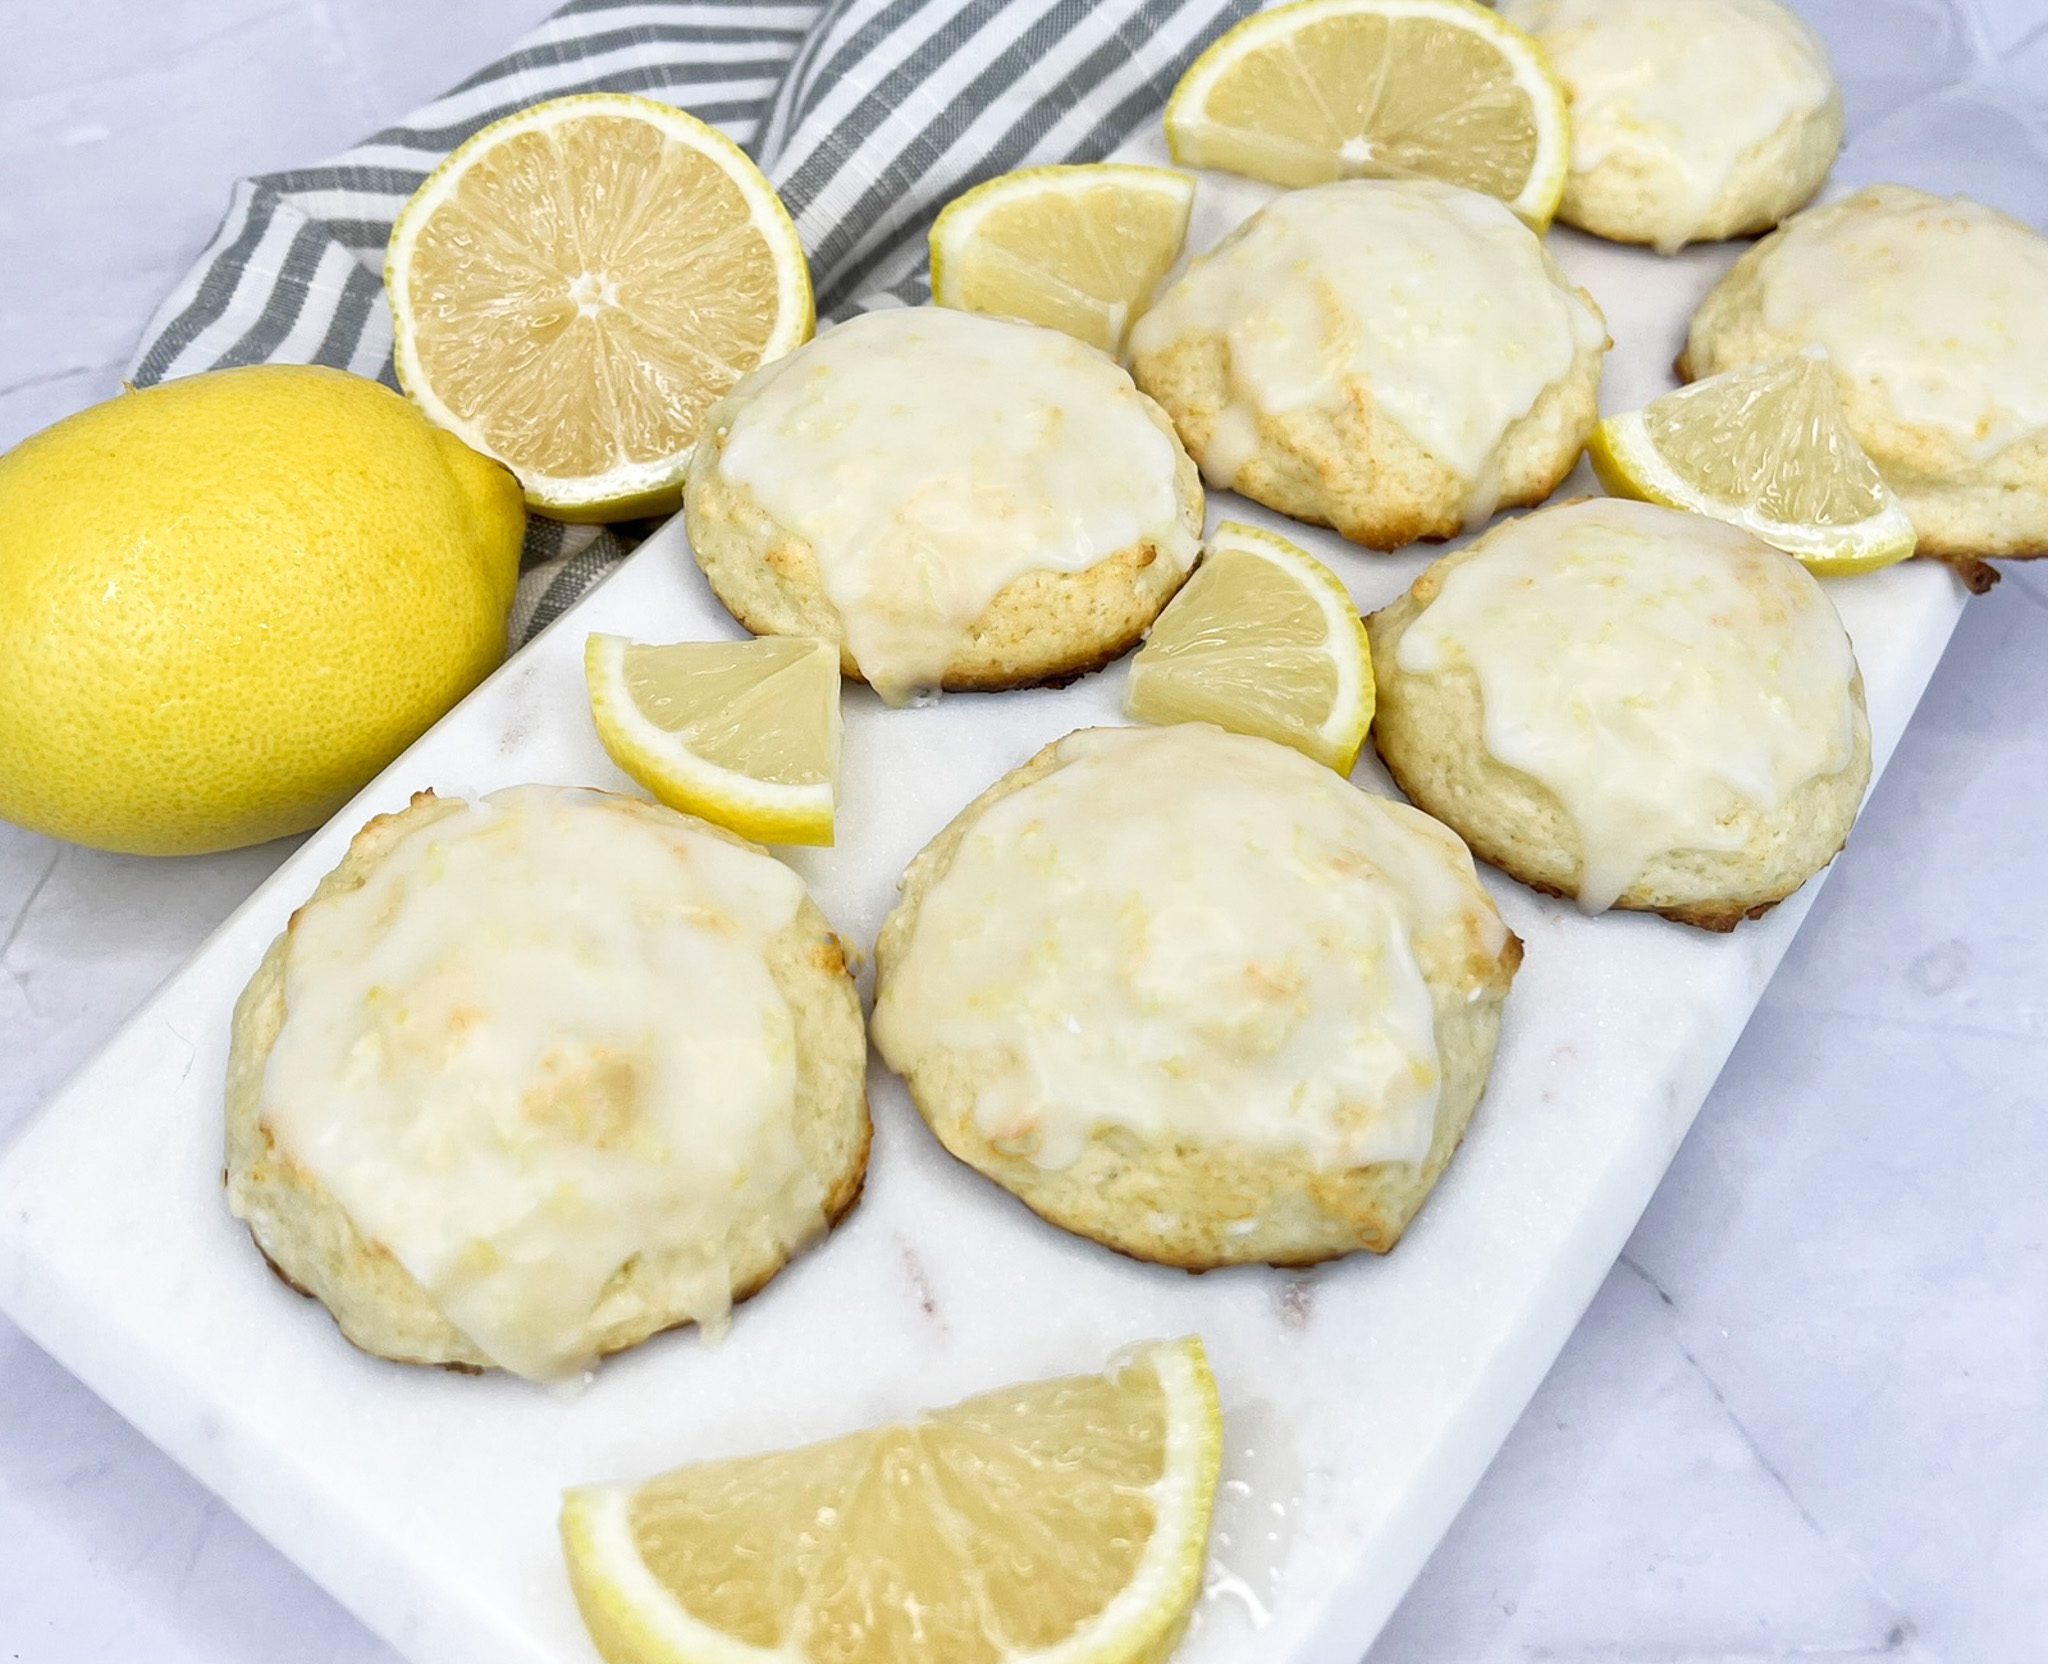
Lemon Tea Cookies
Lemon Tea Cookies
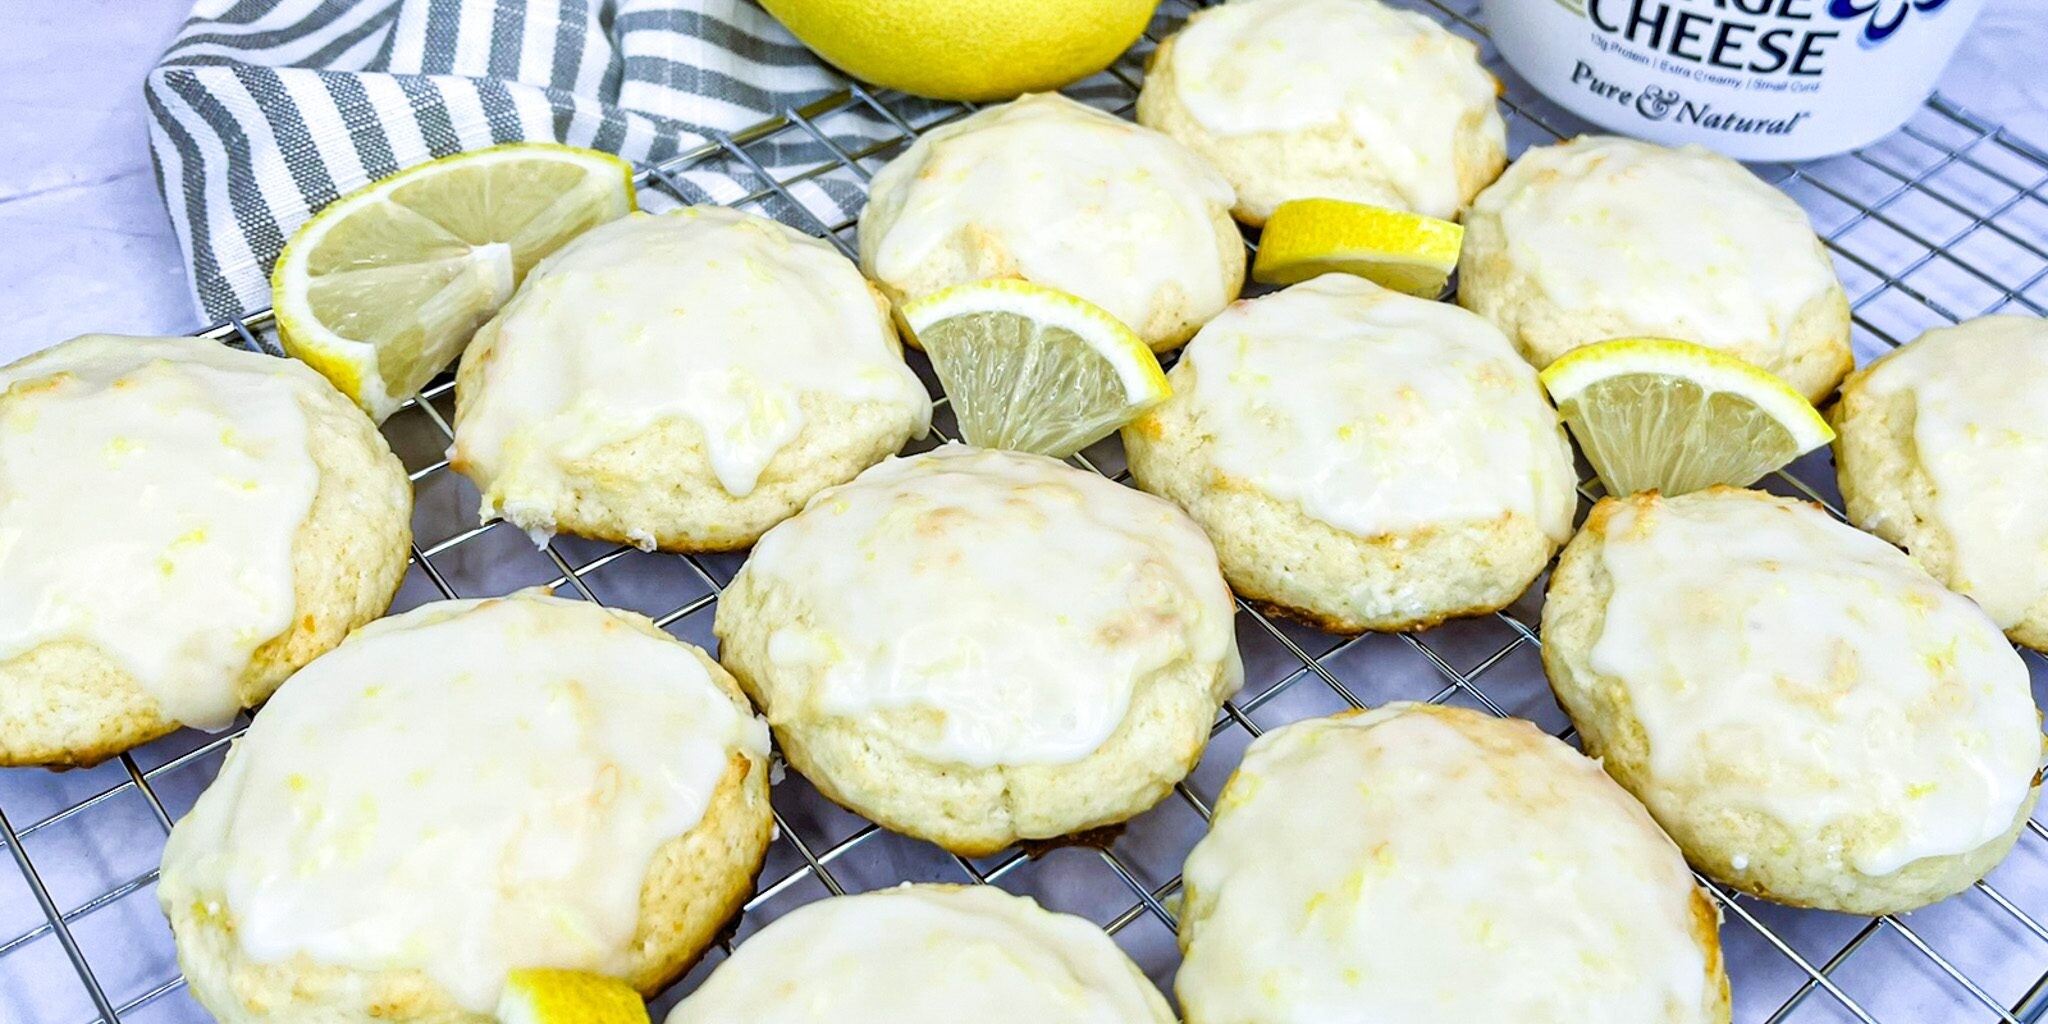
These soft, citrusy Lemon Tea Cookies are bursting with bright lemon flavor and have a melt-in-your-mouth texture, thanks to the creamy richness of Daisy Cottage Cheese. Each bite is a delightful mix of tangy, sweet, and tender crumb — finished with a zesty lemon glaze that adds the perfect punch of flavor. And the best part? They come together in just 15 minutes!
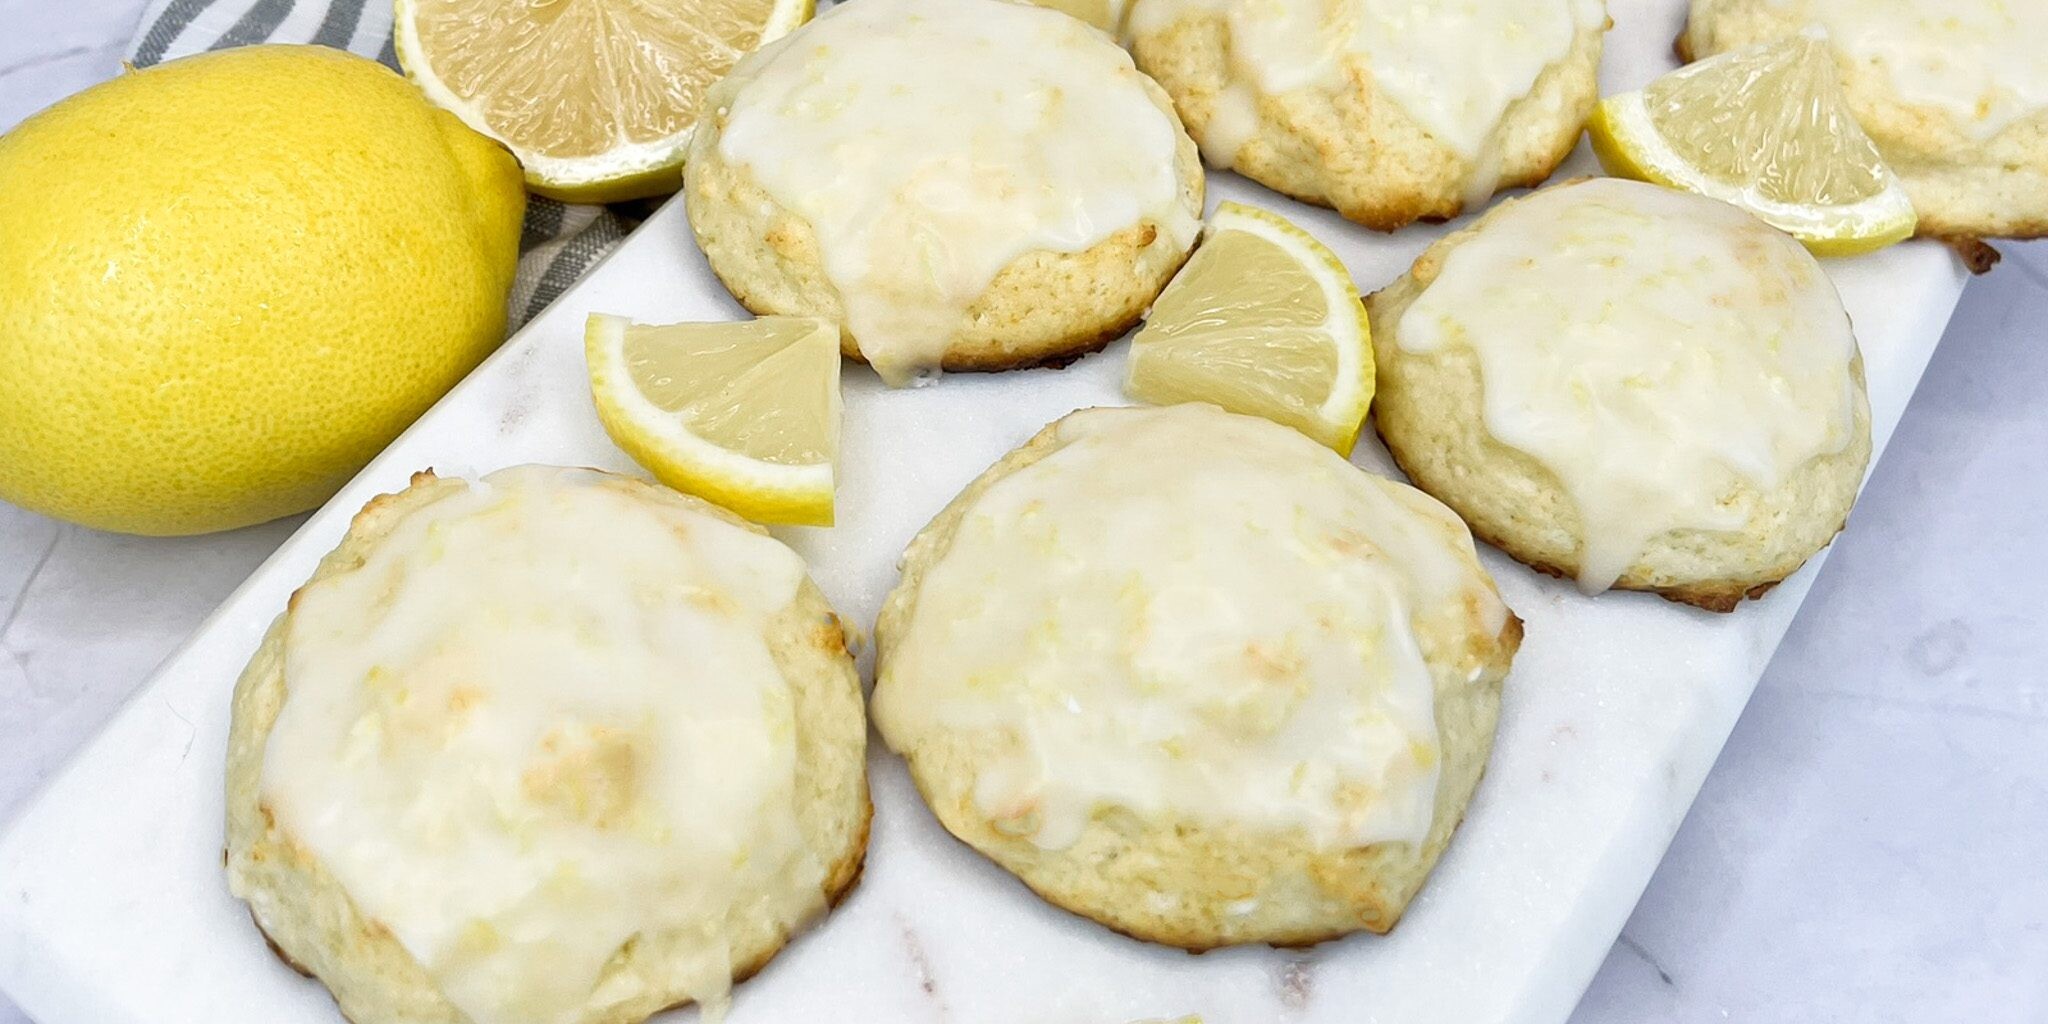
These to-die-for cookies are perfect for summer snacking, after-school treats, or year-round tea time. Pair them with a warm cup of tea or a cold glass of milk for a little moment of joy any time of day.
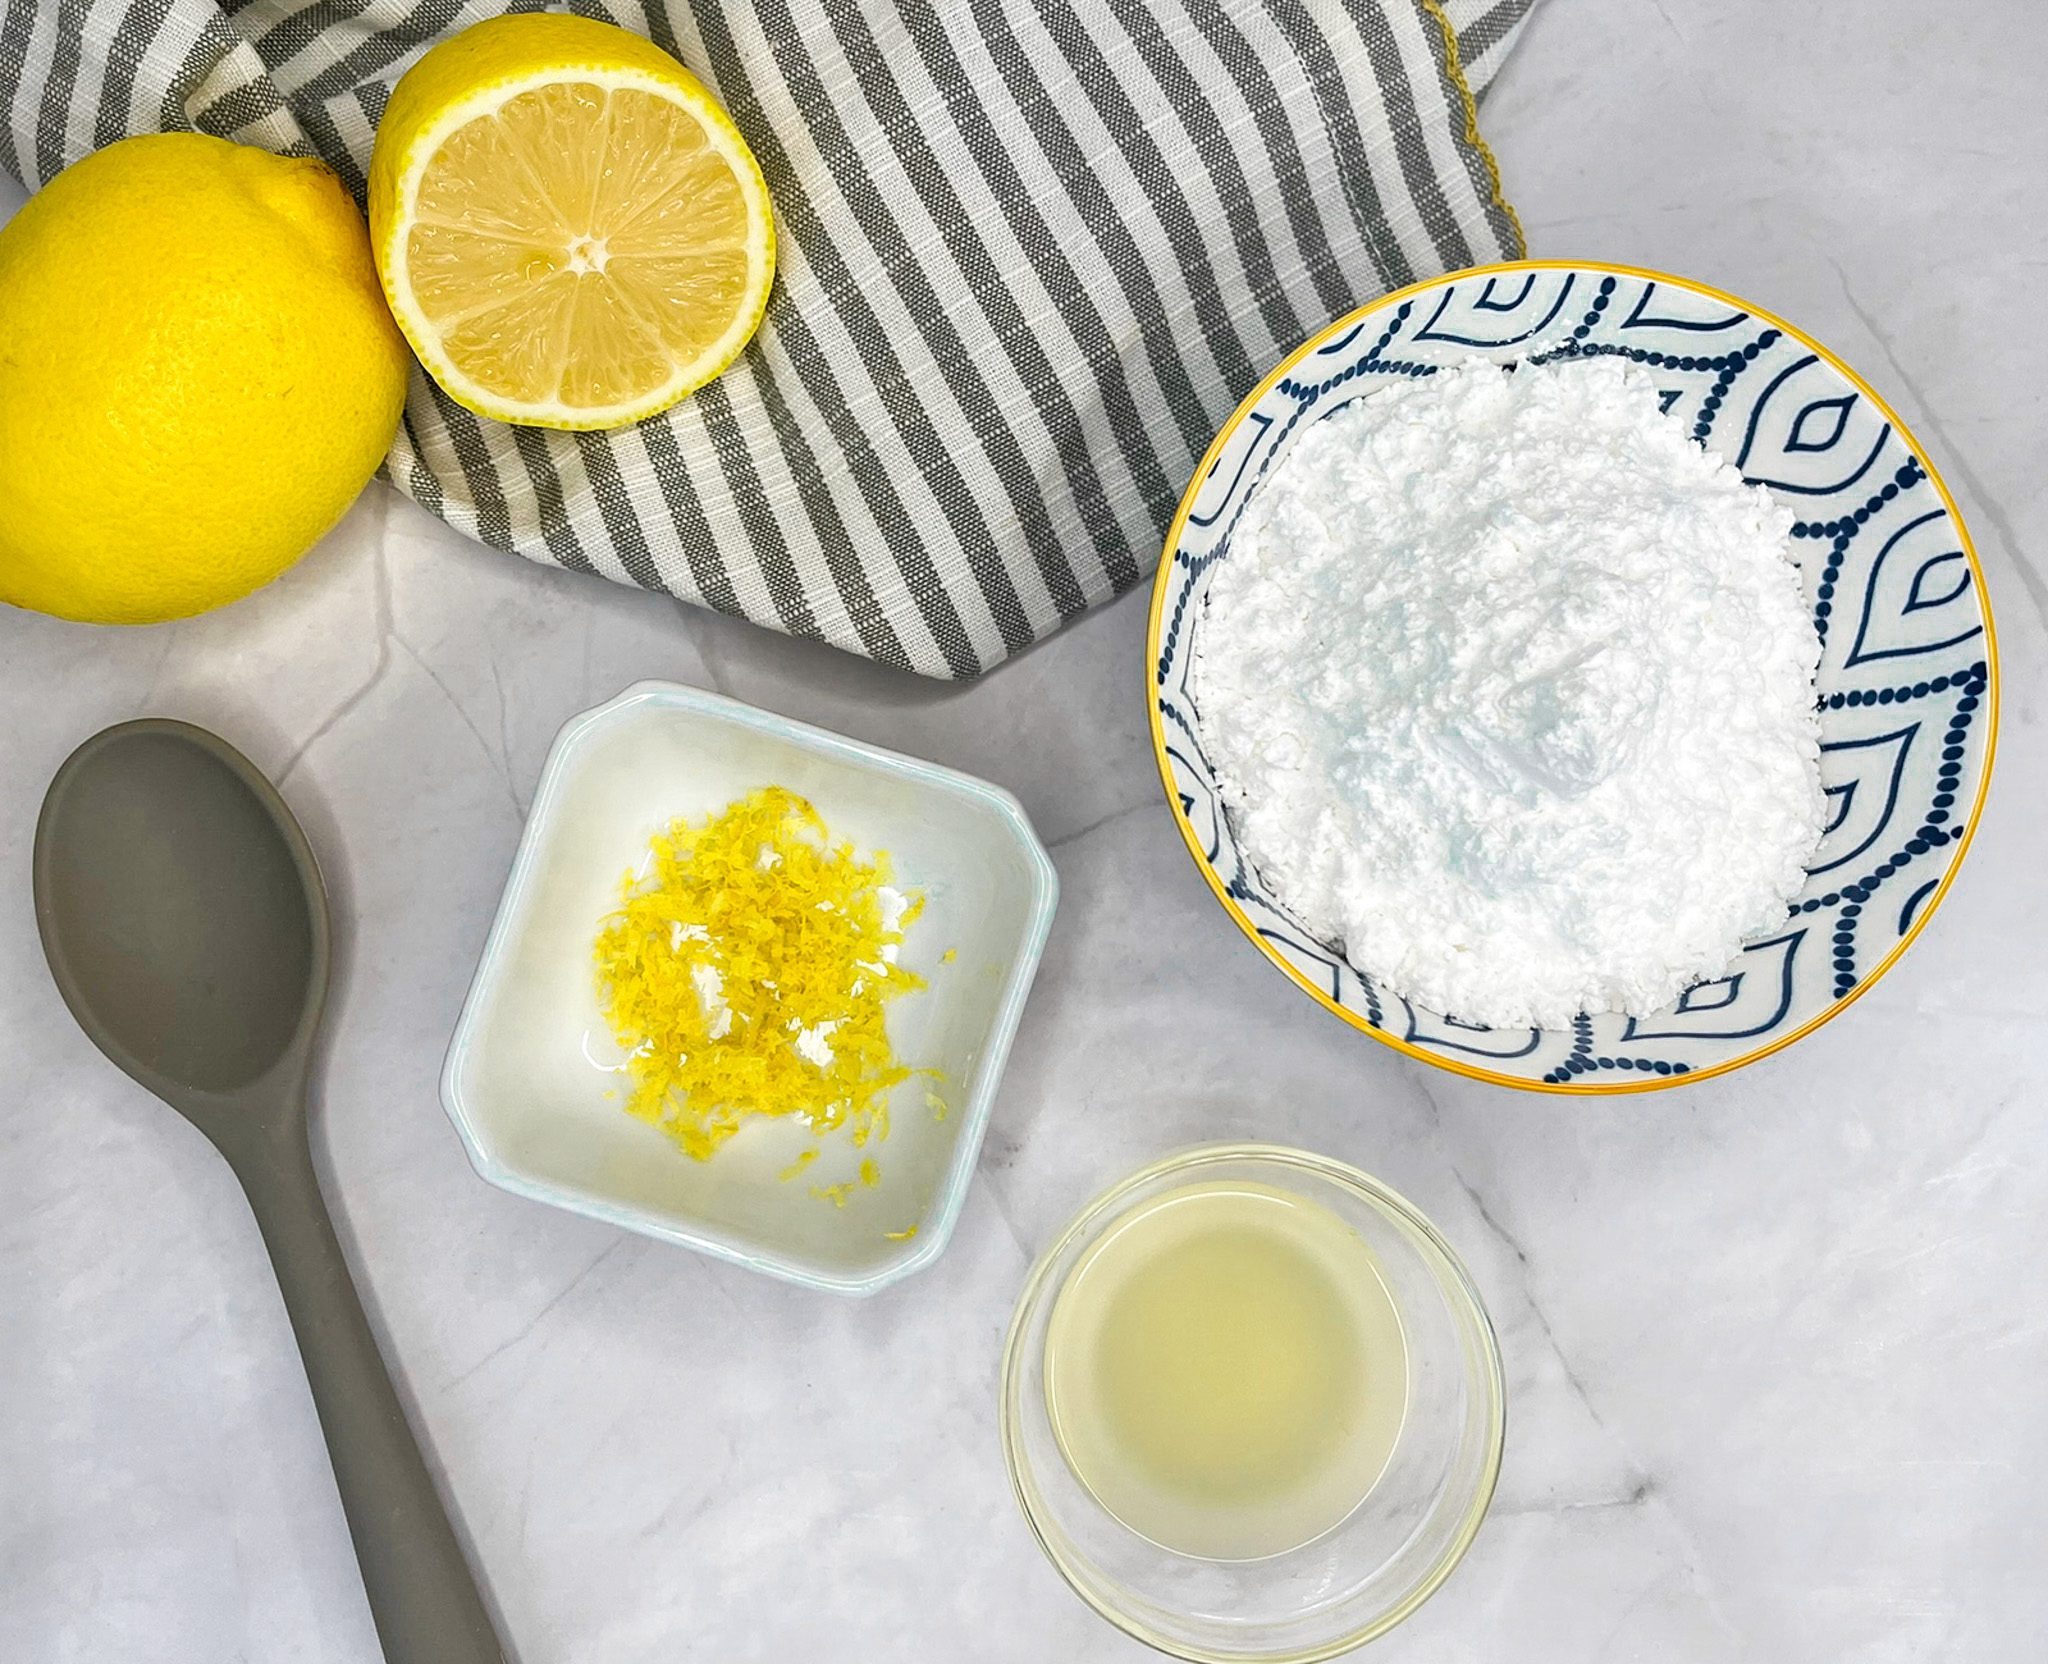
Lemon Tea Cookie Ingredients
- All-Purpose Flour (1 ¼ cups): The gluten in all-purpose flour gives the cookies structure.
- Baking Powder (3/4 teaspoon): A main ingredient for leavening, it adds volume and lightness to the batter and adds height to the cookies.
- Unsalted Butter (4 tablespoons, softened): Lends flavor and richness to the cookies.
- Sugar (1 cup): Adds sweetness to the cookies.
- Egg (1 large): Acts as glue to hold the other ingredients together and adds a bit of height to the cookies.
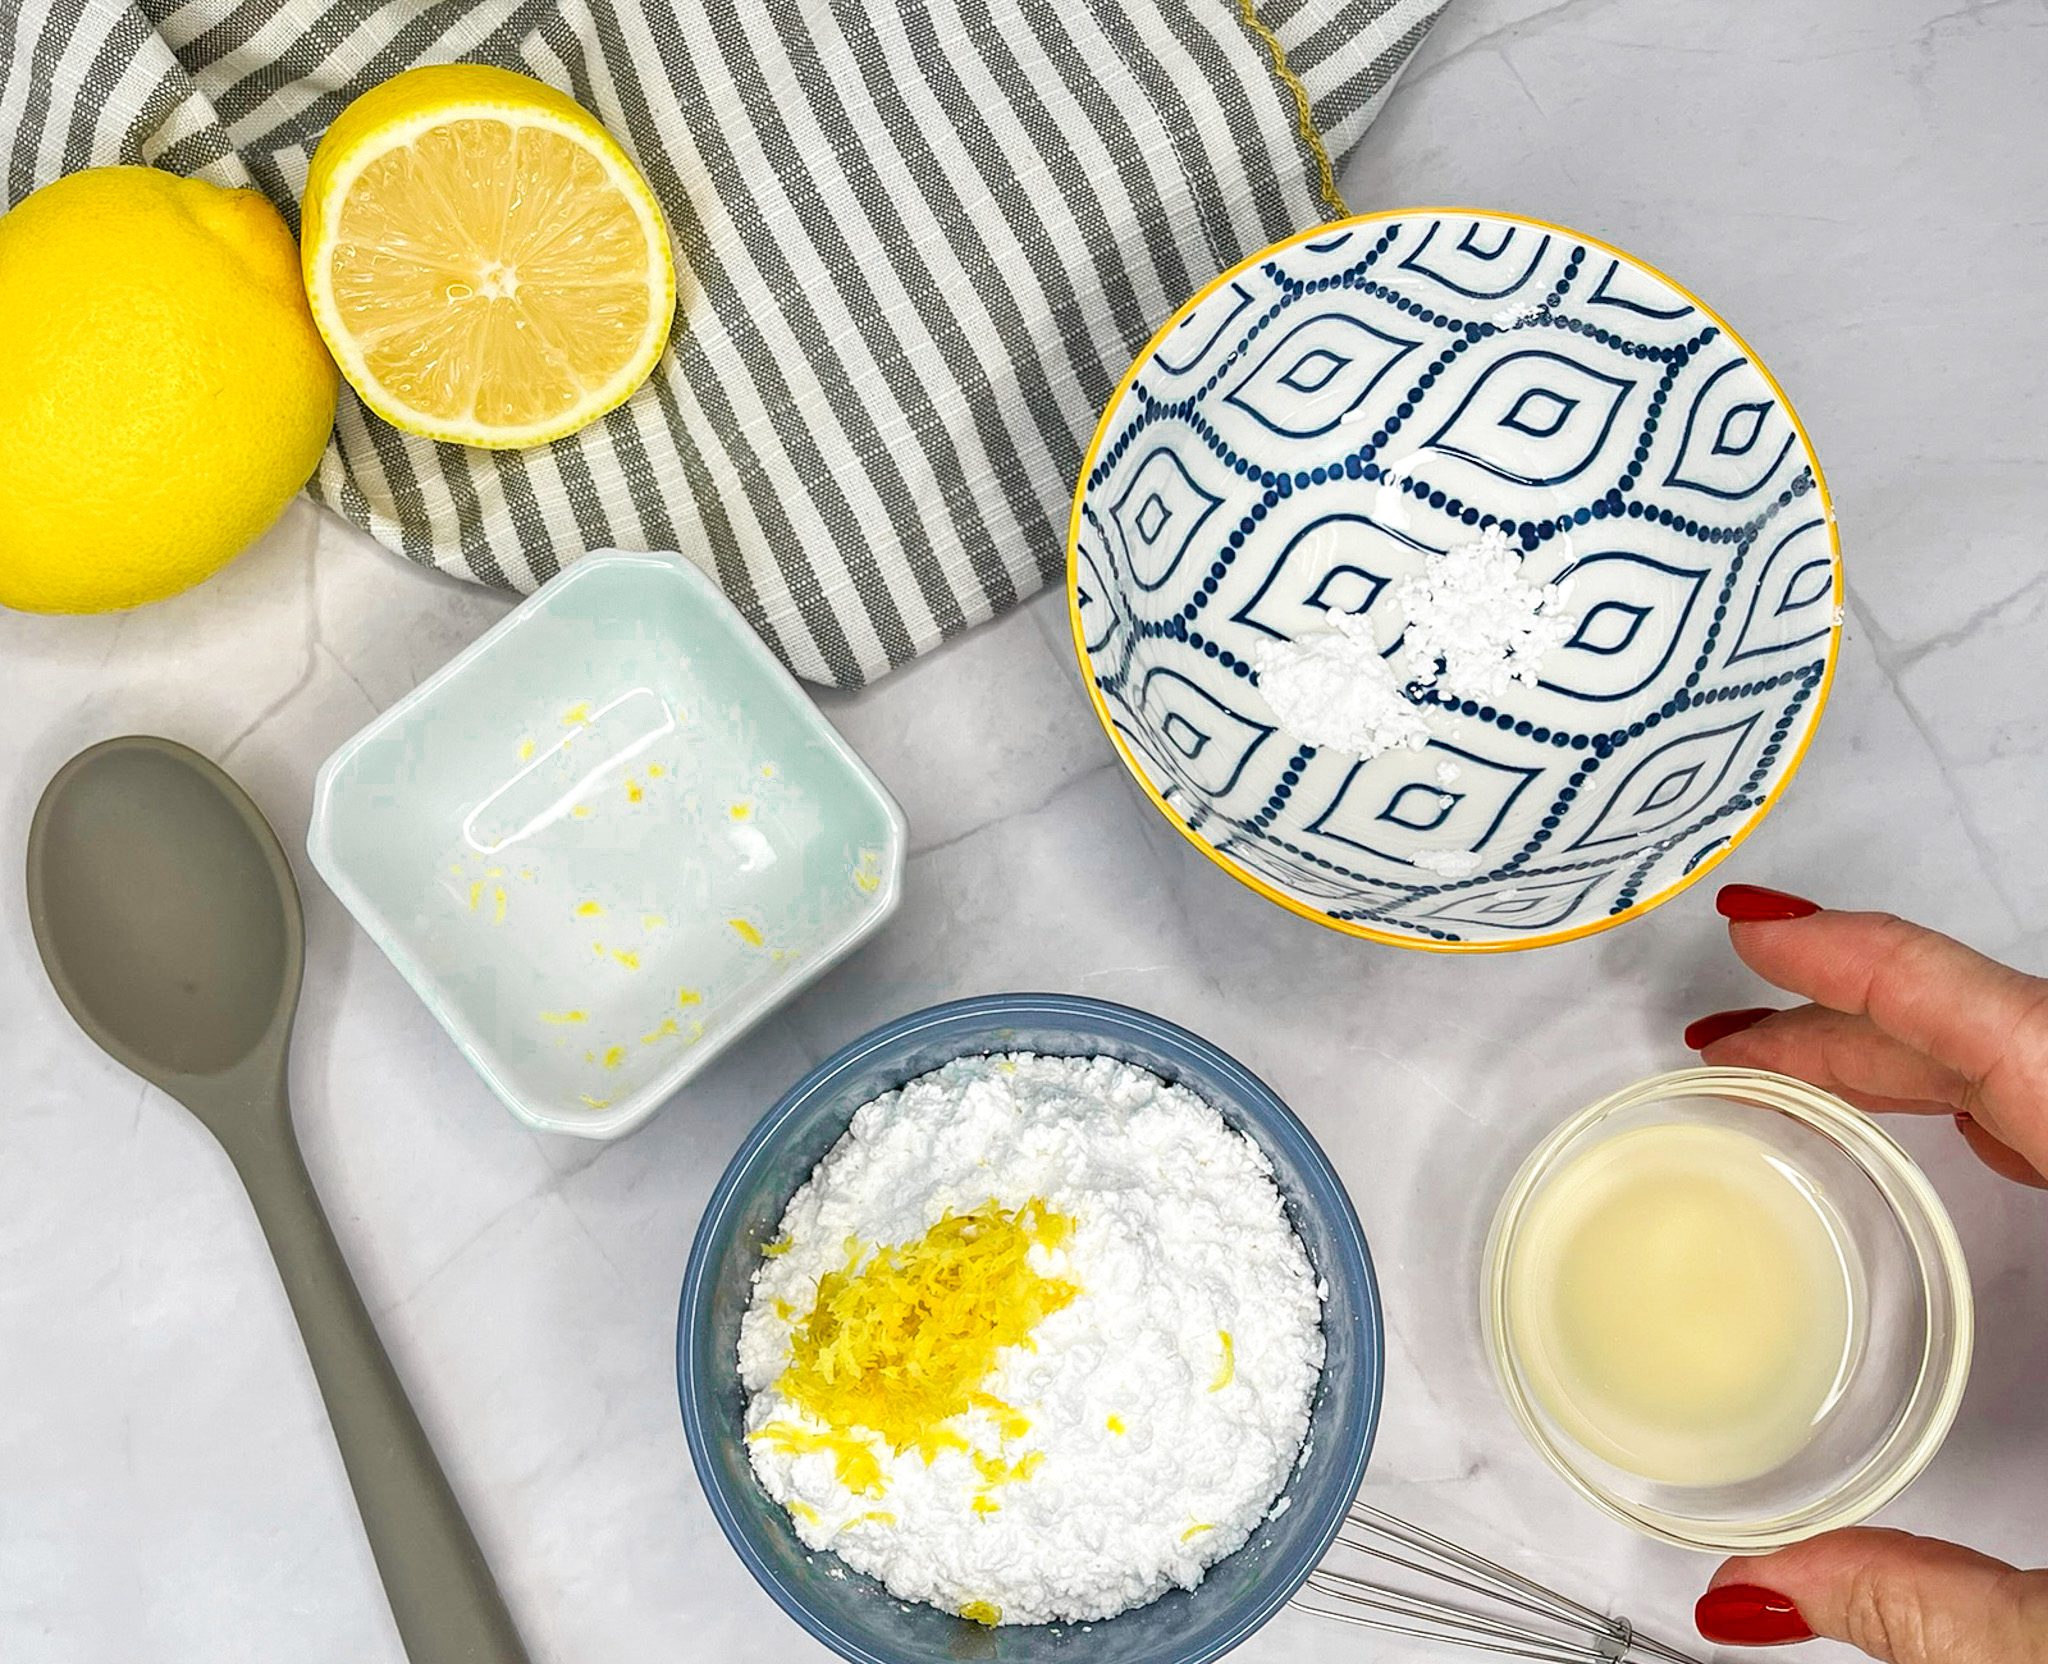
- Daisy Cottage Cheese (1 cup, blended): The star ingredient that gives the cookies their name. It provides moistness and richness to the cookies, plus a bit of protein.
- Lemon (1 large, zested and juiced): Delivers the fresh, concentrated, tart, zesty citrus flavor to the cookies and the glaze.
- Vanilla Extract (1 teaspoon): An essential ingredient in many desserts, it enhances the flavor of the cookies.
- Powdered Sugar (3/4 cups): Finely ground sugar with no hint of graininess, it is the perfect sugar for making the glaze for the cookies.
Substitutions, Variations, and Tips
- Bring all ingredients to room temperature for best results.
- Swap lemon for lime or orange zest and juice for a fun twist.
- When measuring flour, spoon it into the cup and level it off — avoid scooping directly from the bag, which can pack the flour and lead to dry cookies.
- Don’t overmix the dough — too much mixing develops gluten, making cookies dense.
- Want a thicker glaze? Wait until cookies are fully cooled. Add extra powdered sugar for more thickness, or thin with ½ teaspoon water at a time.
- Store cookies in an airtight container to keep them fresh.
How to Make Lemon Tea Cookies
- Preheat oven to 375°F. Line baking sheets with parchment paper.
- In a bowl, mix the flour and baking powder. Set aside.
- Using an electric mixer, beat butter and sugar until light and fluffy (about 3 minutes). Add egg and mix until fully incorporated.
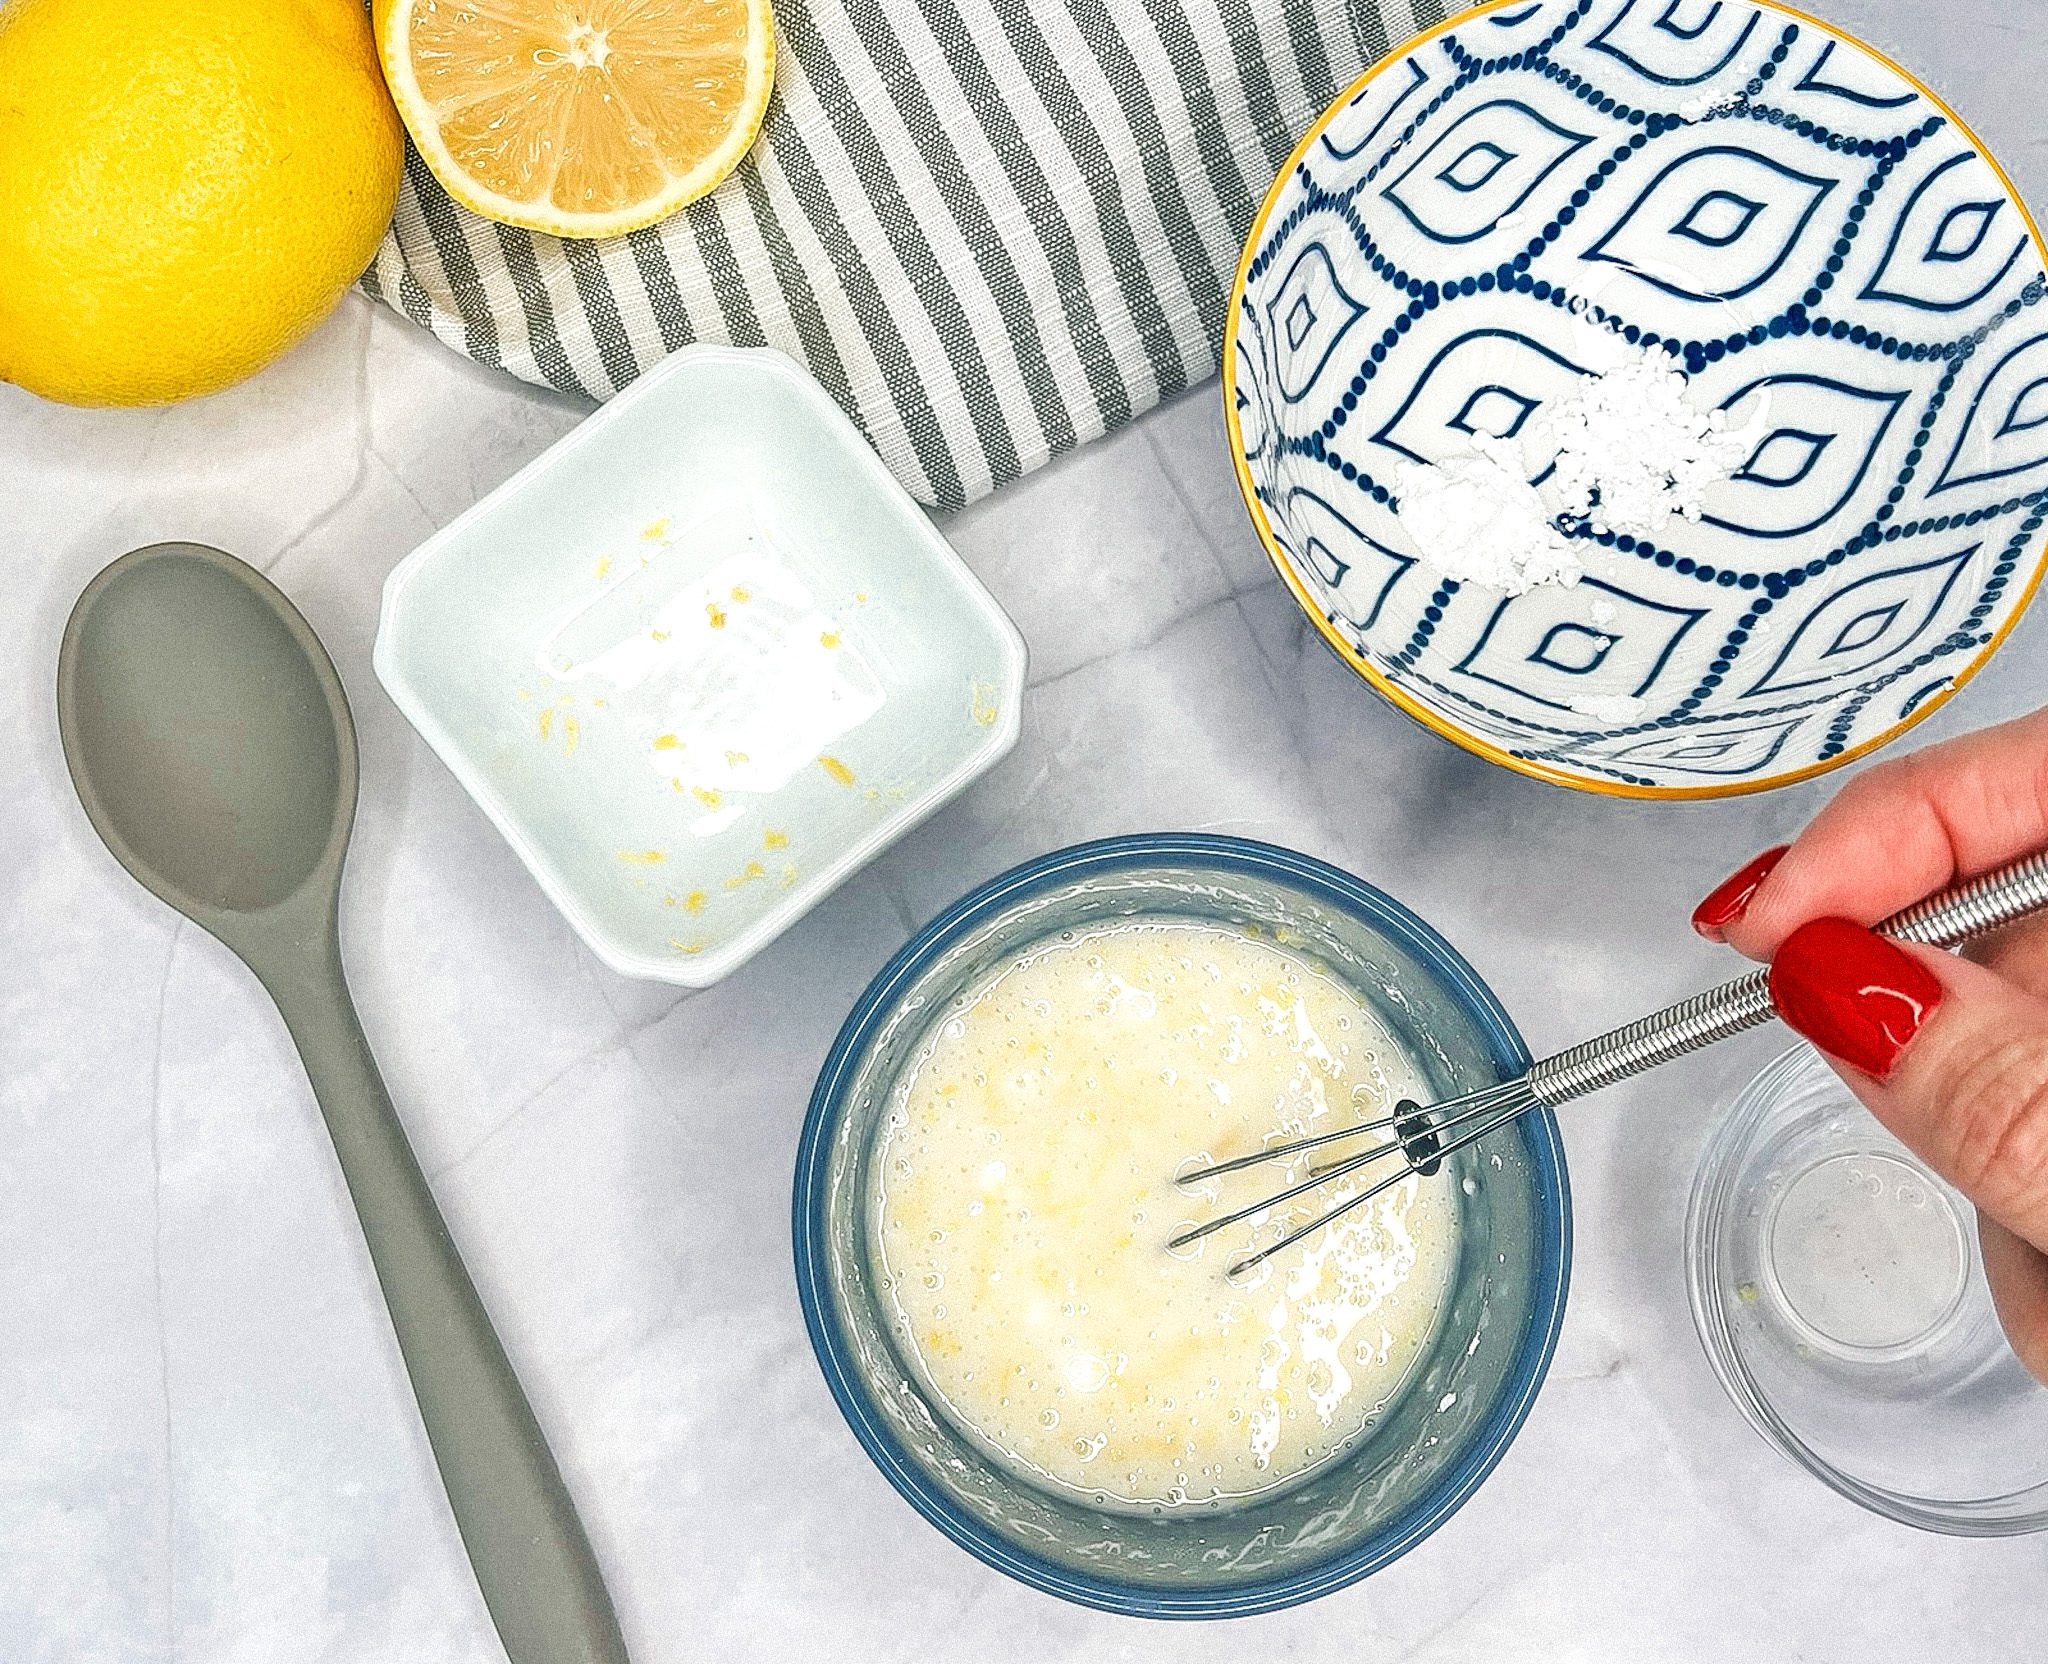
- Add blended Daisy Cottage Cheese, half the lemon zest, half the lemon juice, and vanilla extract. Mix well.
- Stir in dry ingredients until just combined.
- Scoop about 2 tablespoons of dough for each cookie onto prepared baking sheets. Bake for 15 minutes, until edges are slightly golden. Let cookies rest on the baking sheet for 20 minutes.
- Meanwhile, make the glaze: mix powdered sugar with remaining lemon zest and juice. Stir until smooth. Spoon about ½ teaspoon of glaze onto each cookie and gently spread to the edges.
- Let glaze set for about 2 hours before serving.
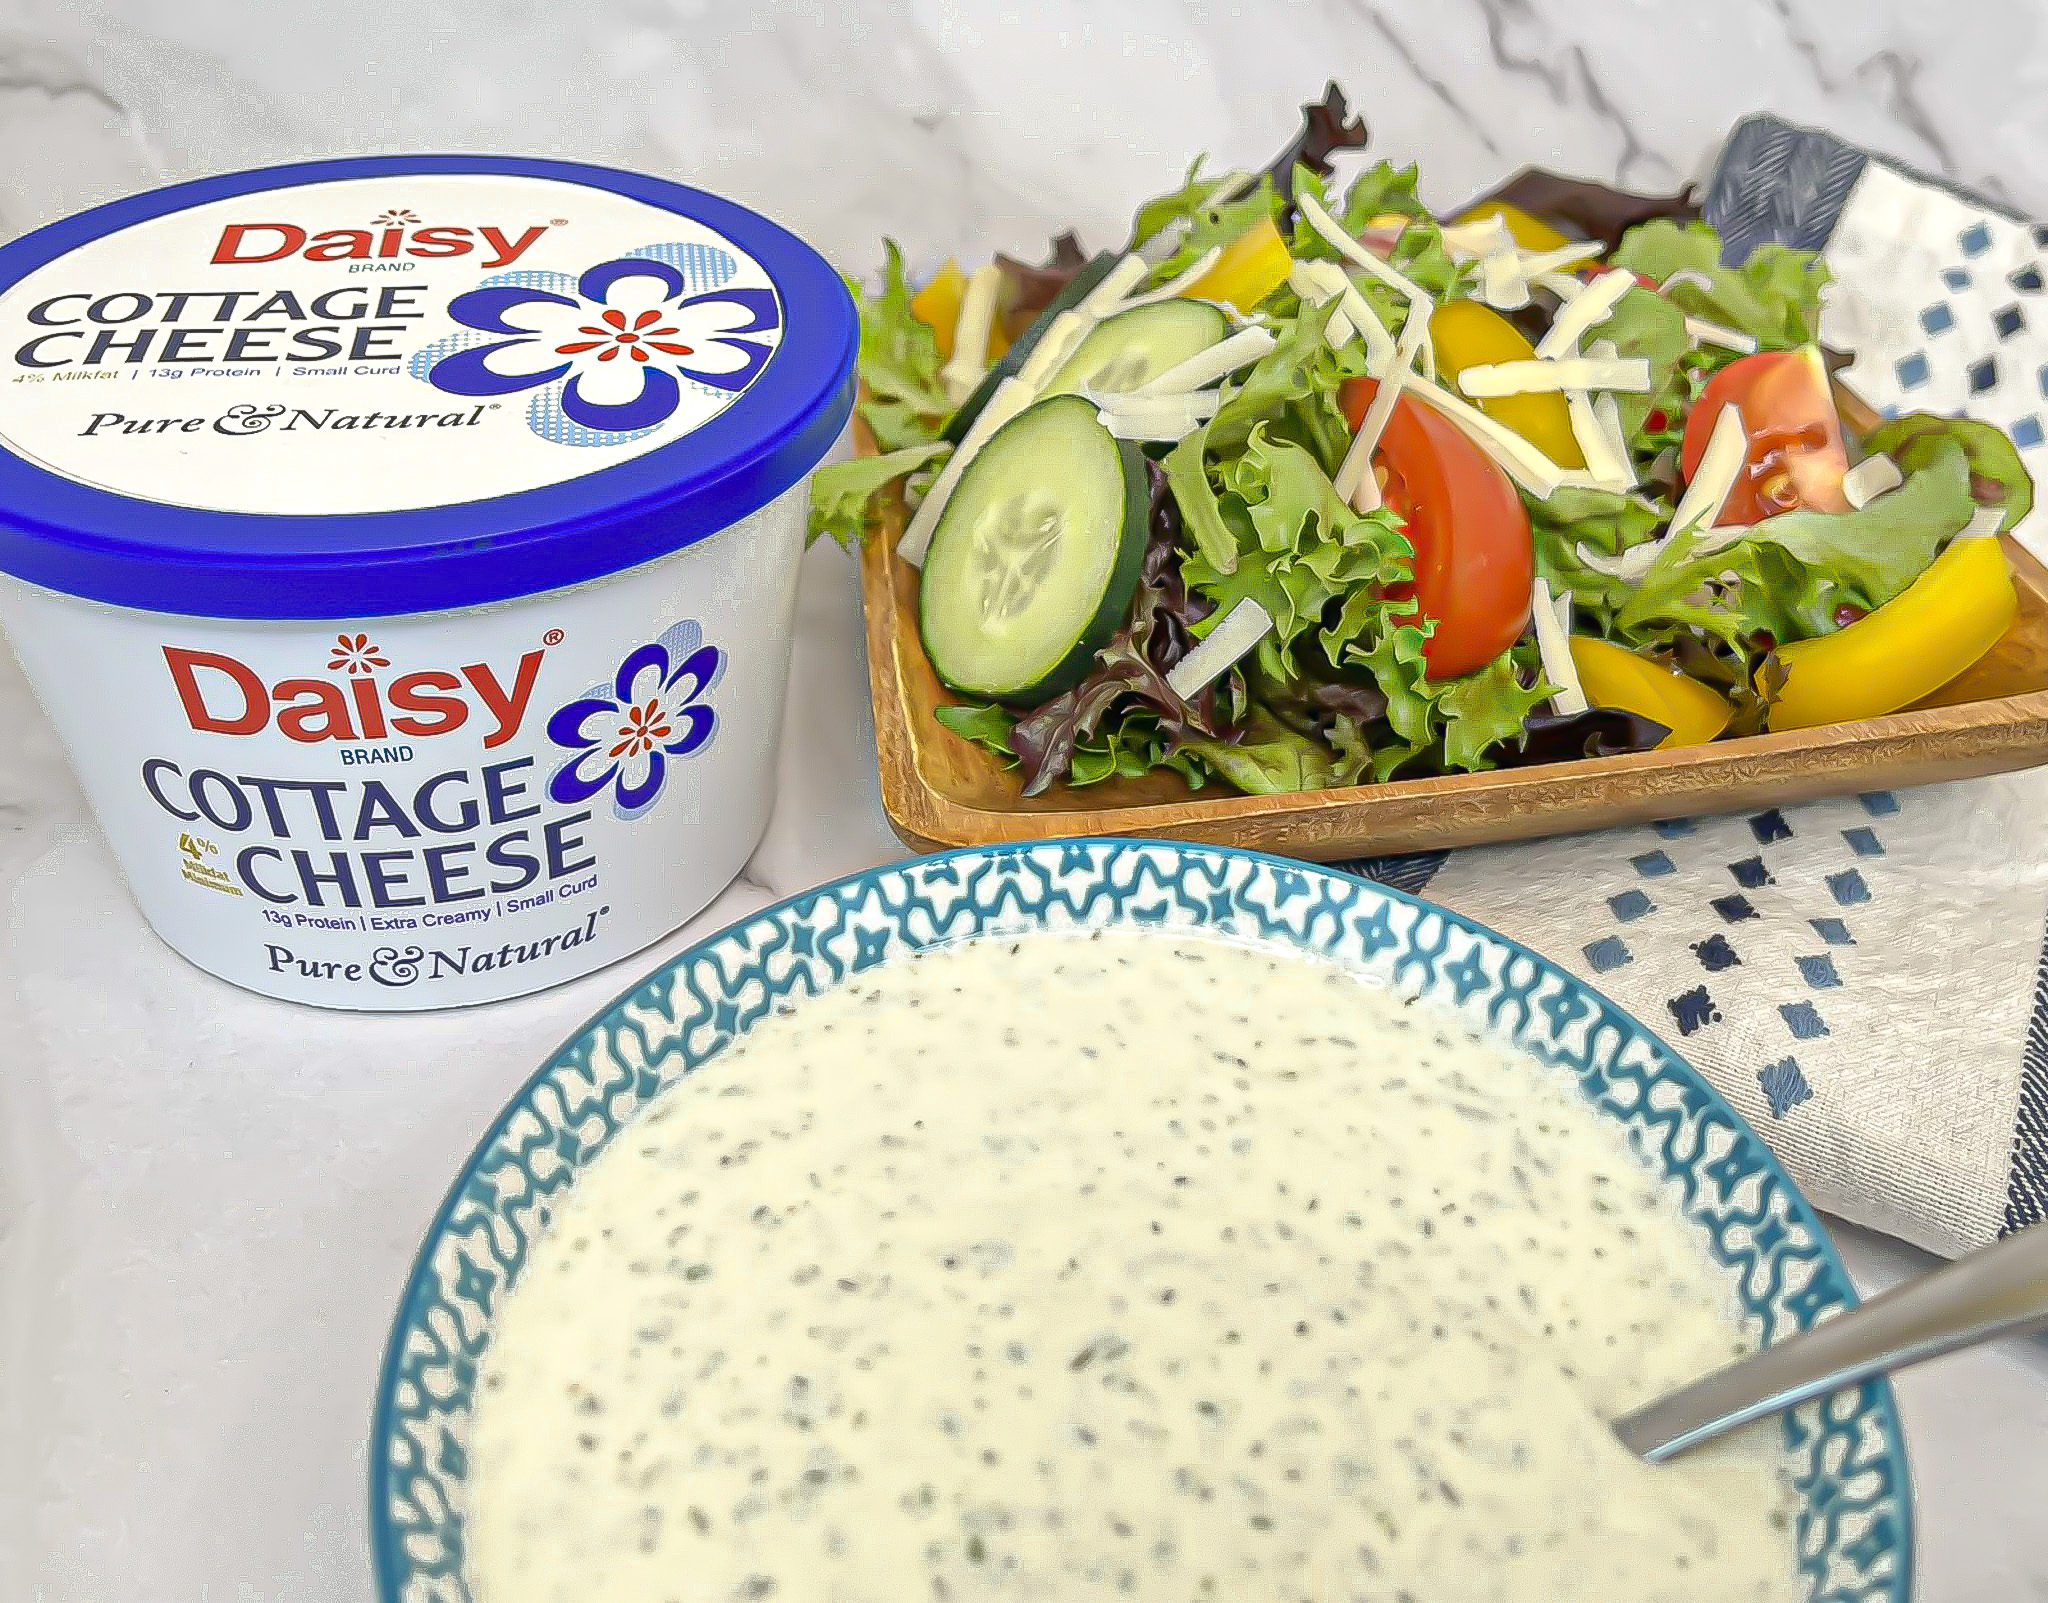
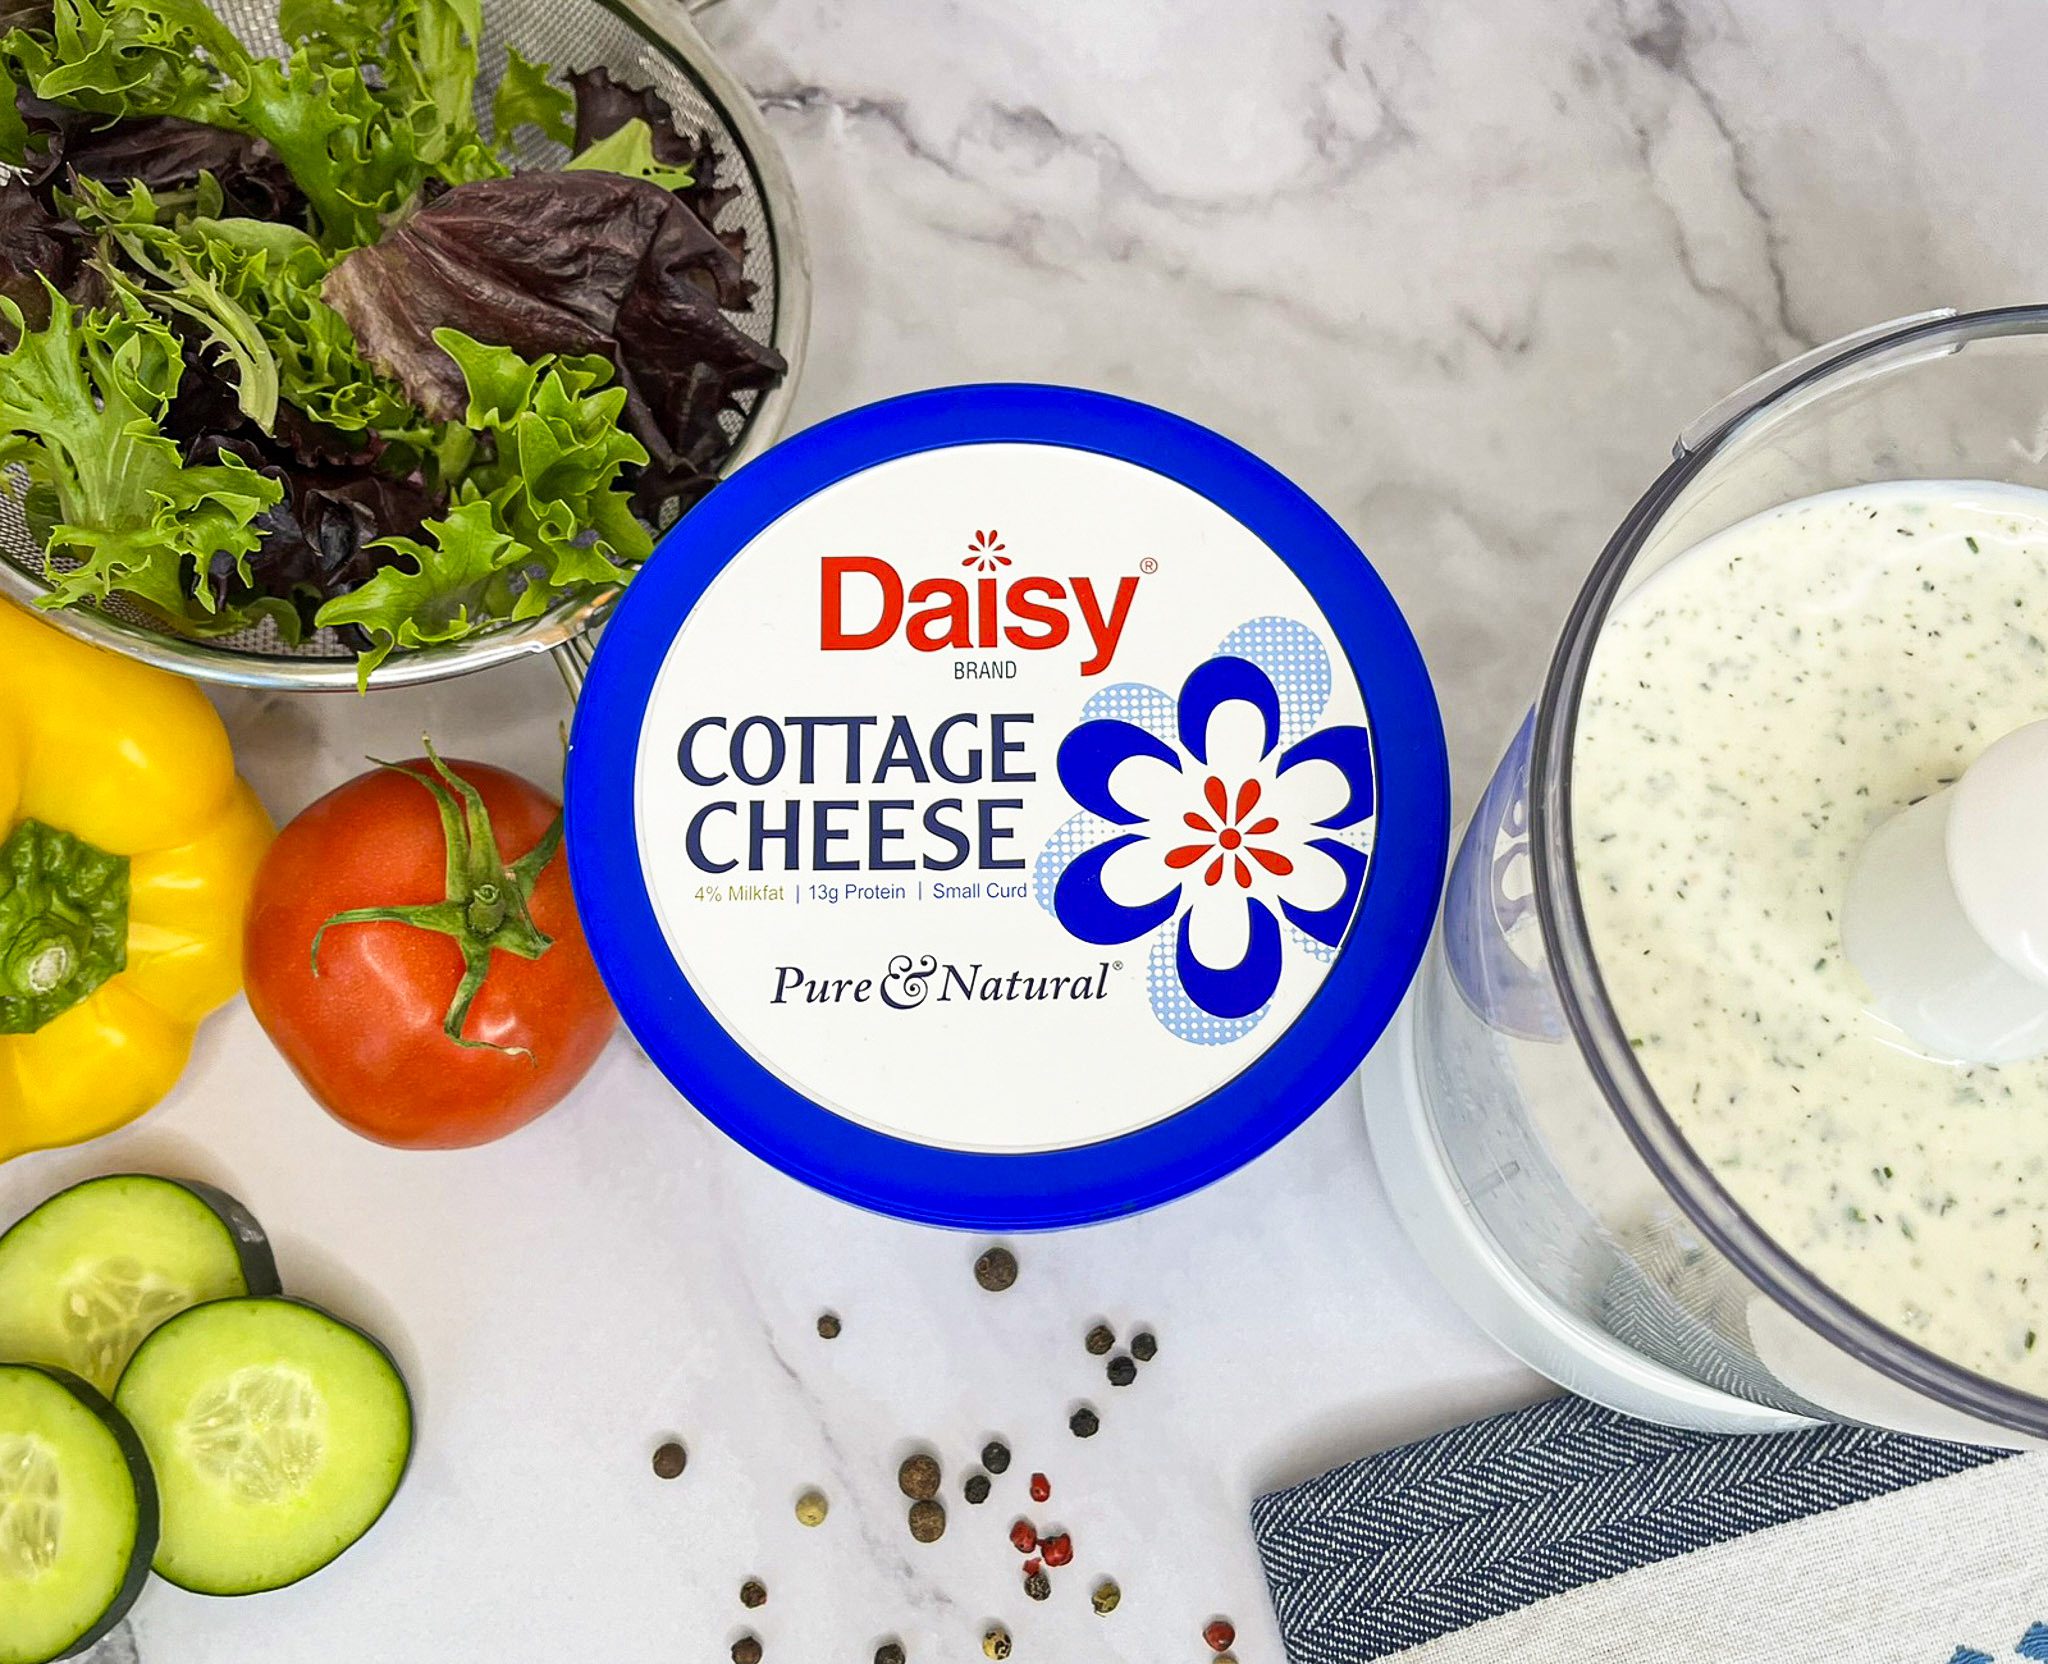
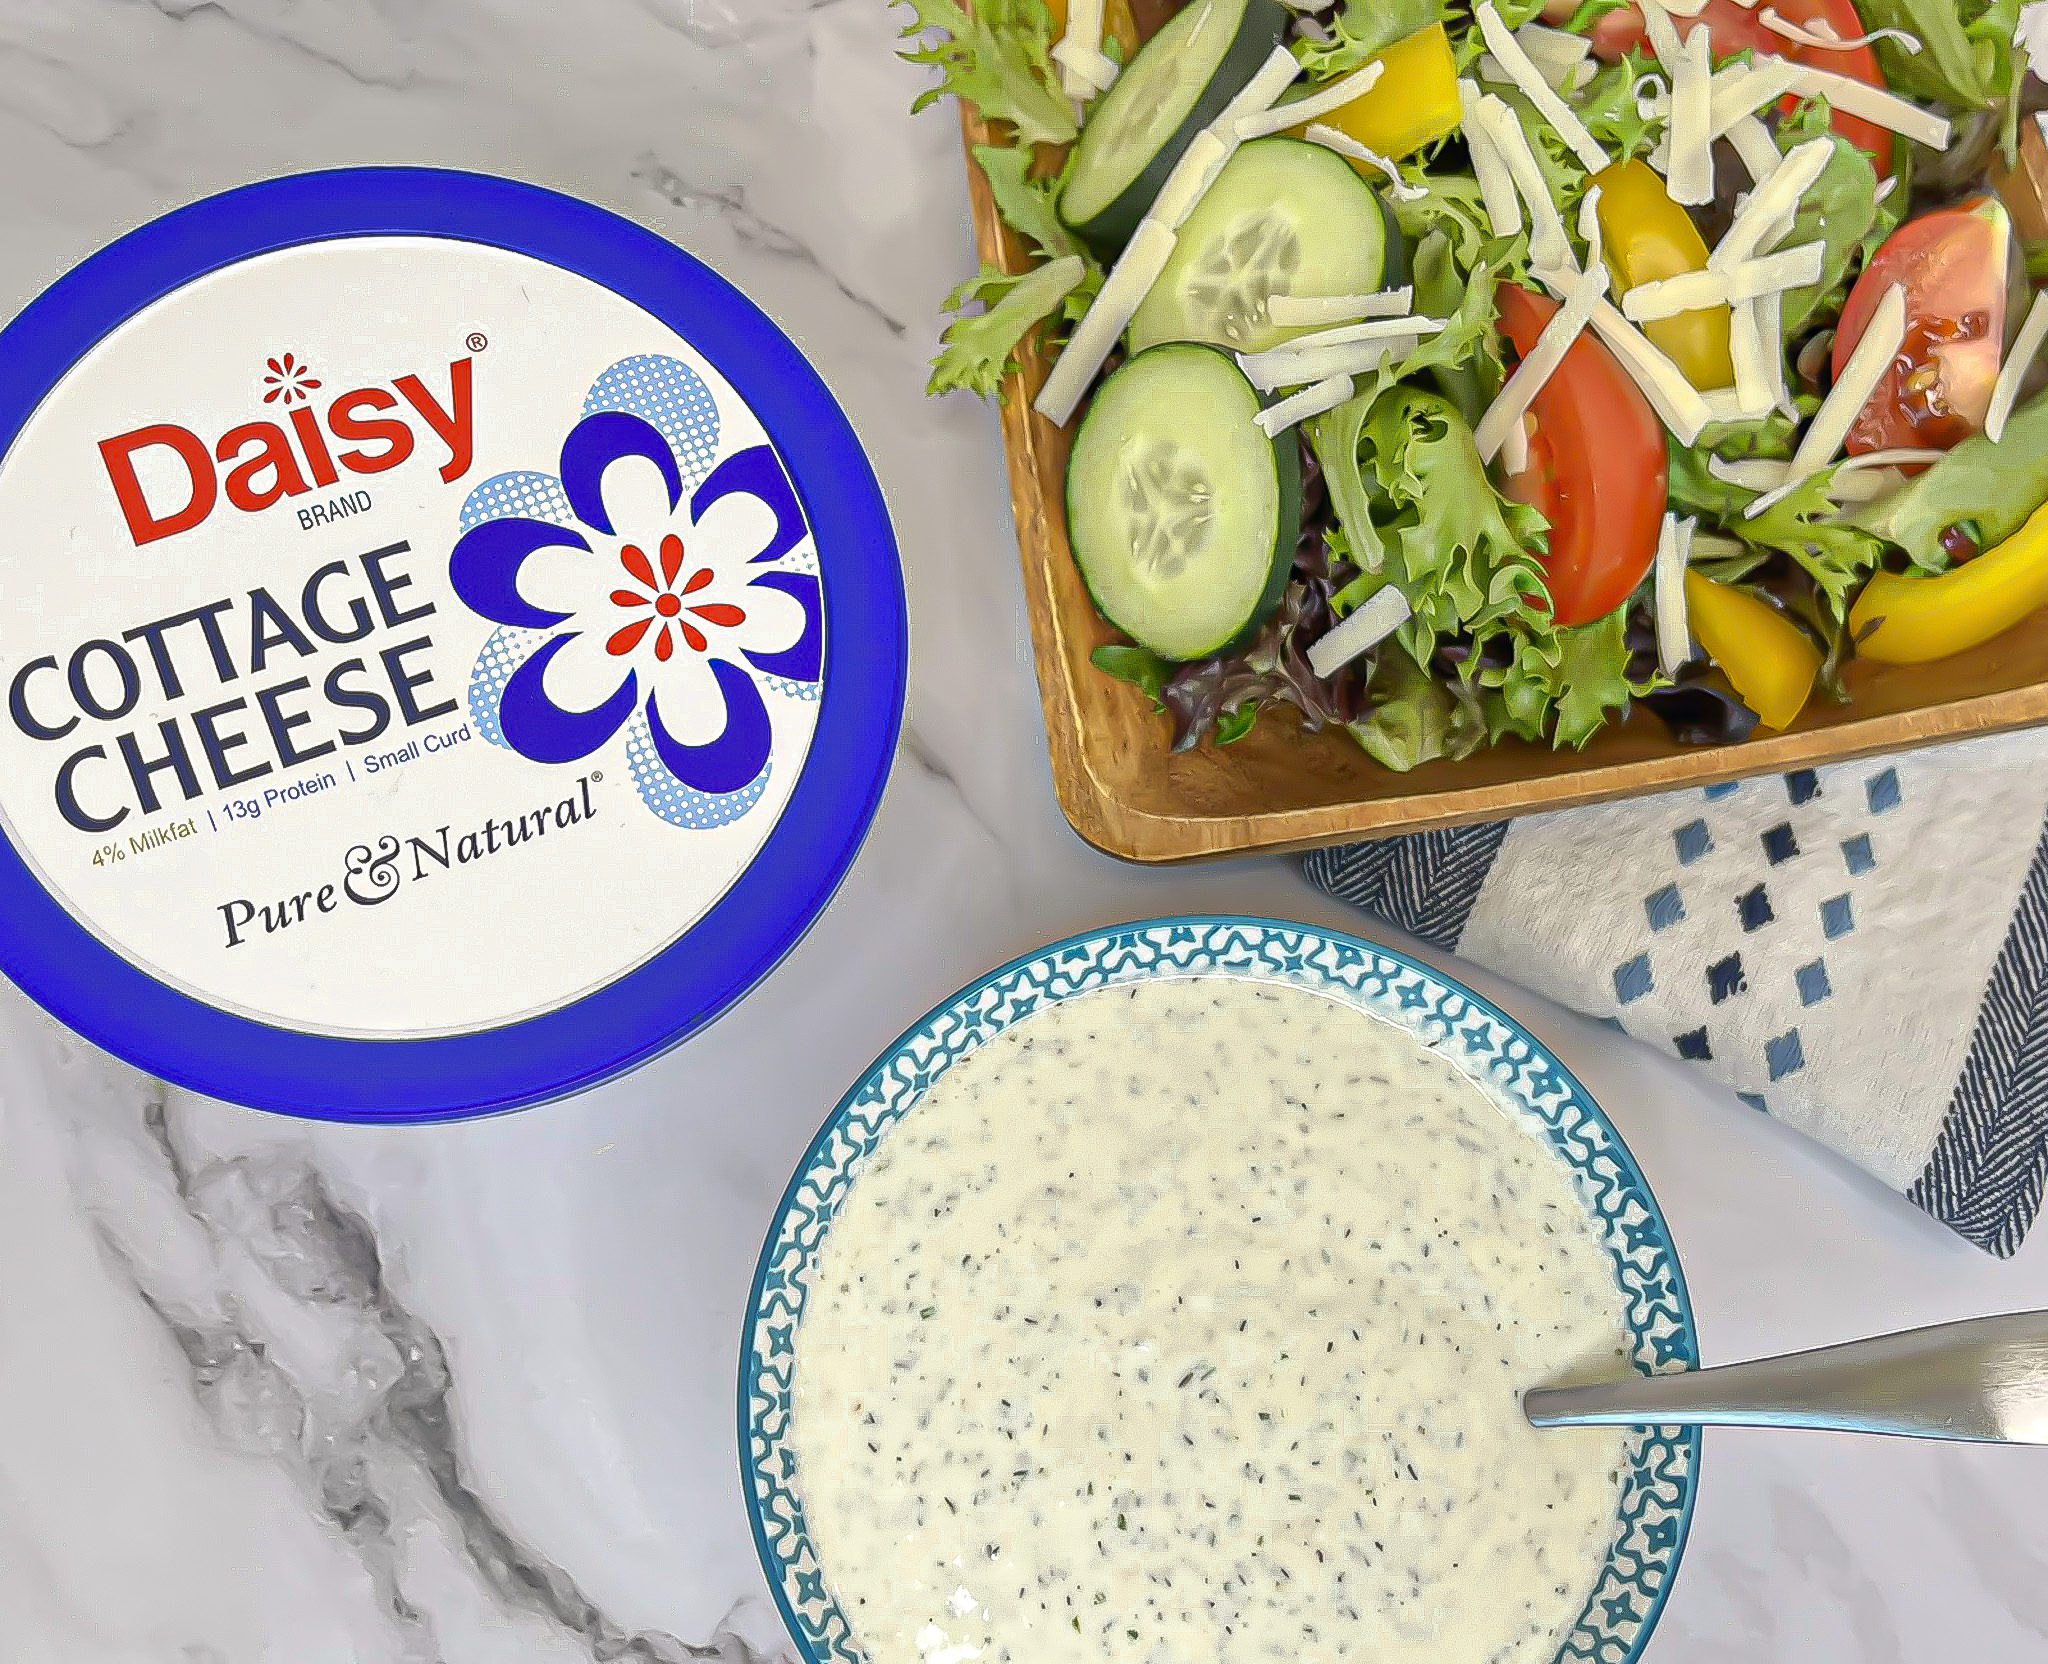
Cheesy Ranch Dressing
Cheesy Ranch Dressing
This easy Cheesy Ranch Dressing comes together in a snap and is packed with protein—without all the preservatives and additives found in many store-bought dressings.
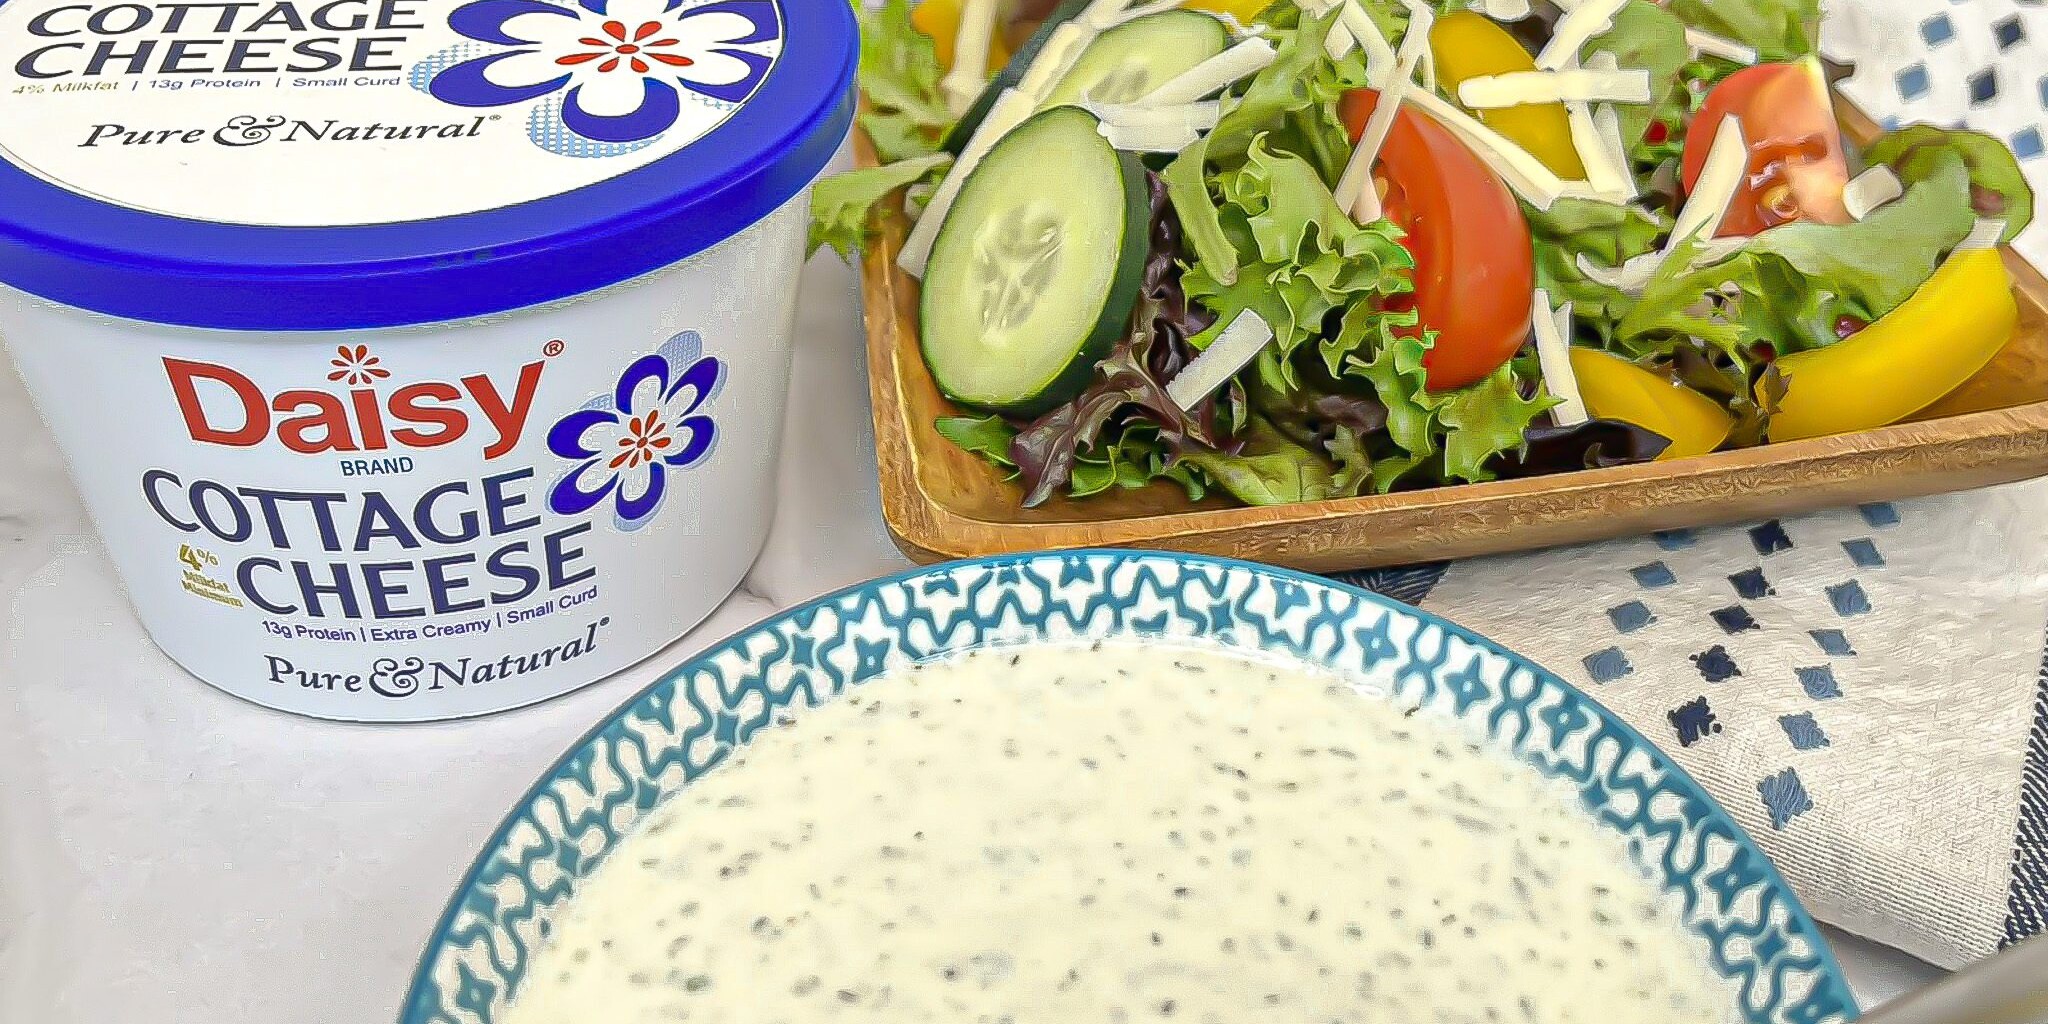
Made with Daisy Cottage Cheese as the creamy base, this dressing is rich, flavorful, and surprisingly light. It’s perfect for salads, dipping veggies, or drizzling over grain bowls and roasted veggies. Once you try it, you’ll never go back to bottled ranch again!
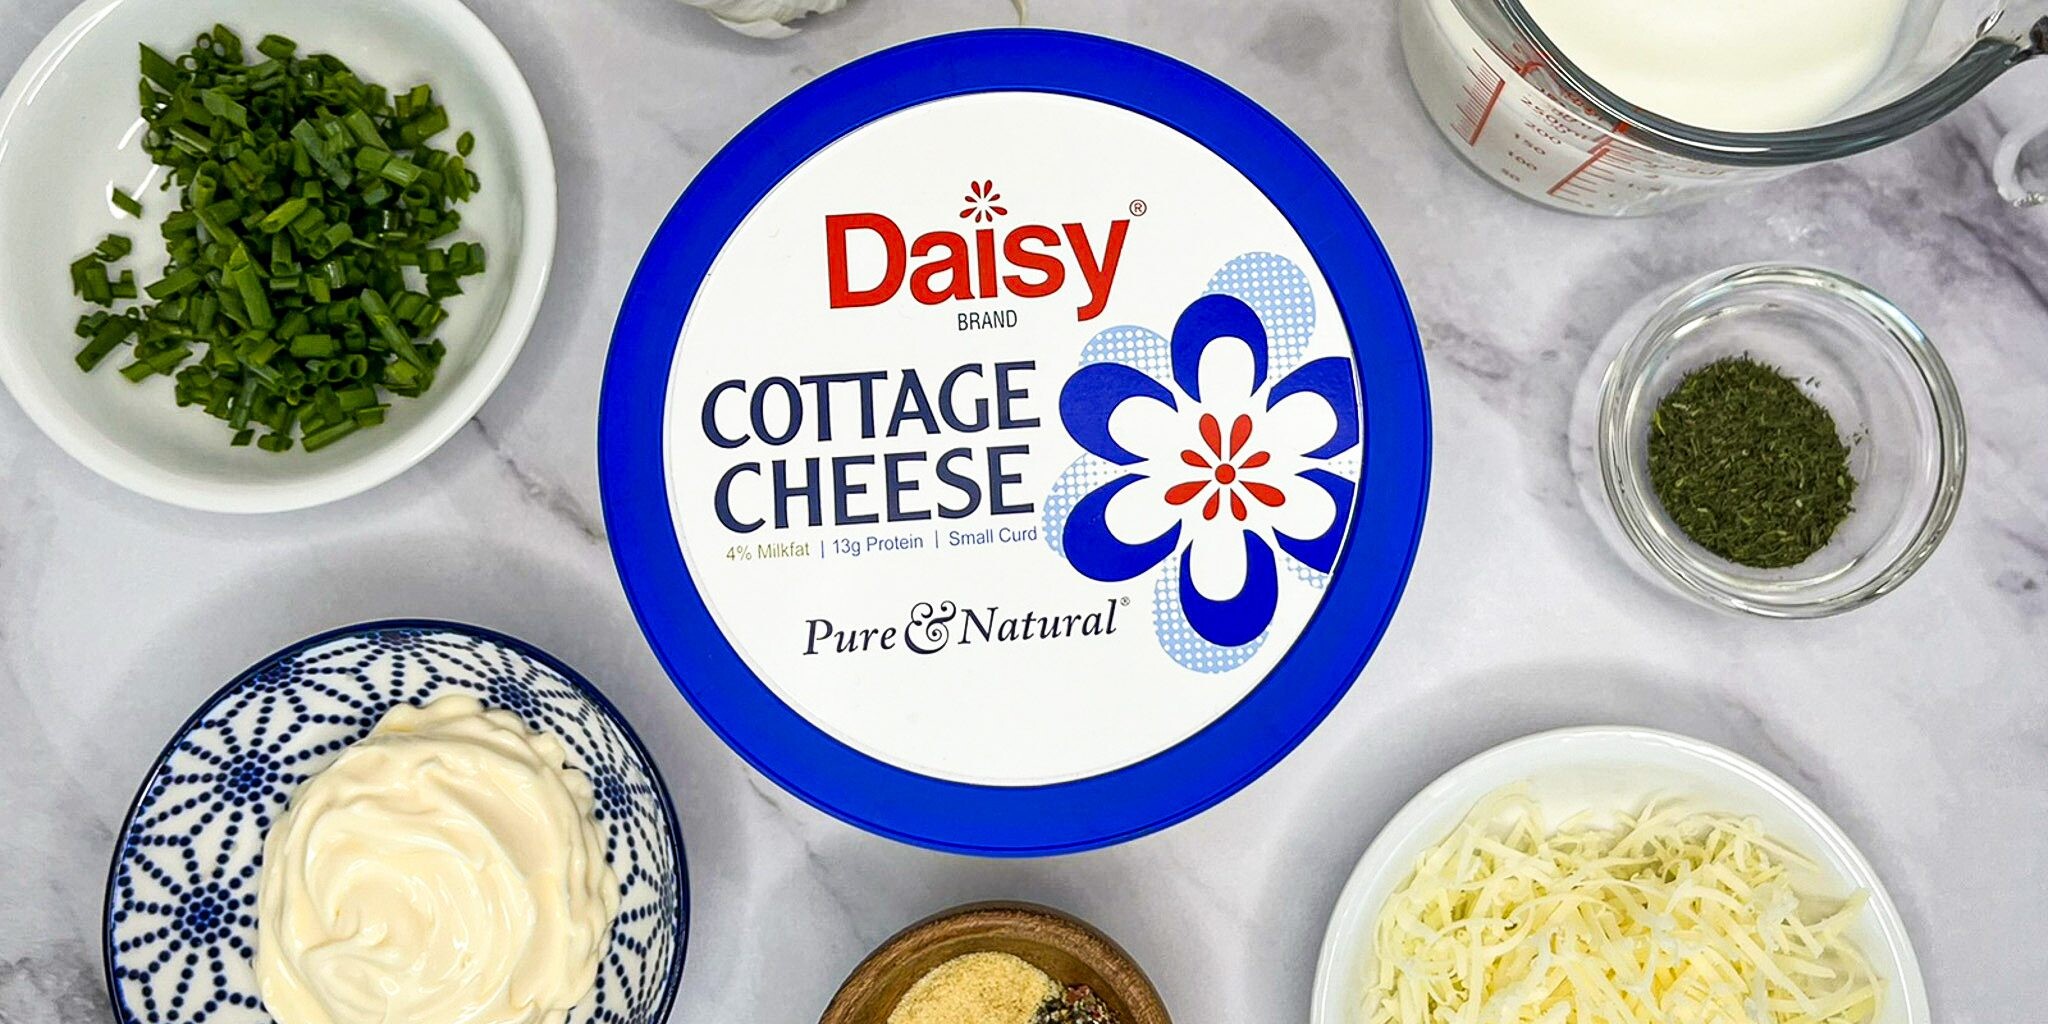
Cheesy Ranch Dressing Ingredients
- Daisy Cottage Cheese (1 cup): Provides the dressing with its creamy texture and adds a subtle tangy taste with a boost of protein.
- Buttermilk (1/2 cup): Tangy in taste, it adds a touch of acid to the dressing and thins it out.
- Mayonnaise (1/4 cup): Adds a creamy richness to the dressing.
- Fresh Chives (2 tablespoons, chopped): Small, thin, and wispy onions, perfect for adding a touch of mild onion flavor with a taste similar to leeks.
- Parmesan (2 tablespoons, grated): Best when freshly grated, it adds a nutty saltiness to the dressing.
- Garlic (1 clove): Fresh garlic gives a pungent, sharp flavor that compliments the herbs.
- Onion Powder (1/4 teaspoon): Adds a concentrated, punchy onion taste without adding texture of fresh onions.
- Kosher Salt (1/4 teaspoon): A large-grain salt that is less refined than table salt and contains no additives. It helps enhance the other flavors of the dressing.
- Cracked Black Pepper (1/4 teaspoon): Adds a round and deep flavor than ground pepper. Highly fragrant and earthy in taste with citrus and slight floral notes.
- Dried Dill (1 teaspoon): One of the traditional flavors of ranch dressing, this concentrated dried herb packs a bright, sweet, citrusy, earthy punch.
Substitutions, Variations, and Tips
- Substitute ½ teaspoon jarred minced garlic for the fresh clove if you’re short on time.
- Want a little heat? Add a small diced jalapeño or 1/8 teaspoon cayenne pepper.
- No buttermilk? Make your own by mixing 1 tablespoon lemon juice or vinegar into 1 cup milk—let it sit for 10 minutes.
- Swap green onions or leeks for the chives.
- Use 1 tablespoon chopped fresh dill instead of dried for a brighter flavor.
- Customize the texture! Blend until smooth or leave a bit of chunkiness for a rustic feel.
How to Make Cheesy Ranch Dressing
- In a food processor, combine all ingredients except the dill and blend until smooth.
- Stir in the dill.
- Serve immediately, or refrigerate for a few hours to let the flavors meld.
This dressing keeps well in the fridge for several days—perfect for meal prep! Once you try this protein-packed twist on ranch, you may never go back to the bottled stuff.
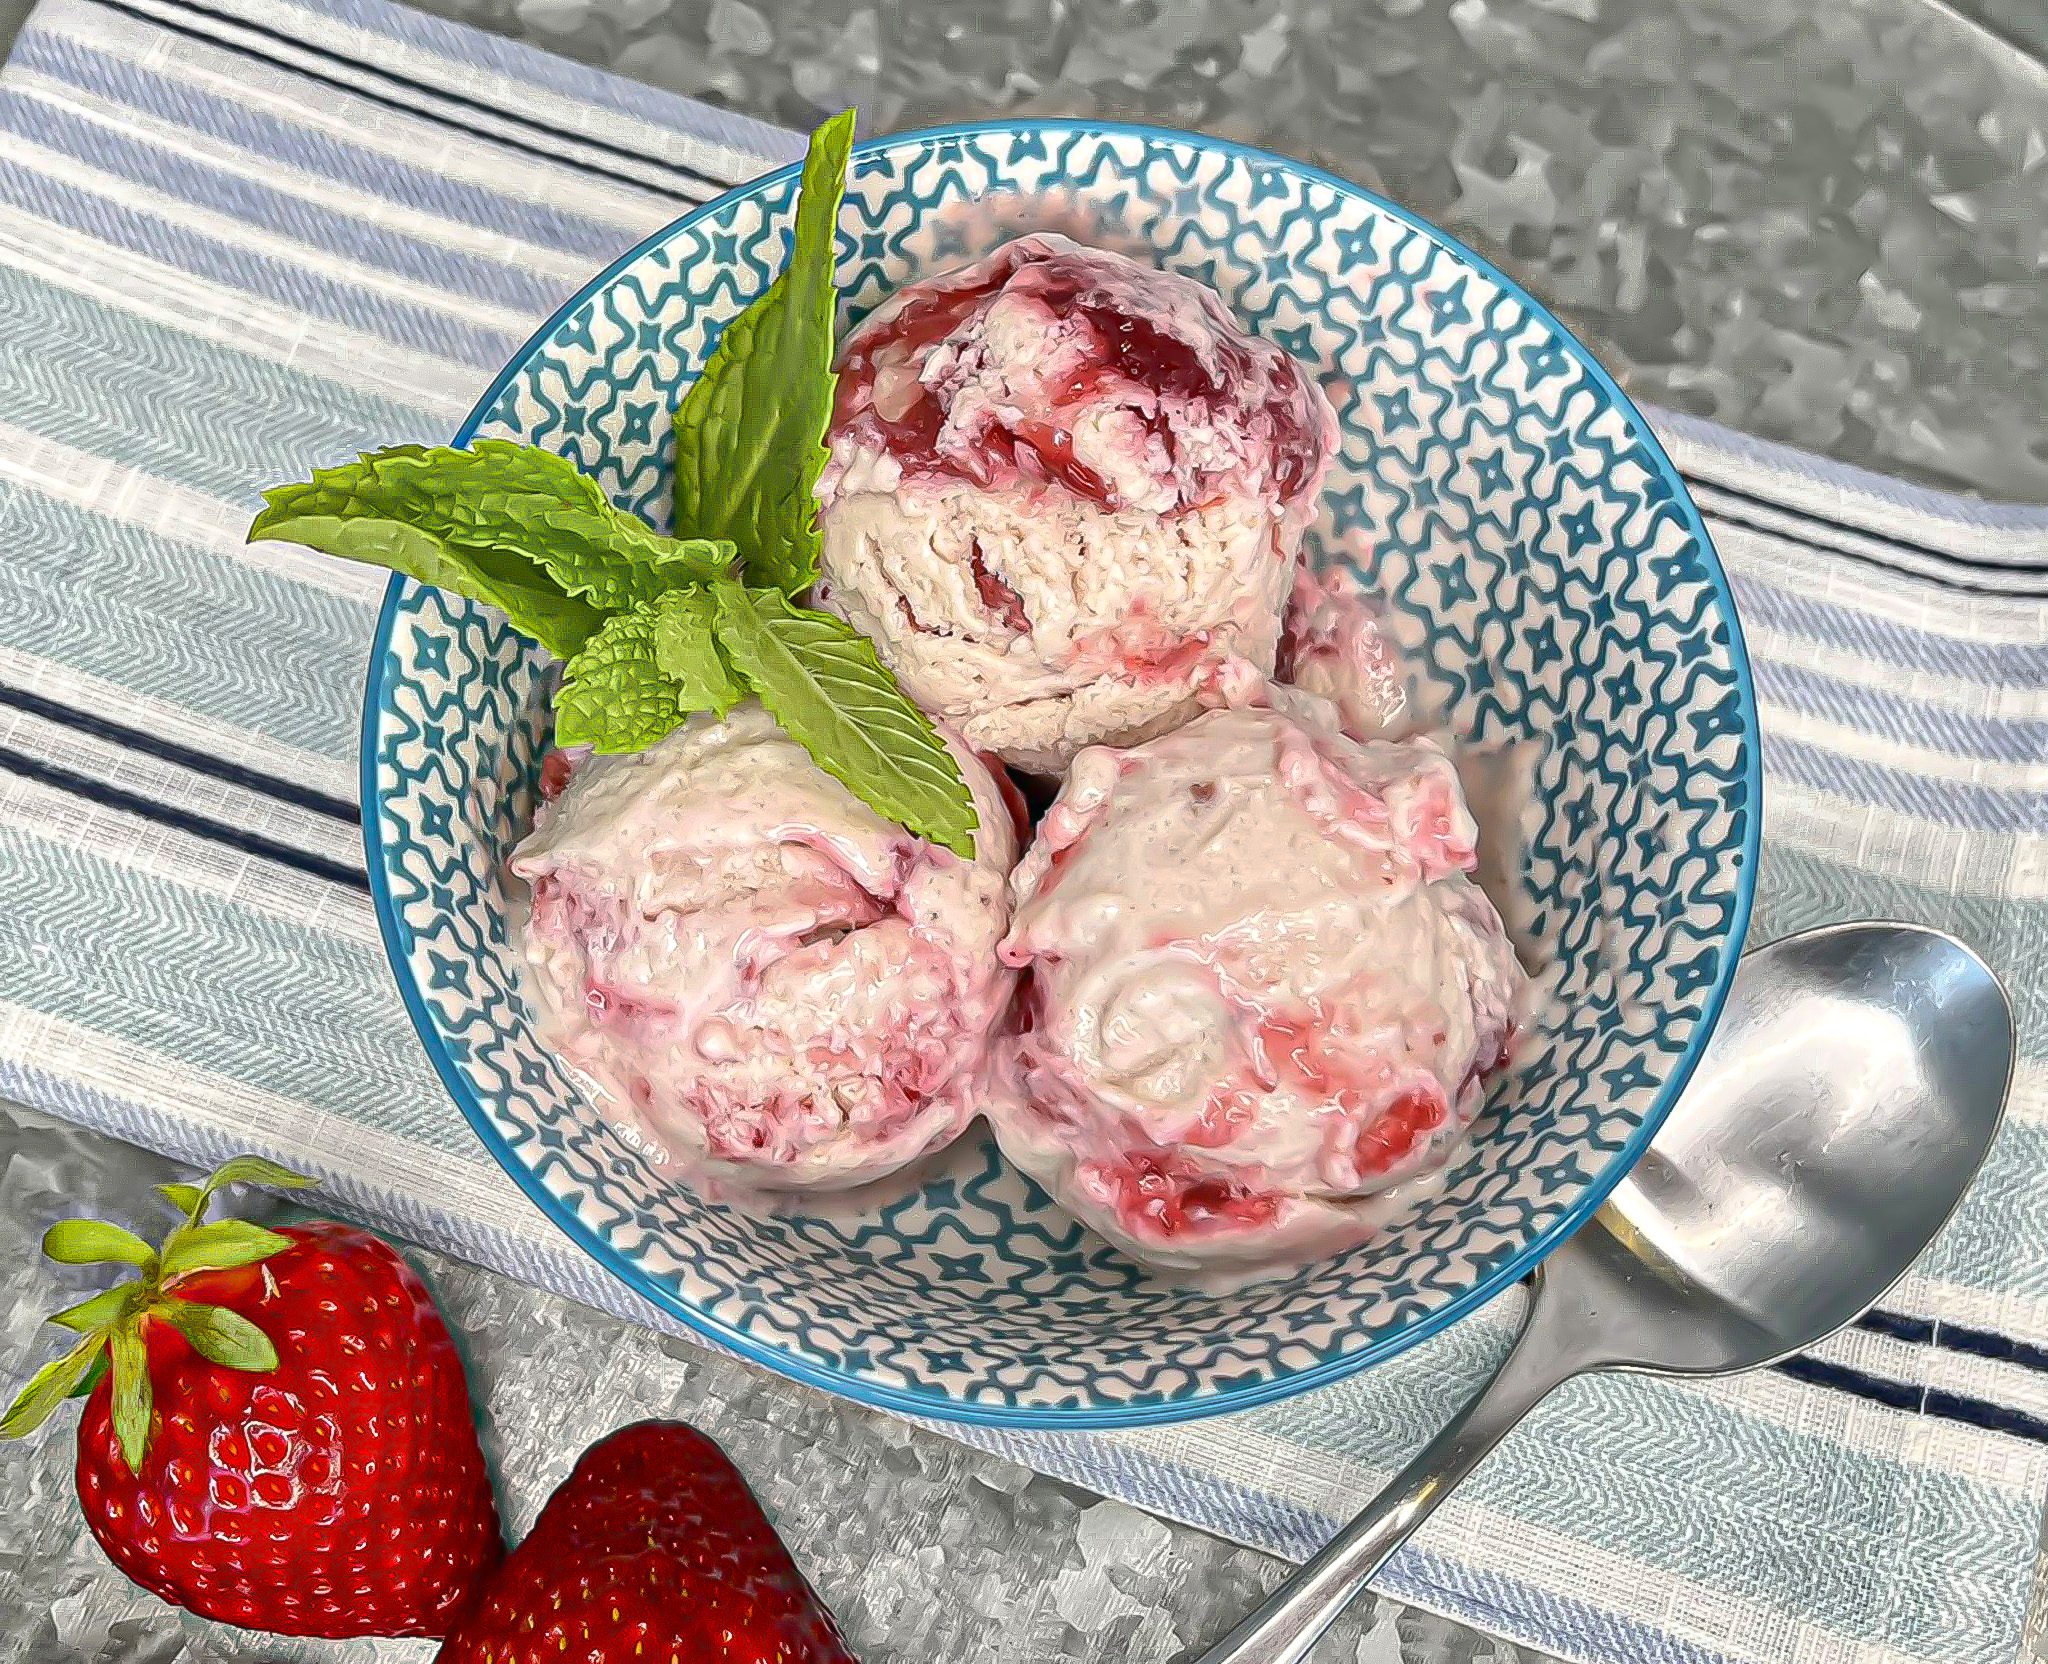
Easy Strawberry Ice Cream
Easy Strawberry Ice Cream
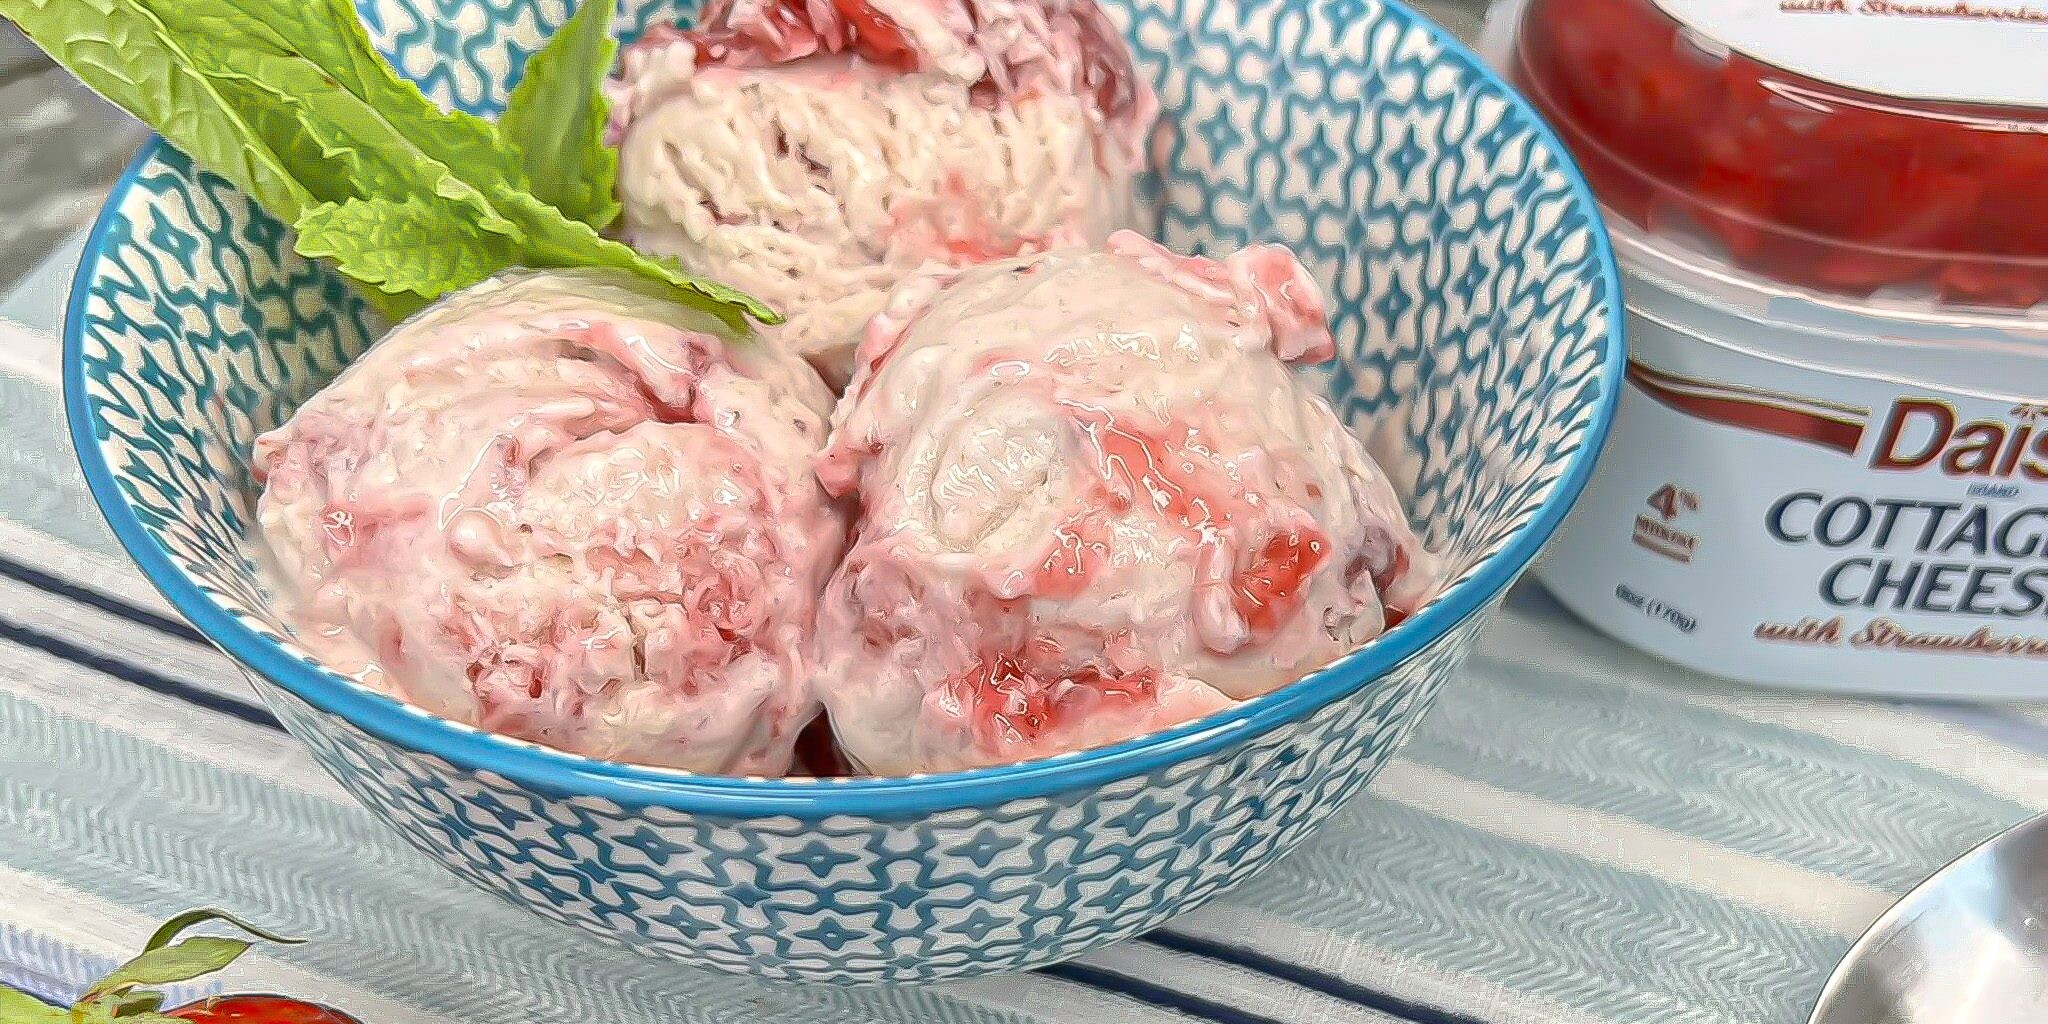
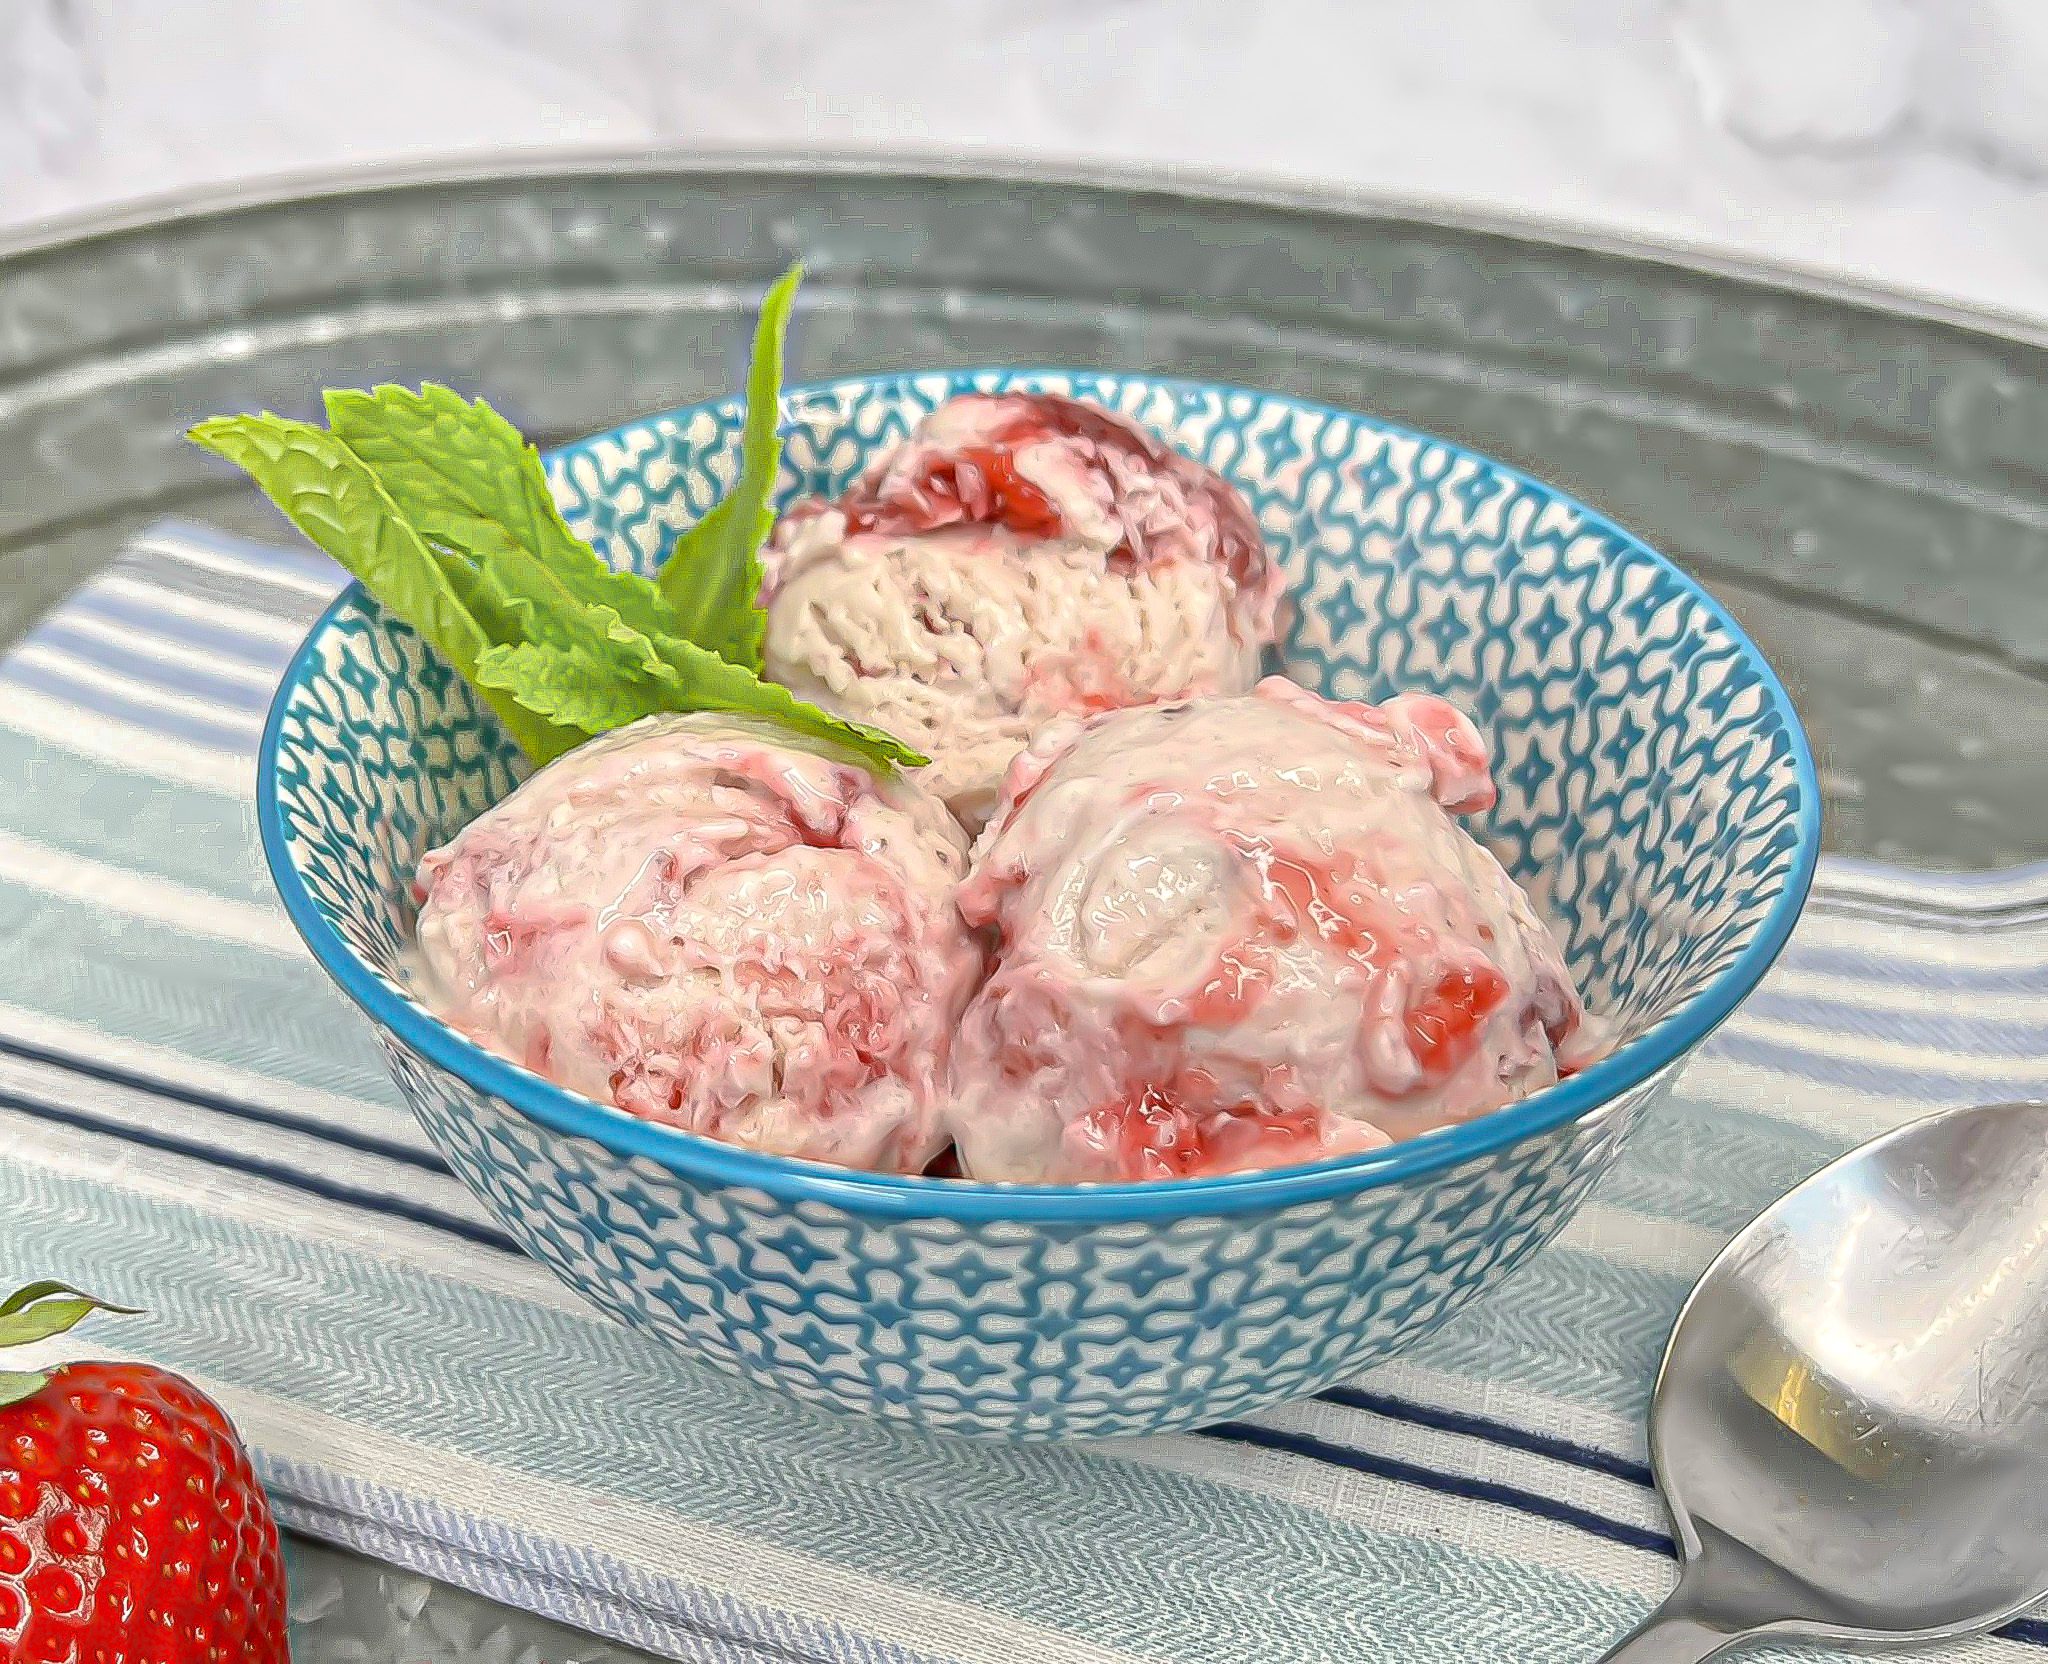
This Easy Strawberry Ice Cream is full of creamy deliciousness with decadent strawberry swirls. With only two ingredients, it has half the fat of traditional strawberry ice cream with more than double the protein. Now you can enjoy delicious ice cream without guilt. Our Easy Strawberry Ice Cream requires no special equipment (no ice cream machine needed) and only takes about 5-minute to prep.
Easy Strawberry Ice Cream Ingredients
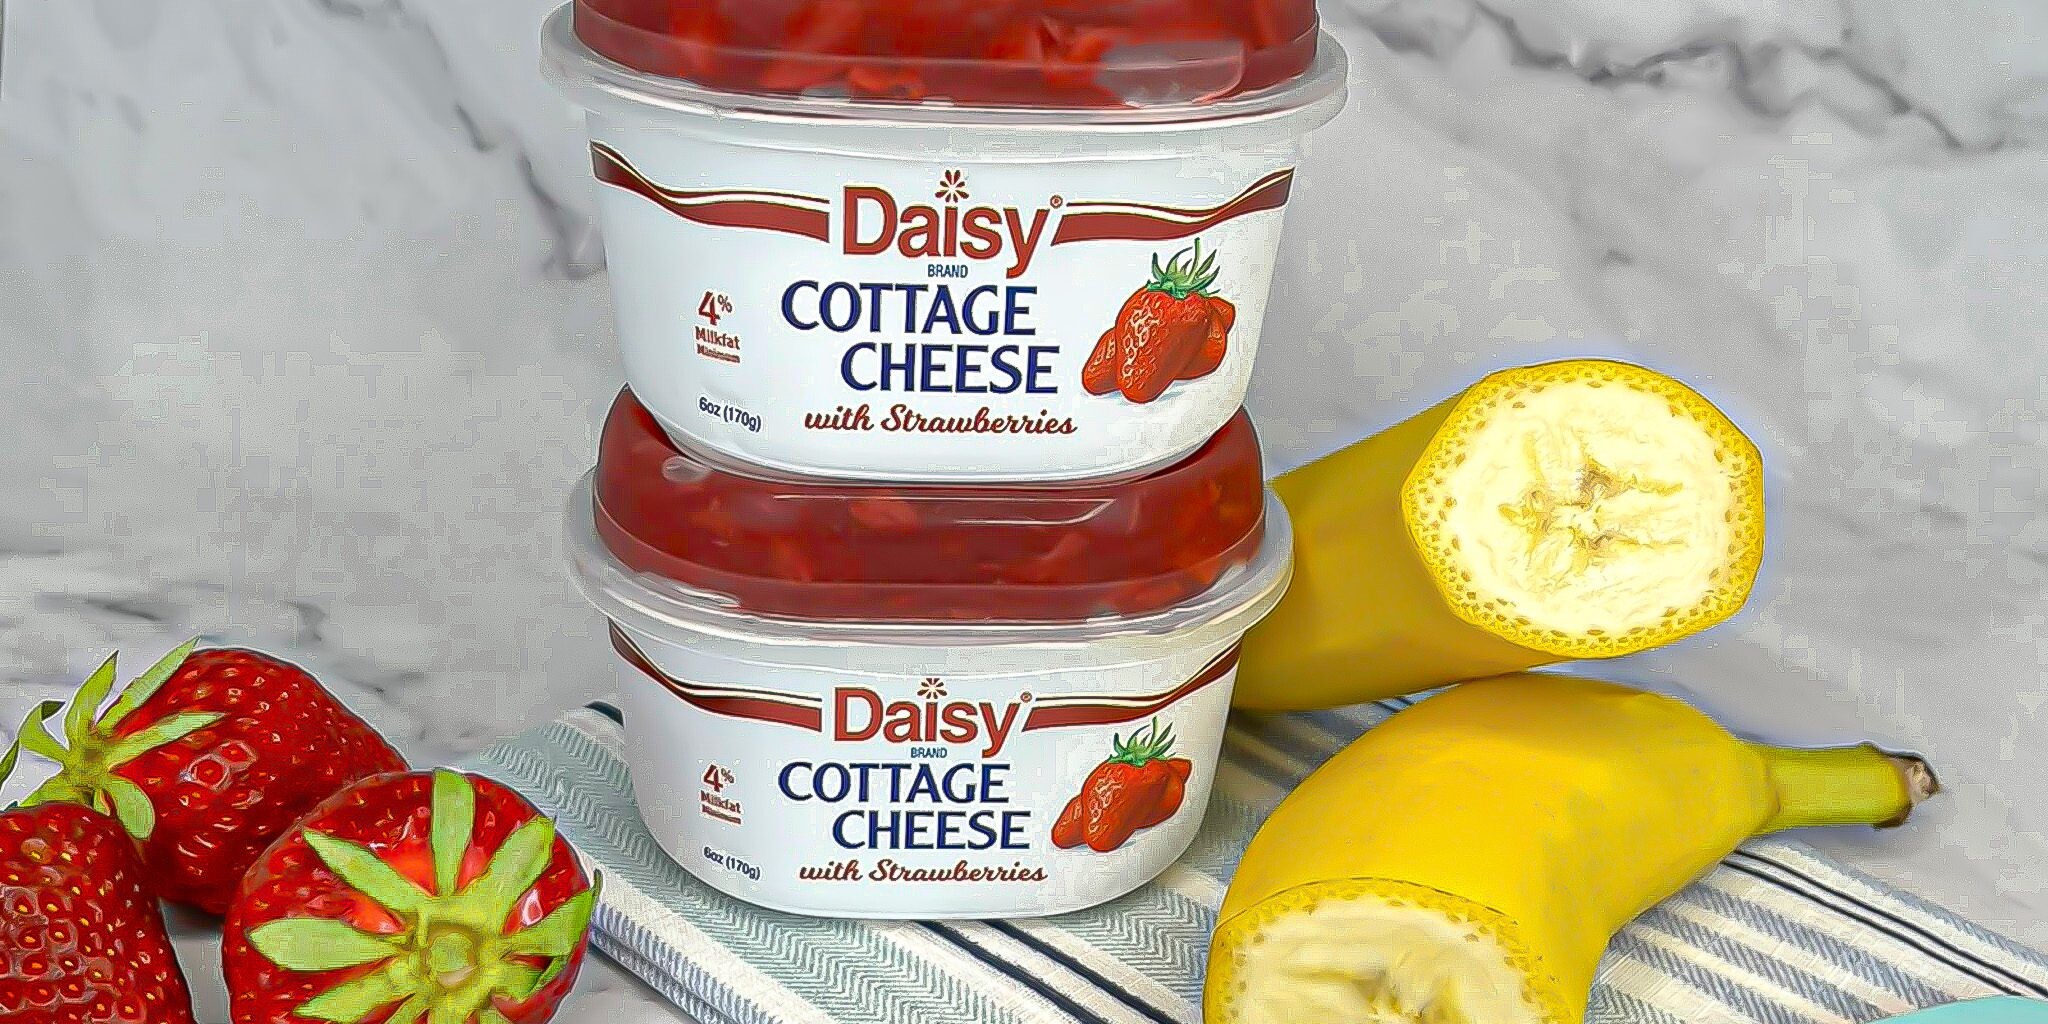
- Daisy Strawberry Cottage Cheese Singles (4 packages): The secret ingredient in this delicious ice cream. The cottage cheese portion creates the smooth, silky, creamy texture that you love. The strawberry compote adds the decadent strawberry swirl deliciousness.
- Frozen Bananas (2): Adds sweetness and helps with the custard-like consistency of ice cream.
Substitutions, Variations, and Tips
- The best bananas for ice cream are ones that are just on the point of turning brown. They are naturally sweeter when they are just over-ripe.
- To get the perfect texture, bananas need to be frozen hard. It’s ideal to freeze them overnight to make sure they are entirely frozen. Don’t take them out of the freezer until you’re ready to use them. The 2 best methods for freezing bananas for ice cream:
- Throw whole unpeeled bananas into the freezer (the peels will turn black as they freeze). Bananas will last about 3 months in the freezer. When ready to use, peel with a knife and chop the banana into pieces.
- Peel ripe bananas, slice or half, and arrange in a single layer on a baking sheet. Freeze for one hour. Transfer pieces to a zip-top bag, remove air, and store frozen bananas up to 3 months.
- Any fruit flavor of Daisy Cottage Cheese singles will work well. Try them all for other delicious flavors such as peach, pineapple, and blueberry.
- Don’t over-blend the ice cream. You want to blend until just thick and creamy. Over-blending will make the ice cream runny.
- 2 hours in the freezer will yield the ideal texture for the ice cream. Freezing it longer will make the ice cream too hard to scoop.
- Ice cream makers may also be used following the manufacturer’s instructions.
- Try topping with chopped pistachios, mini marshmallows, or your other favorite ice cream toppings.
- You can also enjoy for breakfast!
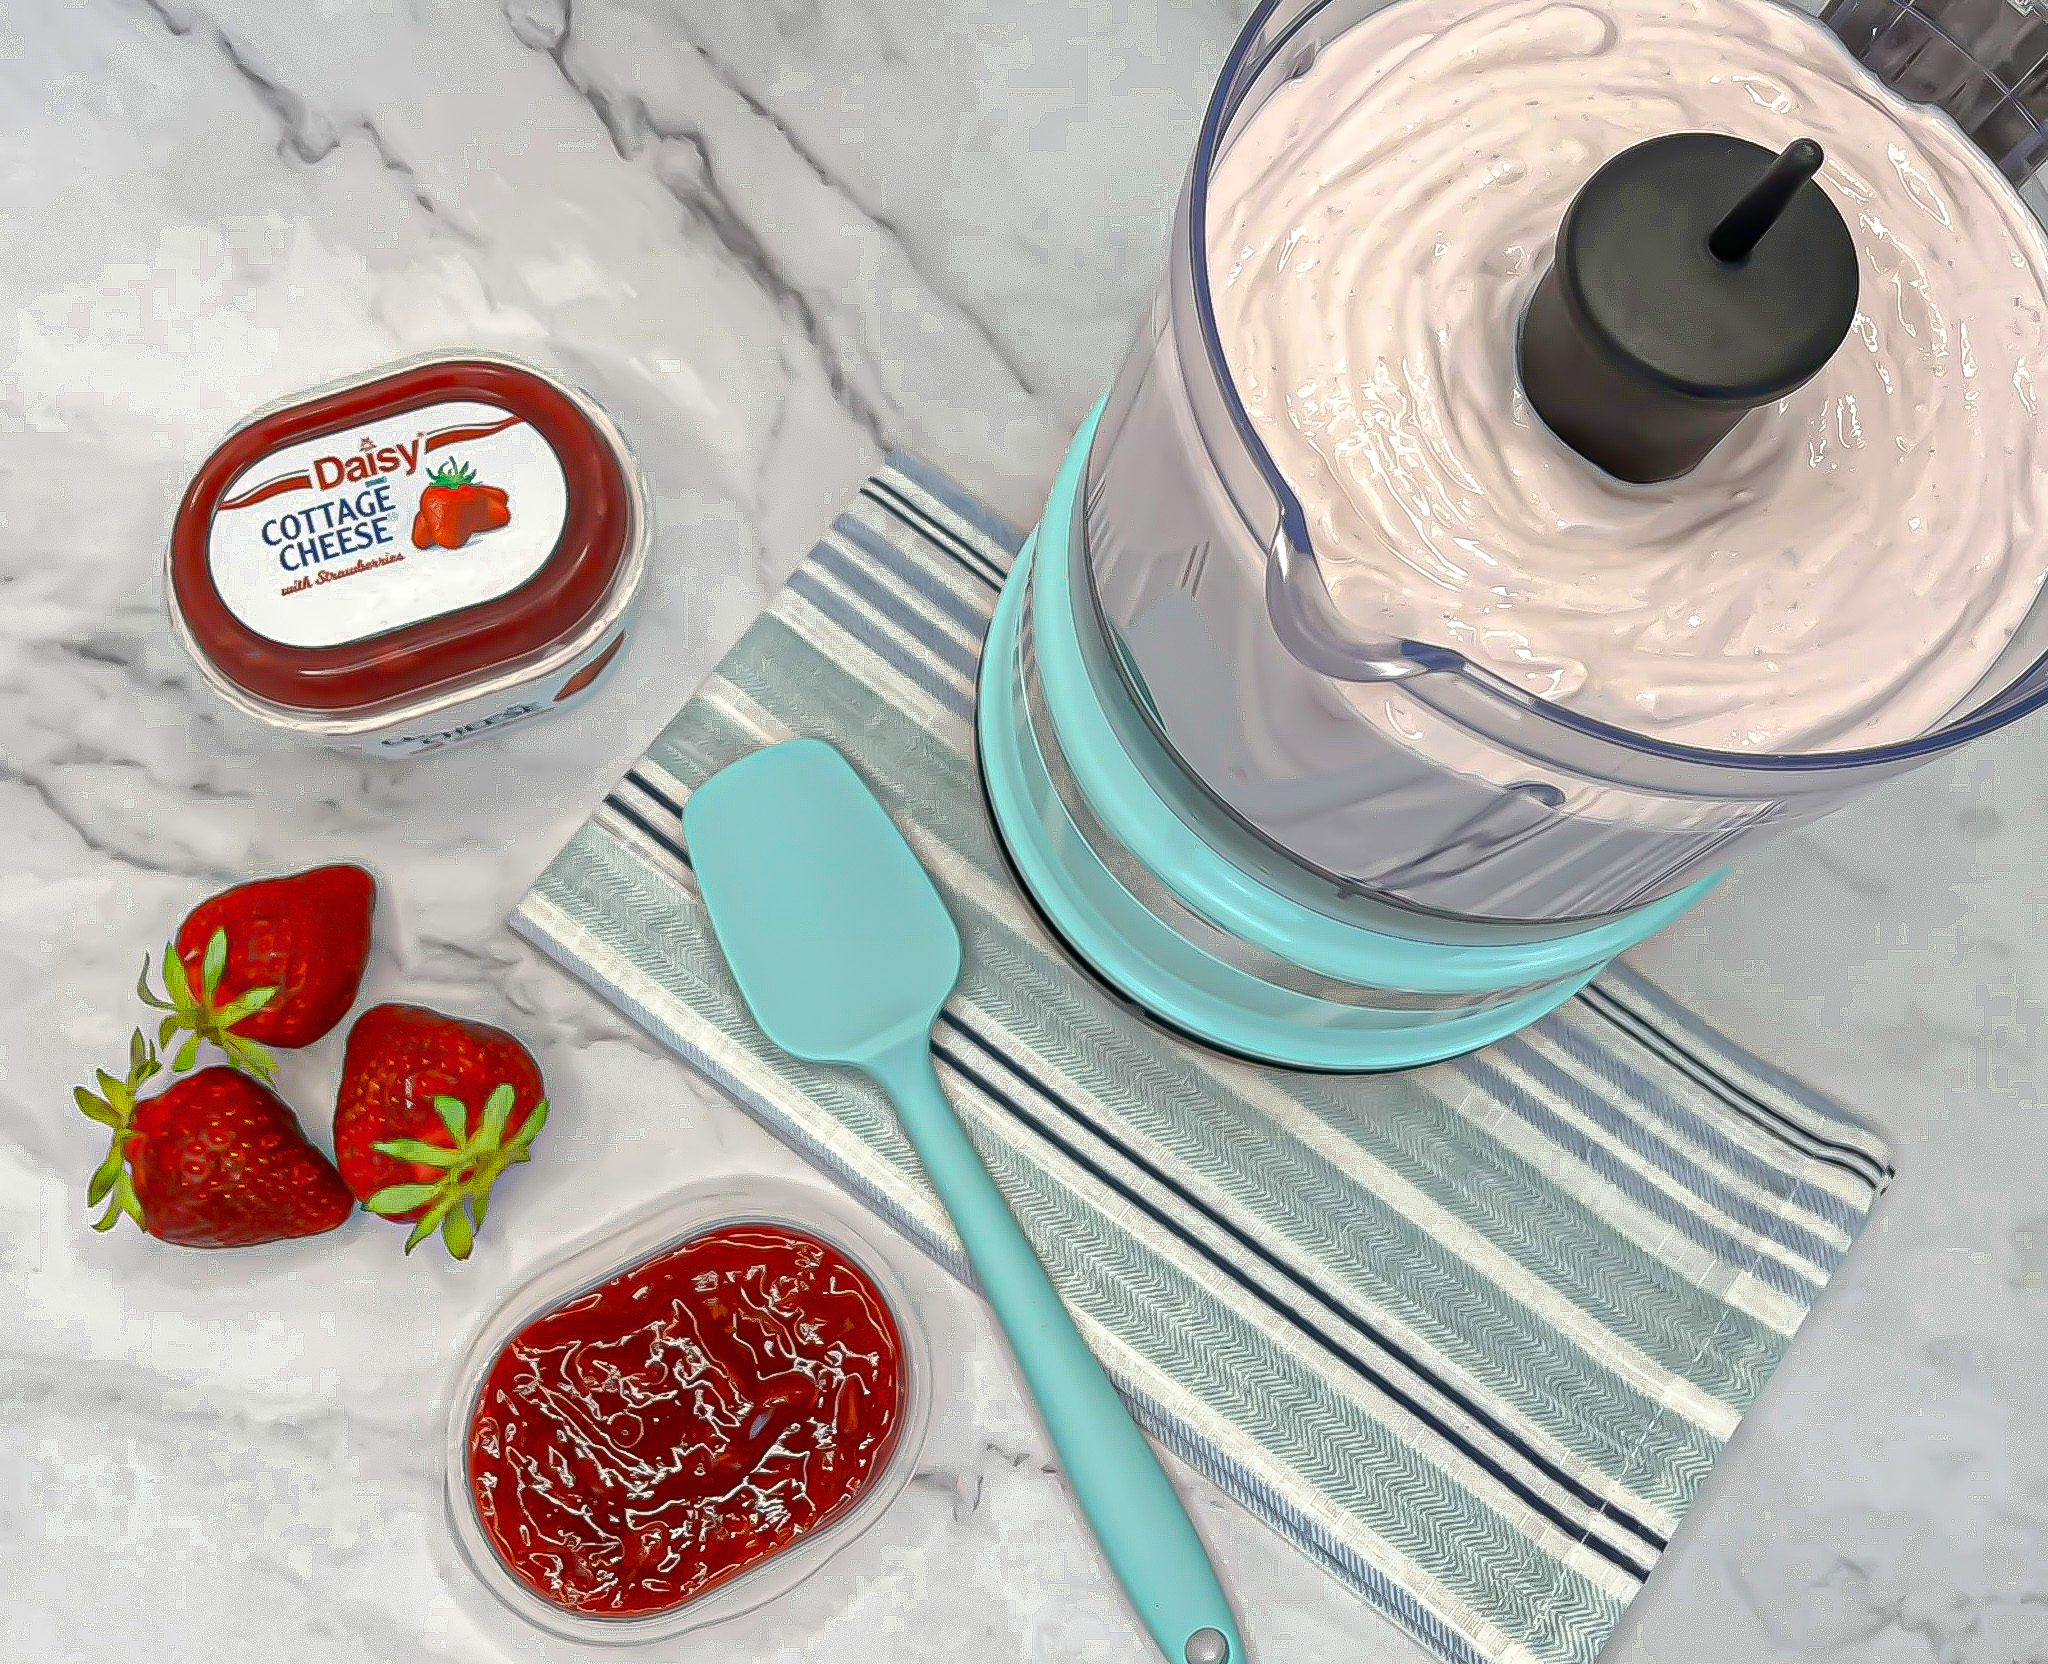
How to Make Easy Strawberry Ice Cream
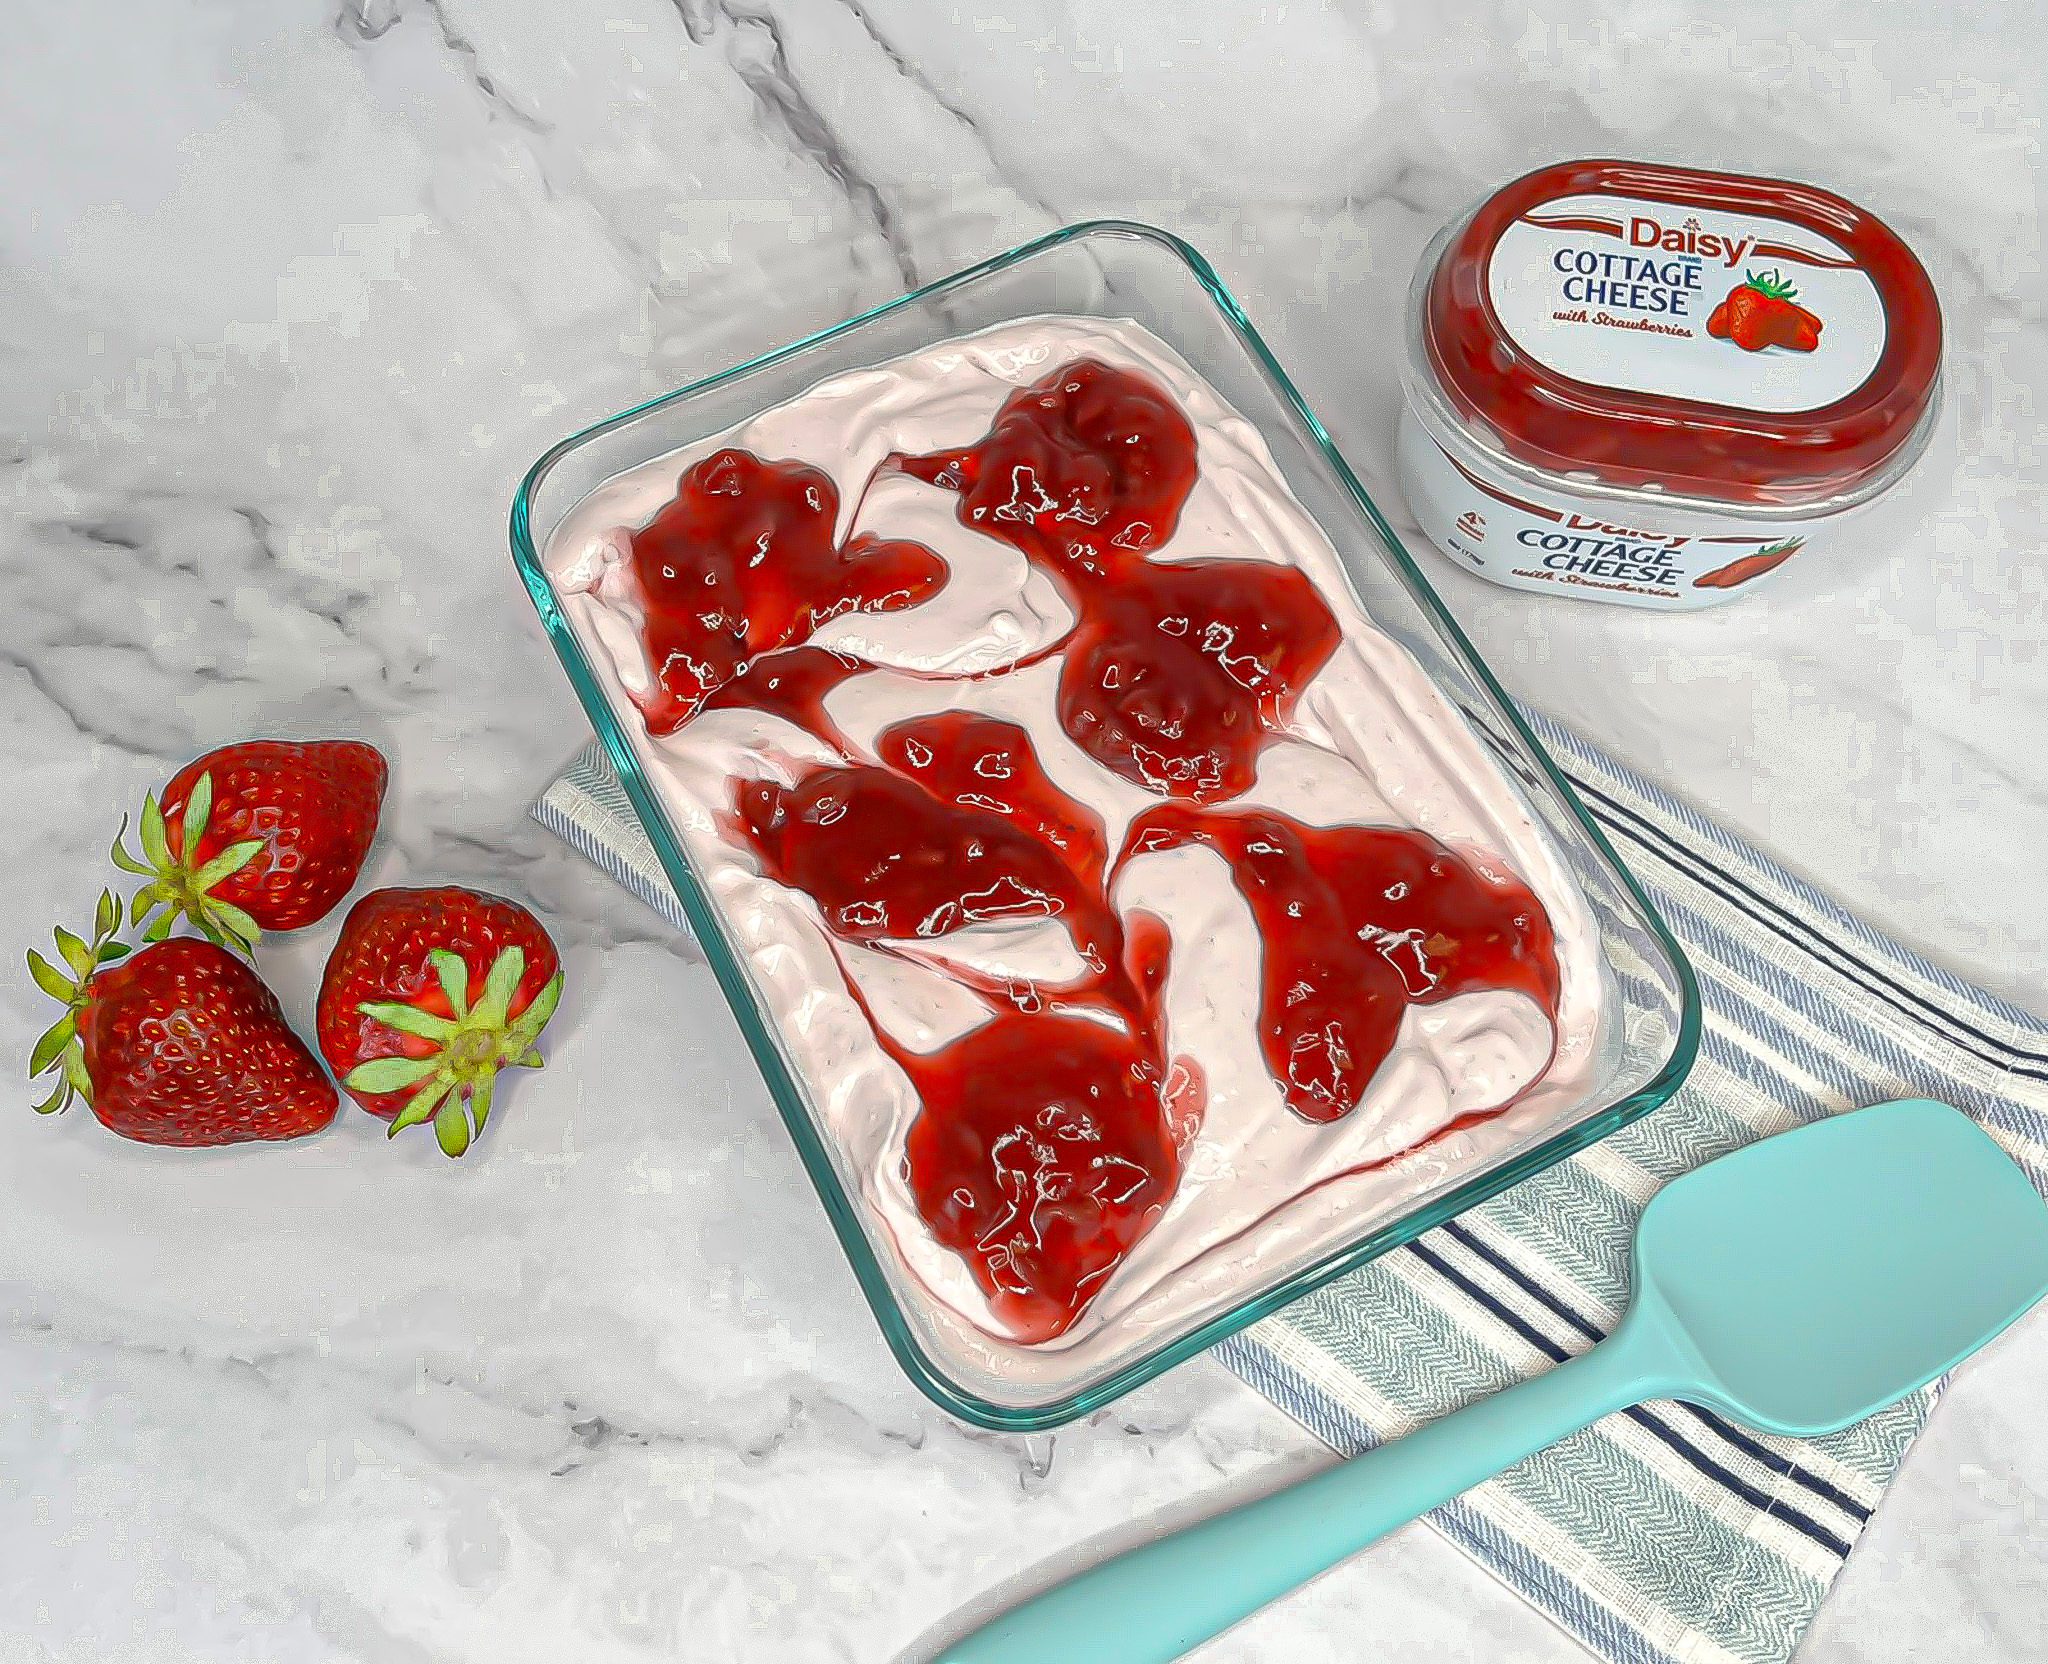
- Reserve fruit compote from 2 packages for swirling.
- Combine cottage cheese, strawberry compote from 2 packages, and frozen bananas in blender. Blend until completely smooth.
- Transfer into pan lined with parchment paper. Swirl reserved strawberry compote on top. Freeze for 1-2 hours or until frozen (enjoy within 2 hours of freezing).
- Let ice cream sit at room temperature for 5-10 minutes before scooping and serving.

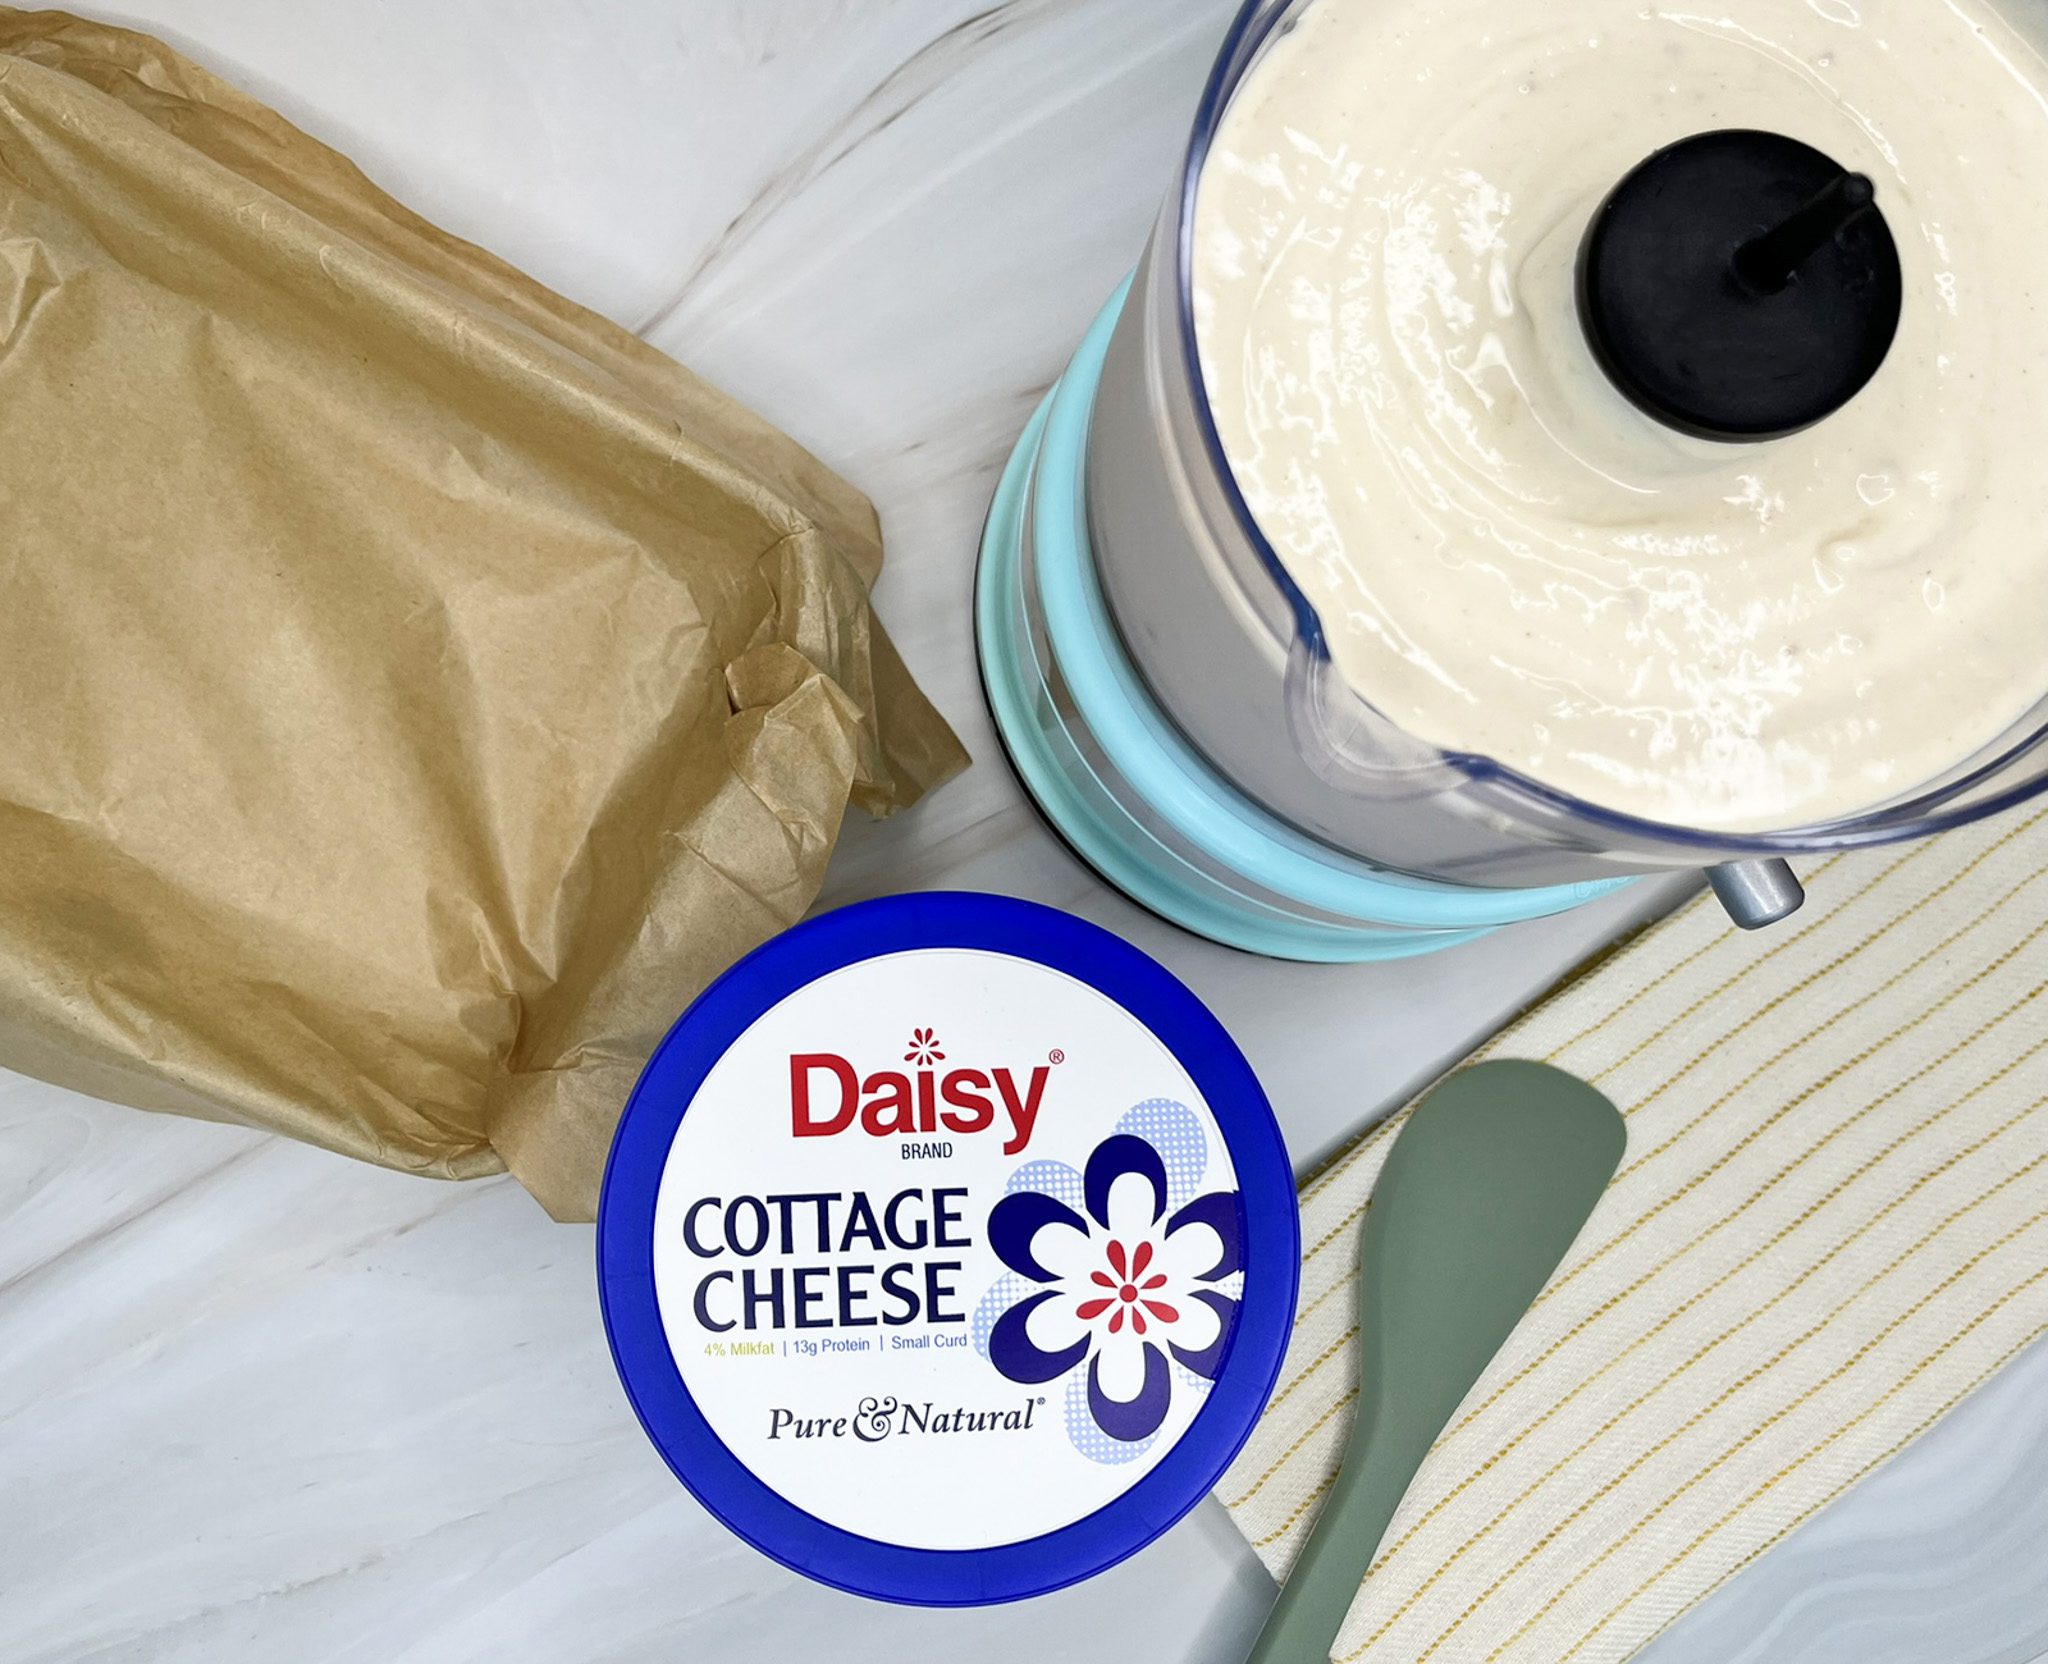
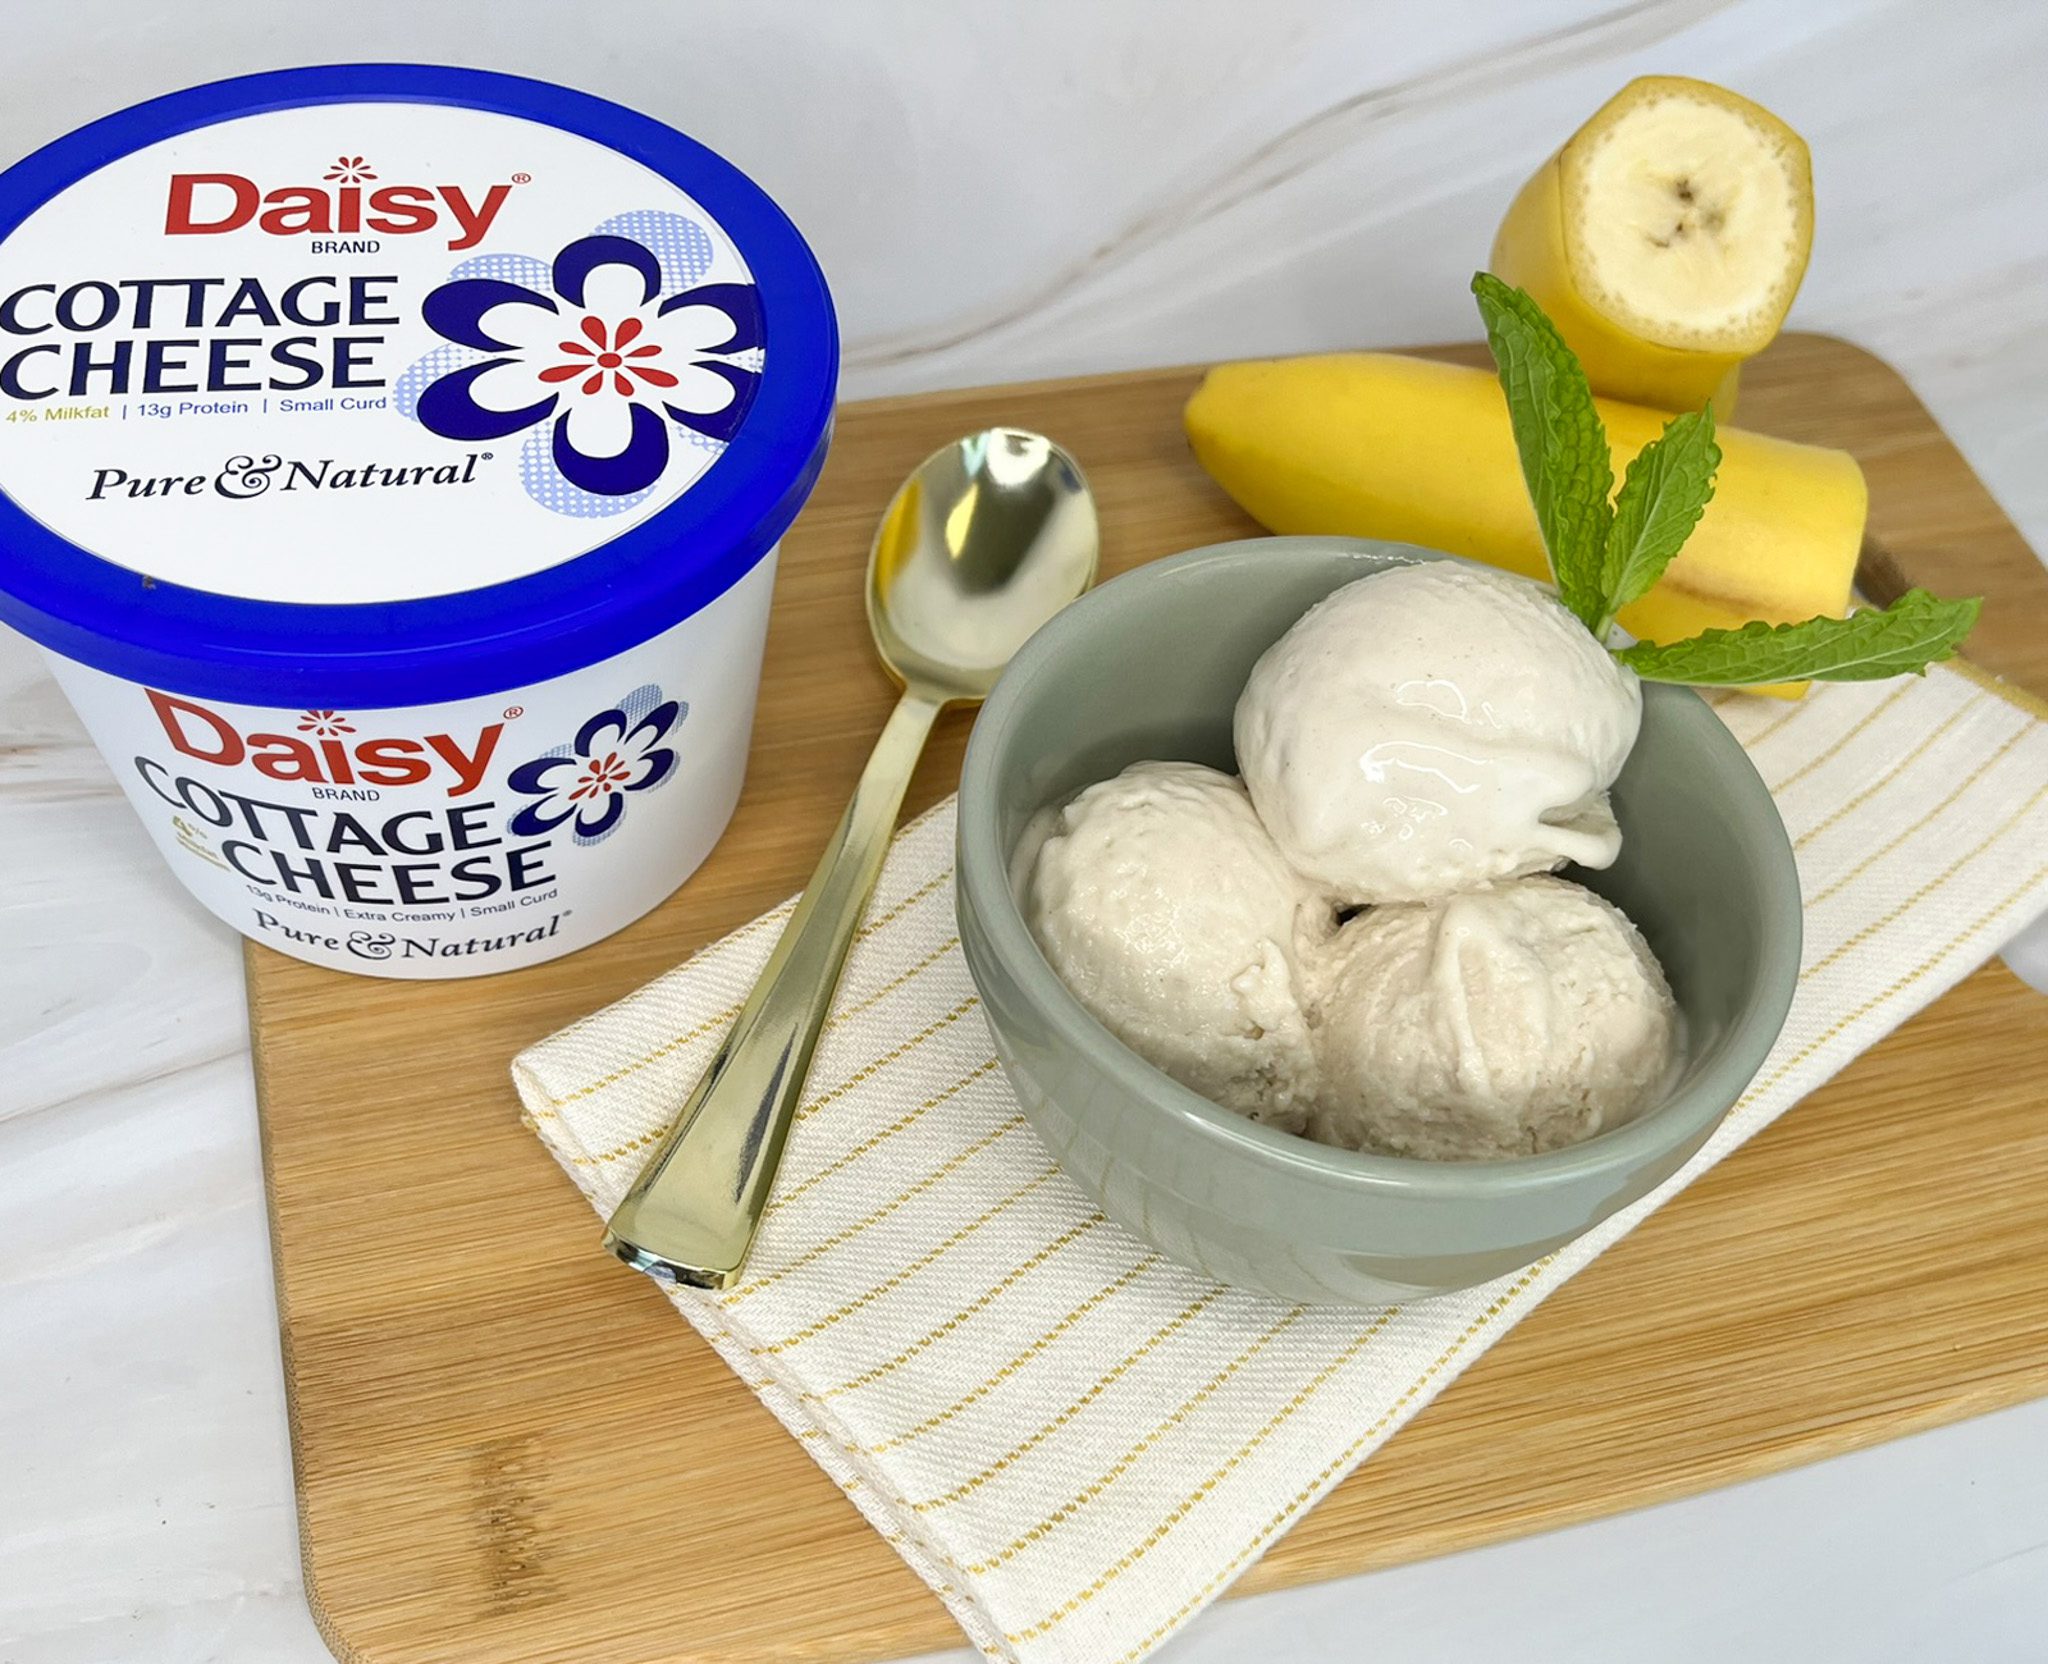
Peanut Butter Banana Ice Cream
Peanut Butter Banana Ice Cream
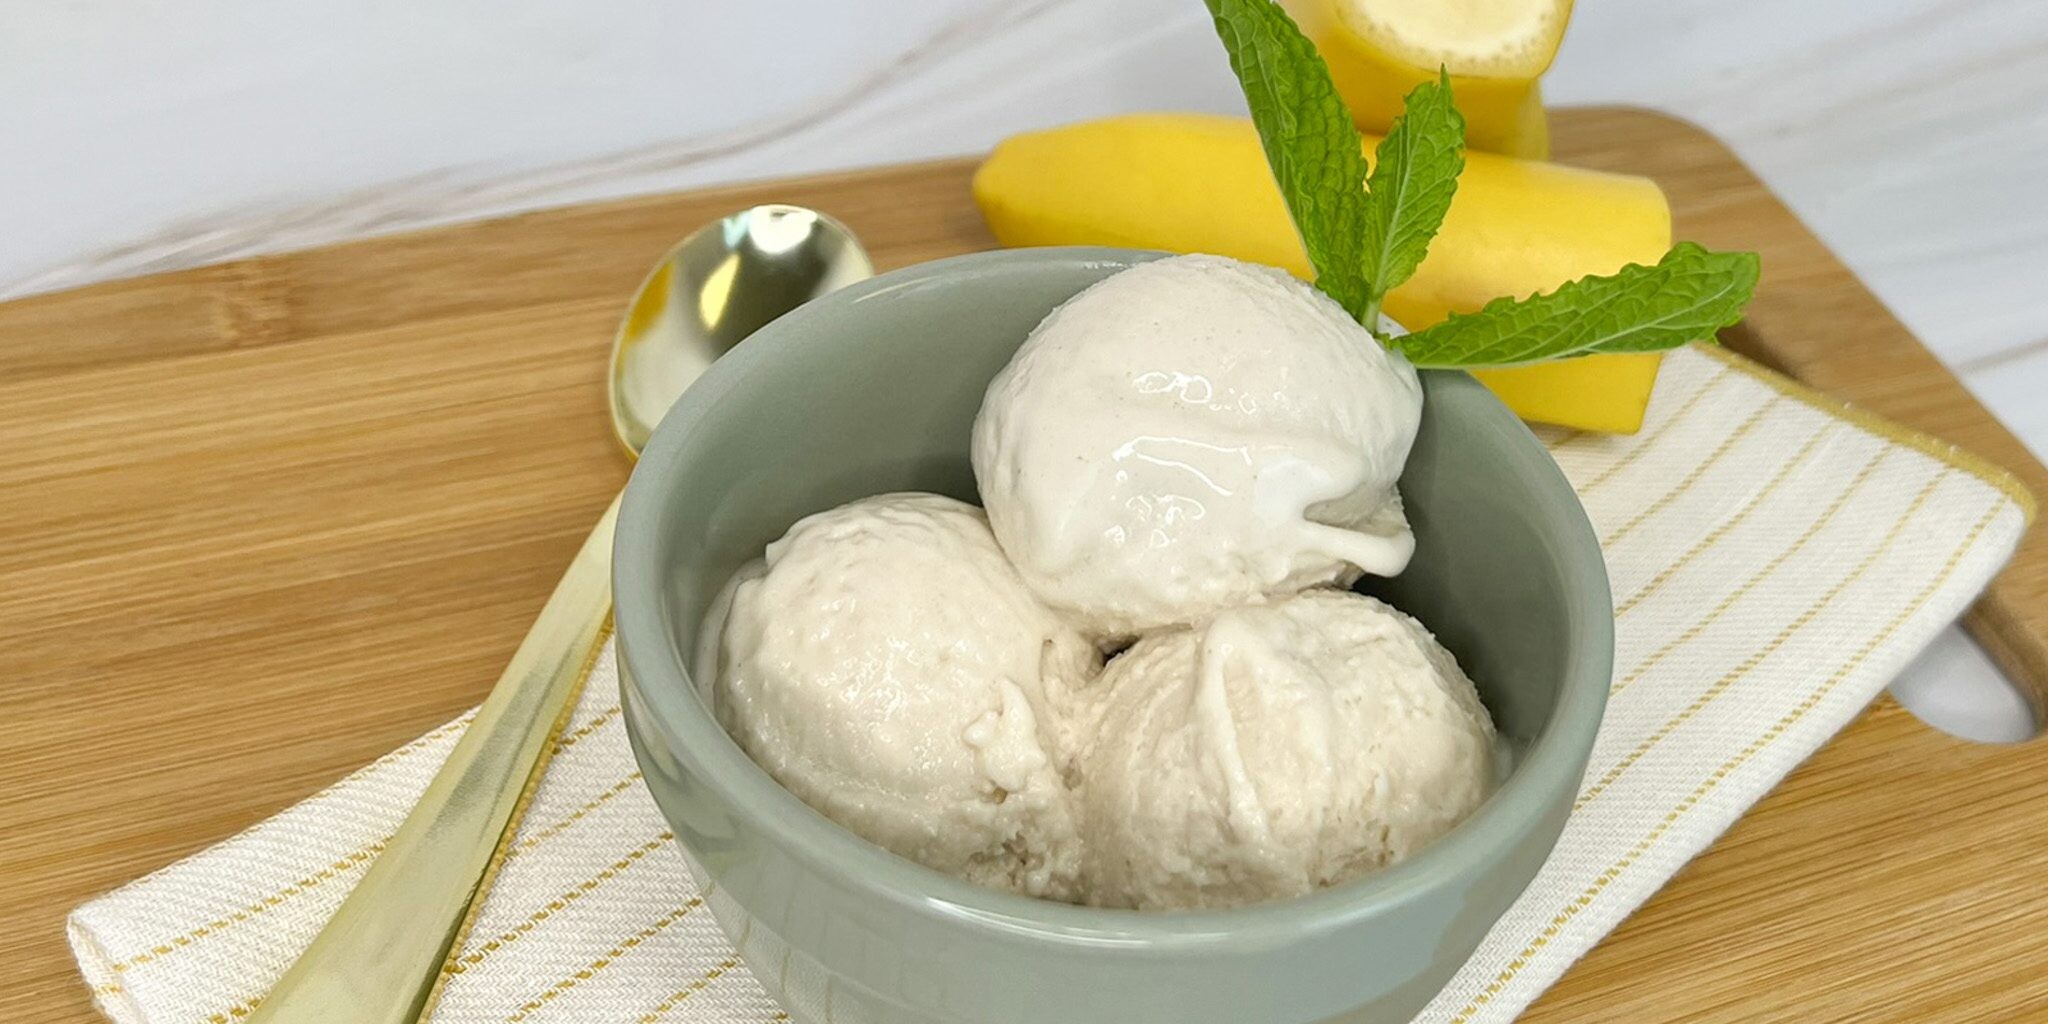
Easy, rich, and creamy, you won’t believe this Peanut Butter Banana Ice Cream has half the fat of traditional peanut butter ice cream. Made with only four ingredients that come together in minutes, it’s perfect for those summer parties or for an easy treat anytime. This ice cream requires no special equipment (no ice cream machine needed) and can be made in about 5 minutes.
Made with only a few simple ingredients, this dessert packs creamy deliciousness in every bite. With 1/3 less calories and half the fat of traditional peanut butter ice cream, you can enjoy delicious ice cream without the guilt.
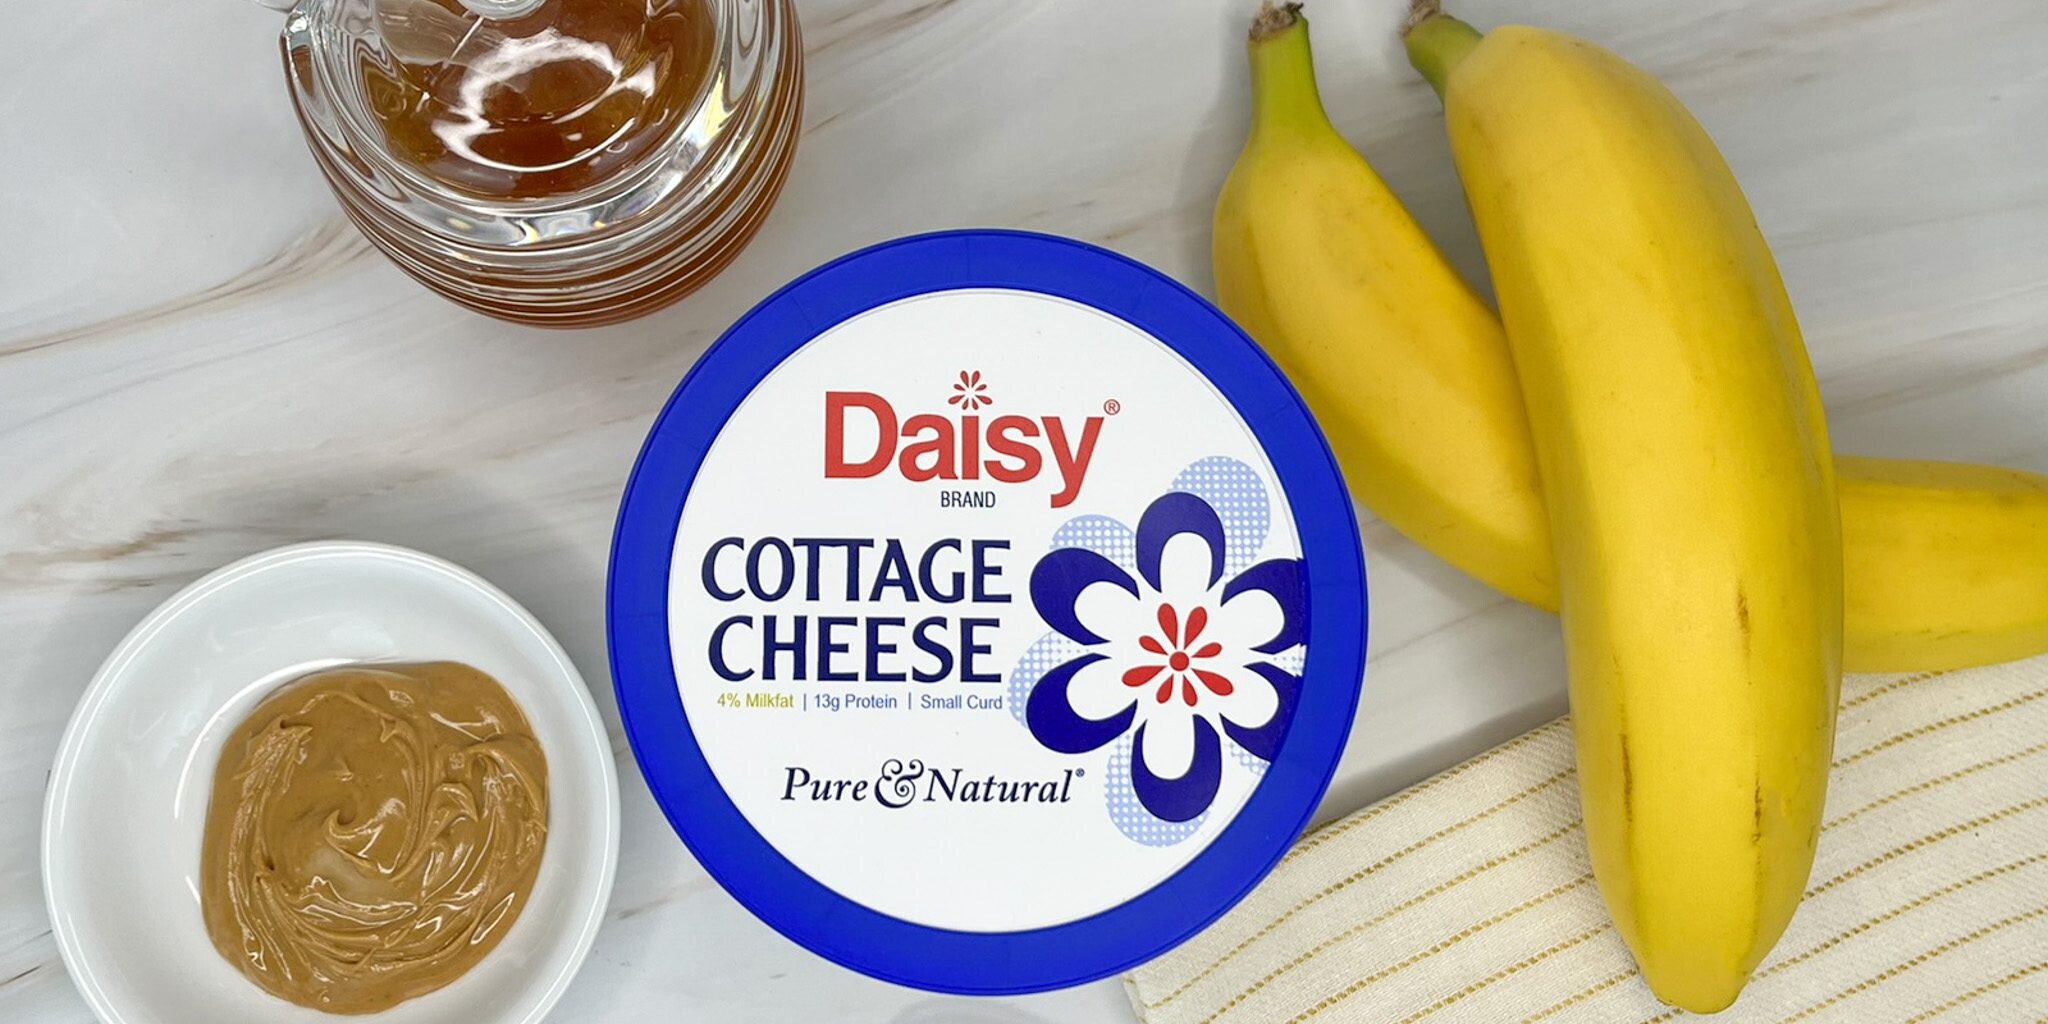
Peanut Butter Banana Ice Cream Ingredients
- Daisy Cottage Cheese (2 cups): The secret ingredient in this delicious ice cream. It lightens the ice cream and adds a smooth, silky, creamy texture that you love.
- Frozen Bananas (2): Adds sweetness and helps with the custard-like consistency of ice cream.
- Creamy Peanut Butter (2 tablespoons): Adds flavor to the ice cream.
- Honey (2 tablespoons): Adds additional sweetness to the ice cream.
Substitutions, Variations, and Tips
- The best bananas for ice cream are ones that are just on the point of turning brown. They are naturally sweeter when they are just over-ripe.
- To get the perfect texture, bananas need to be frozen hard. It’s ideal to freeze them overnight to make sure they are entirely frozen. Don’t take them out of the freezer until you’re ready to use them. The 2 best methods for freezing bananas for ice cream:
- Throw whole unpeeled bananas into the freezer (the peels will turn black as they freeze). Bananas will last about 3 months in the freezer. When ready to use, peel with a knife and chop the banana into pieces.
- Peel ripe bananas, slice or half, and arrange in a single layer on a baking sheet. Freeze for one hour. Transfer pieces to a zip-top bag, remove air, and store up to 3 months in the freezer.
- Other nut butters or chocolate hazelnut spread may be used in place of peanut butter.
- Agave or maple syrup may be used in place of honey.
- Don’t over-blend the ice cream. You want to blend until just thick and creamy. Over-blending will make the ice cream runny.
- 2 hours in the freezer will yield the ideal texture for the ice cream. Freezing it longer will make the ice cream too hard to scoop.
- Ice cream makers may also be used following the manufacturer’s instructions.
- Try topping with chopped peanuts, chocolate chips, mini marshmallows, or your favorite ice cream toppings.
- You can also enjoy this delicious ice cream for breakfast!
How to Make Peanut Butter Banana Ice Cream
- Combine all ingredients in food processor and blend until completely smooth.
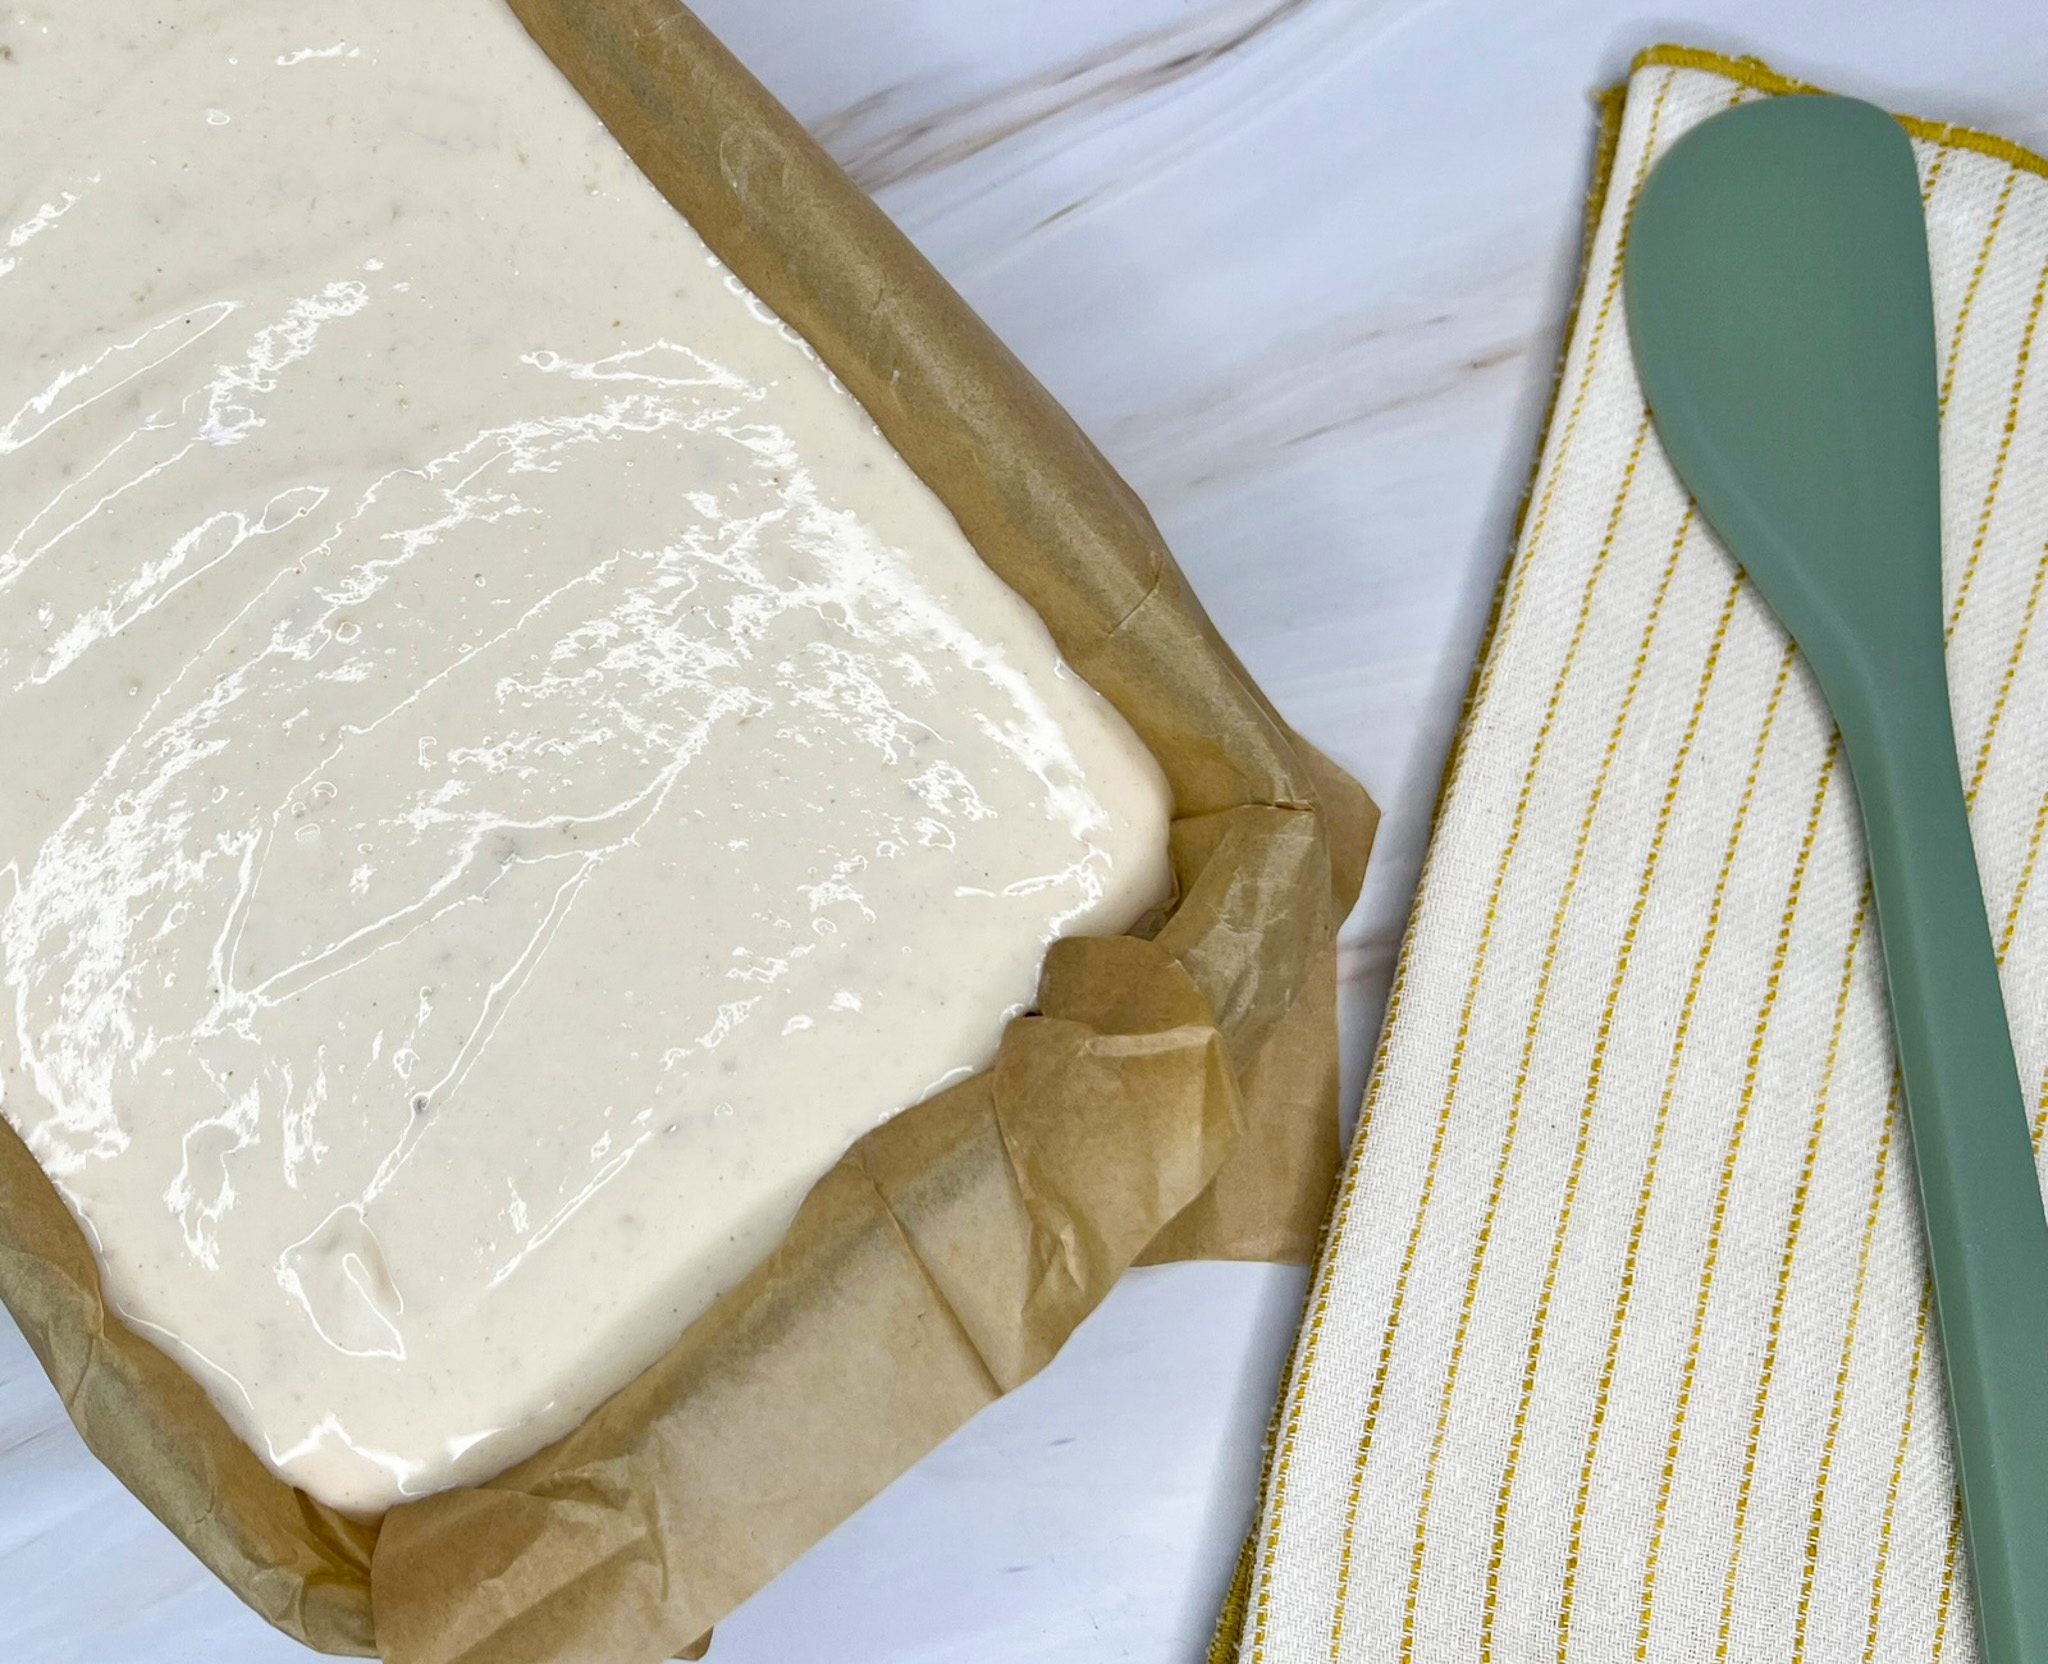
- Transfer into pan lined with parchment paper. Freeze for 1-2 hours or until frozen (enjoy within 2 hours of freezing).
- Let ice cream sit at room temperature for 5 -10 minutes before scooping and serving. Garnish as desired.

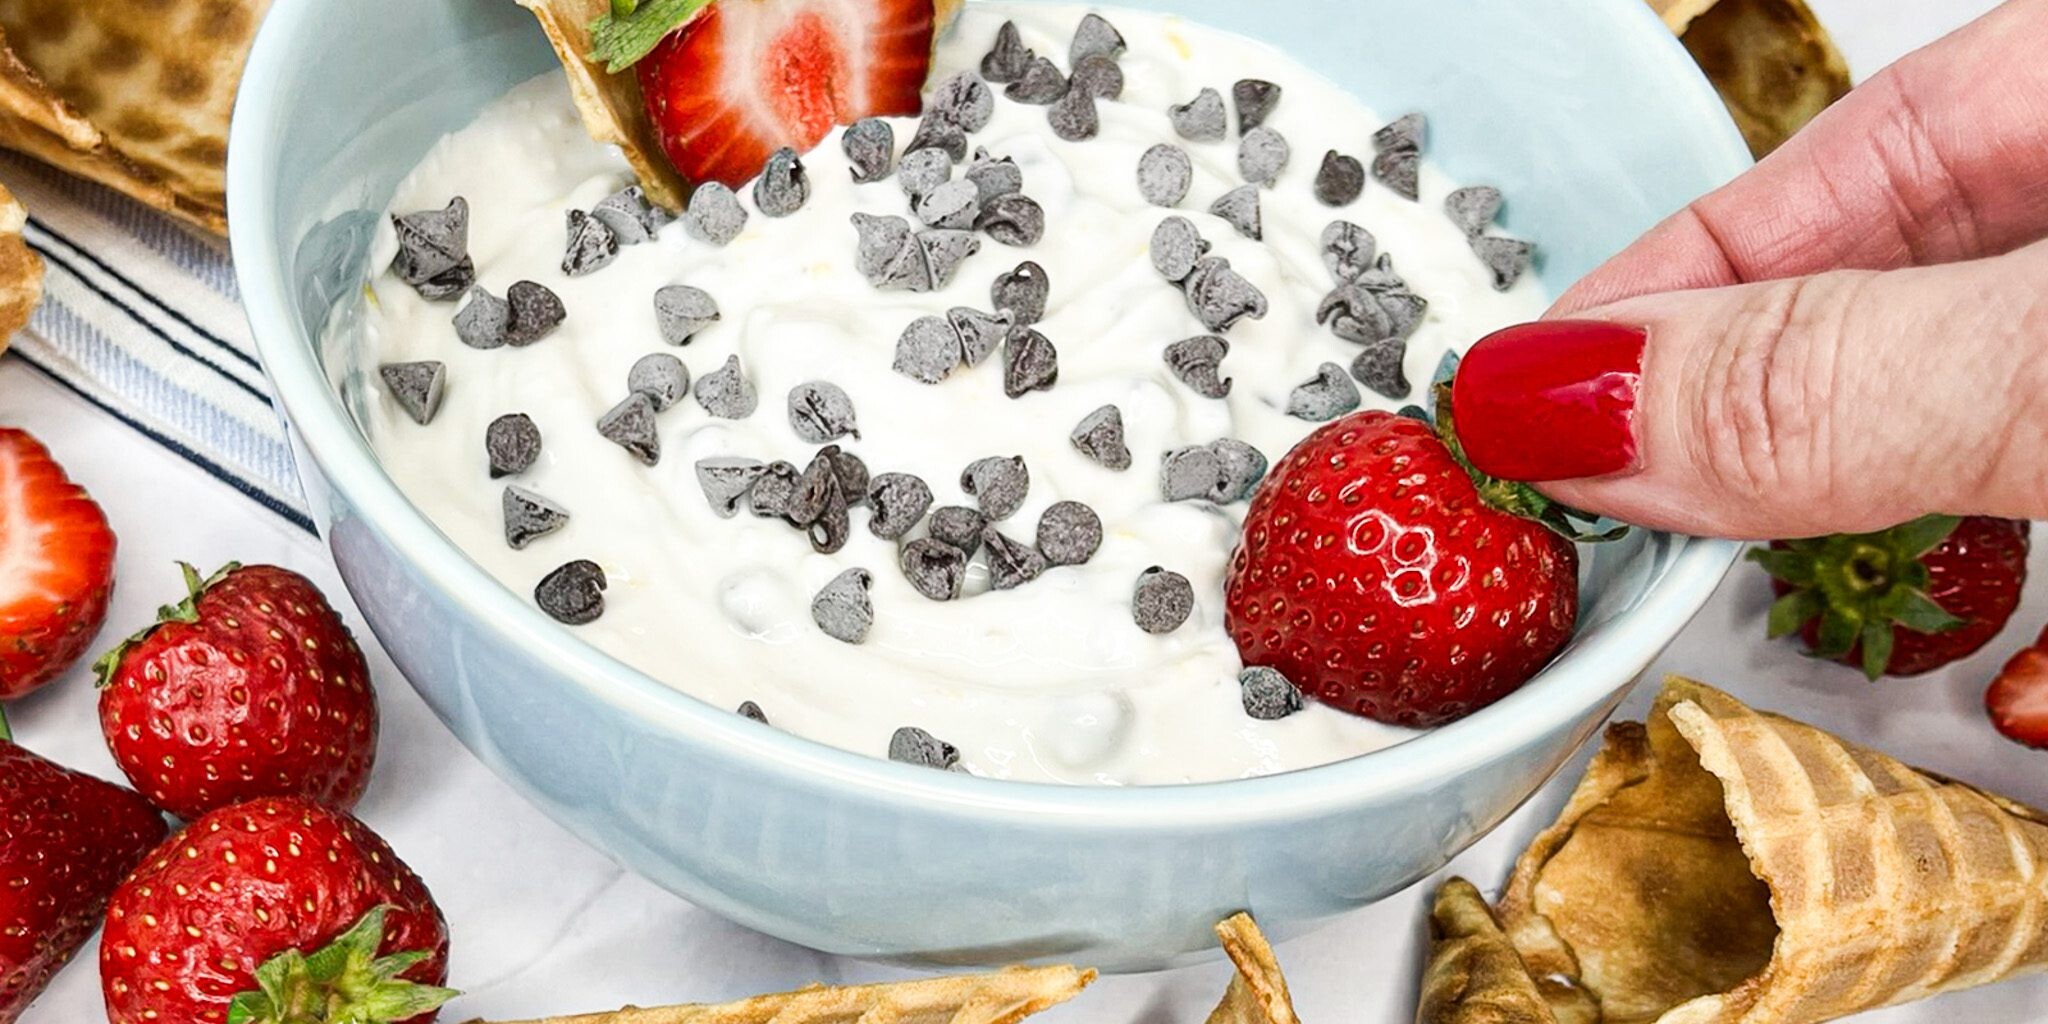
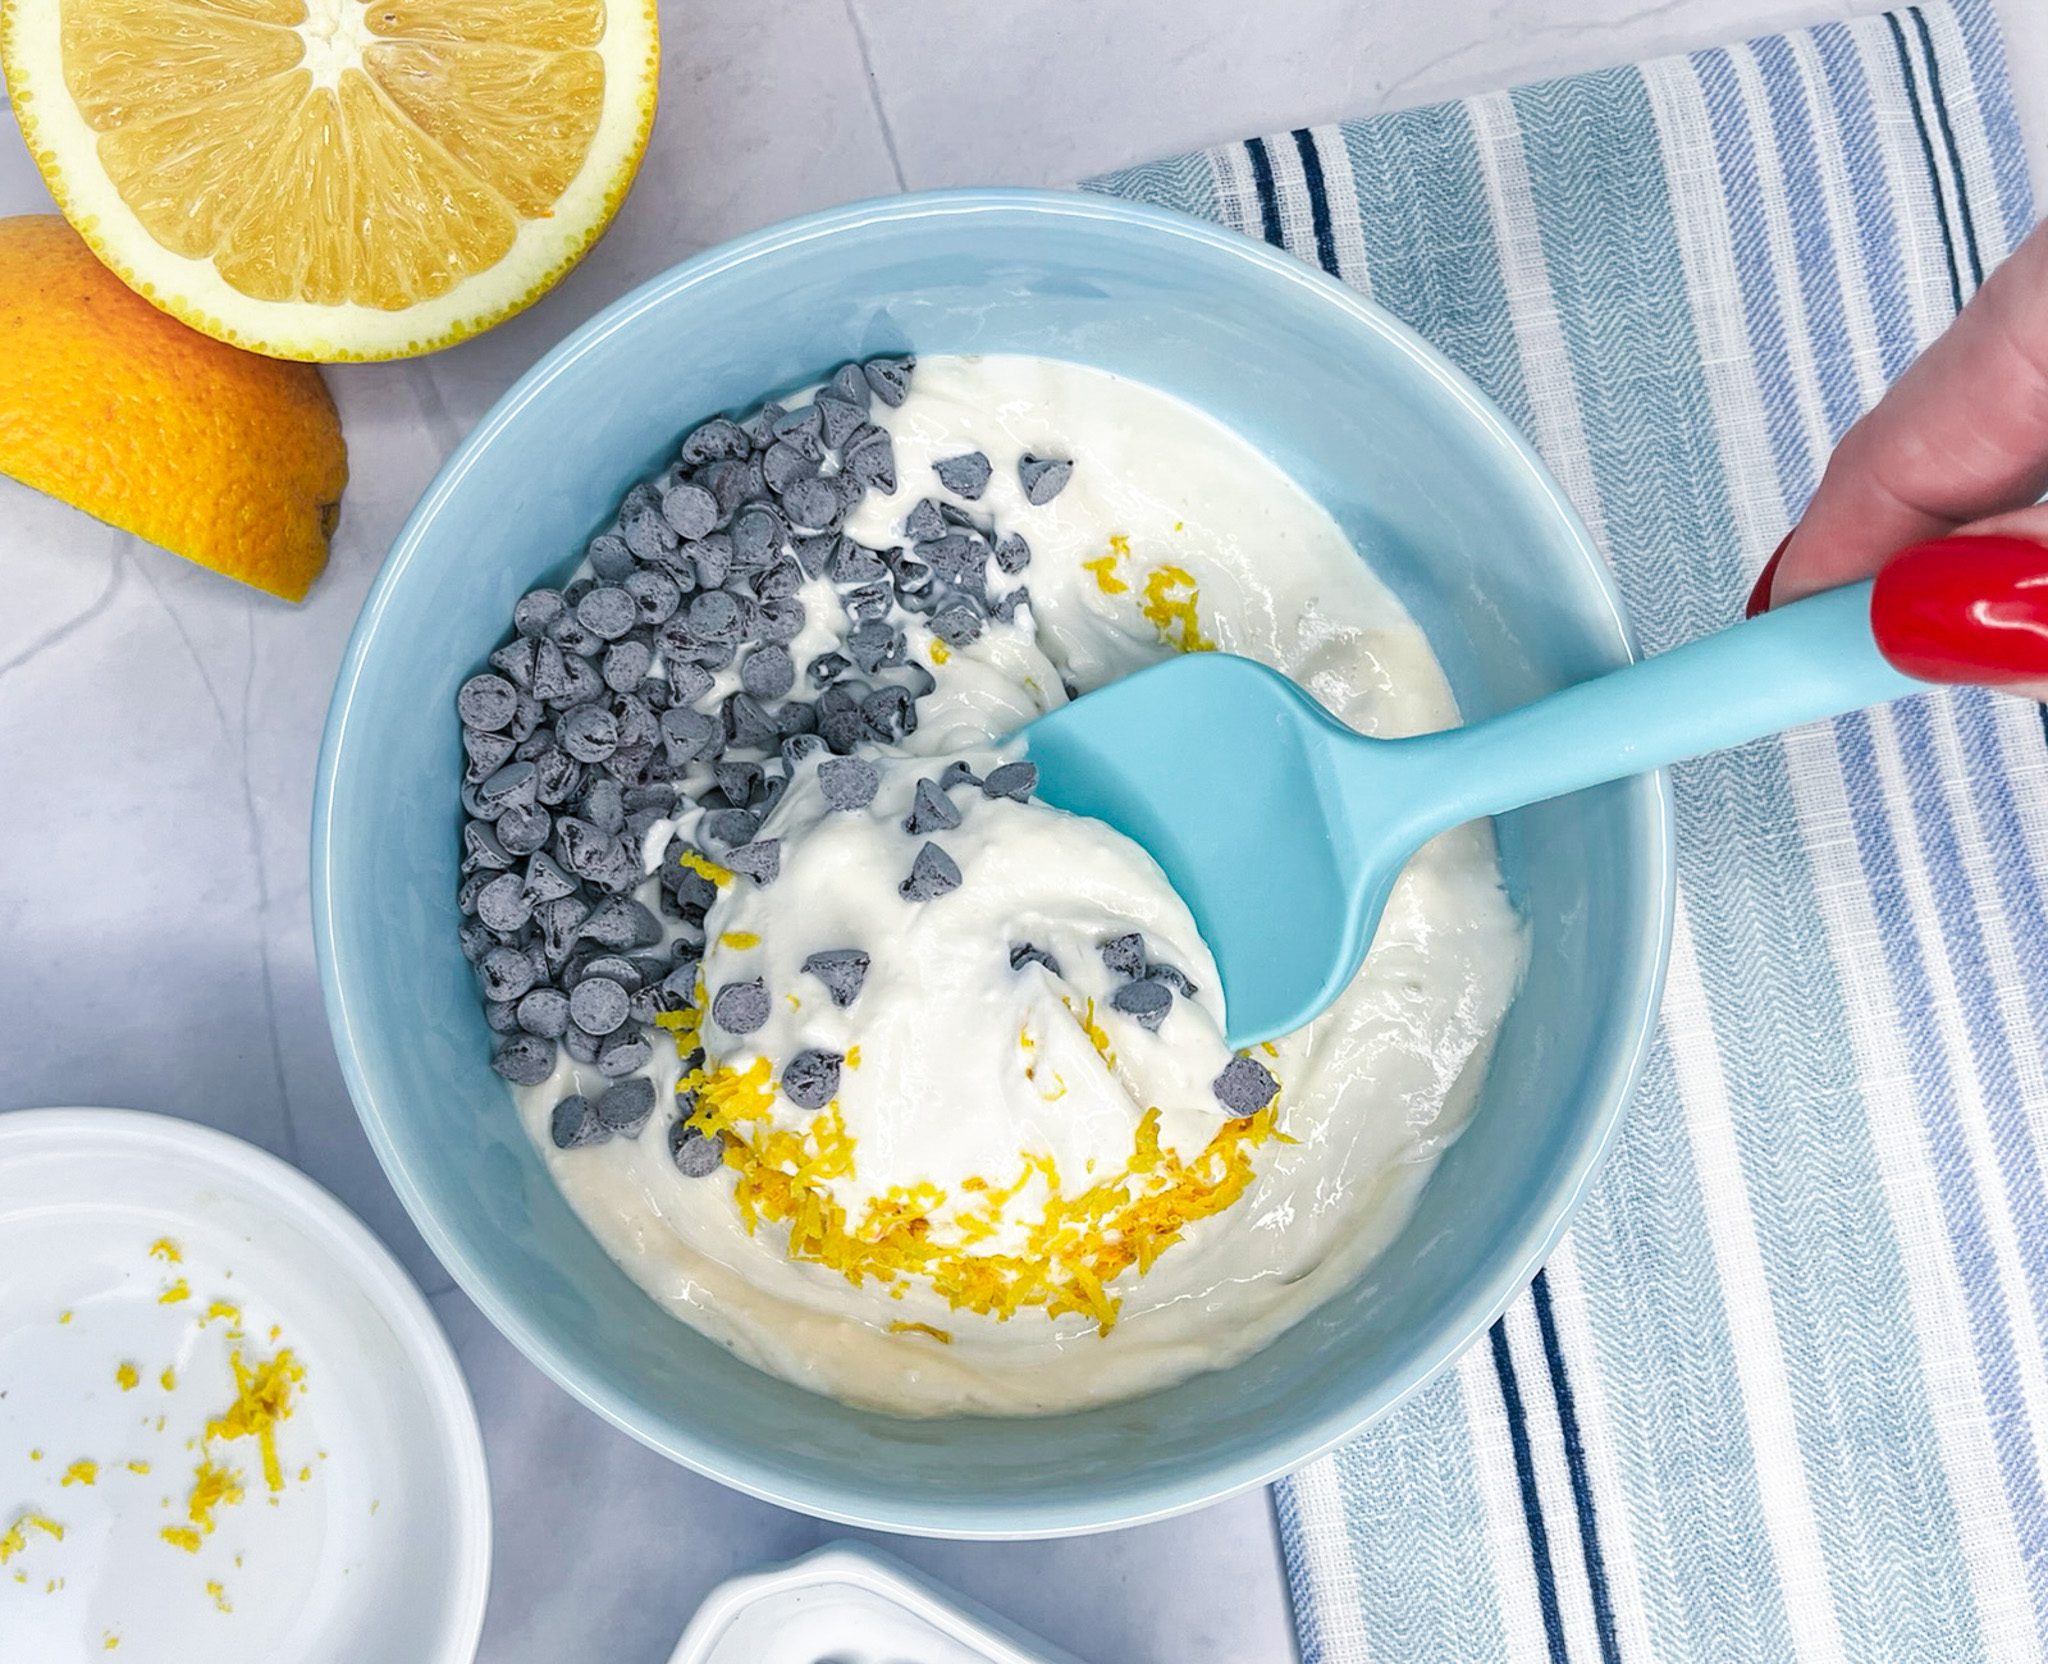
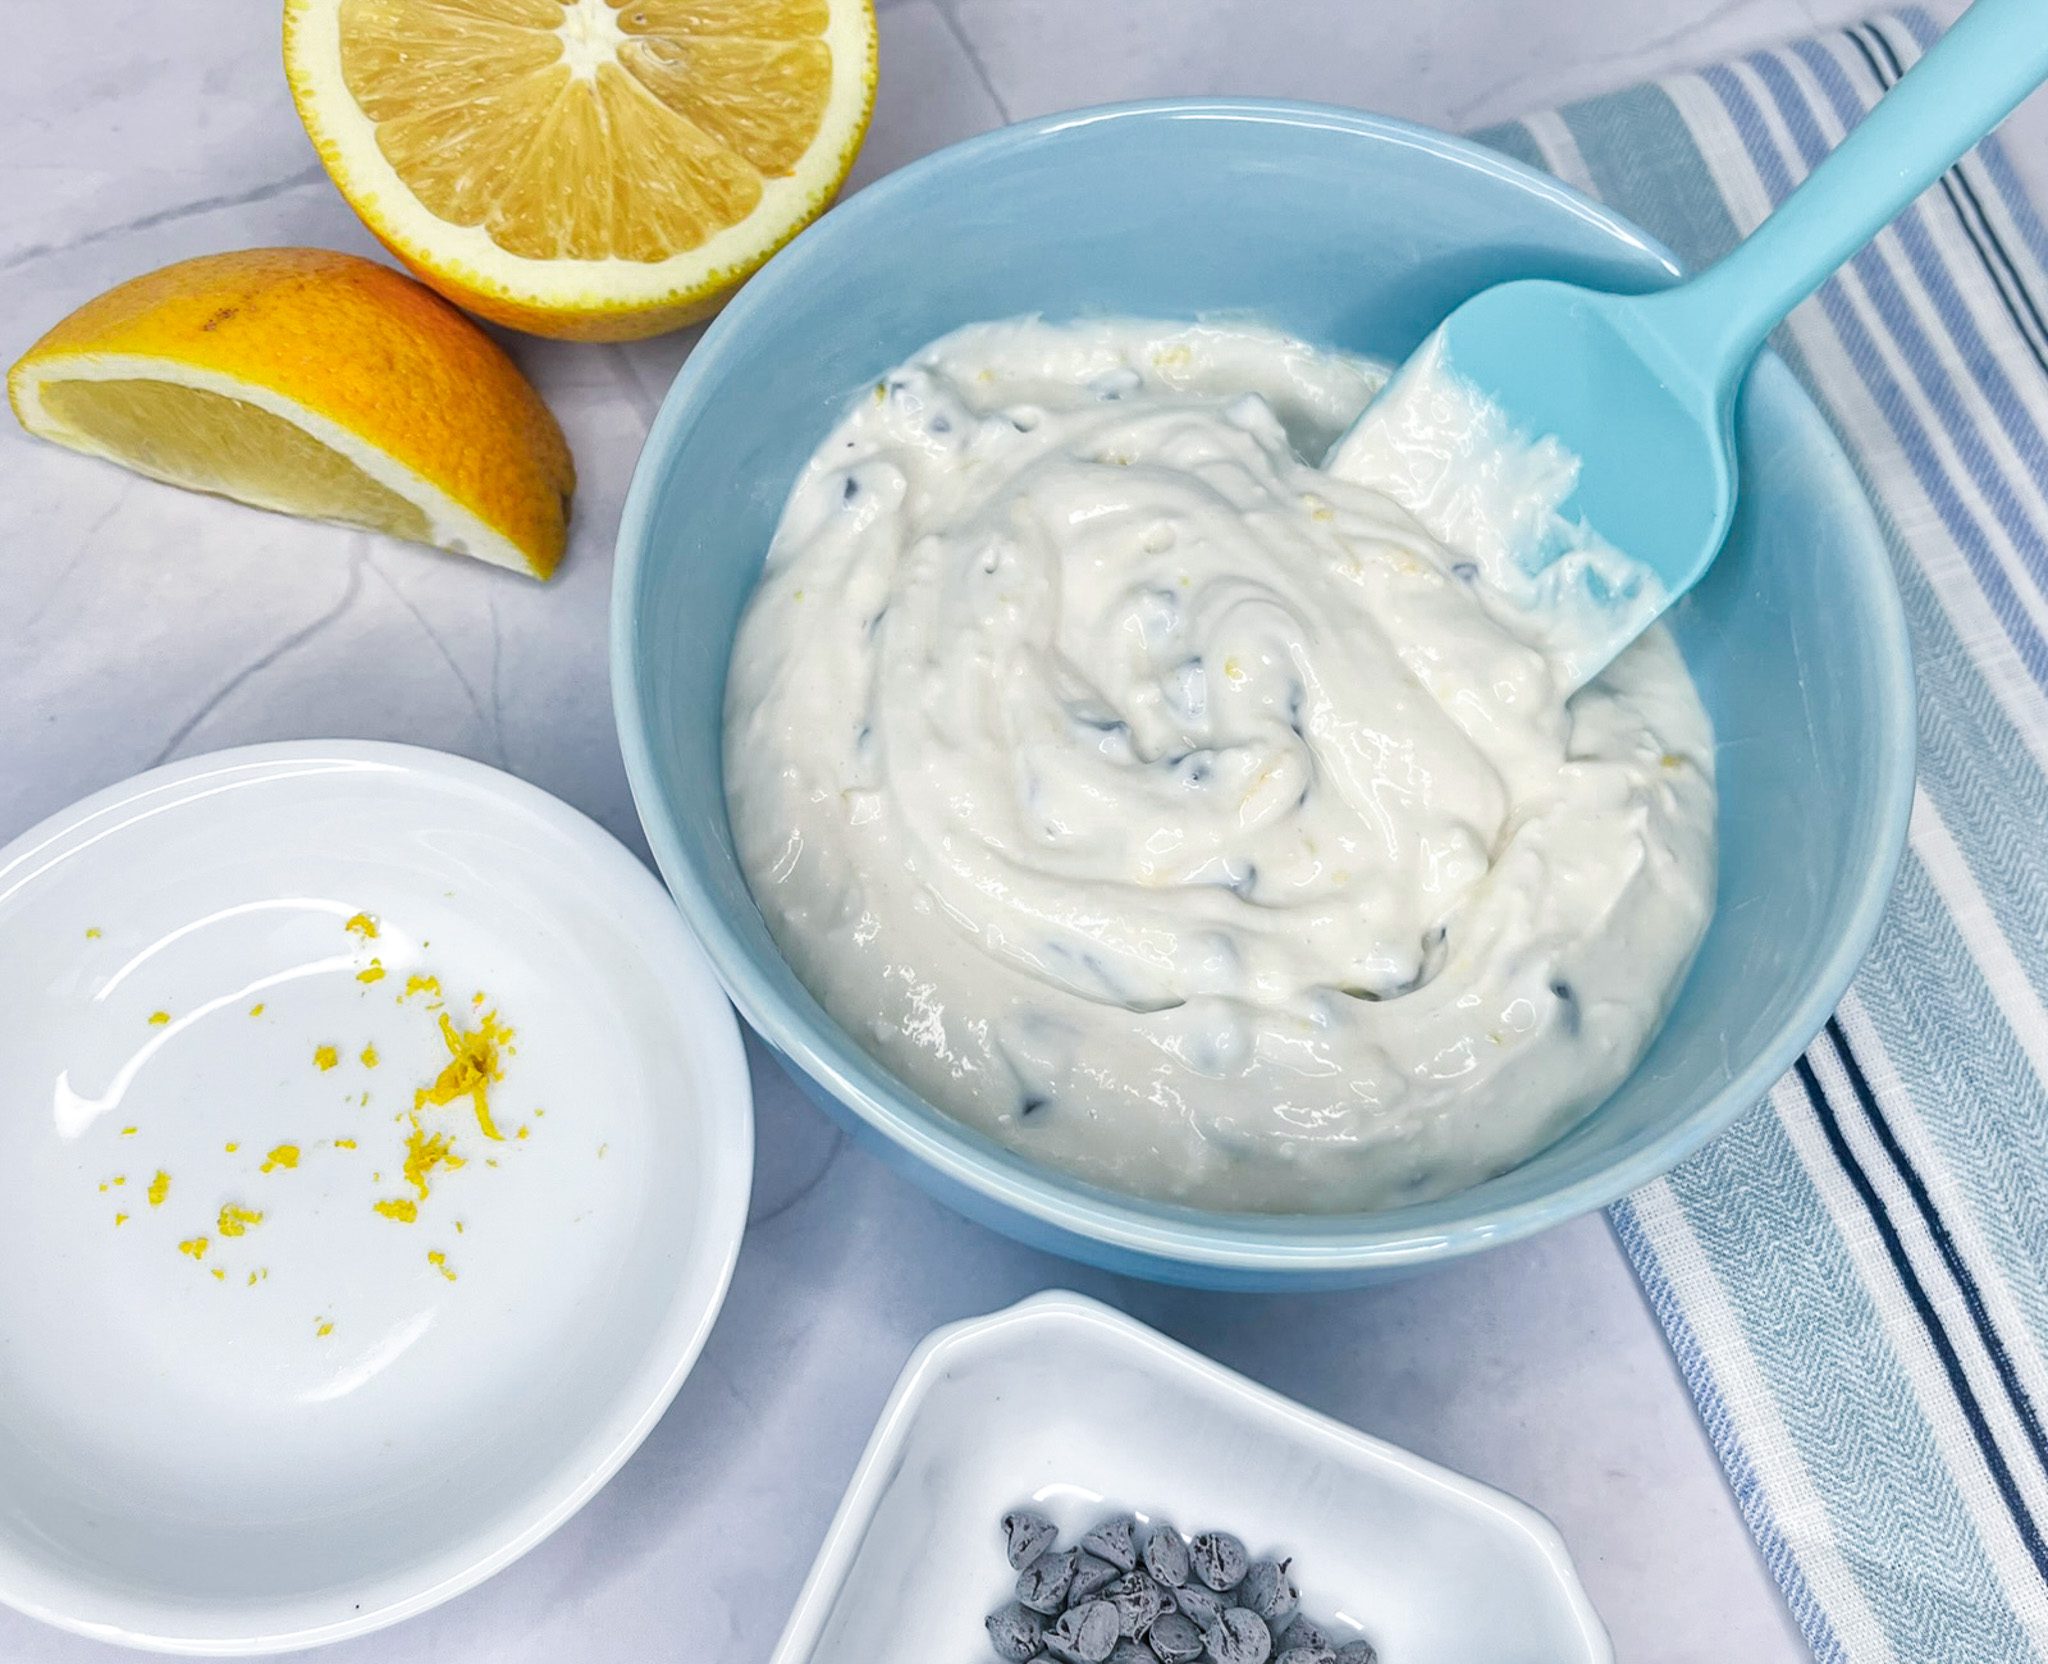
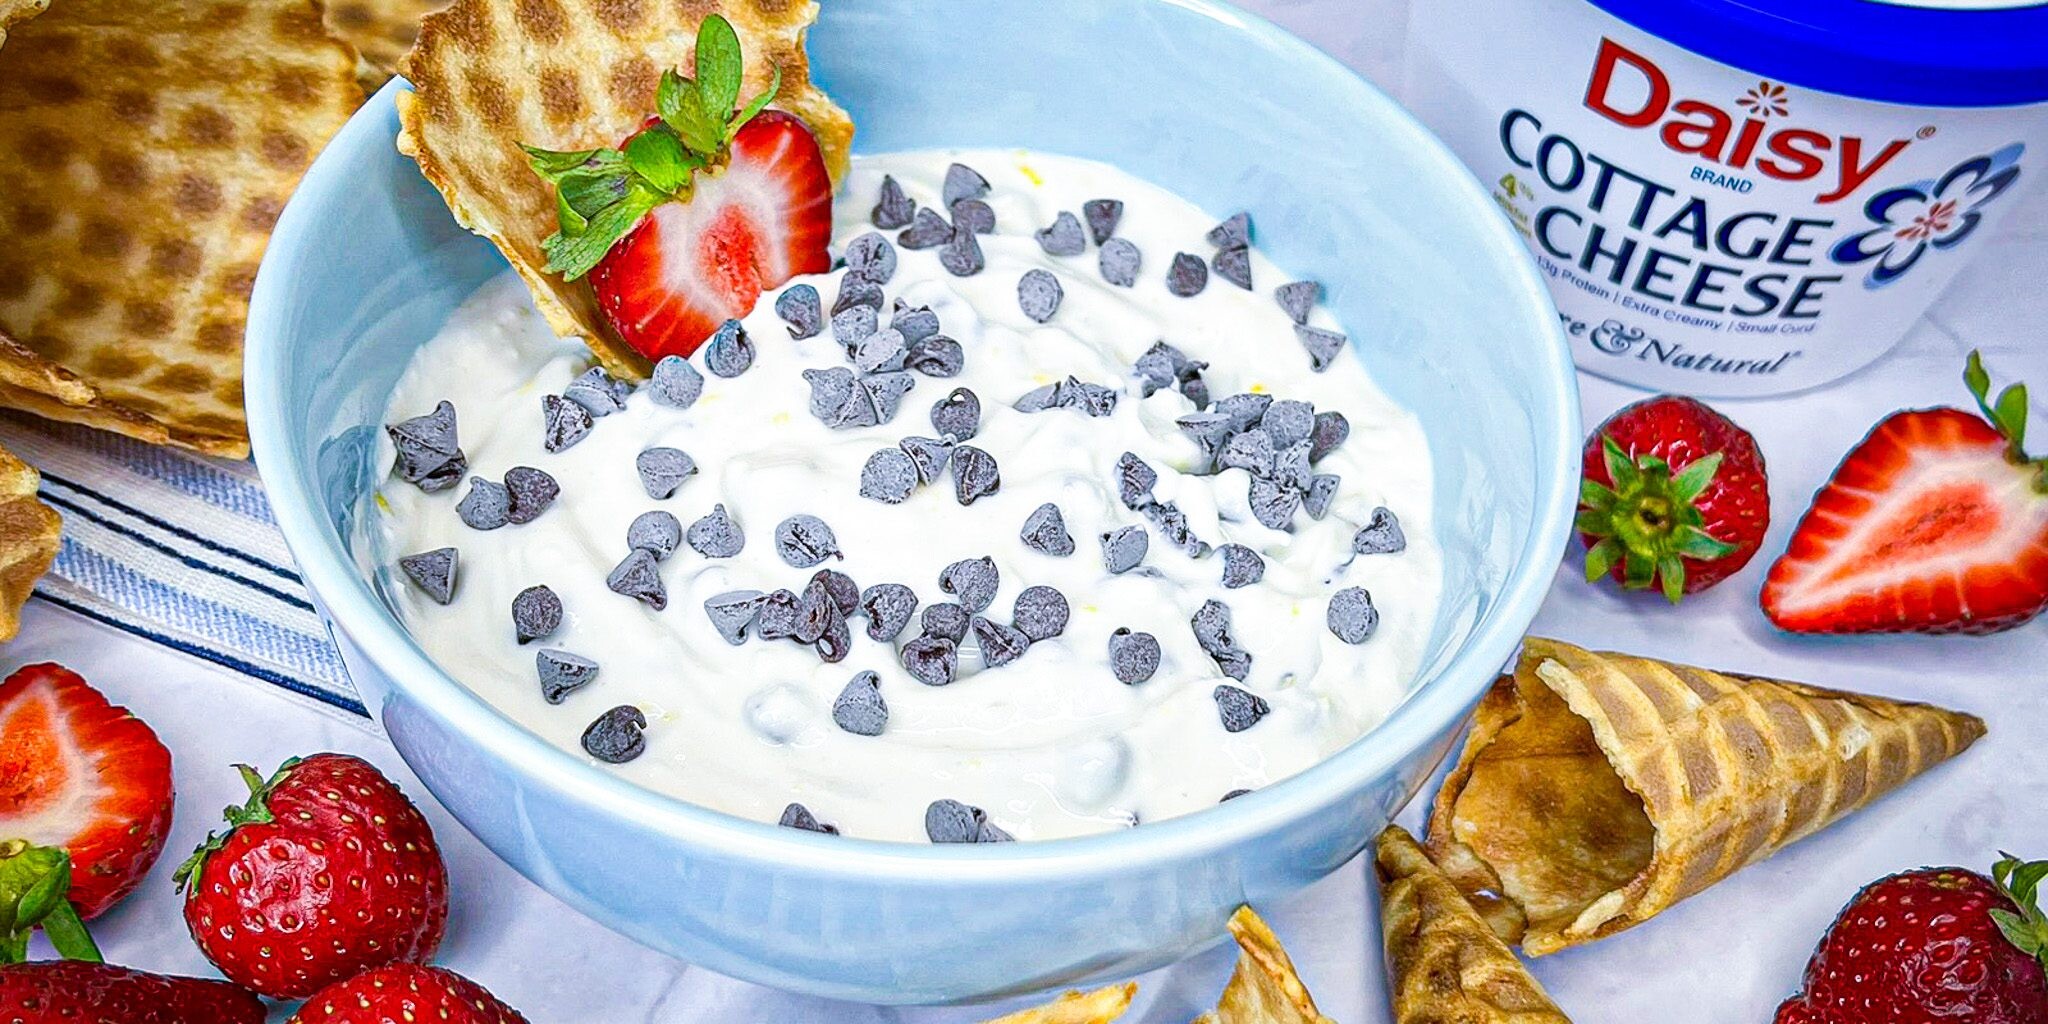
Light Cannoli Dip
Light Cannoli Dip
Love cannoli but want something a little lighter? You’re going to love this Light Cannoli Dip! It’s fluffy, creamy, and full of classic cannoli flavor — but made with Daisy Cottage Cheese, so it has less than half the calories, fat, and carbs of most traditional cannoli dips.
The best part? It comes together in just 5 minutes with only 5 simple ingredients you probably already have on hand. It’s perfect for parties, holidays, or even an after-school snack.
Serve it with your favorite fresh fruit, waffle cone pieces, graham crackers, or cookies — the possibilities are endless!
Mix It Up!
This dip is super easy to customize. Switch up the flavor with different citrus zests, extracts, or mix-ins like pistachios. Feeling festive? Add cinnamon and cranberries for a holiday-ready dip. Want it a little tangier? Stir in a tablespoon of Daisy Sour Cream.
It’s also easy to double or triple for a crowd — and yes, you can make it ahead!
Light Cannoli Dip Ingredients
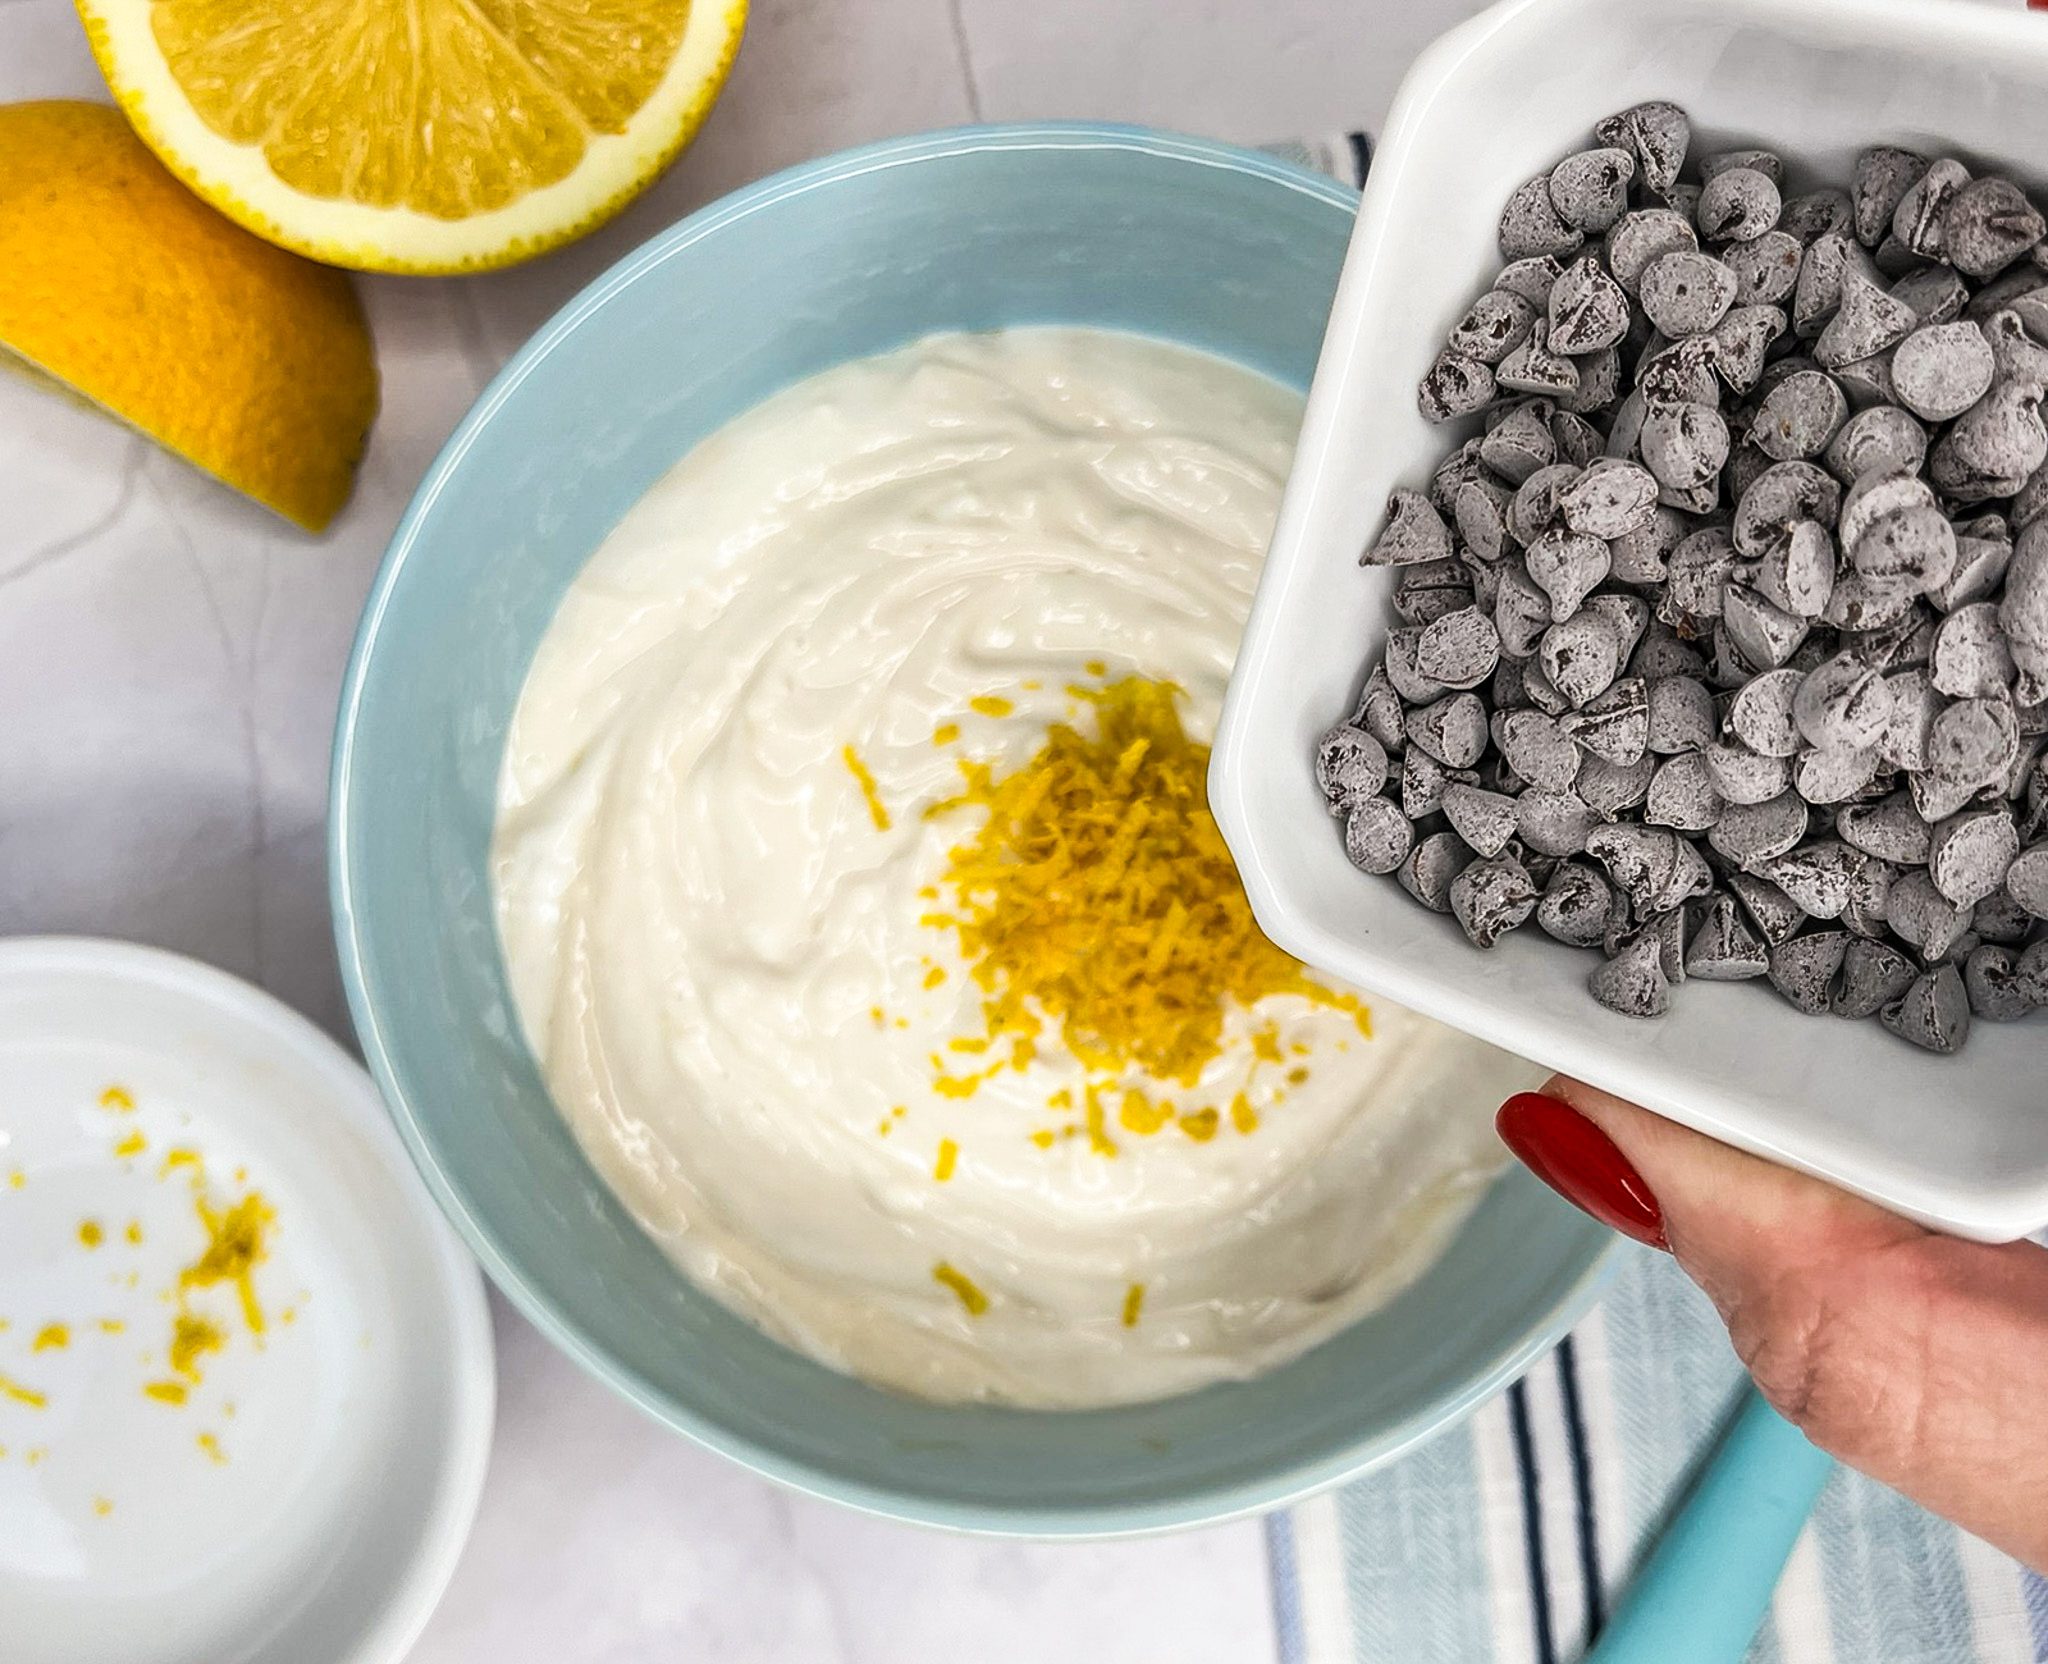
- Daisy Cottage Cheese (3/4 cup): The creamy base that makes this dip light and protein-packed.
- Powdered Sugar (1 tablespoon): Adds a touch of sweetness.
- Vanilla Extract (1 teaspoon): Brings out the flavor in every bite.
- Fresh Orange Zest (1 teaspoon): Adds a burst of bright, citrusy flavor without thinning the dip.
- Mini Chocolate Chips (2 teaspoons): Just enough for that sweet chocolate crunch!
Substitutions, Variations, and Tips
- Swap lemon or lime zest for the orange zest to change up the citrus profile.
- Use almond extract instead of vanilla for a nutty twist.
- Add a dash of cinnamon or nutmeg for a warm holiday flavor.
- Try chopped nuts, seeds, or dried fruit instead of chocolate chips.
- Want a chocolate cannoli dip? Add ½ teaspoon of unsweetened cocoa powder.
- Or go rich with a chocolate hazelnut twist: add 1 teaspoon of chocolate hazelnut spread.
- Substitute white chocolate or butterscotch chips — just be sure they’re mini!
- A finely chopped chocolate bar works just as well if you don’t have chips.
- For extra tang, stir in 1 tablespoon of Daisy Sour Cream.
- Store leftovers in the fridge — it keeps well for up to 4 days.
- Make it ahead! This dip can be prepared the day before and gets even better after chilling.
How to Make Light Cannoli Dip
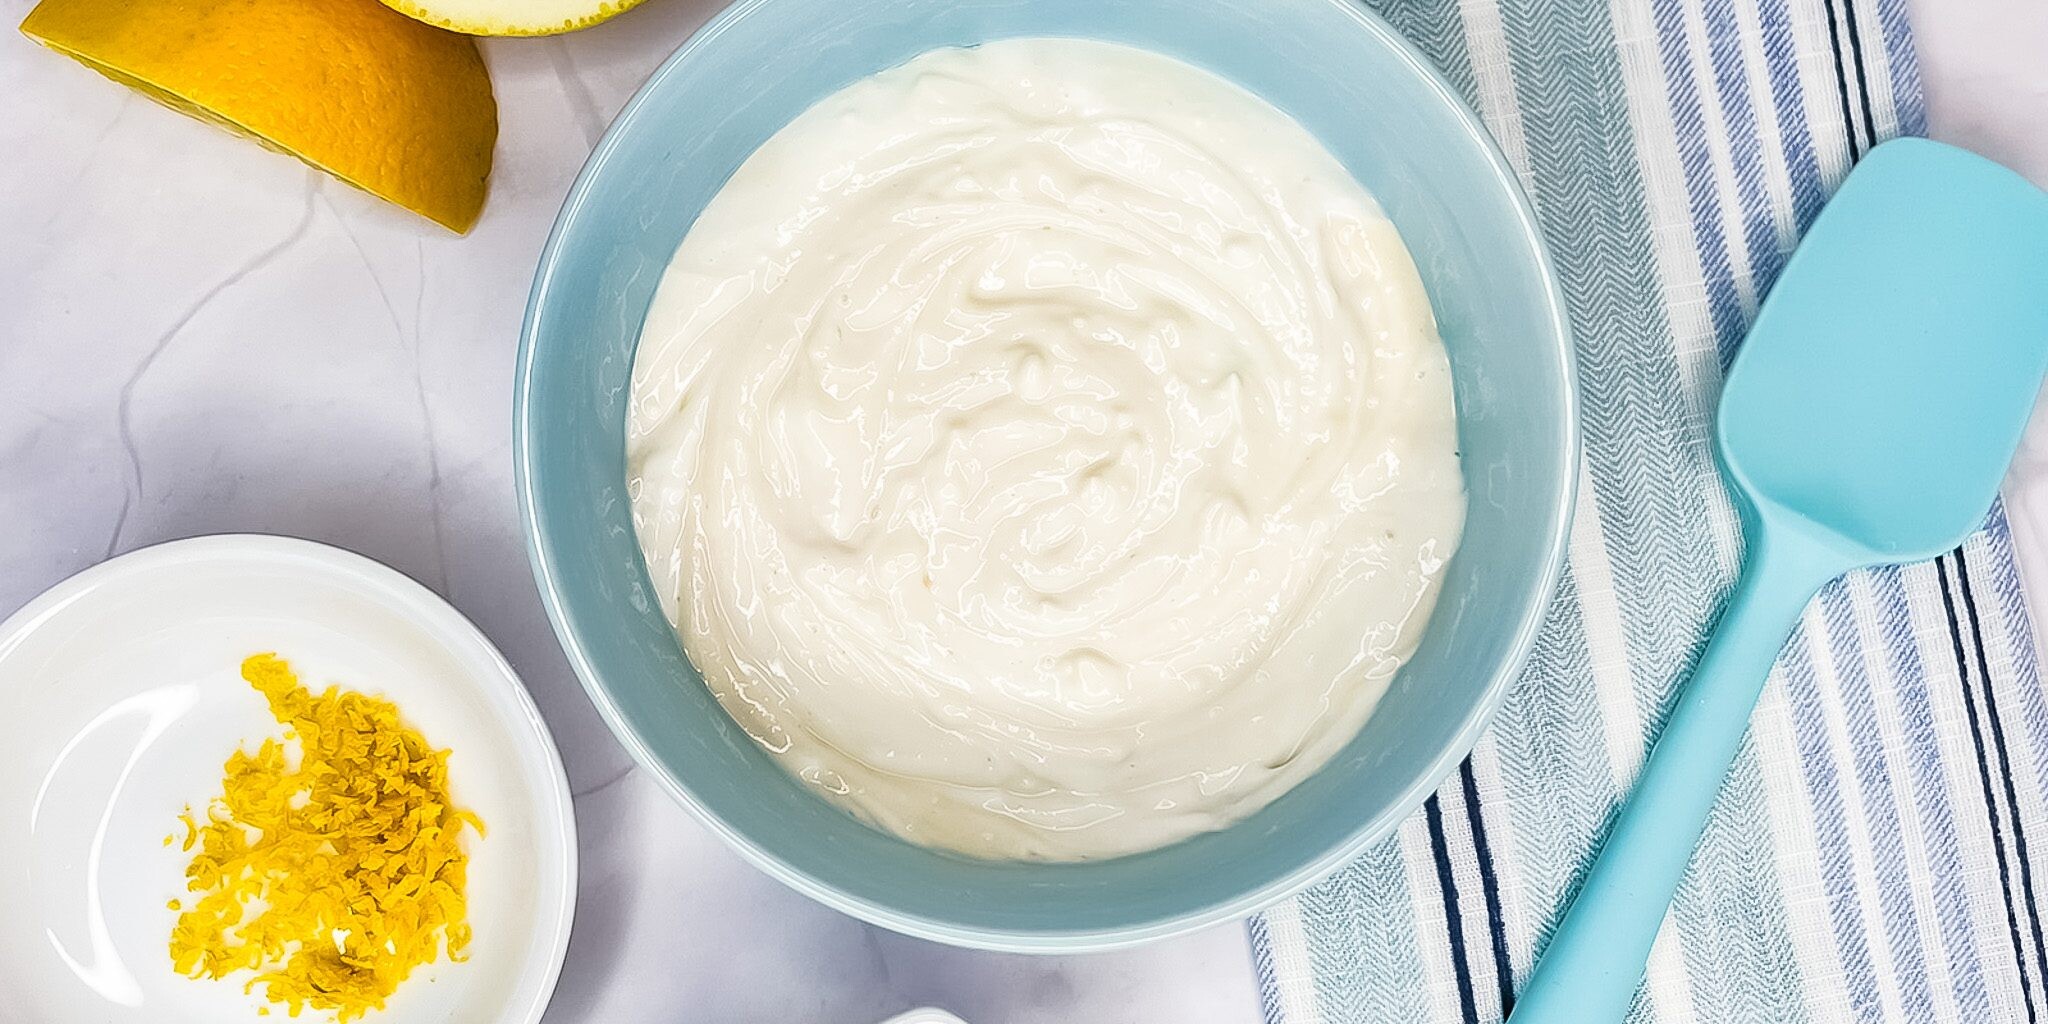
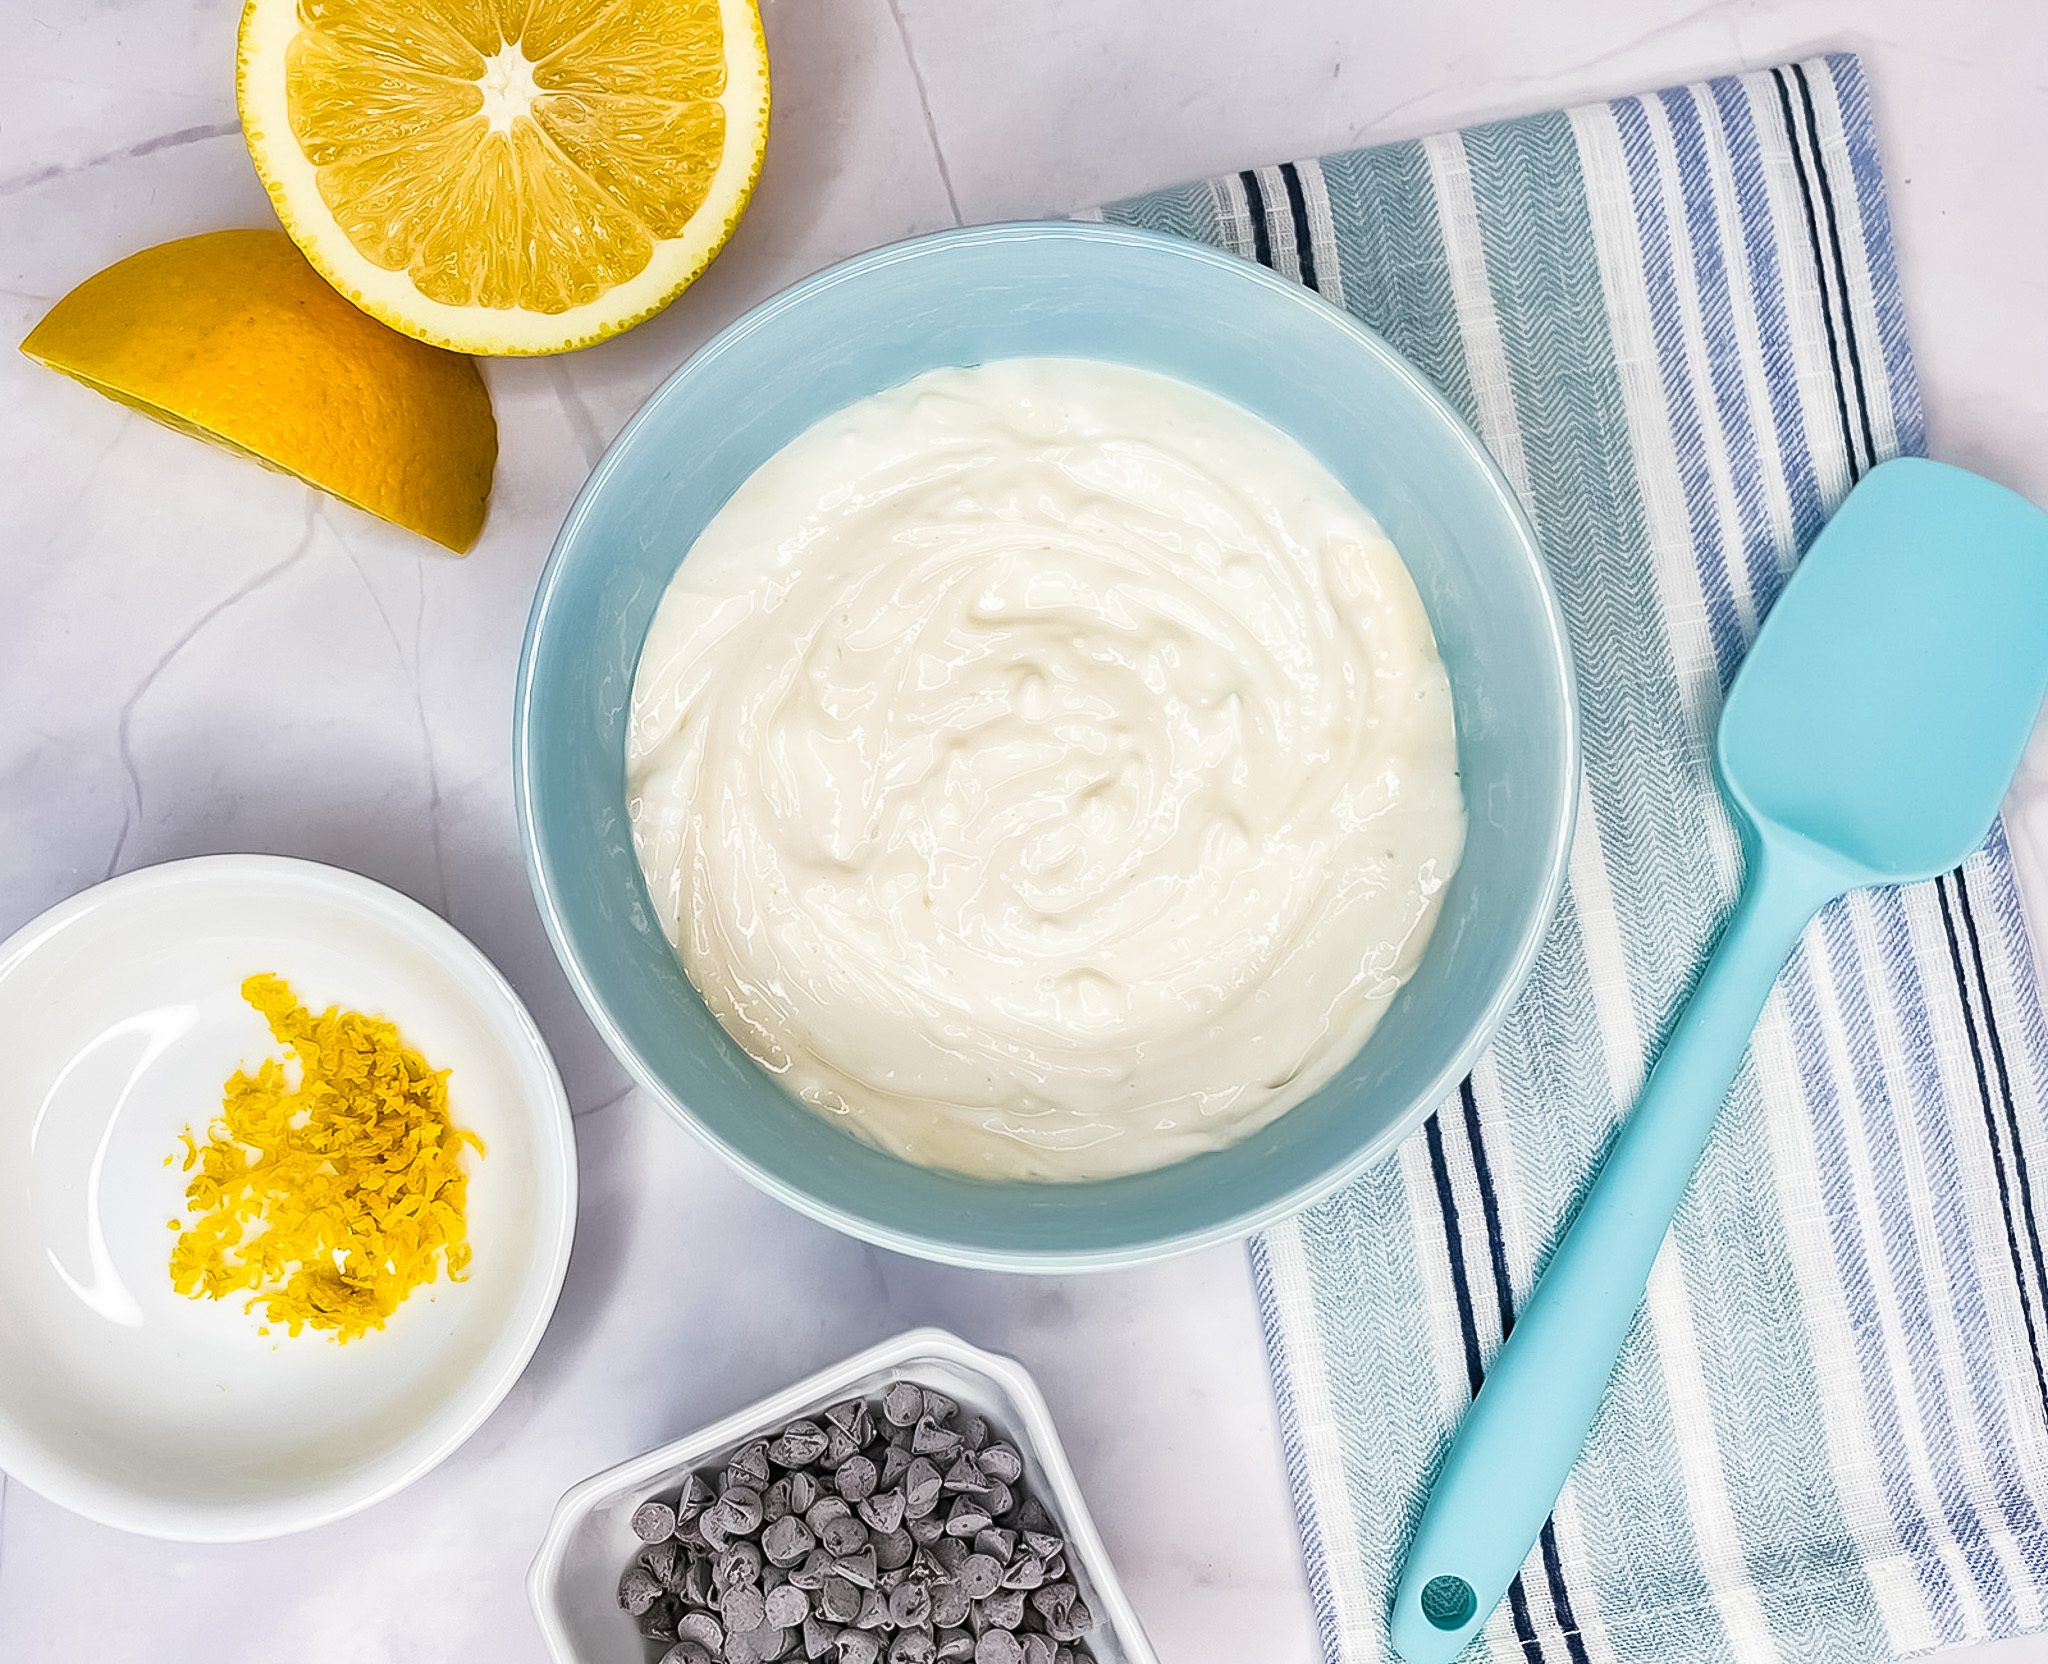
- In a blender or food processor, blend the cottage cheese until completely smooth (about 1 minute). Transfer to a bowl.
- Fold in the powdered sugar, vanilla, orange zest, and mini chocolate chips.
- Cover and chill for at least 30 minutes before serving.
- Garnish with extra mini chocolate chips, if you like. Serve with your favorite dippers!
- Pro Tip: Try serving with waffle cone pieces, sliced apples, strawberries, or graham crackers for the perfect sweet dip combo!

Gluten-Free Peanut Butter Cookies
Gluten-Free Peanut Butter Cookies
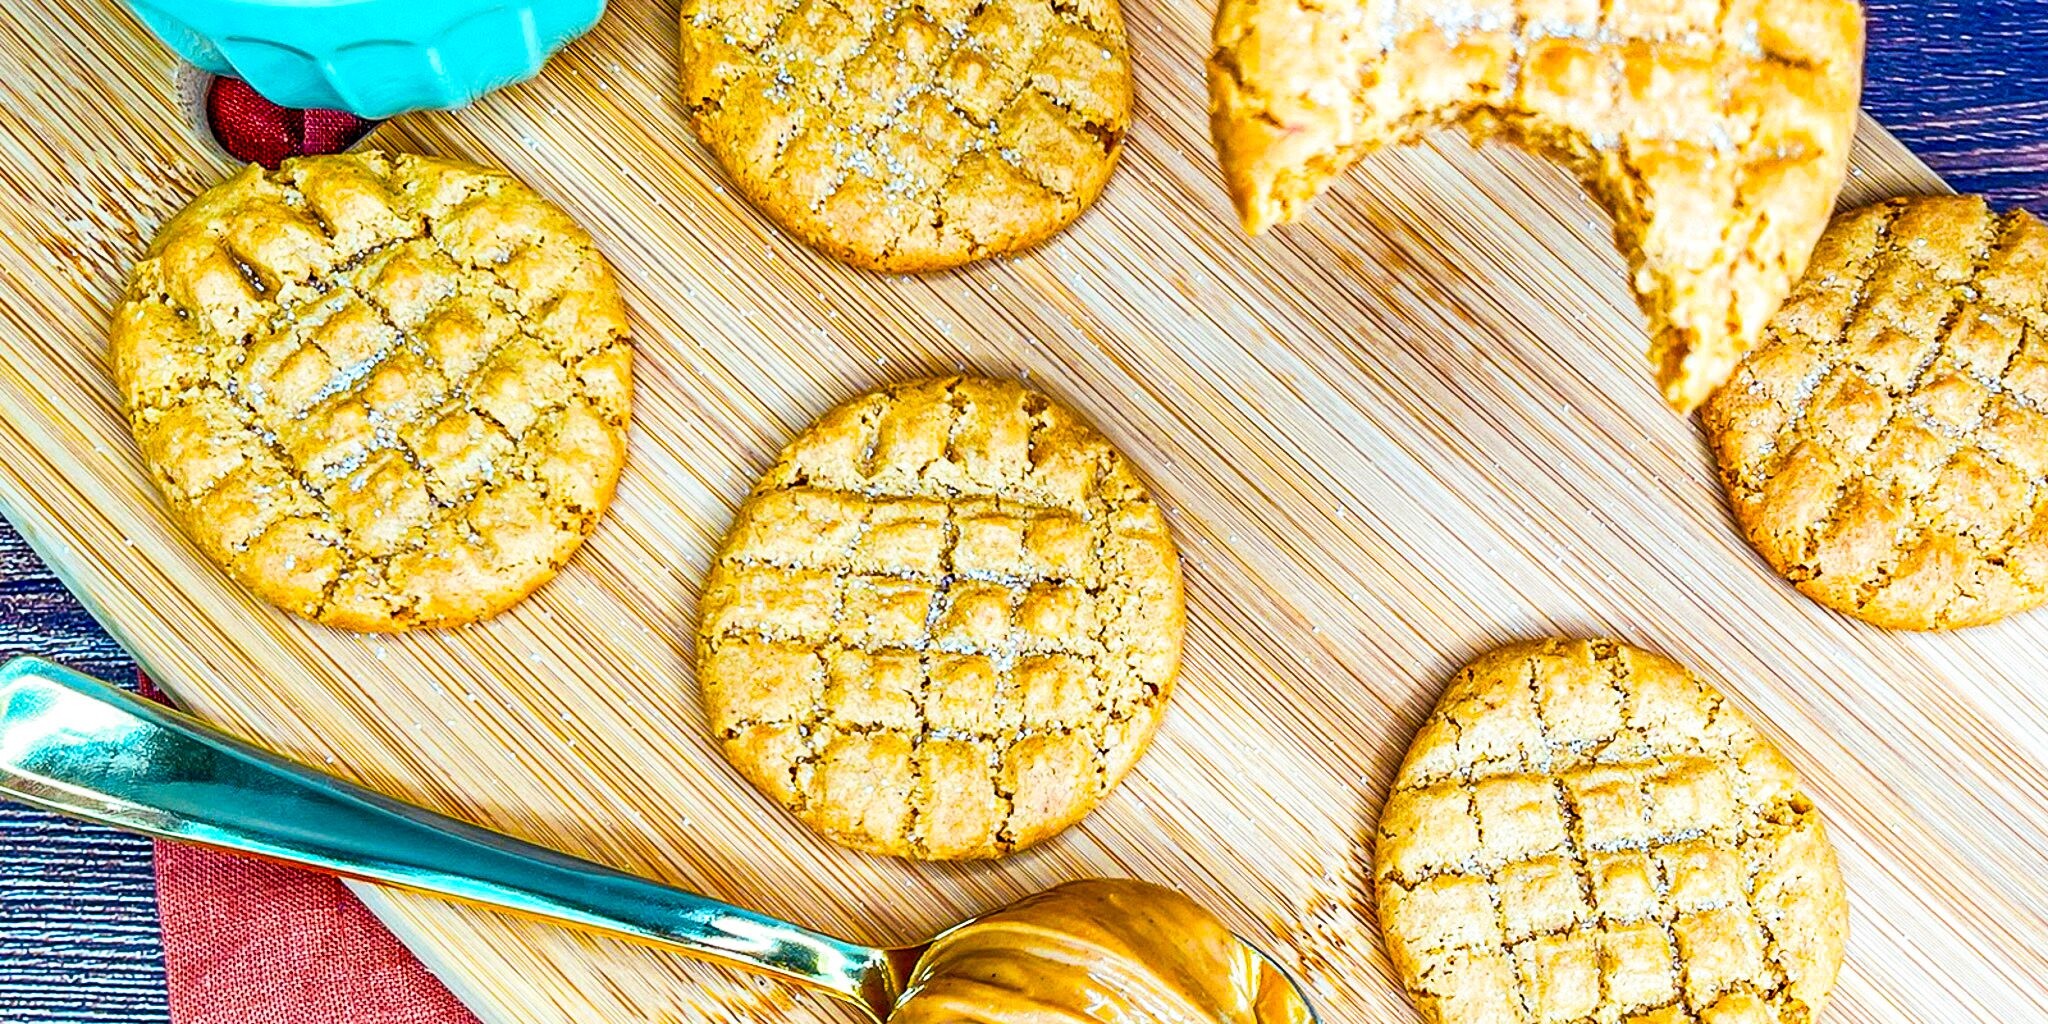
Chewy, rich peanut butter goodness? Yes, please! These Gluten-Free Peanut Butter Cookies are so craveable that you won’t be able to eat just one. Ready in just 20 minutes, chewy, peanut buttery perfection is only moments away. Enjoy with a cold glass of milk today!
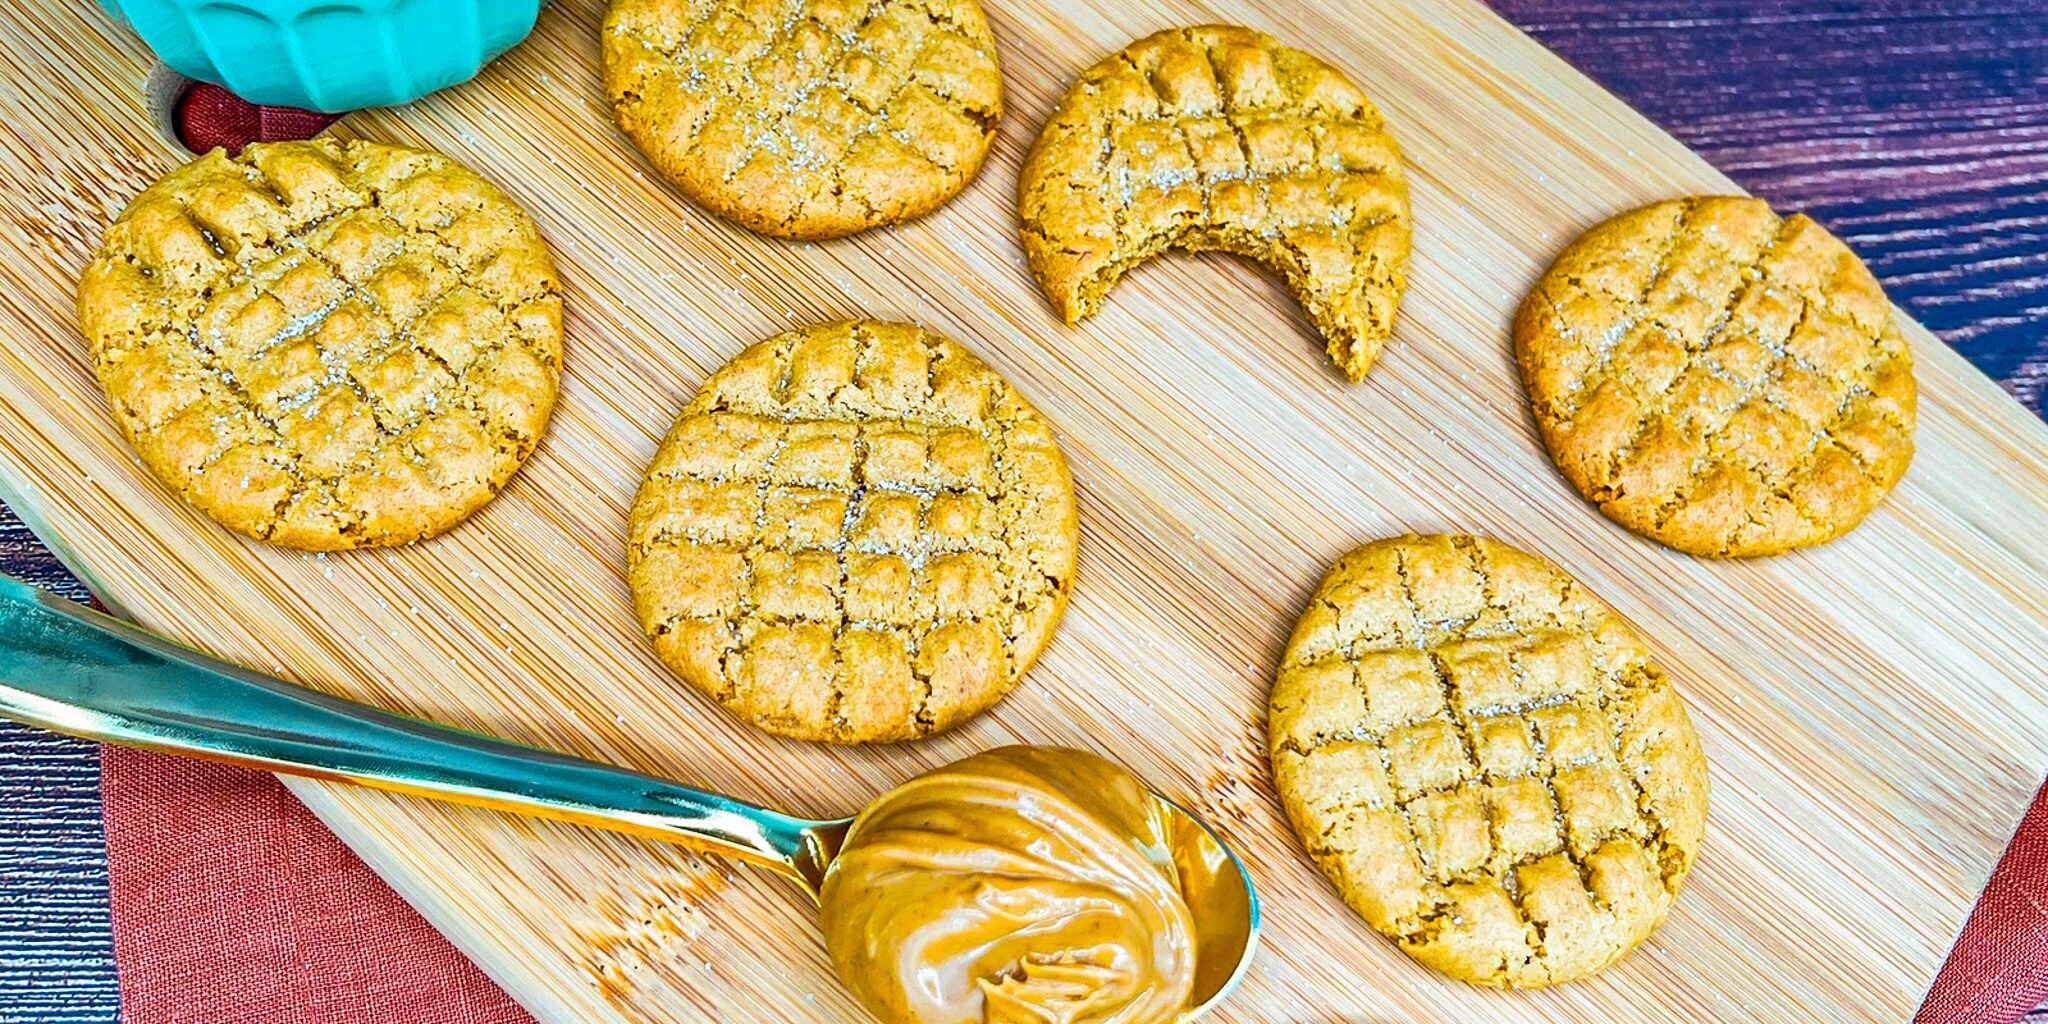
Packed with peanut butter flavor and added protein from blended cottage cheese, these cookies contain only five ingredients and are perfect for those with dietary restrictions. They’re healthier than many traditional cookies thanks to the nutritional value of both the cottage cheese and the peanut butter — yet they still taste like they came straight from a decadent bakery.
Gluten-Free Peanut Butter Cookie Ingredients
- Peanut Butter (1 cup): Provides flavor and structure. Combined with the other ingredients, it creates chewy cookies.
- Sugar (1 cup): Adds sweetness to the cookies.
- Egg (1 large, beaten): Acts as a binder, helping hold the ingredients together. It also adds structure and a bit of lift.
- Daisy Cottage Cheese (1/2 cup): Adds moistness, richness, and protein to the cookies.
- Baking Soda (1 teaspoon): The primary leavening agent; it adds volume and height to the cookies.
Substitutions, Variations, and Tips
- For best results, bring all ingredients to room temperature before mixing, and use high-quality ingredients.
- Both creamy and crunchy peanut butter work well in this recipe.
- Other nut butters (like almond or cashew butter) may be used in place of peanut butter.
- Customize your cookies by adding mix-ins such as chocolate chips or peanut butter candies.
- To create the iconic crisscross pattern, use a cold fork to gently press down on the dough balls before baking.
- For an extra-special touch, sprinkle coarse sugar on top after making the crisscross pattern.
- For a flavor twist, roll dough balls in a cinnamon-sugar mixture before baking. To make the mixture, combine ½ cup sugar and 2 tablespoons cinnamon. Store any leftovers in an airtight container.
- Store baked cookies in an airtight container for up to five days.
- To freeze, roll dough into balls and flash-freeze on a baking sheet. Then transfer to a zip-top bag with as much air removed as possible. Freeze for up to six months. Thaw in the refrigerator or bake from frozen — just follow the recipe’s baking directions.
How to Make Gluten-Free Peanut Butter Cookies
- Preheat oven to 350°F. Line baking sheets with parchment paper.
- Beat peanut butter and sugar together with an electric mixer until smooth.
- Add egg, blended cottage cheese, and baking soda. Beat until well combined.
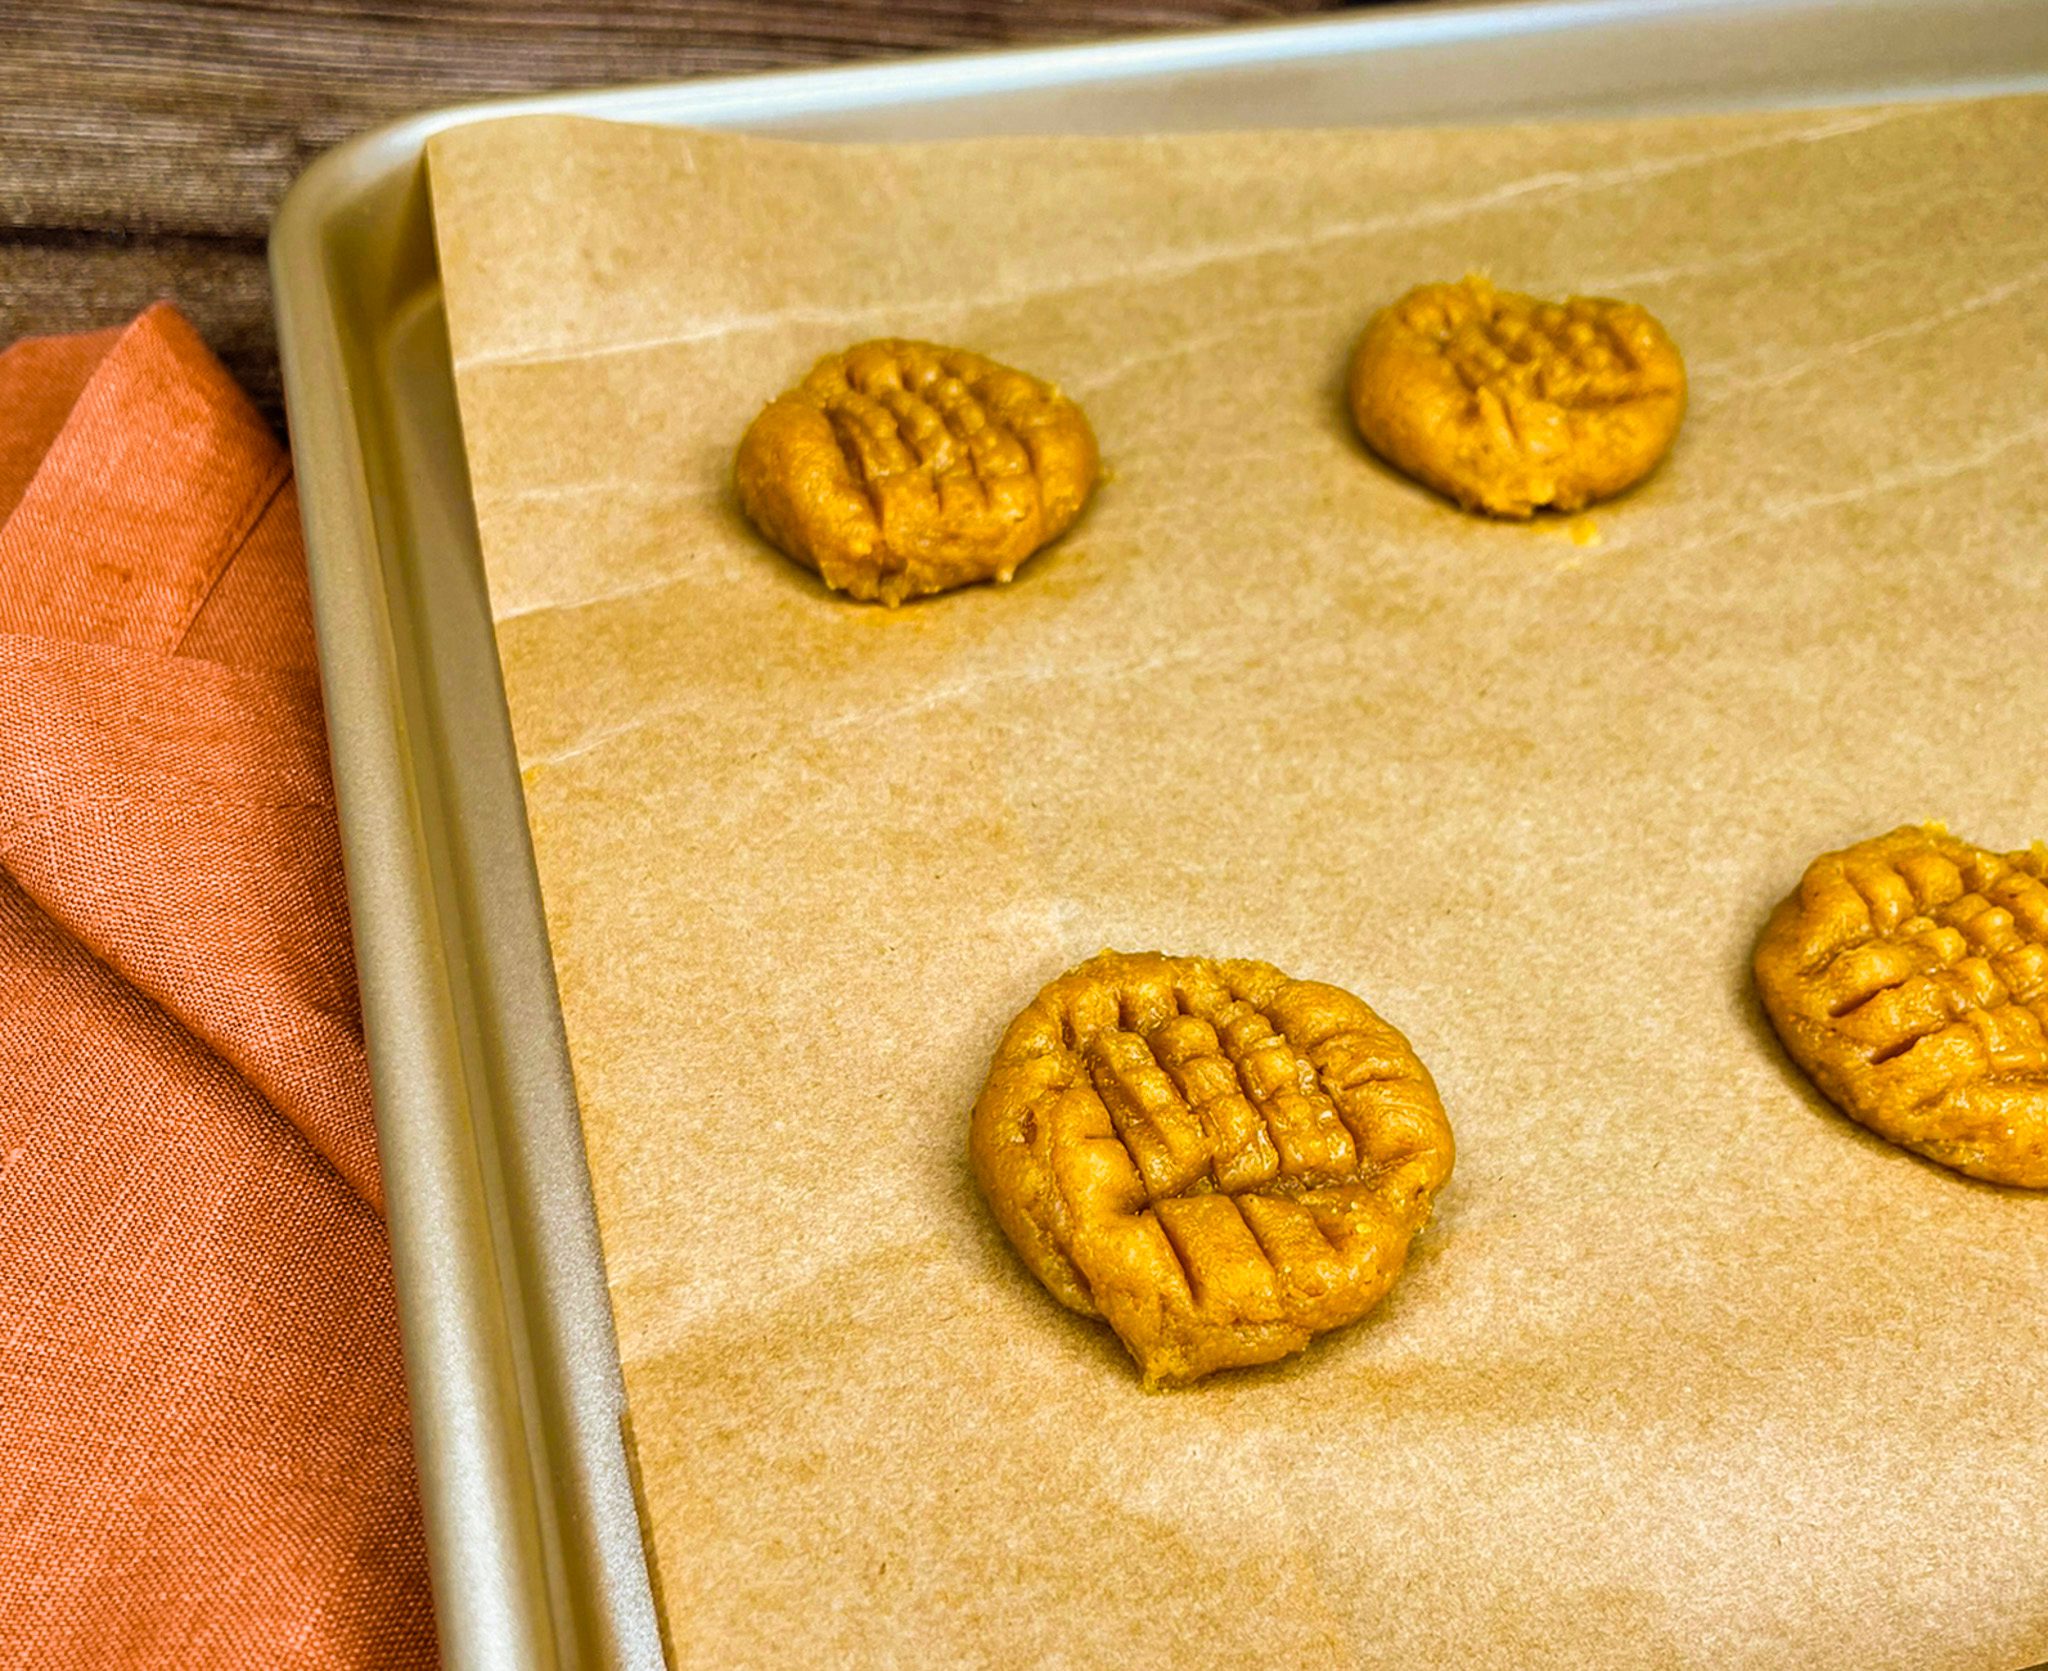
- Roll 1 tablespoon of dough into a ball and place 2 inches apart on the baking sheets. If desired, create a crisscross pattern with a cold fork.
- Bake until puffed and pale golden, about 12–14 minutes.
- Cool on the baking sheet for about 2 minutes, then transfer to a wire rack to cool completely before serving.
Tomato Salad
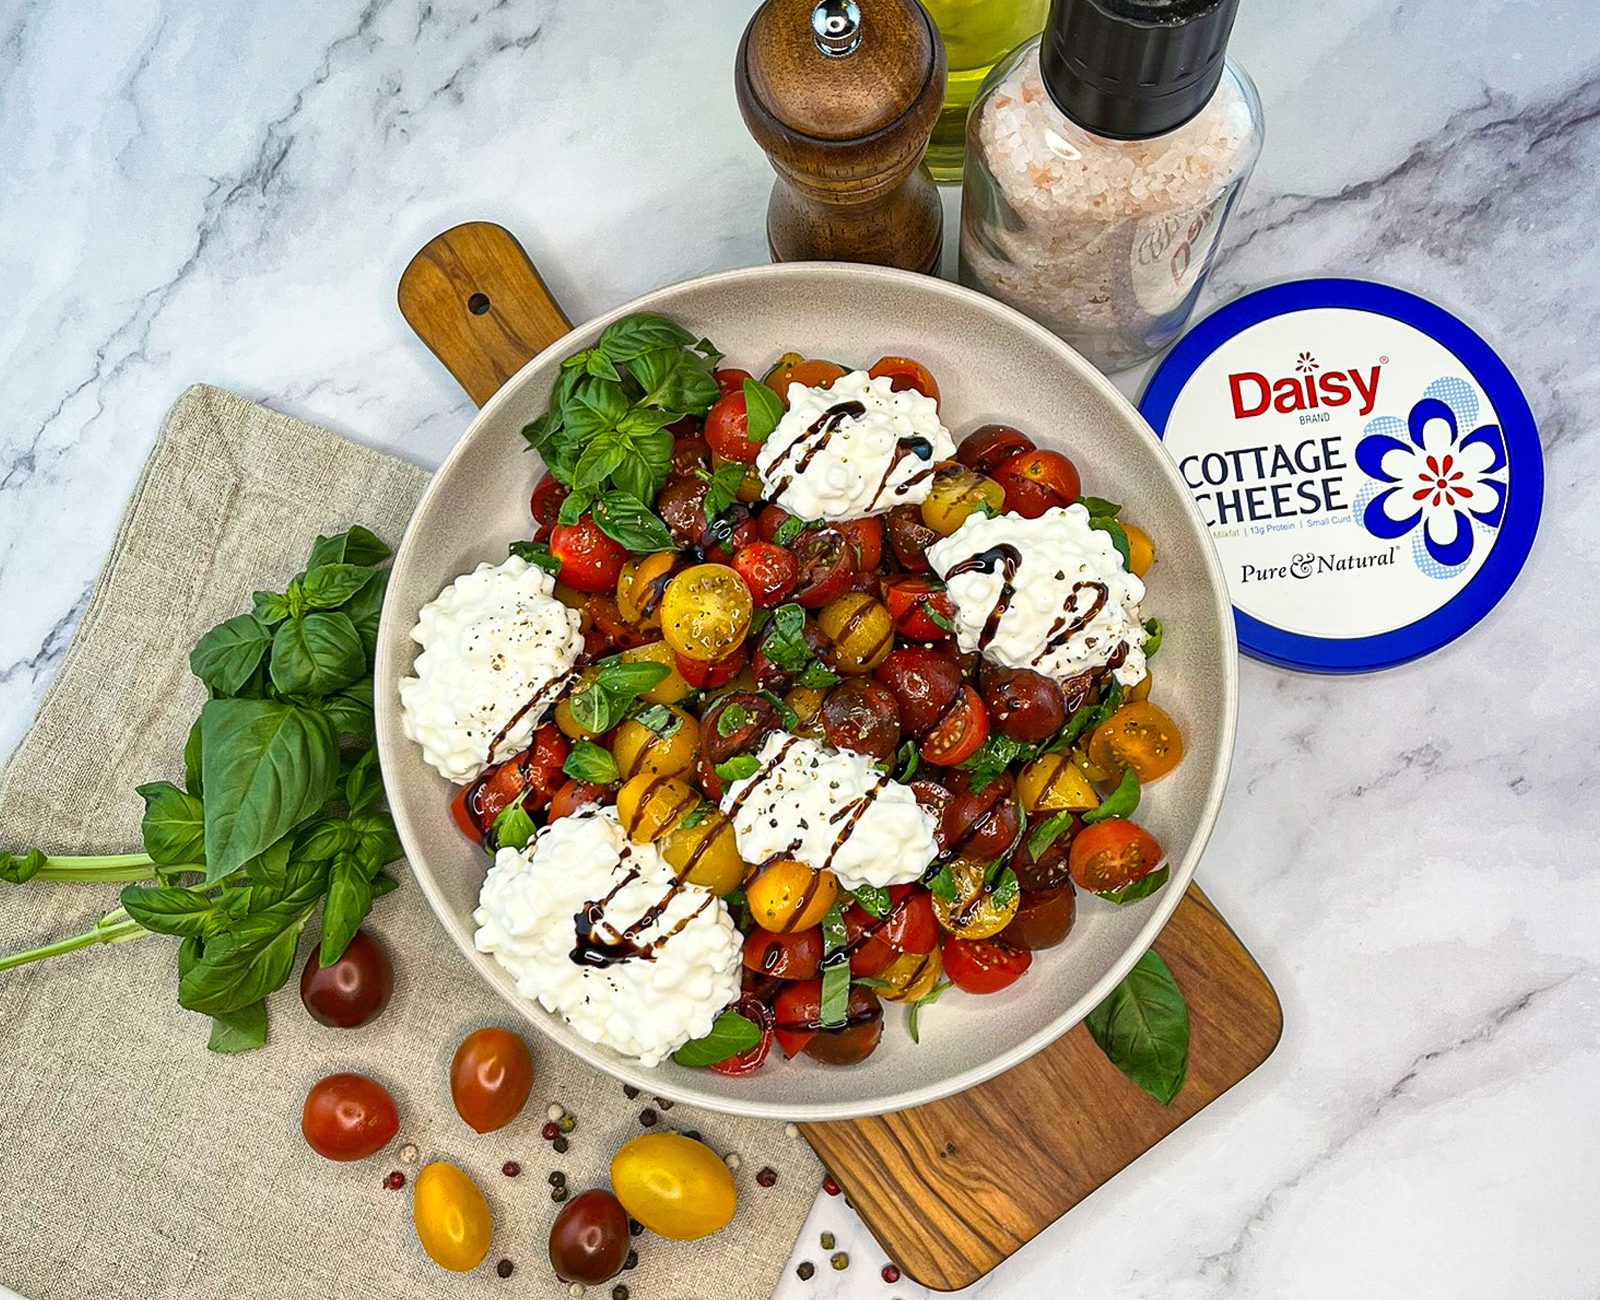
Simple Tomato Salad
Light, fresh, creamy, and totally addictive – this Tomato Salad has it all. It tastes like summer in a bowl and is the perfect lunch, side dish, or even light dinner along with some crusty bread or chicken. It’s also great for gatherings. Easily scalable, it travels well and pairs well with everything from grilled chicken to burgers. It also brings a beautiful pop of color to the table. It’s vibrant, summary, and indulgent without the guilt of heavier dishes. This Tomato Salad brings it all, without any fuss.
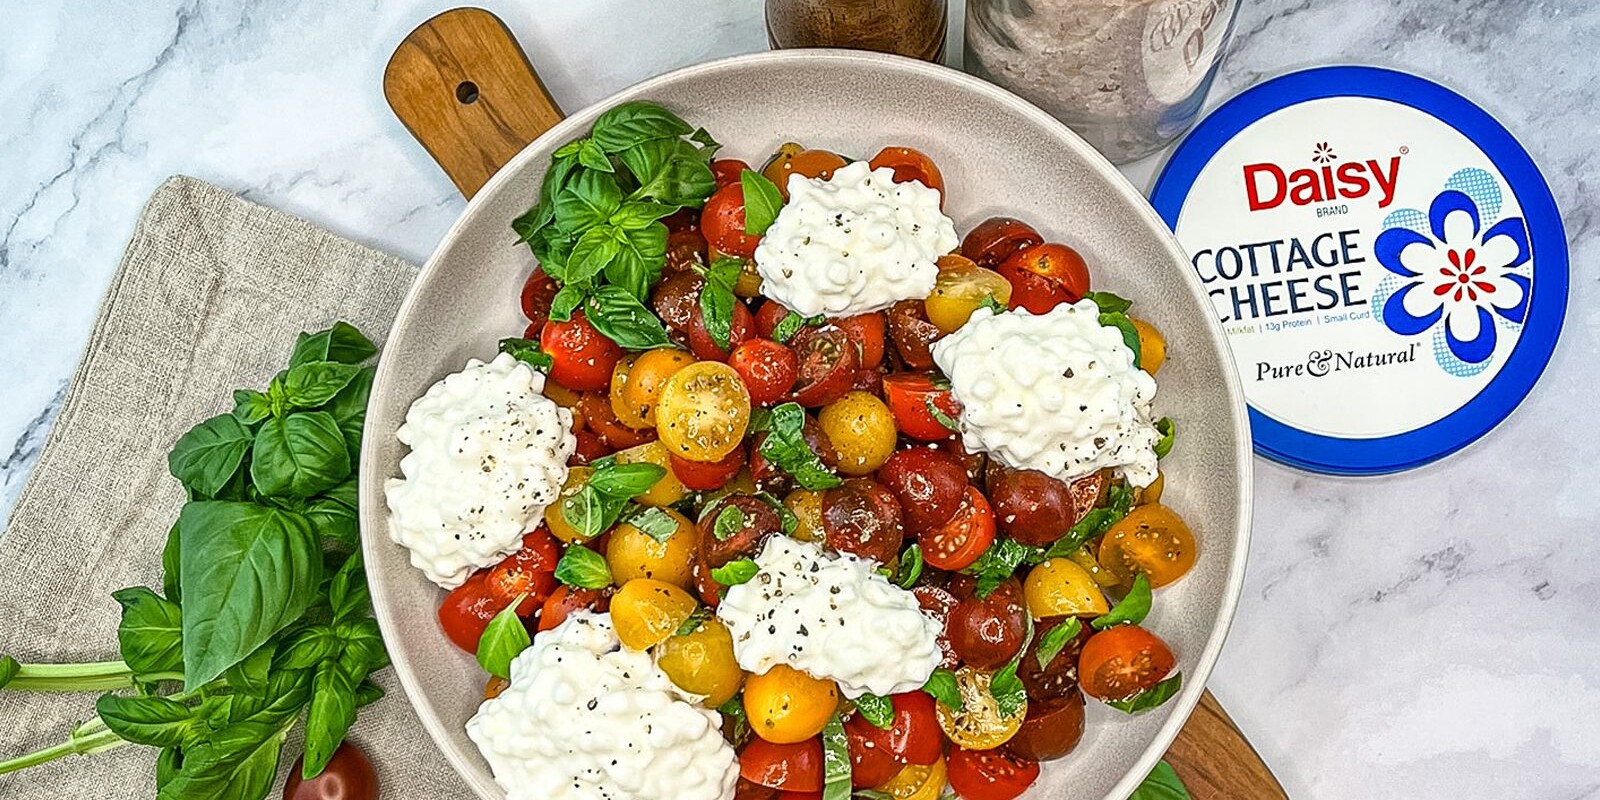
High in protein, easy to make, and full of good-for-you ingredients. The juicy, sweet tomatoes are the perfect companion to the cool, creamy and rich Daisy Cottage Cheese, known for its minimal ingredients and fresh taste. The fresh basil adds a burst of herby, peppery brightness and the sweet acidity of the balsamic glaze enhance the flavors of the tomatoes and cottage cheese.
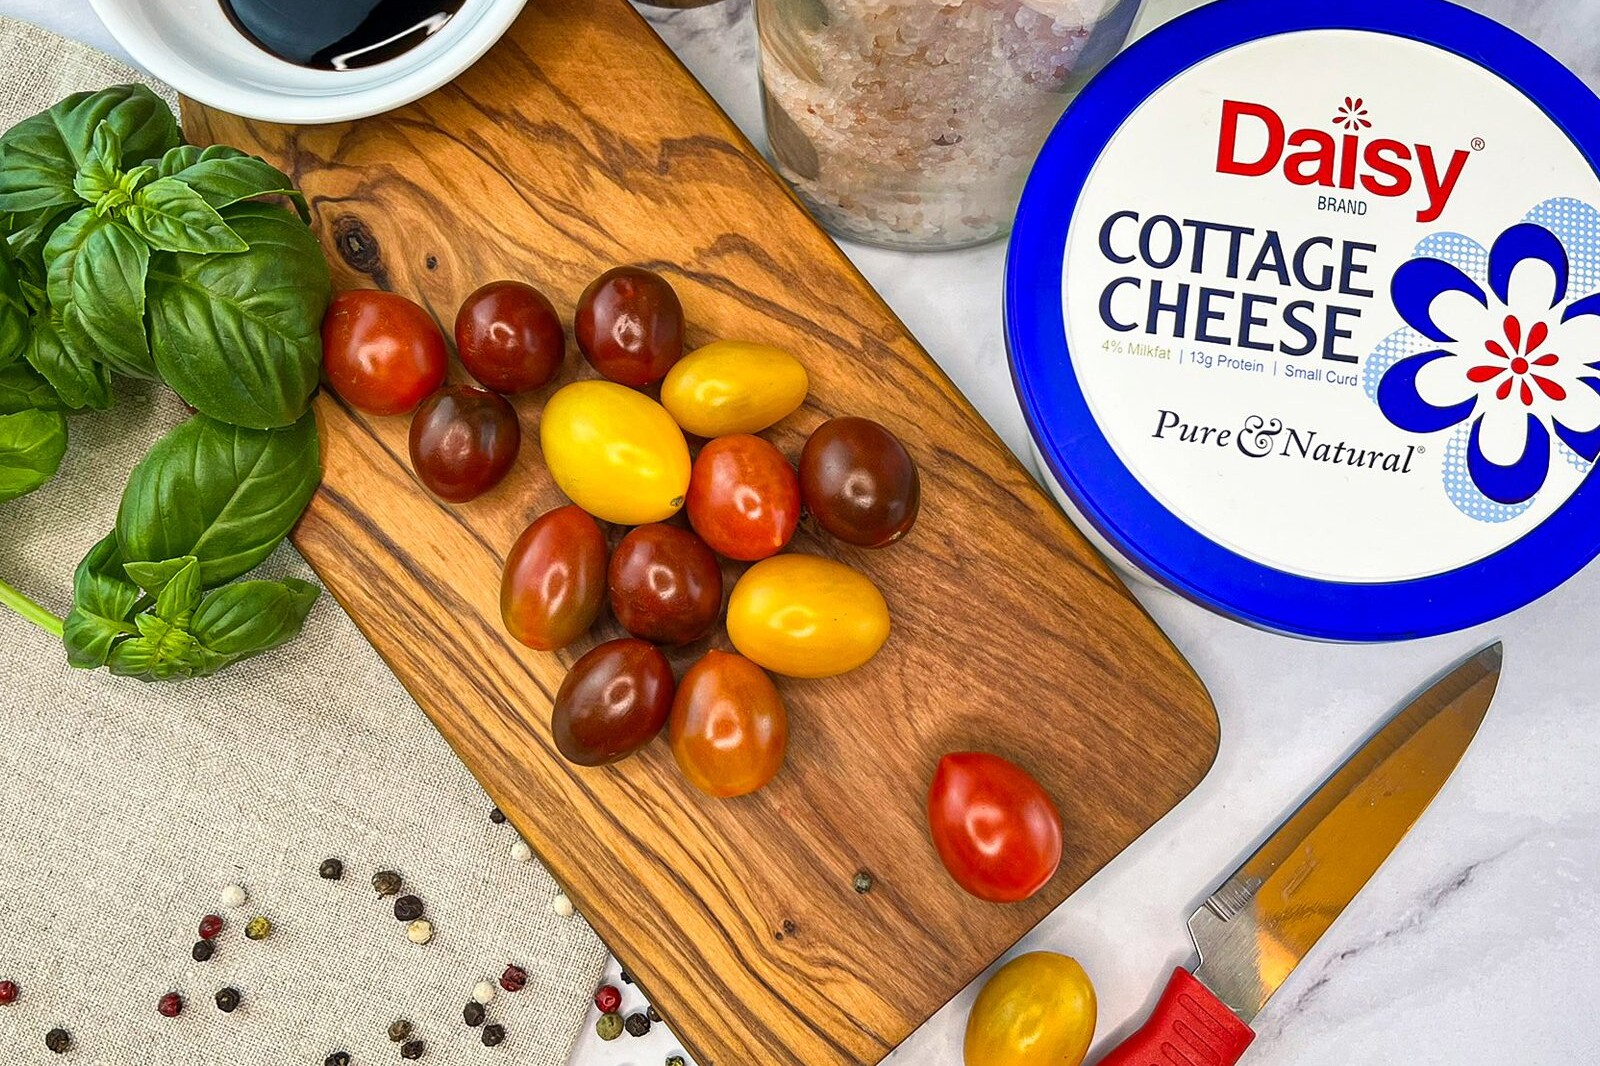
Tomato Salad Ingredients
- Cherry Tomatoes (1 1/2 pounds, halved): Bursting with fresh summer bite-sized flavor, low in calories, and full of vitamin C and antioxidants.
- Salt & Fresh Cracked Black Pepper (1 teaspoon, each): The classic combination that enhances the flavors of other ingredients.
- Extra Virgin Olive Oil (2 tablespoons): Slightly green gold in color and rich in healthy fats, it is less processed than regular olive oil and adds a delightful floral flavor to the tomatoes.
- Fresh Basil (1/2 cup, sliced or torn): Provides vibrant fresh minty, peppery flavor and a pop of color contrast for the tomatoes.
- Daisy Cottage Cheese (2 cups): The secret ingredient to this tasty salad, it adds a boost of protein and creamy deliciousness that is the perfect complement to the acidity of the tomatoes. Together they create a symphony in your mouth!
- Balsamic Glaze (2-3 tablespoons): Adds a burst of sweet acidity, helping balance the olive oil.
Substitutions, Variations, and Tips
- Grape tomatoes or chopped heirloom tomatoes may be used as an alternative to cherry tomatoes.
- Regular olive oil may be used instead of extra virgin olive oil.
- Other fresh herbs may be used rather than basil.
- Any balsamic vinegar or other kind of vinegar may be used as an alternative to balsamic glaze.
- Feel free to add a few tablespoons of finely sliced green onions or scallions, if desired.
- Thinly sliced red onions will add a zesty flavor to the tomatoes.
- Cucumbers are a great complement to tomatoes. Feel free to add a cup of diced up cucumbers to the salad.
- Grilled chicken is also a great accompaniment, turning this light salad into a heartier meal.
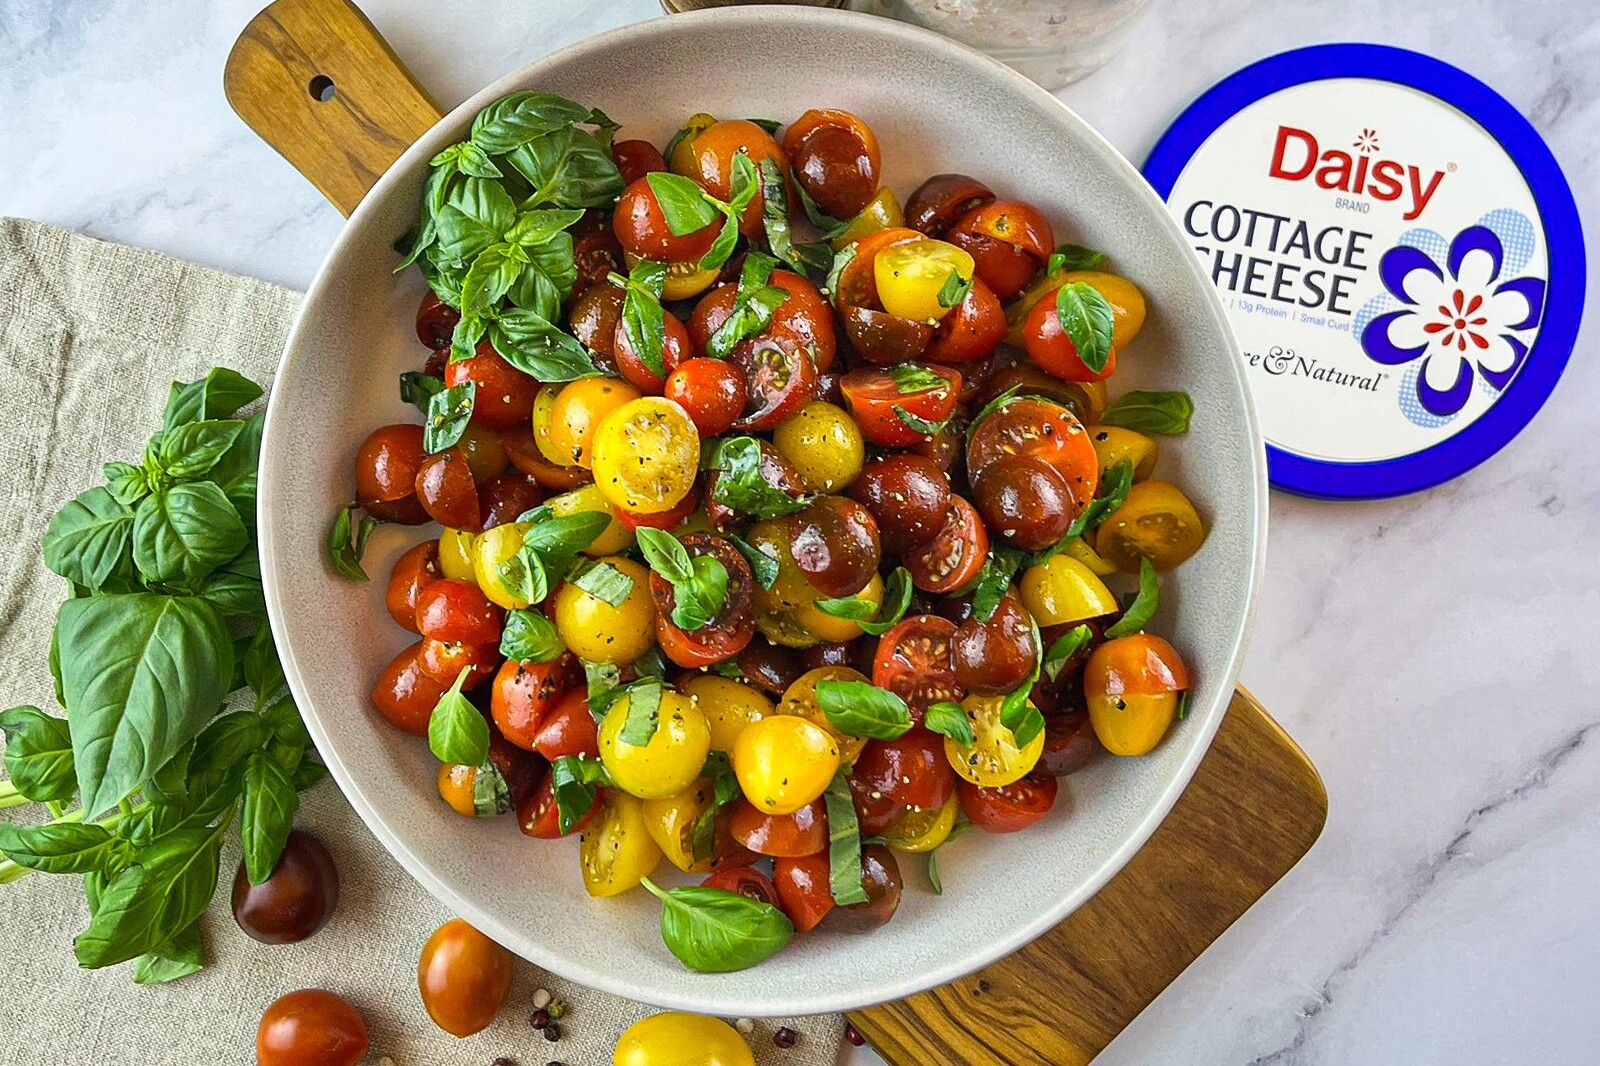
How To Make Tomato Salad
- Sprinkle tomatoes with salt and pepper. Chill 10 minutes and then drain.
- Add olive oil and basil. Toss gently to combine.
- Spoon cottage cheese over tomatoes and drizzle with balsamic glaze.