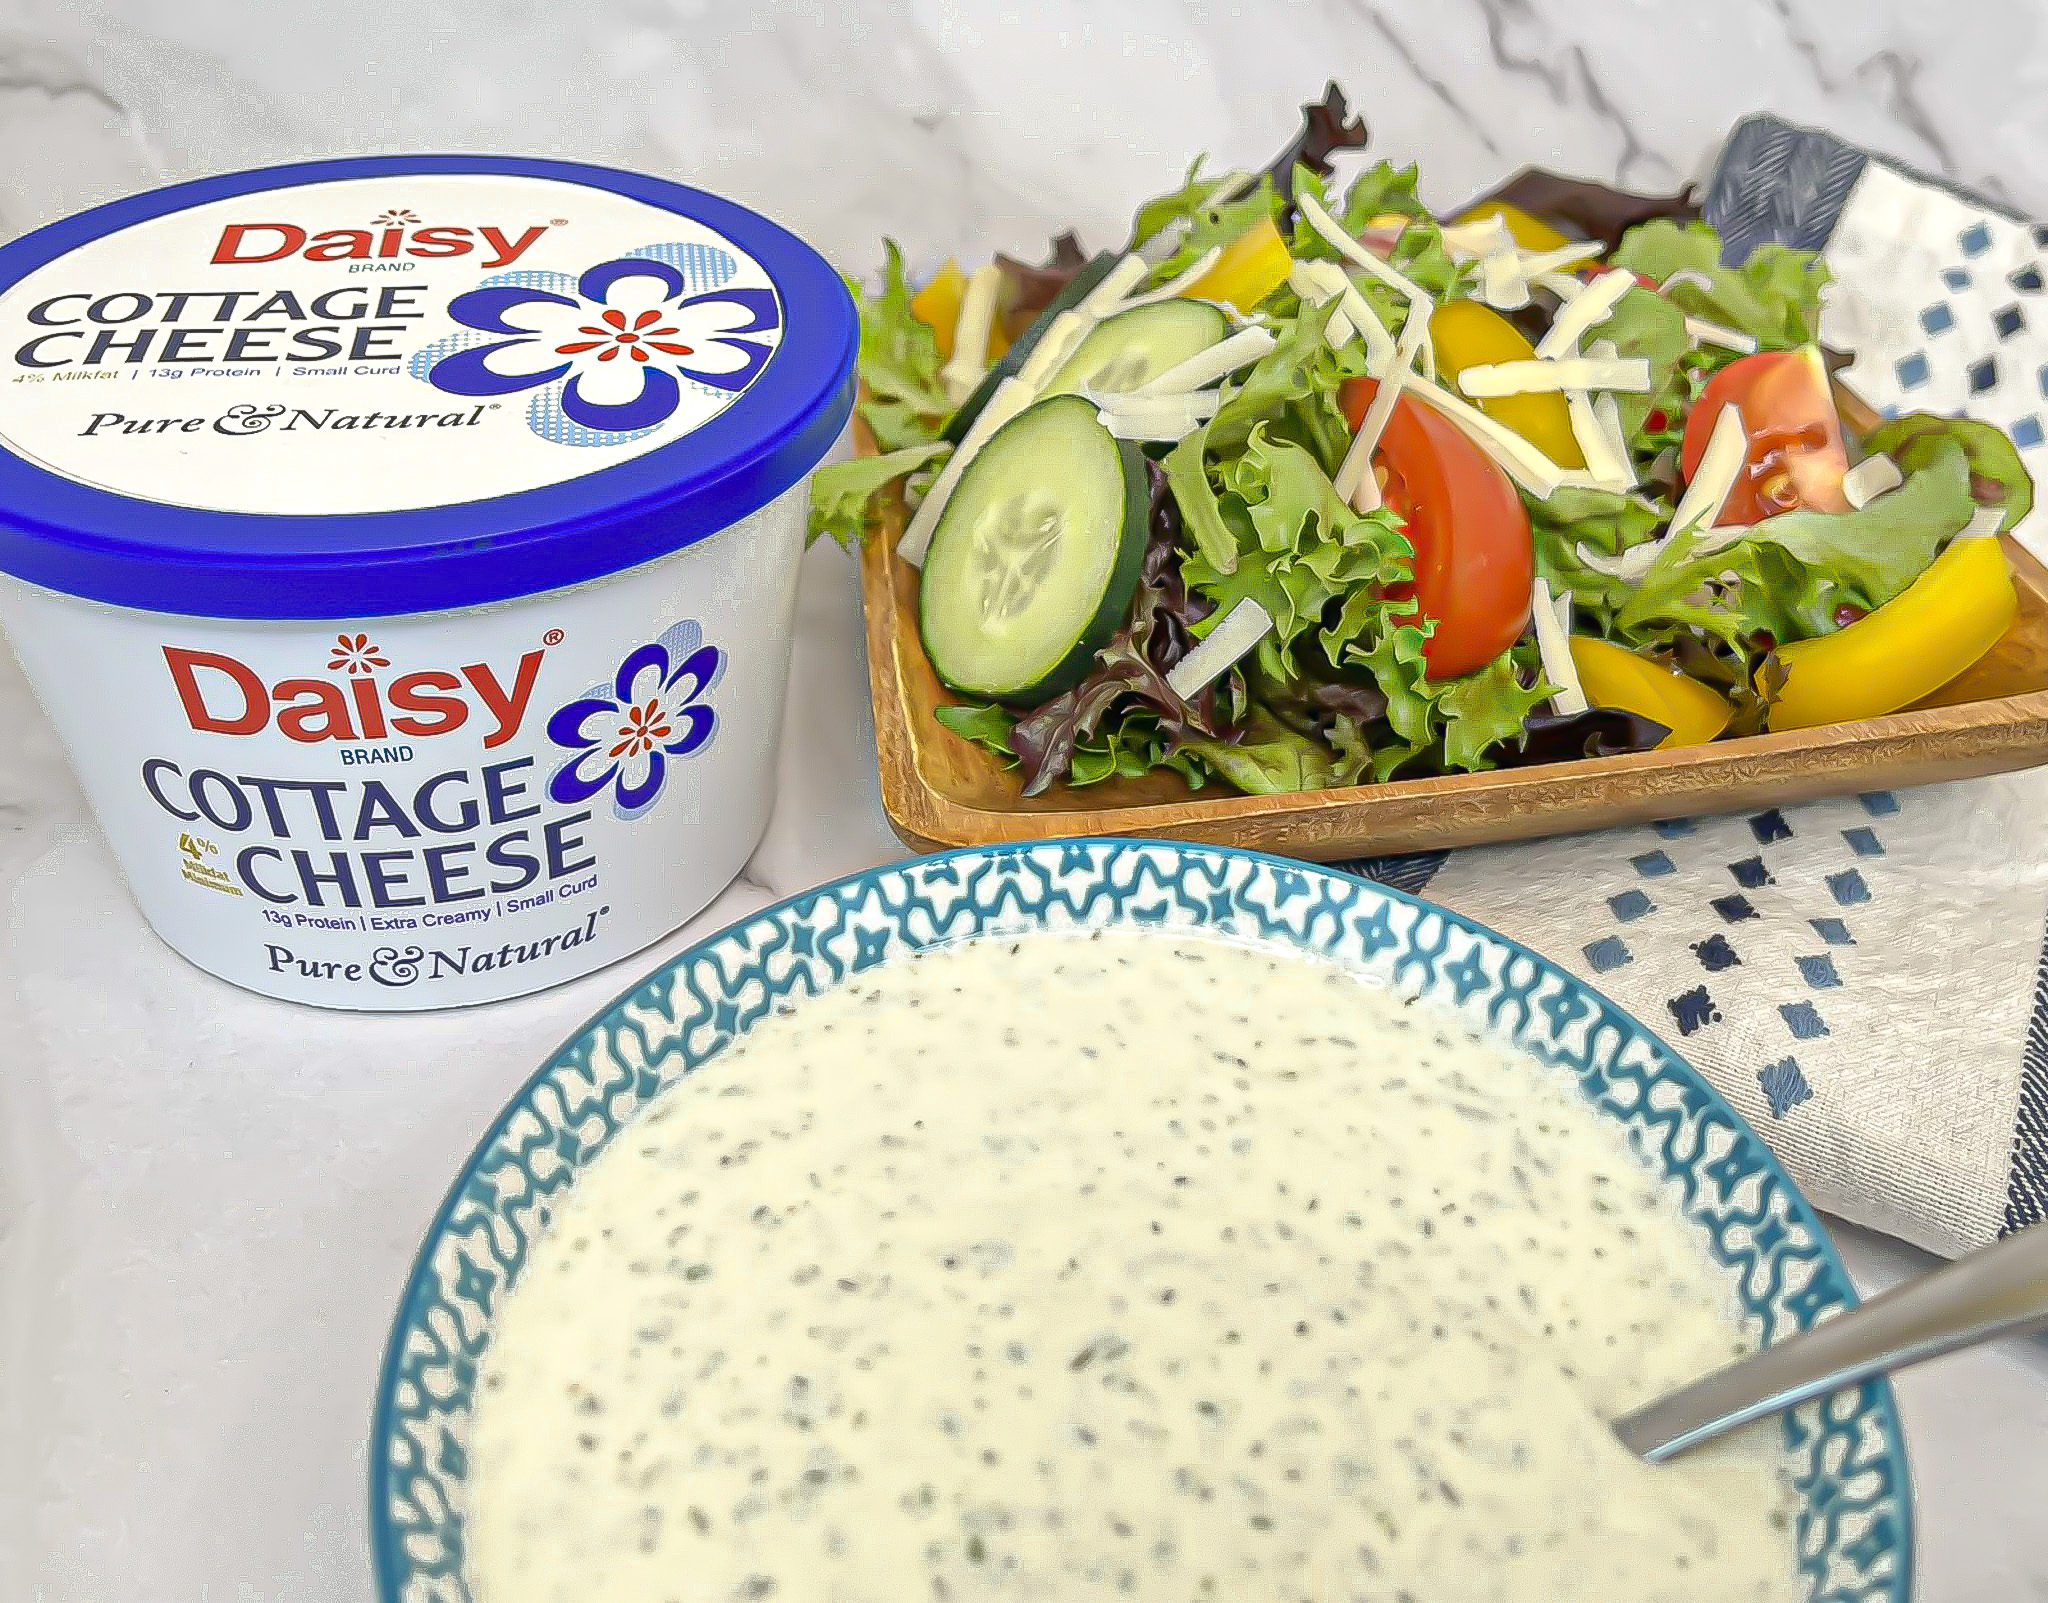
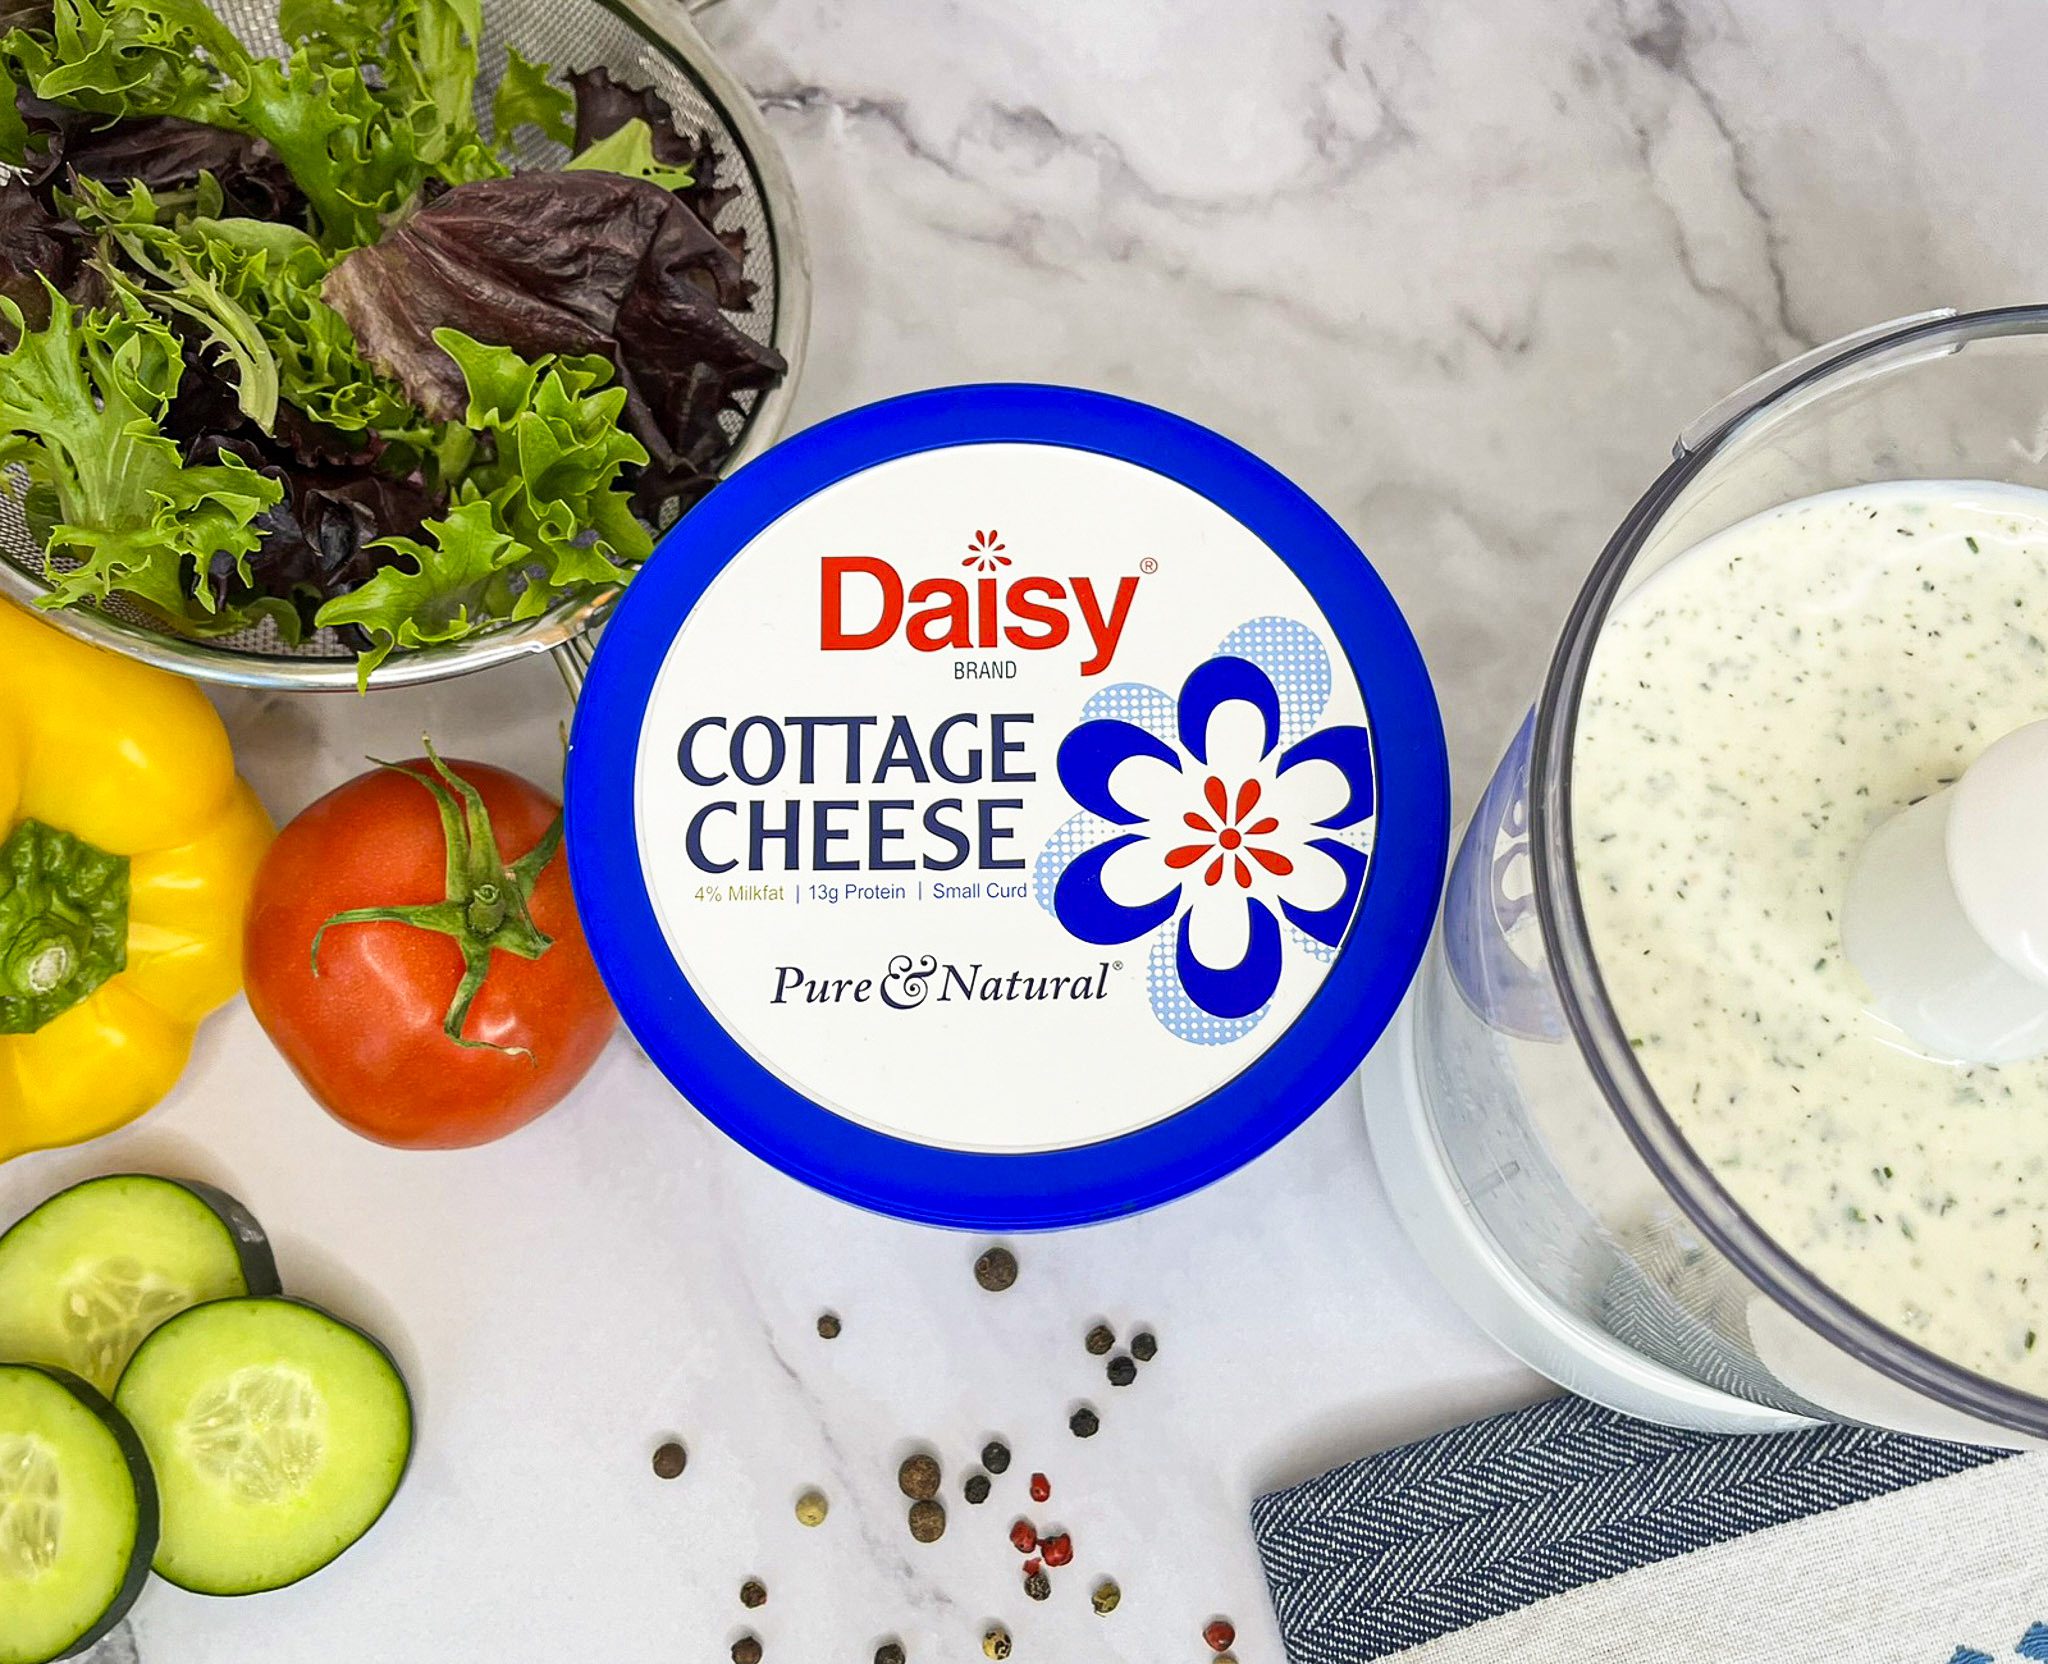
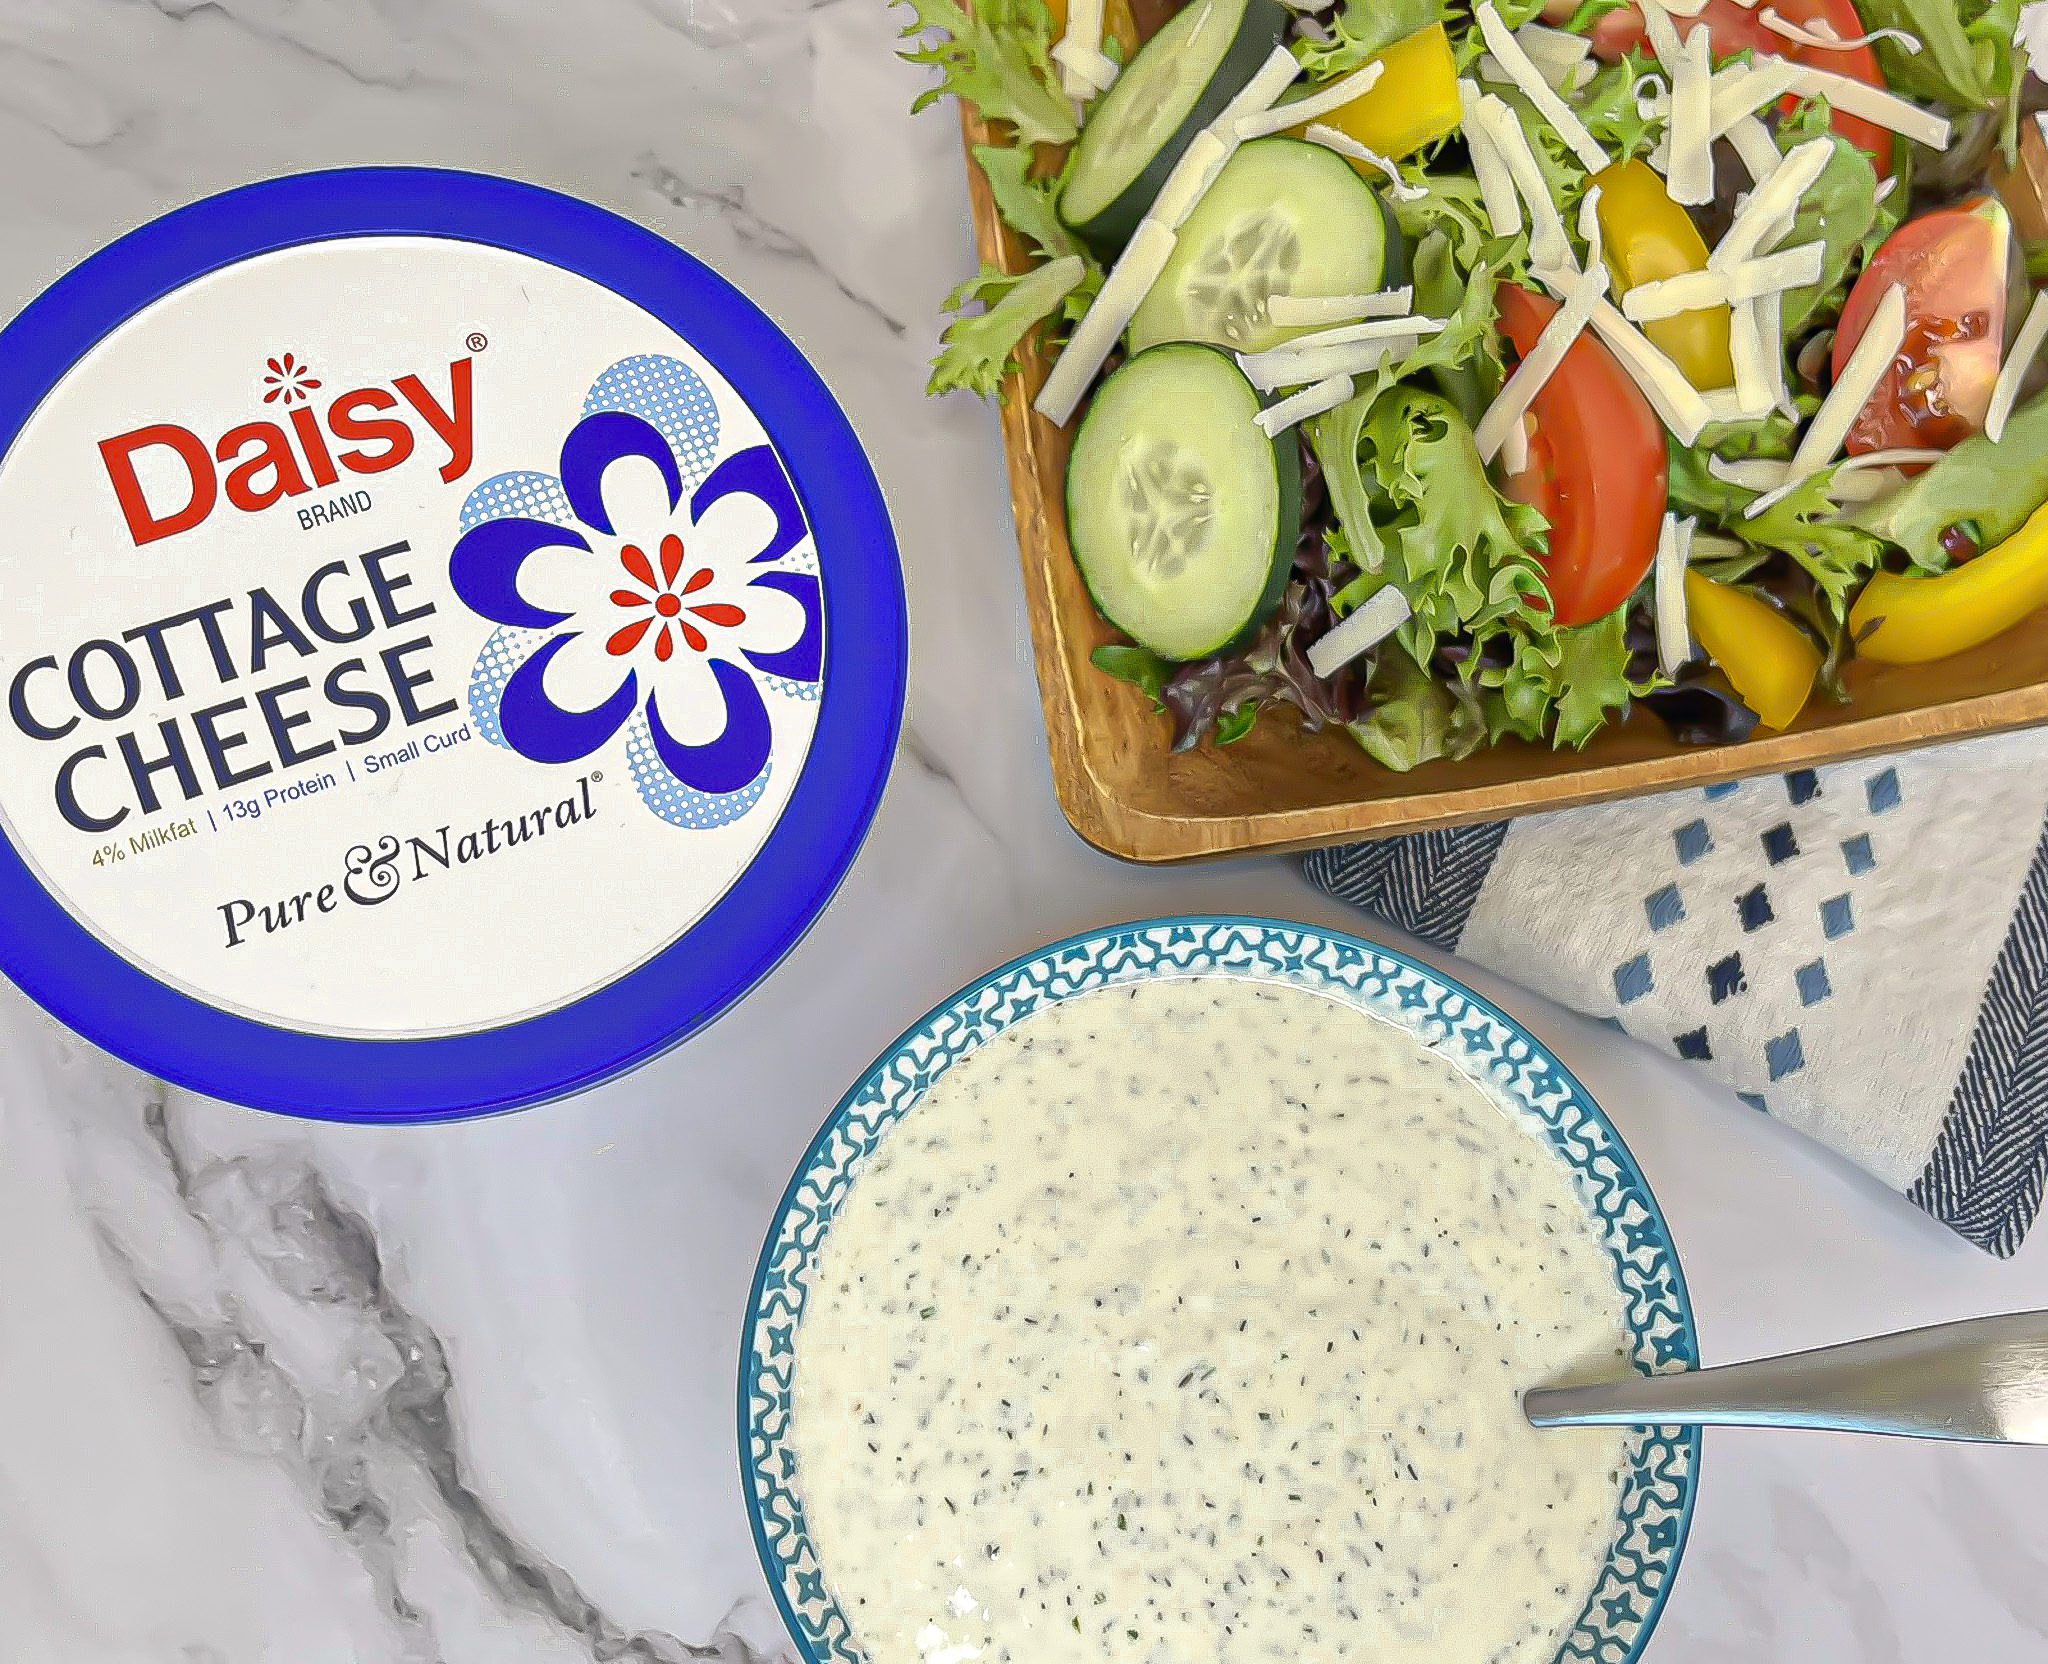
Cheesy Ranch Dressing
Cheesy Ranch Dressing
This easy Cheesy Ranch Dressing comes together in a snap and is packed with protein—without all the preservatives and additives found in many store-bought dressings.
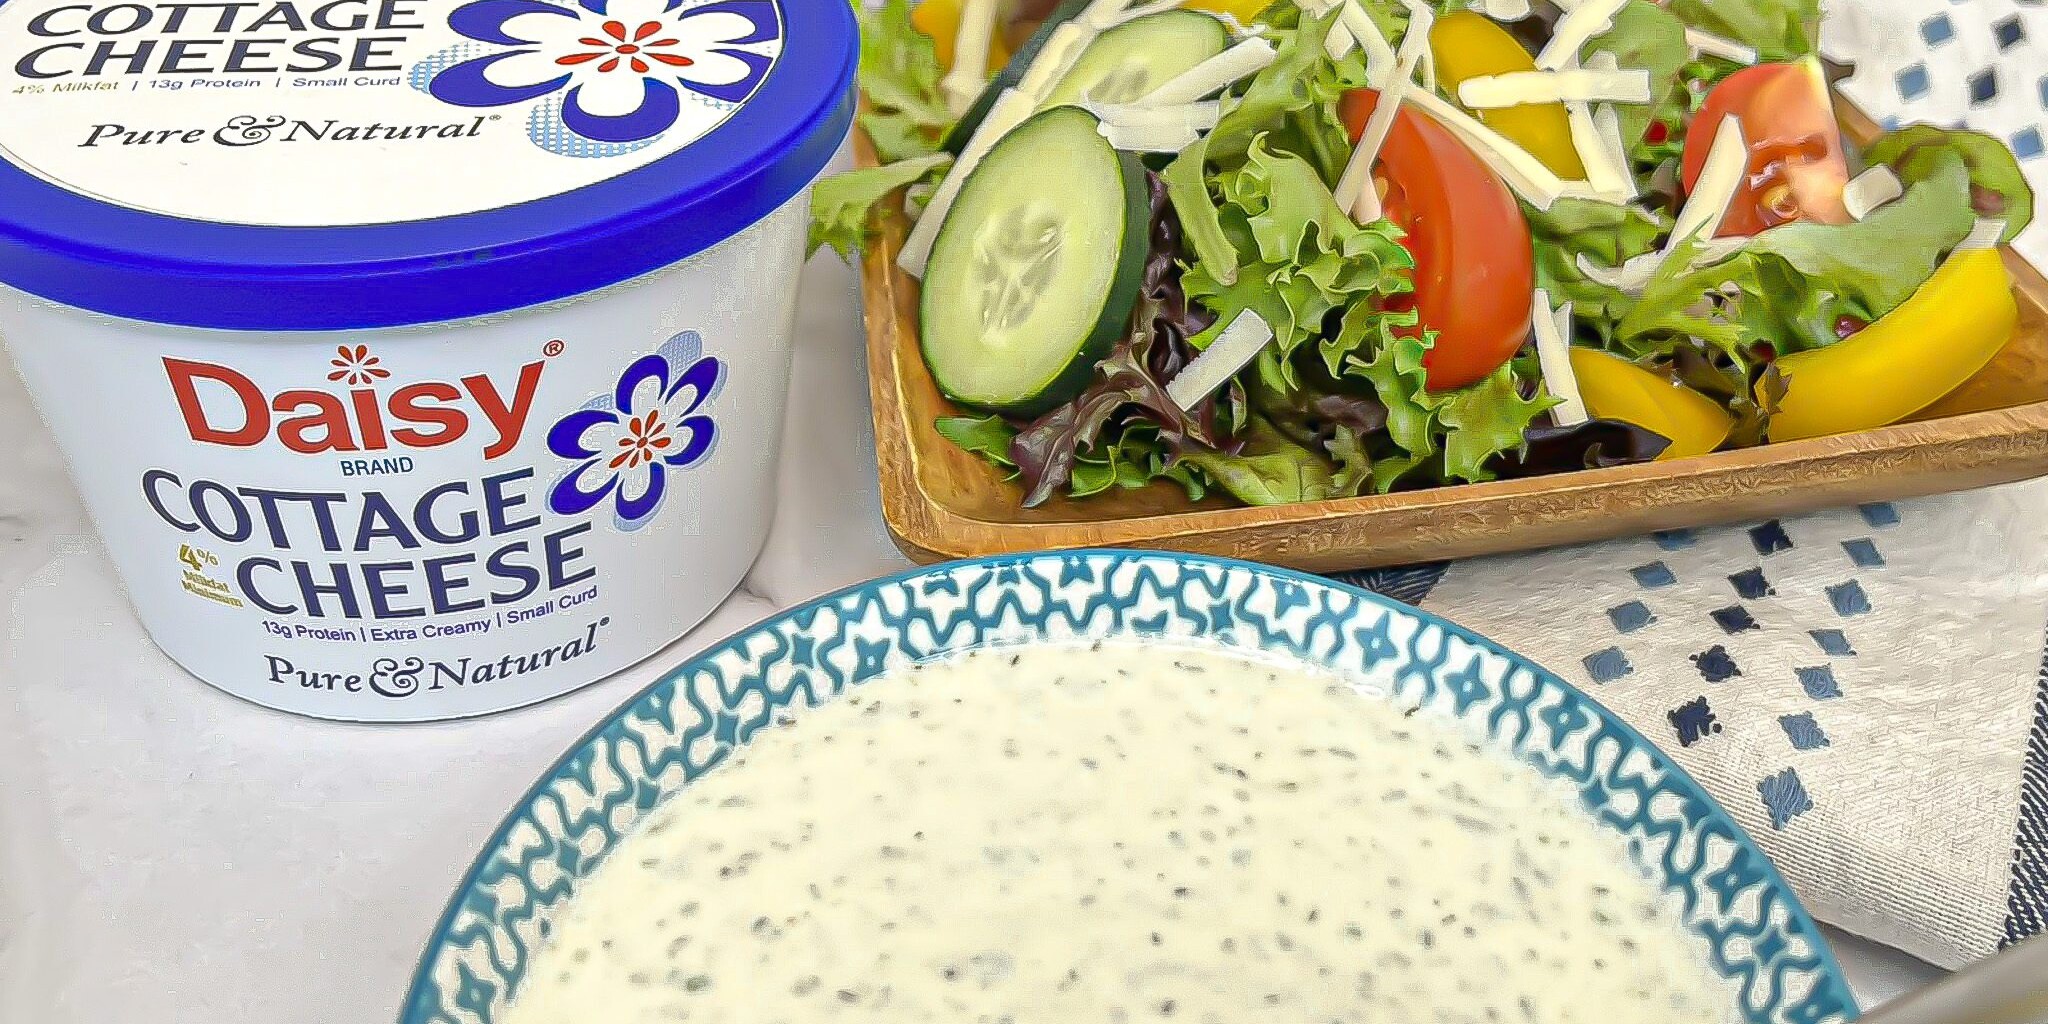
Made with Daisy Cottage Cheese as the creamy base, this dressing is rich, flavorful, and surprisingly light. It’s perfect for salads, dipping veggies, or drizzling over grain bowls and roasted veggies. Once you try it, you’ll never go back to bottled ranch again!
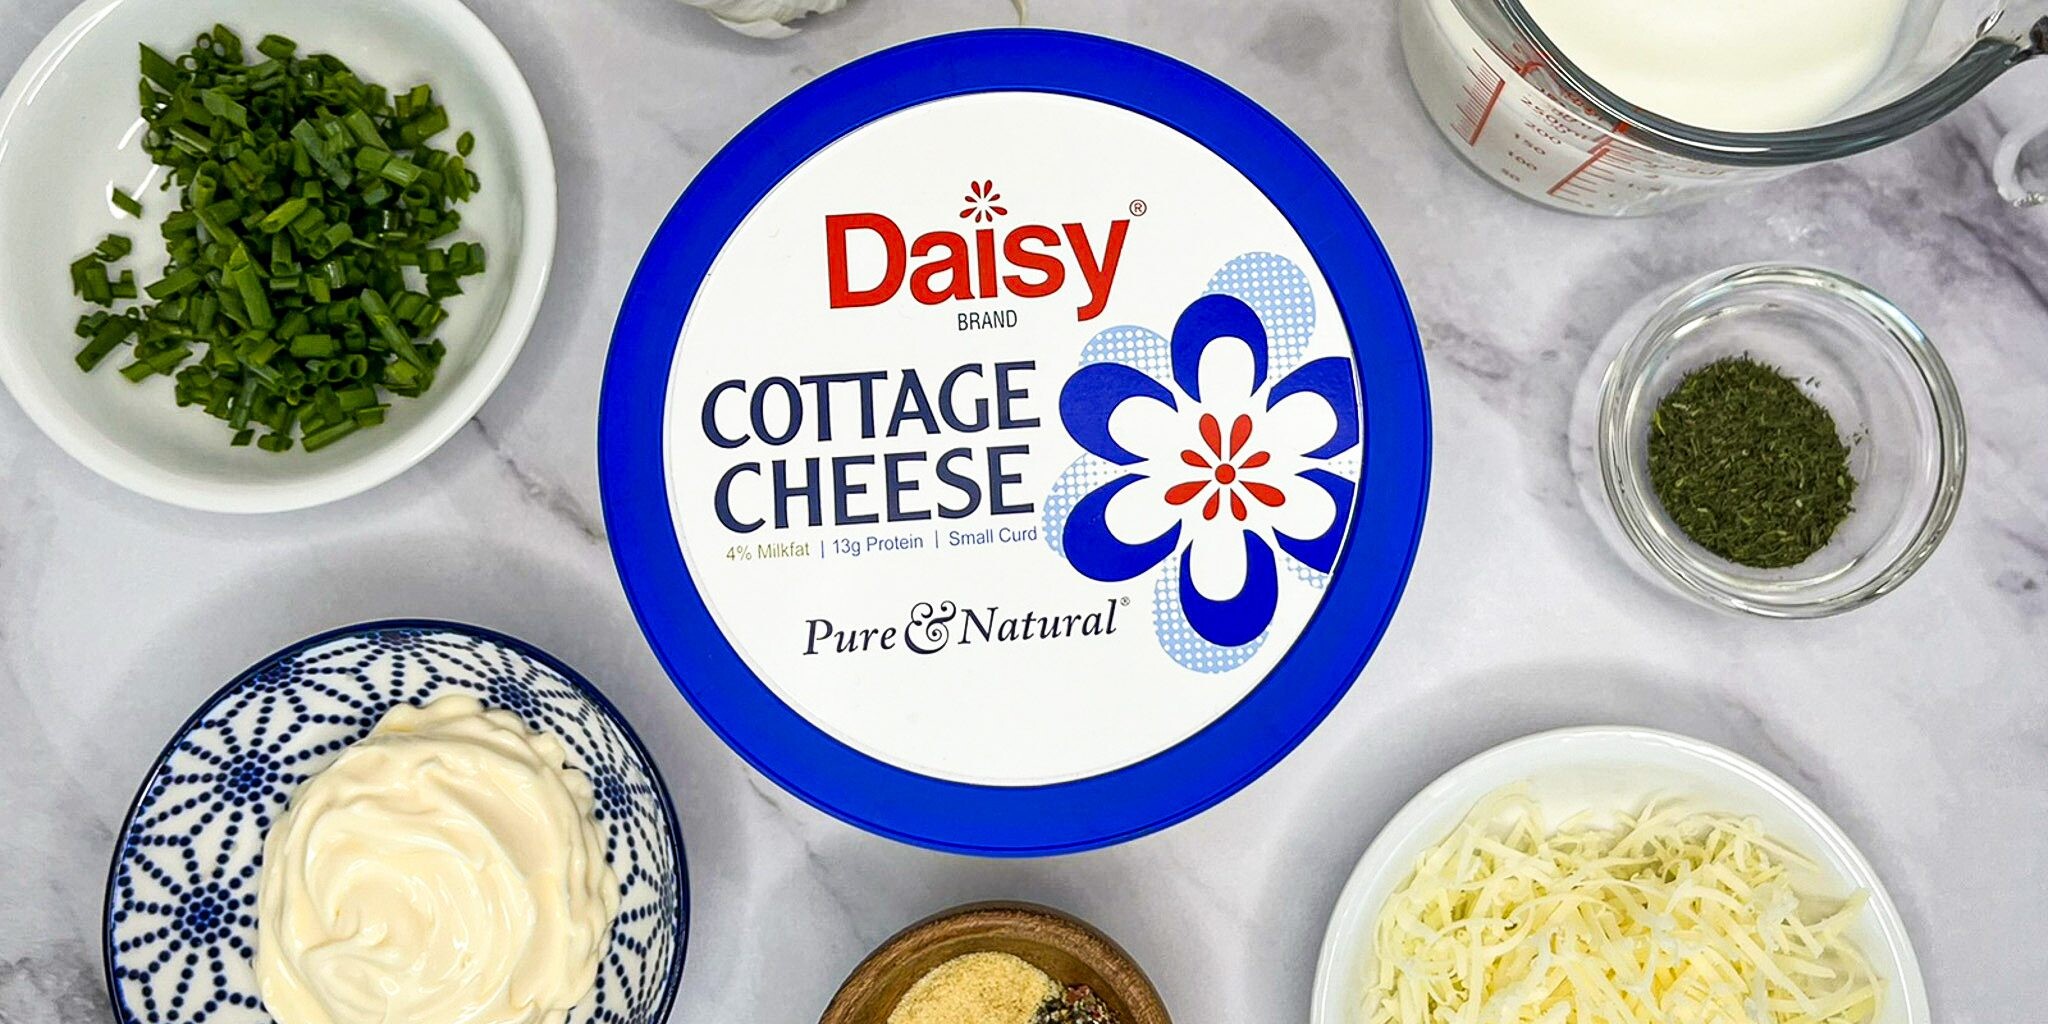
Cheesy Ranch Dressing Ingredients
- Daisy Cottage Cheese (1 cup): Provides the dressing with its creamy texture and adds a subtle tangy taste with a boost of protein.
- Buttermilk (1/2 cup): Tangy in taste, it adds a touch of acid to the dressing and thins it out.
- Mayonnaise (1/4 cup): Adds a creamy richness to the dressing.
- Fresh Chives (2 tablespoons, chopped): Small, thin, and wispy onions, perfect for adding a touch of mild onion flavor with a taste similar to leeks.
- Parmesan (2 tablespoons, grated): Best when freshly grated, it adds a nutty saltiness to the dressing.
- Garlic (1 clove): Fresh garlic gives a pungent, sharp flavor that compliments the herbs.
- Onion Powder (1/4 teaspoon): Adds a concentrated, punchy onion taste without adding texture of fresh onions.
- Kosher Salt (1/4 teaspoon): A large-grain salt that is less refined than table salt and contains no additives. It helps enhance the other flavors of the dressing.
- Cracked Black Pepper (1/4 teaspoon): Adds a round and deep flavor than ground pepper. Highly fragrant and earthy in taste with citrus and slight floral notes.
- Dried Dill (1 teaspoon): One of the traditional flavors of ranch dressing, this concentrated dried herb packs a bright, sweet, citrusy, earthy punch.
Substitutions, Variations, and Tips
- Substitute ½ teaspoon jarred minced garlic for the fresh clove if you’re short on time.
- Want a little heat? Add a small diced jalapeño or 1/8 teaspoon cayenne pepper.
- No buttermilk? Make your own by mixing 1 tablespoon lemon juice or vinegar into 1 cup milk—let it sit for 10 minutes.
- Swap green onions or leeks for the chives.
- Use 1 tablespoon chopped fresh dill instead of dried for a brighter flavor.
- Customize the texture! Blend until smooth or leave a bit of chunkiness for a rustic feel.
How to Make Cheesy Ranch Dressing
- In a food processor, combine all ingredients except the dill and blend until smooth.
- Stir in the dill.
- Serve immediately, or refrigerate for a few hours to let the flavors meld.
This dressing keeps well in the fridge for several days—perfect for meal prep! Once you try this protein-packed twist on ranch, you may never go back to the bottled stuff.

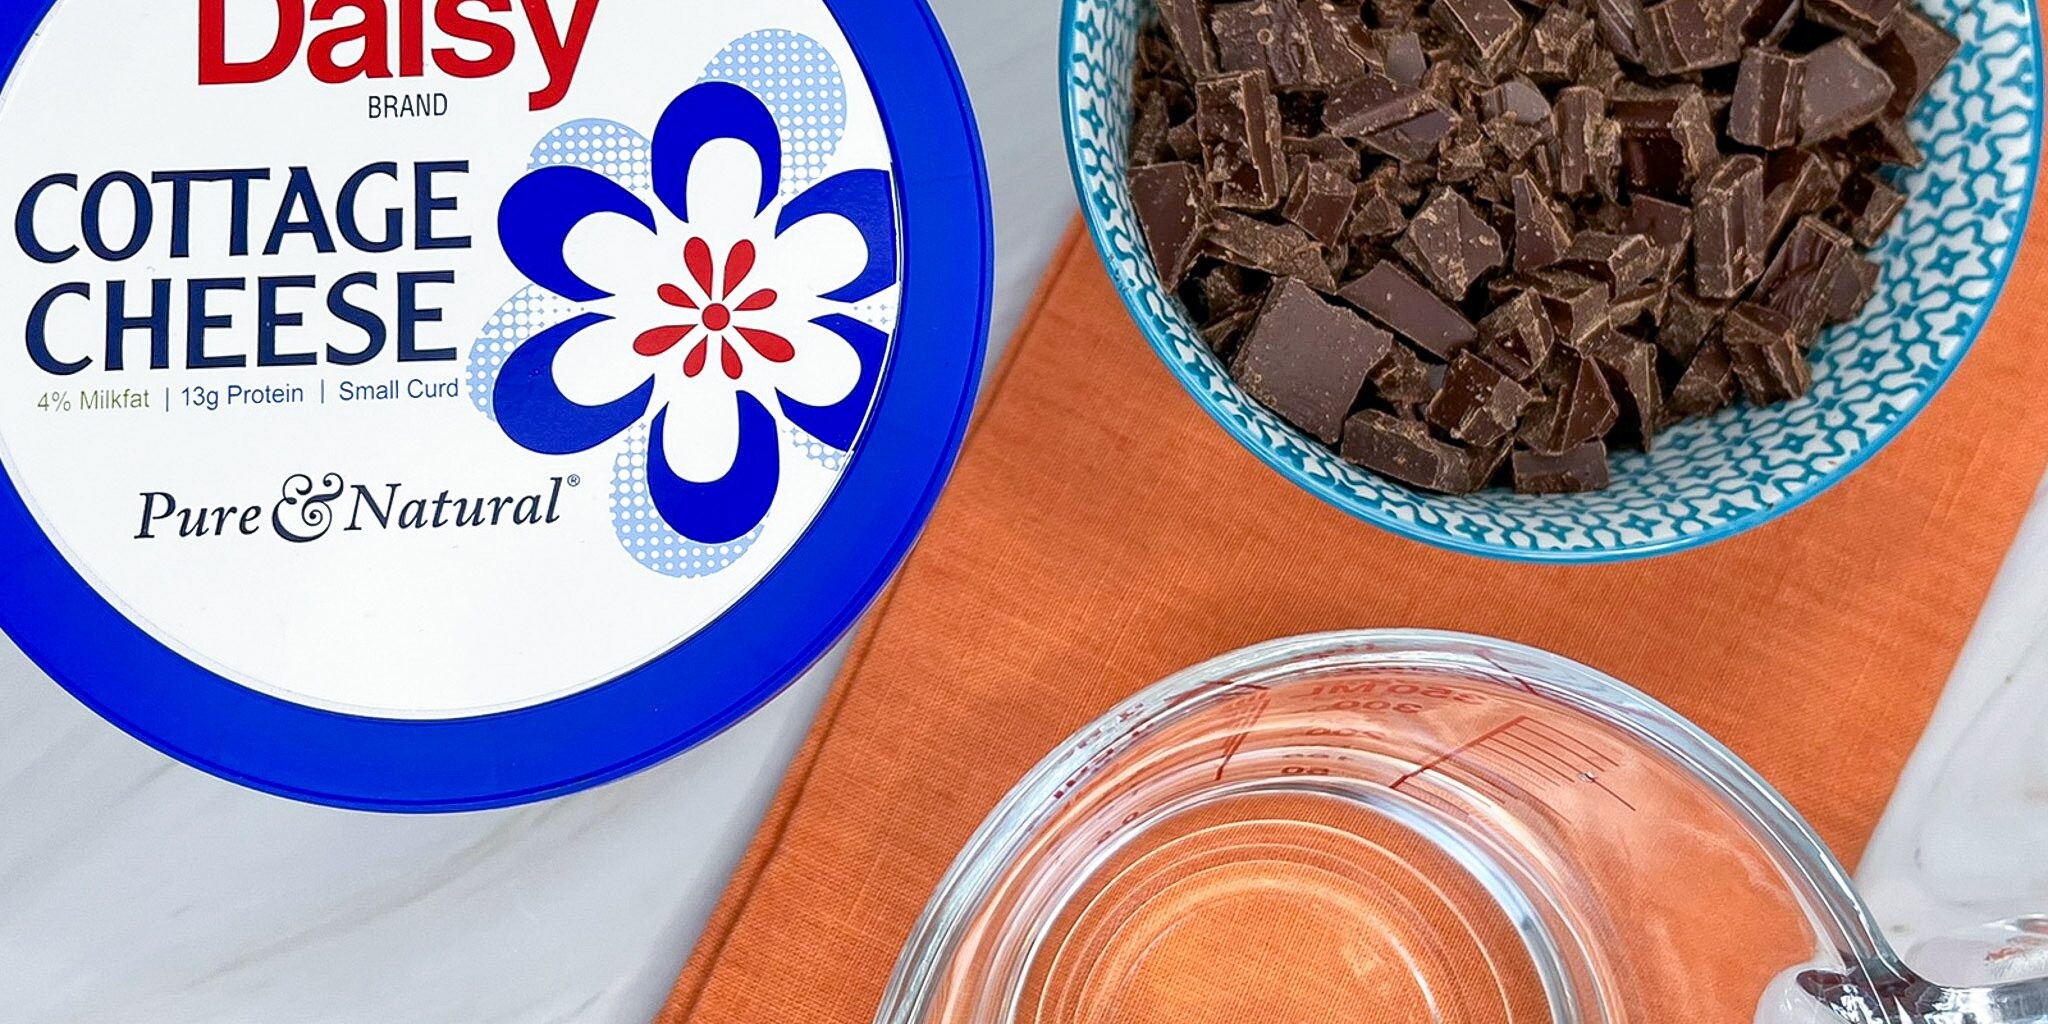
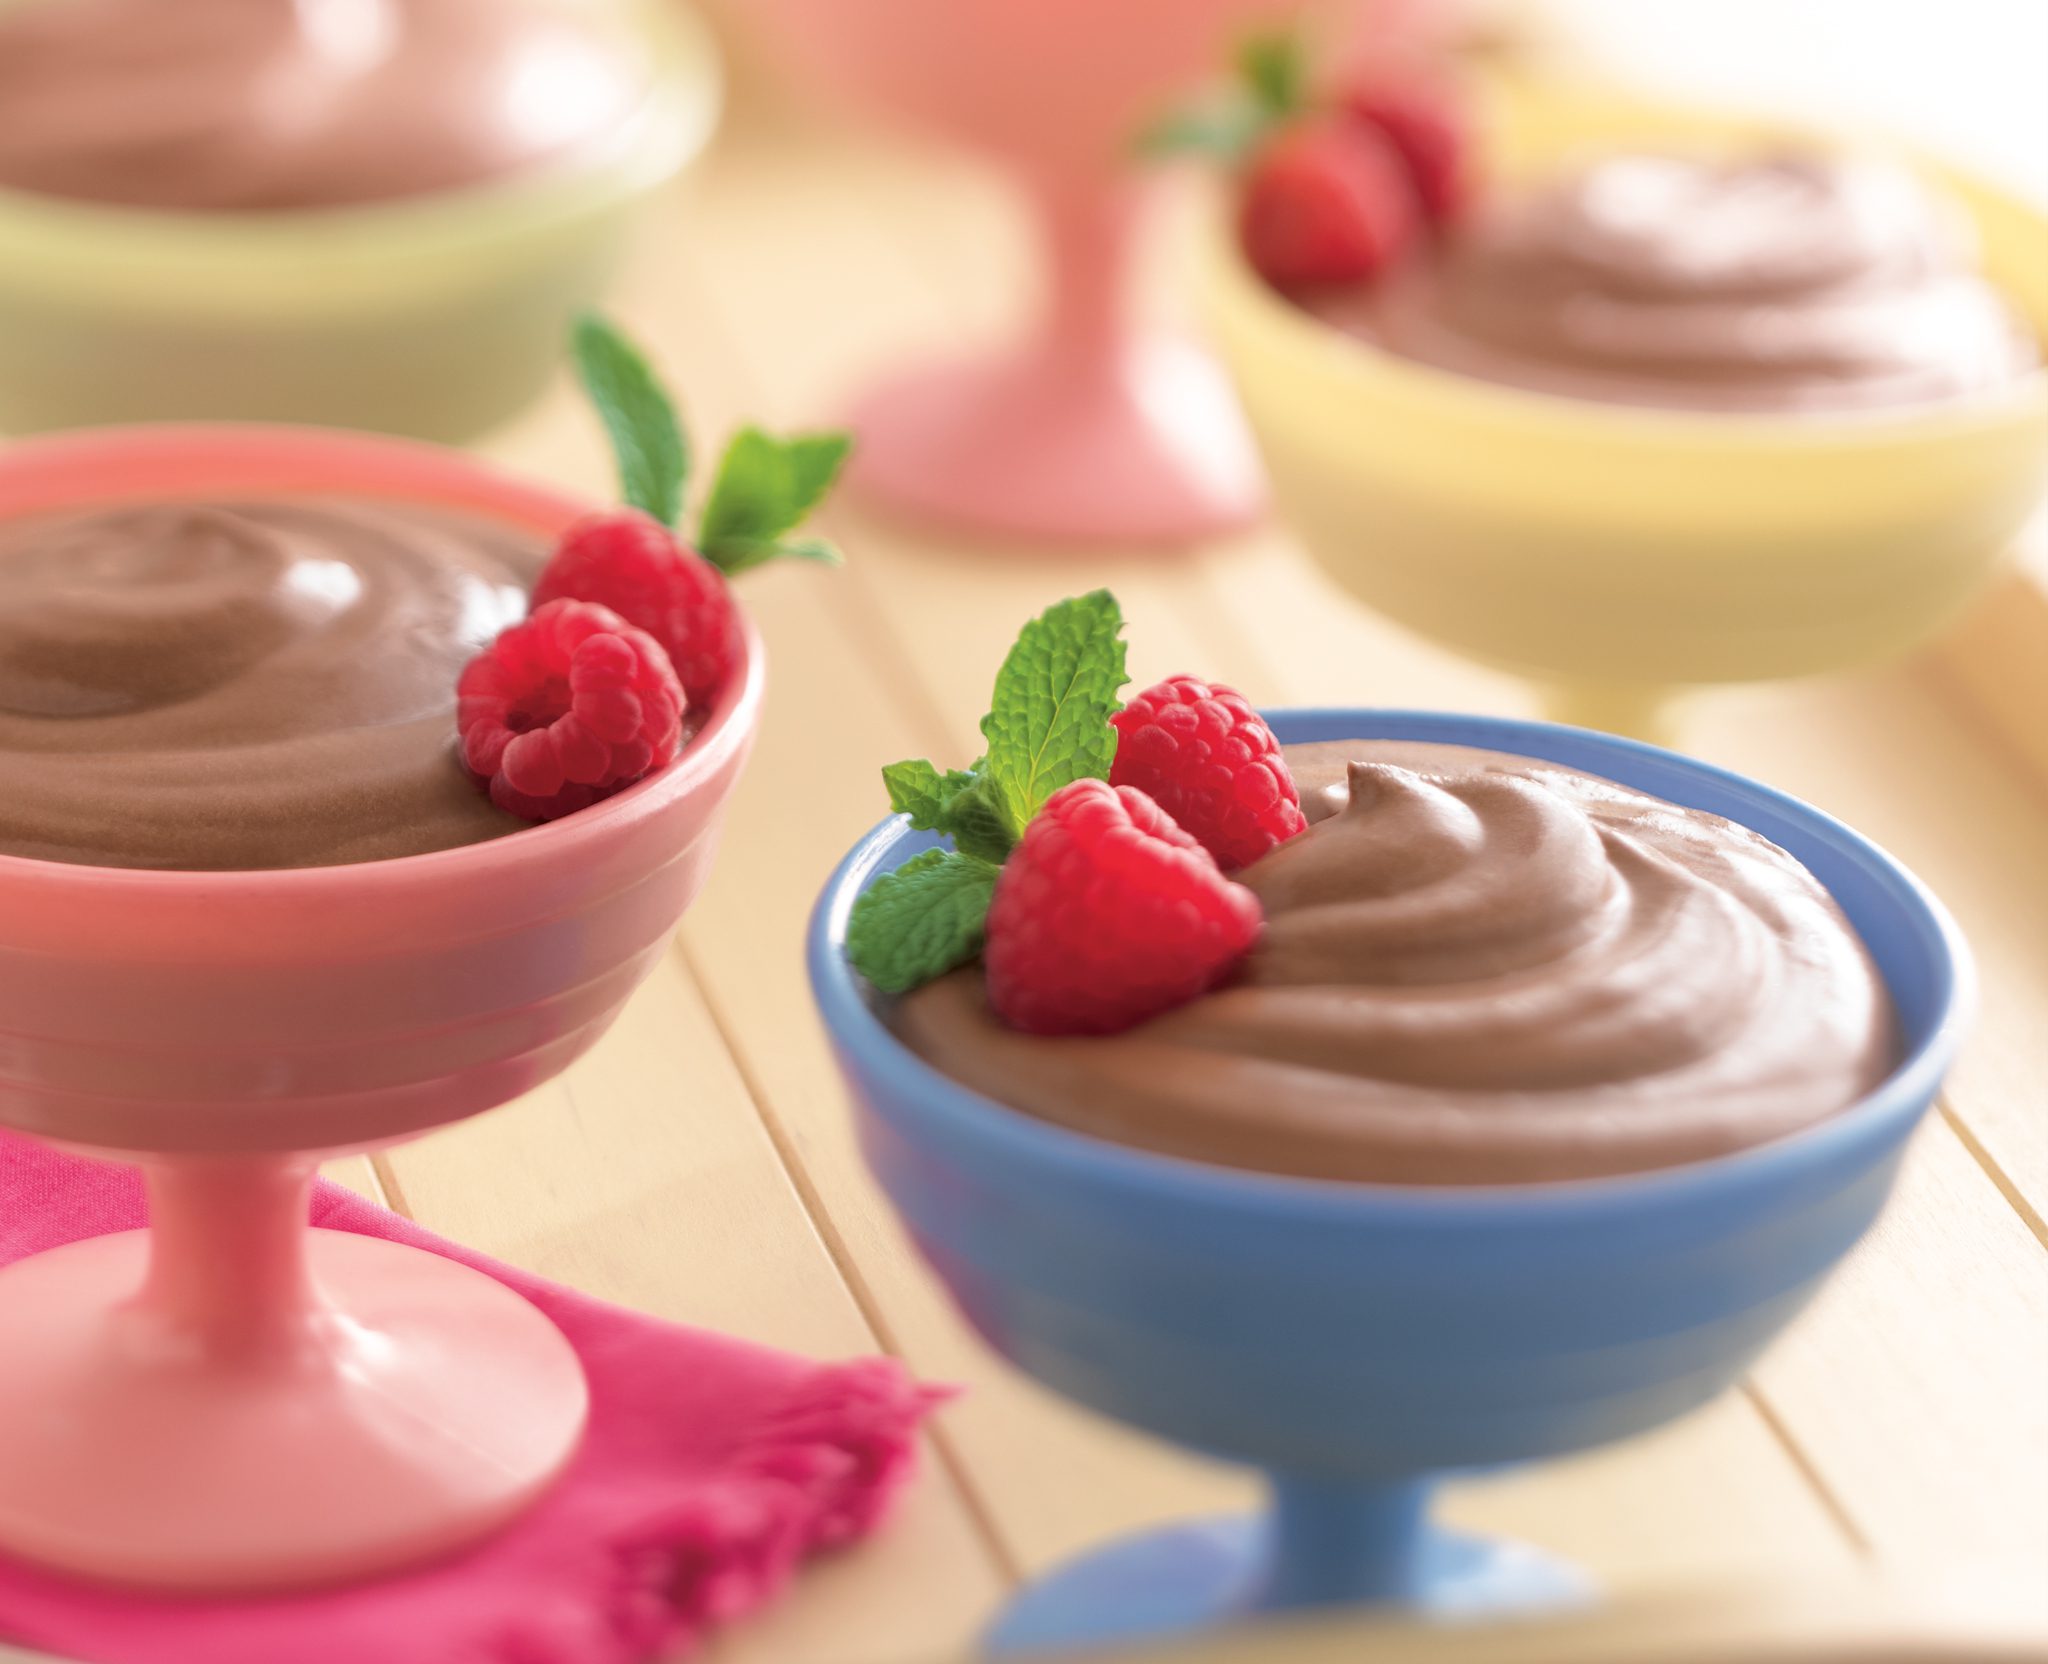
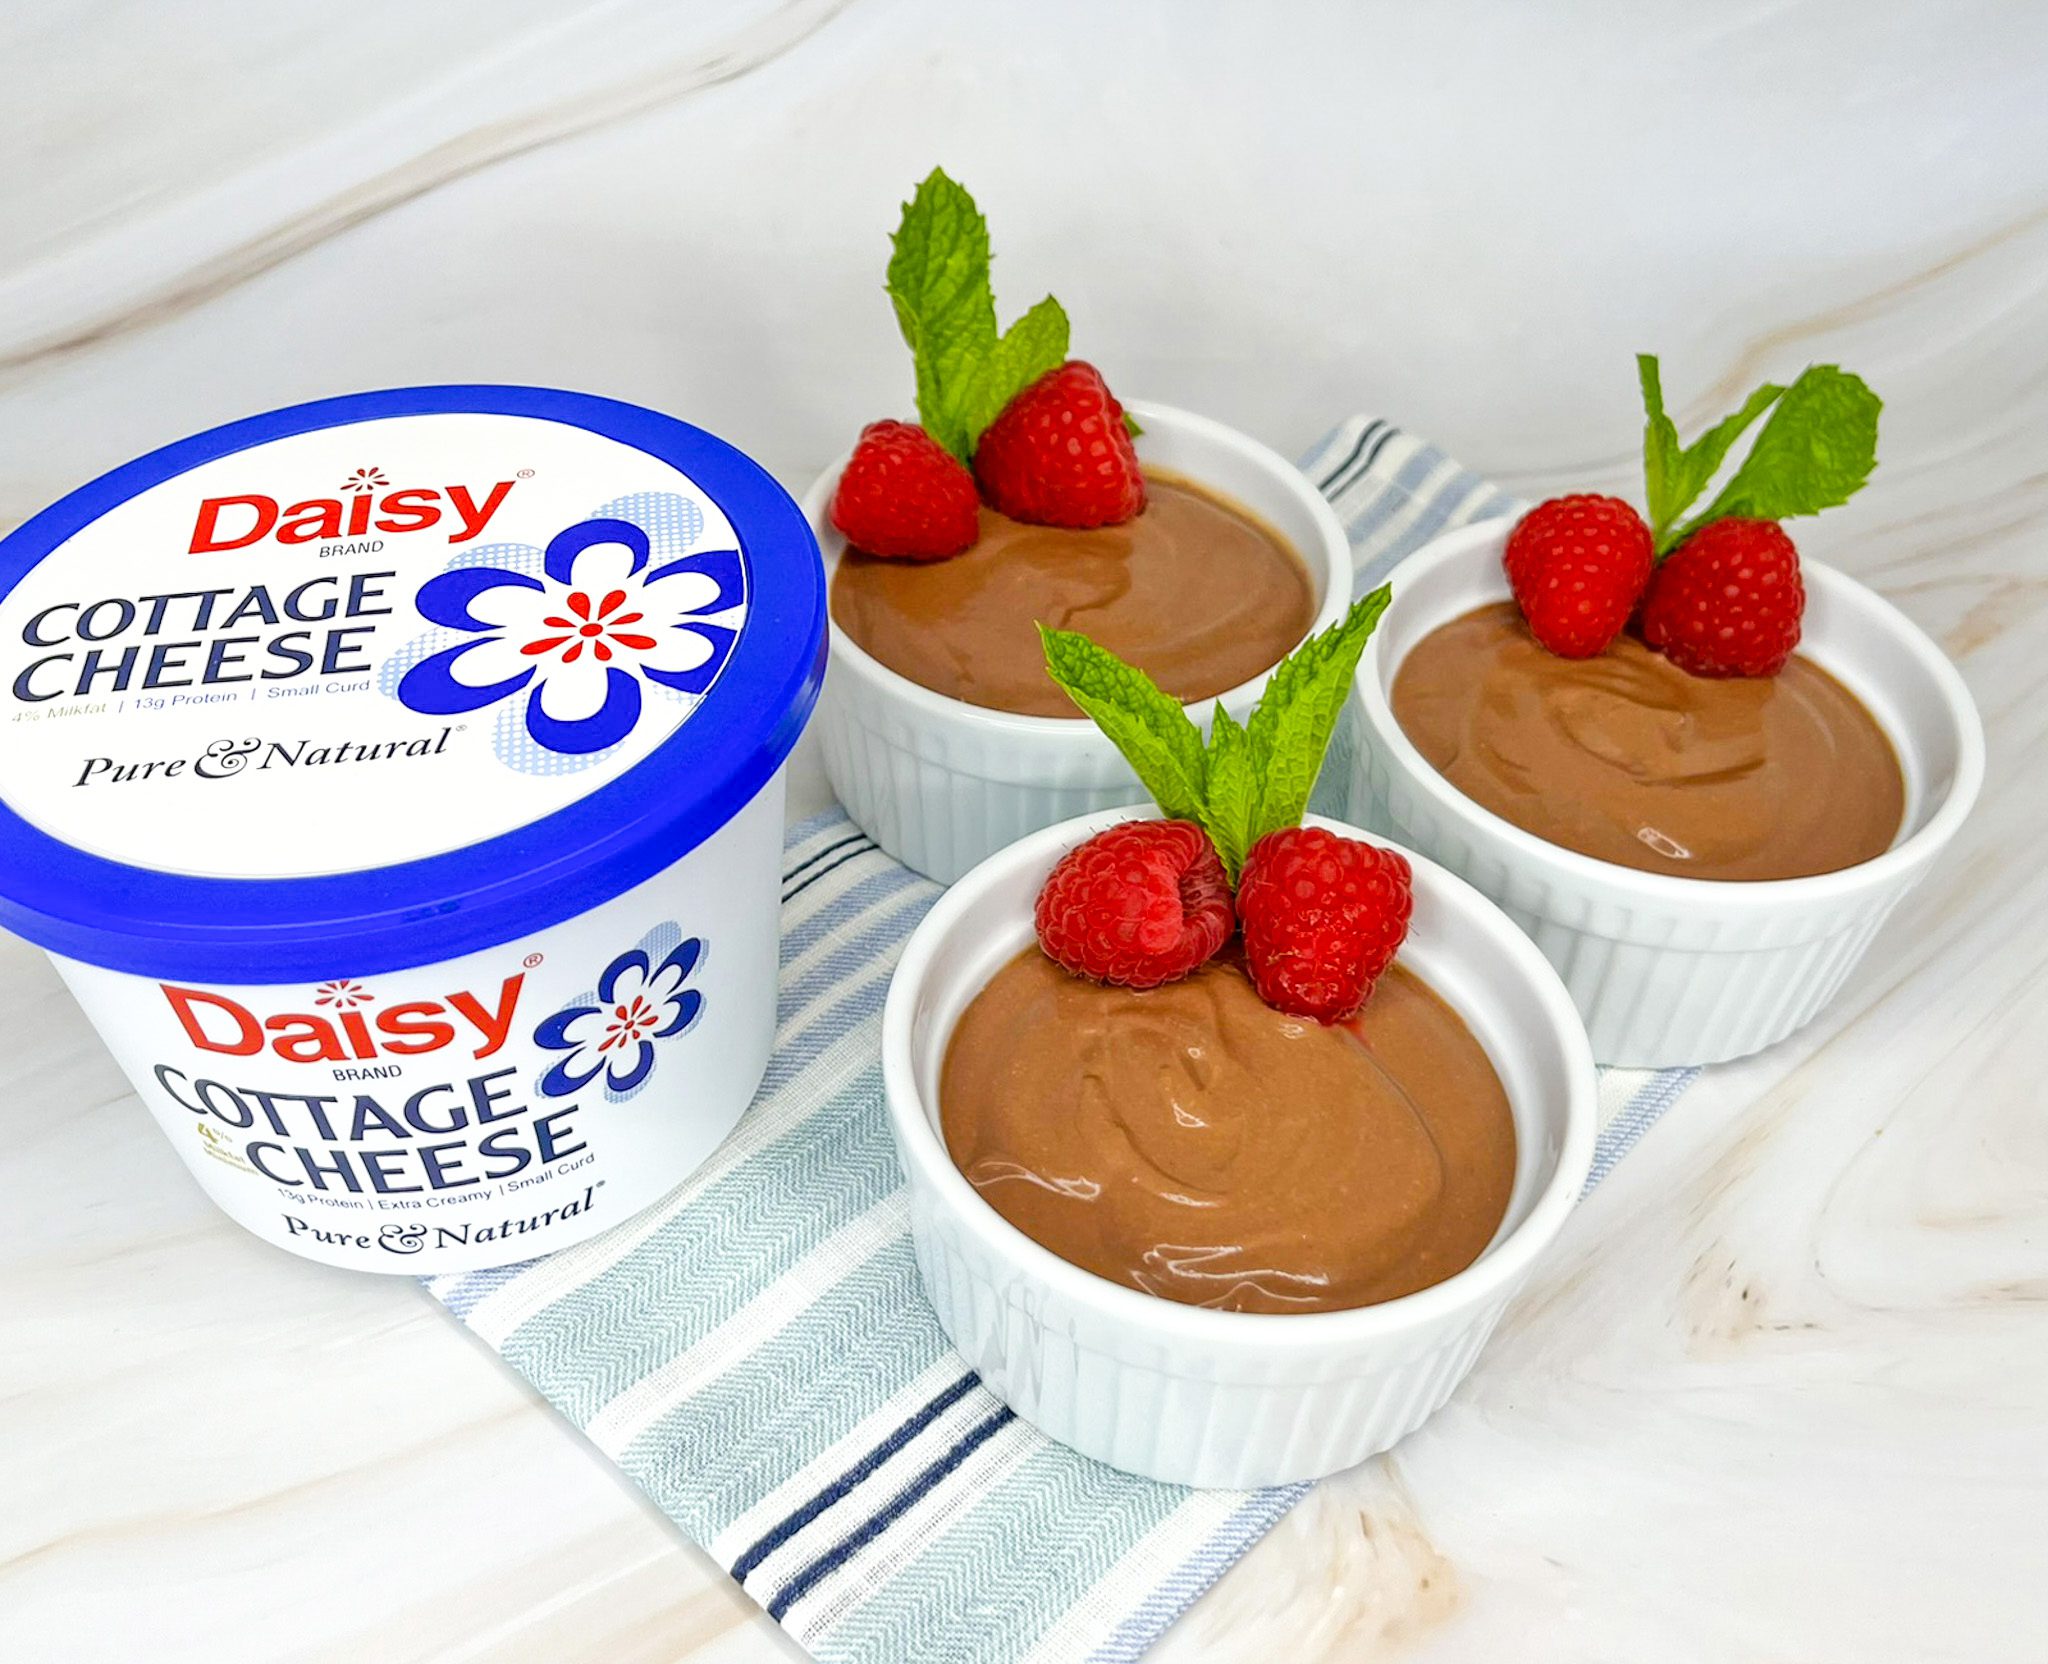
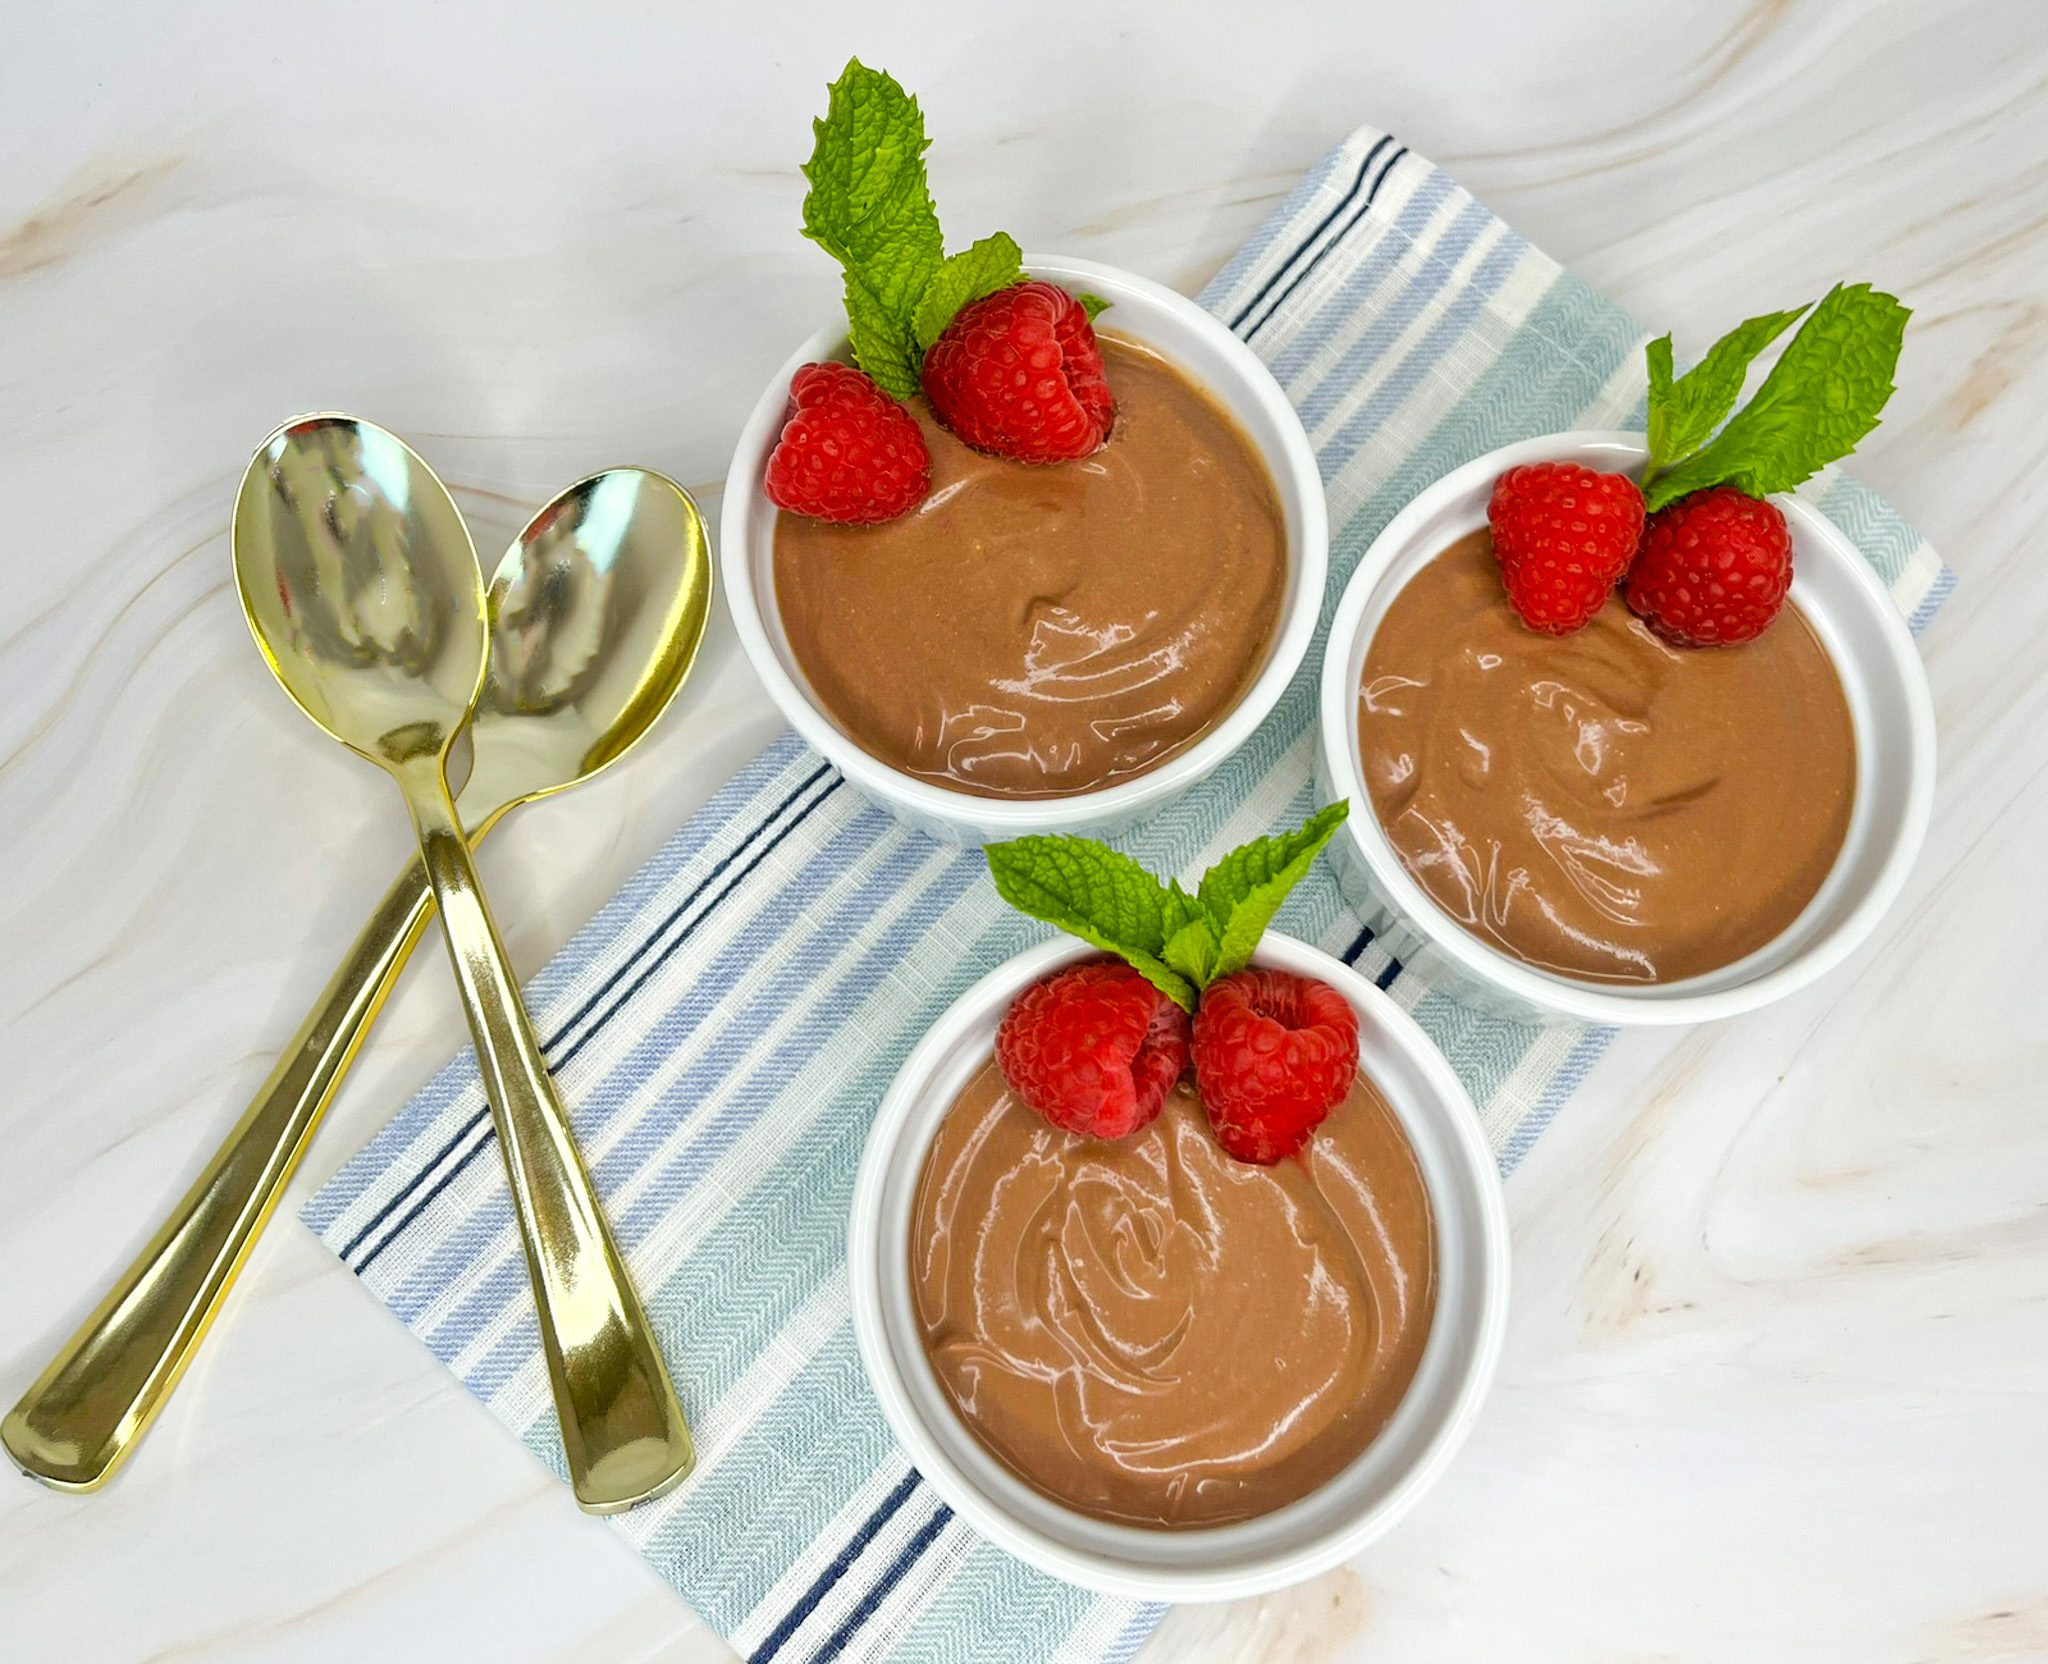
High Protein Chocolate Pudding
High Protein Chocolate Pudding
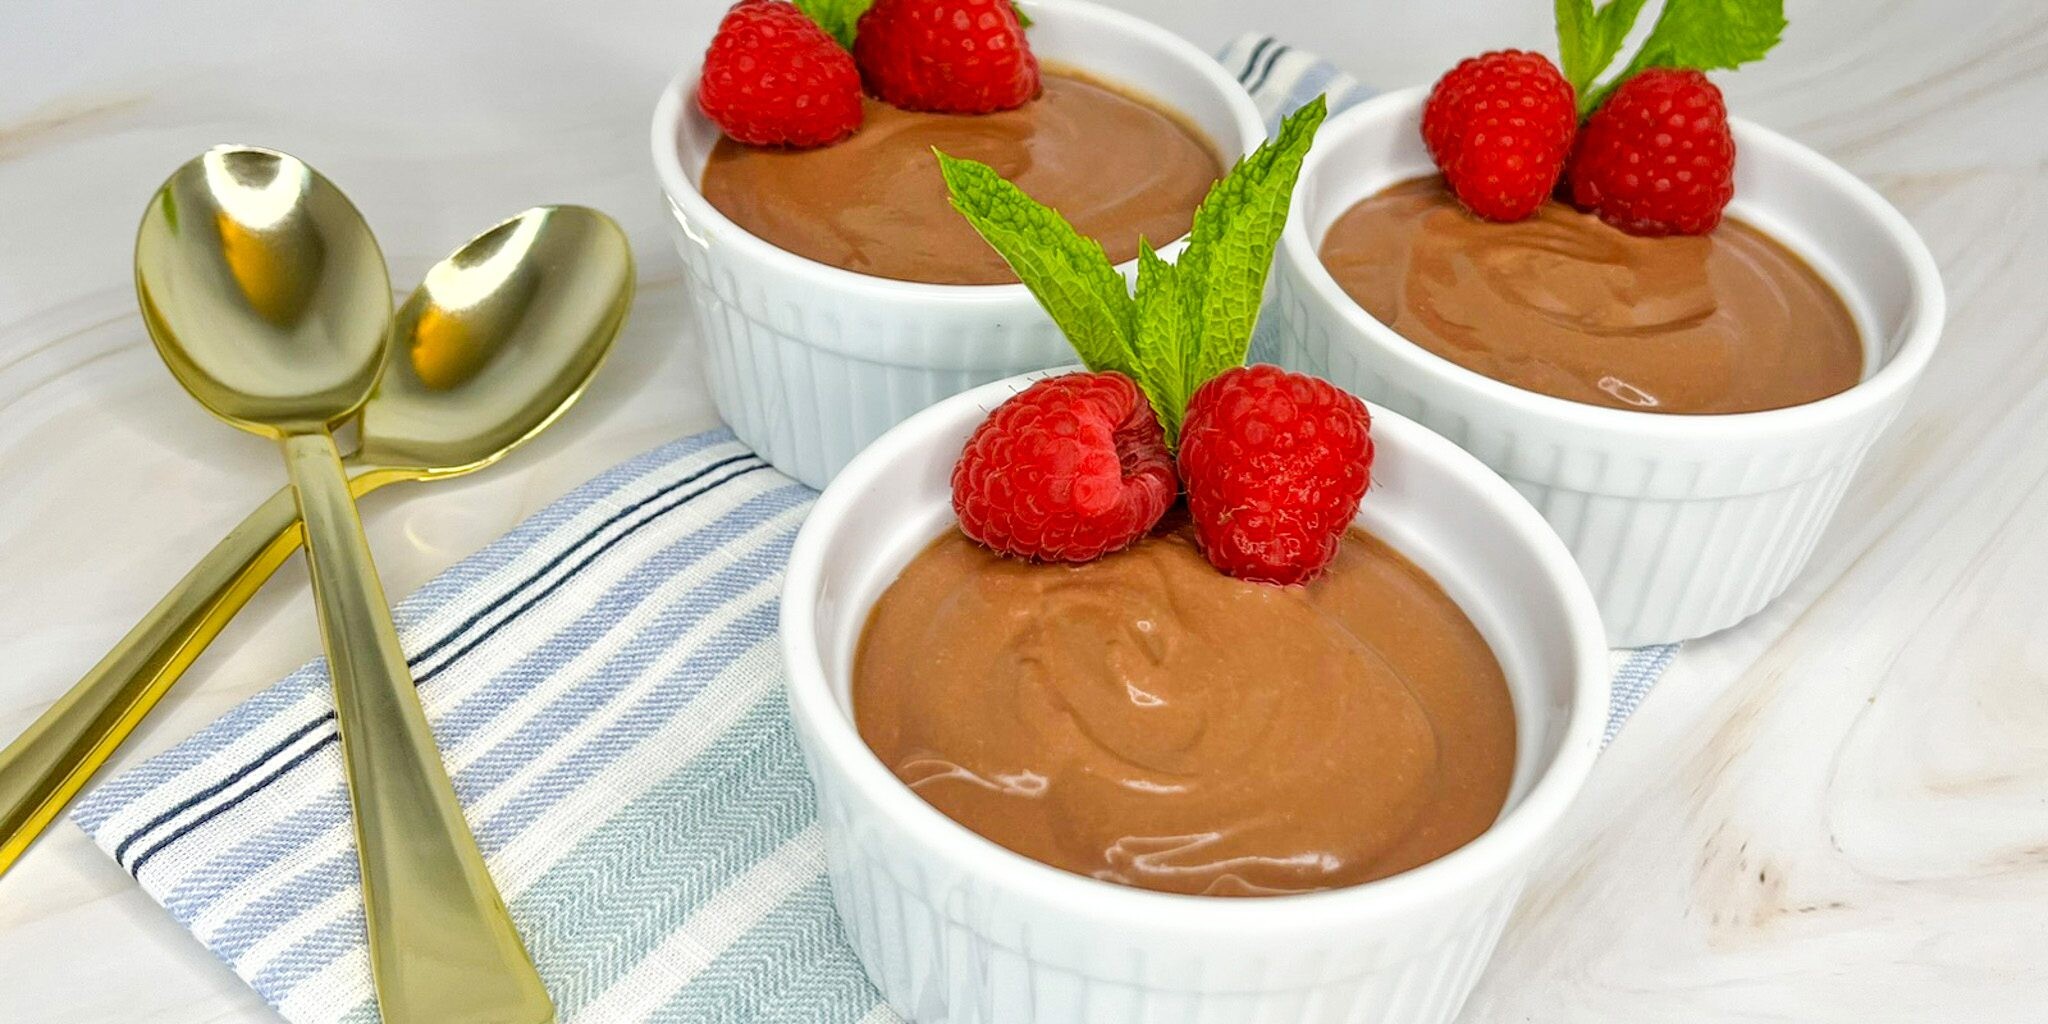
Looking for a quick and healthy snack or dessert that feels indulgent but is packed with protein? This High Protein Chocolate Pudding is the perfect treat for summer evenings—or anytime you’re craving something sweet and satisfying. With only two main ingredients and double the protein of traditional pudding, it’s a delicious way to sneak in some extra nutrition. Best of all, it comes together in just minutes!
High Protein Chocolate Pudding Ingredients
- Daisy Cottage Cheese (1 cup): The secret ingredient in this delicious and healthy pudding. It adds the creamy base to the pudding with a smooth and silky texture.
- Good Quality Chocolate (5 ounces): Adds flavor to the pudding. Both bittersweet and semisweet chocolate work well for the pudding.
- Water (1/2 cup): Thins the chocolate out and helps it mix well with the cottage cheese.
Substitutions, Variations, and Tips
- Try other chocolate varieties like white or milk chocolate for different flavor profiles.
- Avoid chocolate chips—they contain stabilizers that prevent smooth melting and result in a thicker texture.
- This pudding also makes a delicious dip for strawberries, bananas, or other fresh fruit!
- Agave, corn syrup, or artificial sweetener may be used in place of honey.
How to Make High Protein Chocolate Pudding
- Combine chocolate and water in a small saucepan over medium heat. Stir until melted and smooth (about 3 minutes).
- In a food processor, purée the cottage cheese until smooth and creamy. Add the melted chocolate and blend until fully combined.
- Pour into ramekins or dessert bowls. Enjoy immediately, or cover and refrigerate until ready to serve.
Pro Tip: Top with a dollop of Daisy Sour Cream or a few berries for an extra-special touch.
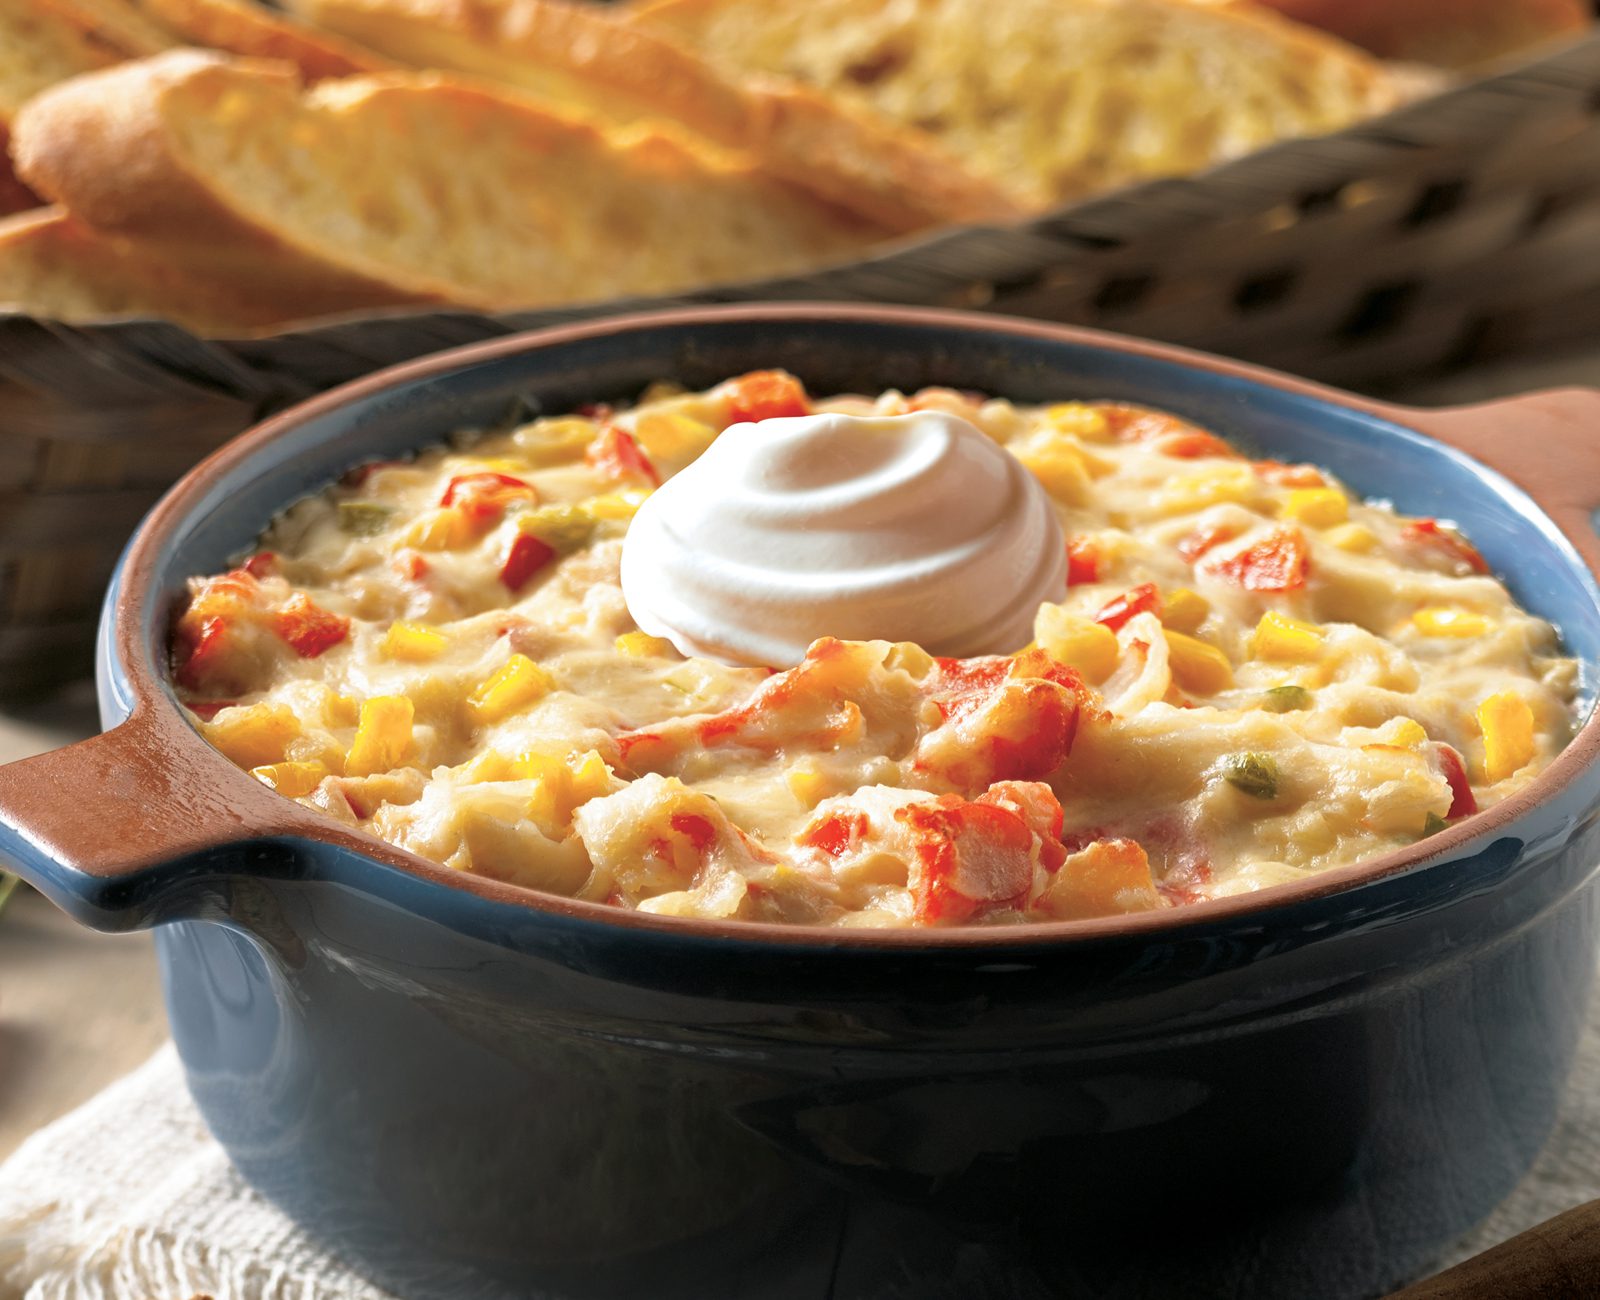
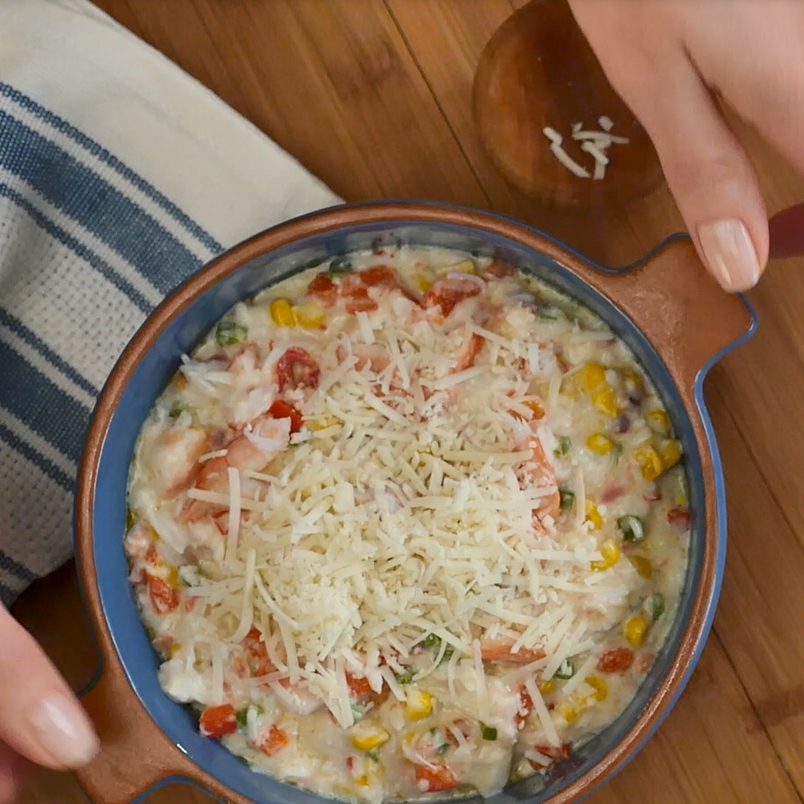
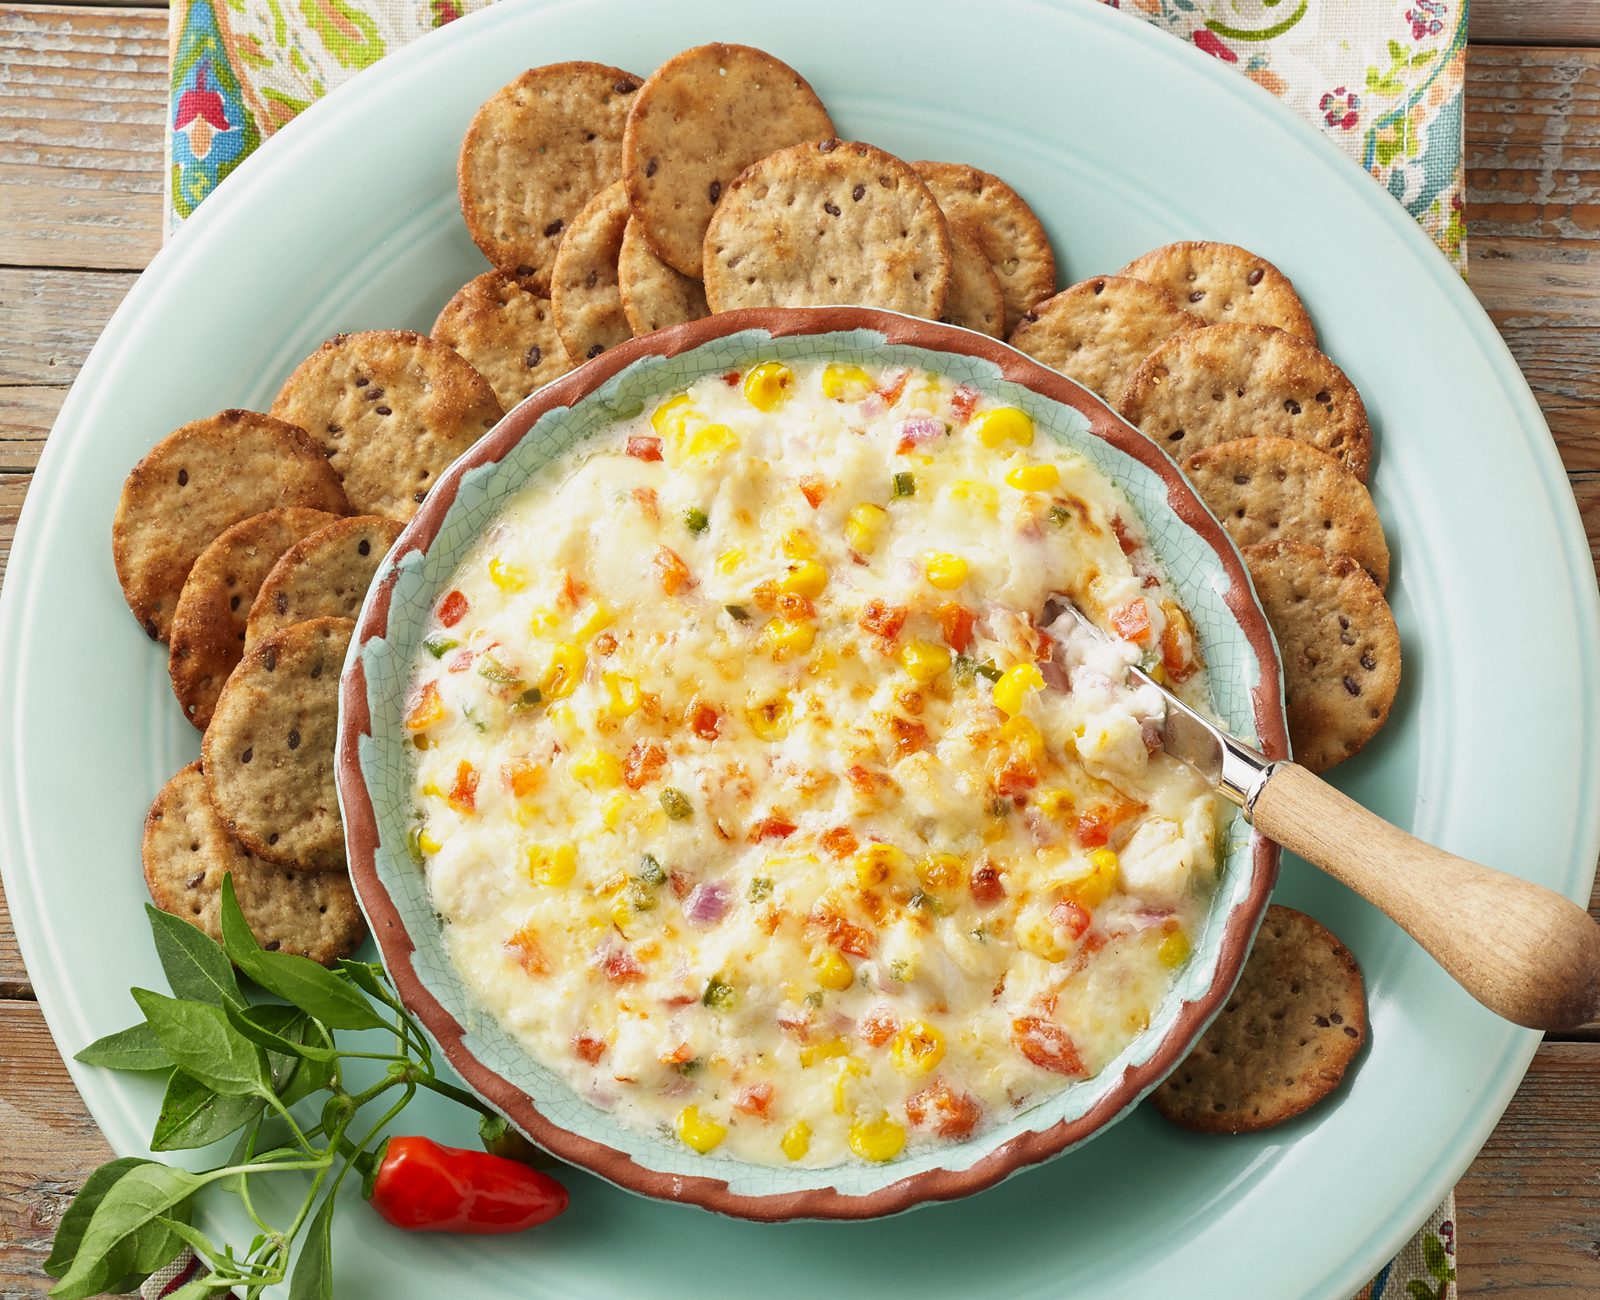
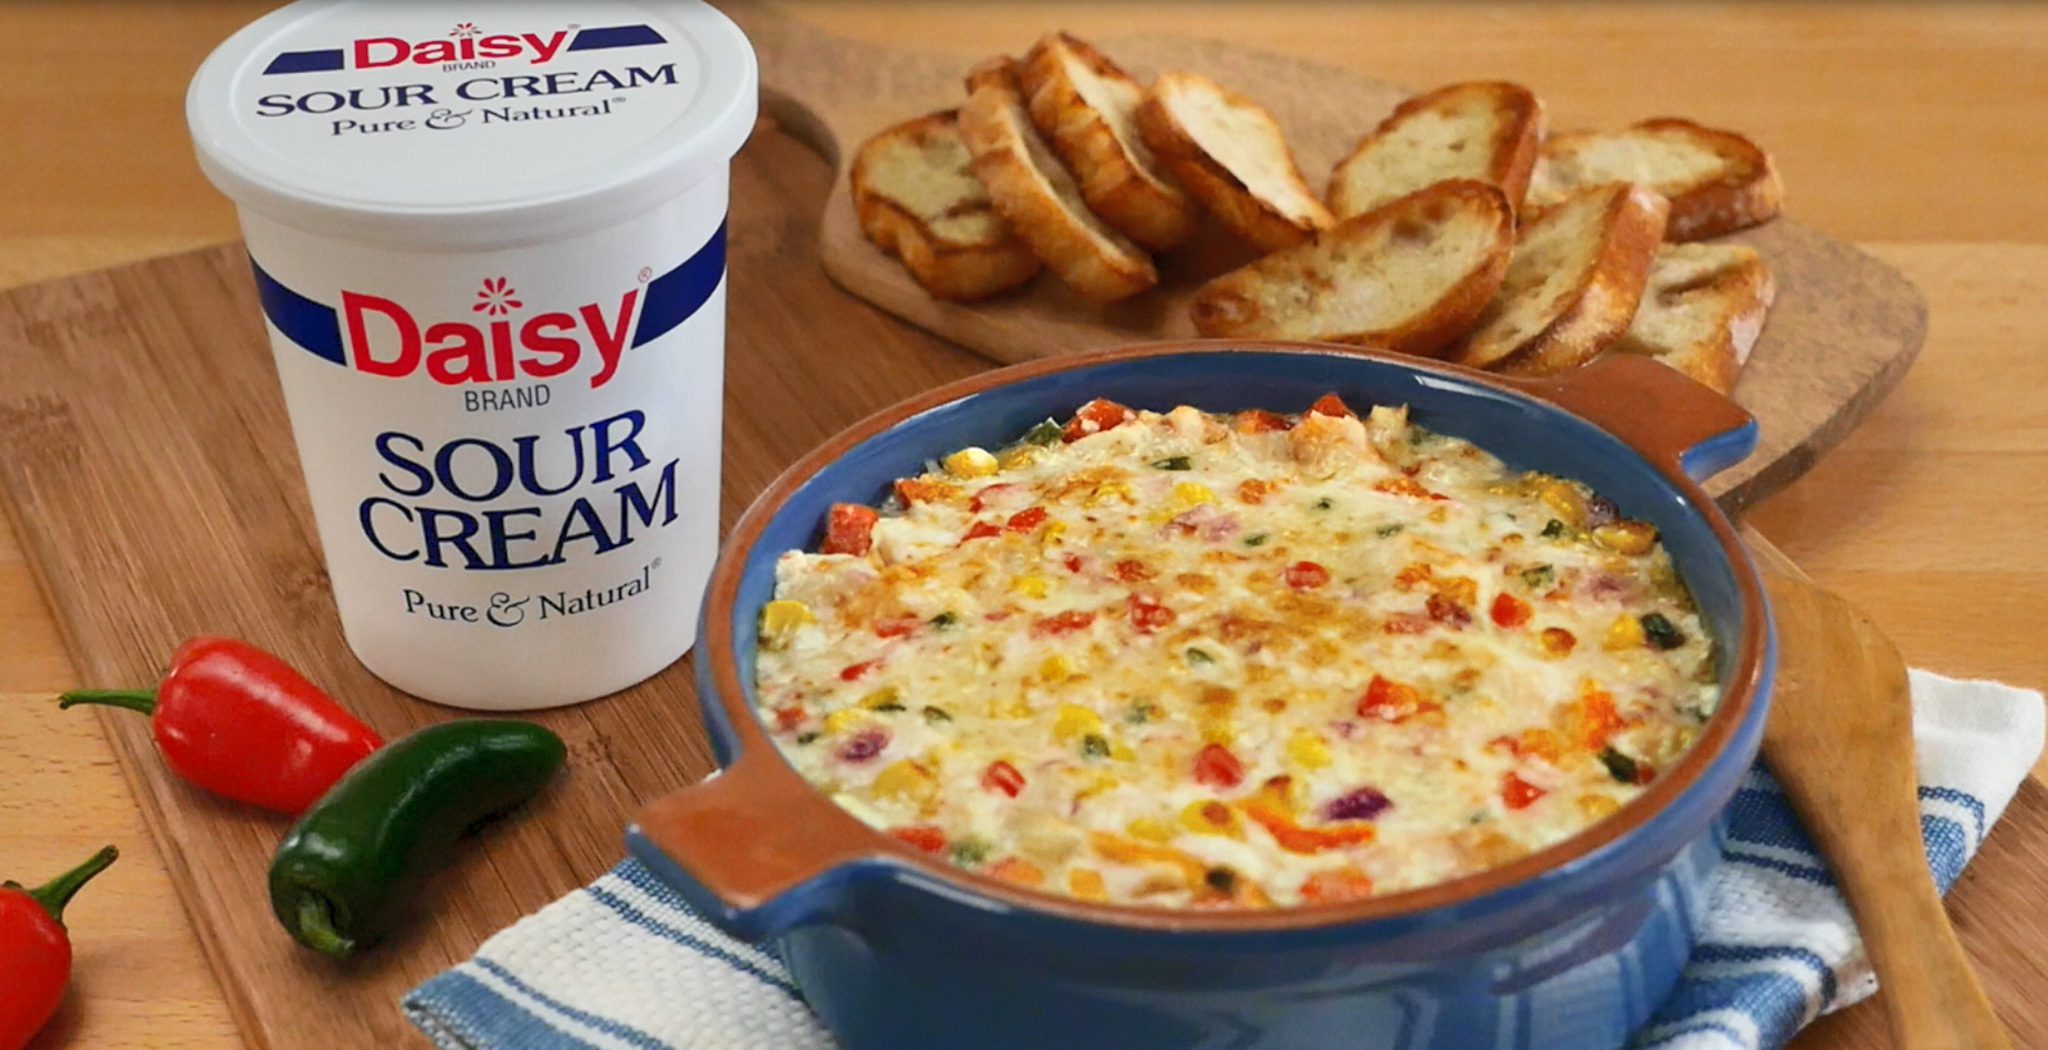
Jalapeno Crab Dip
Jalapeño Crab Dip
Spicy, Cheesy, and Perfect for Sharing
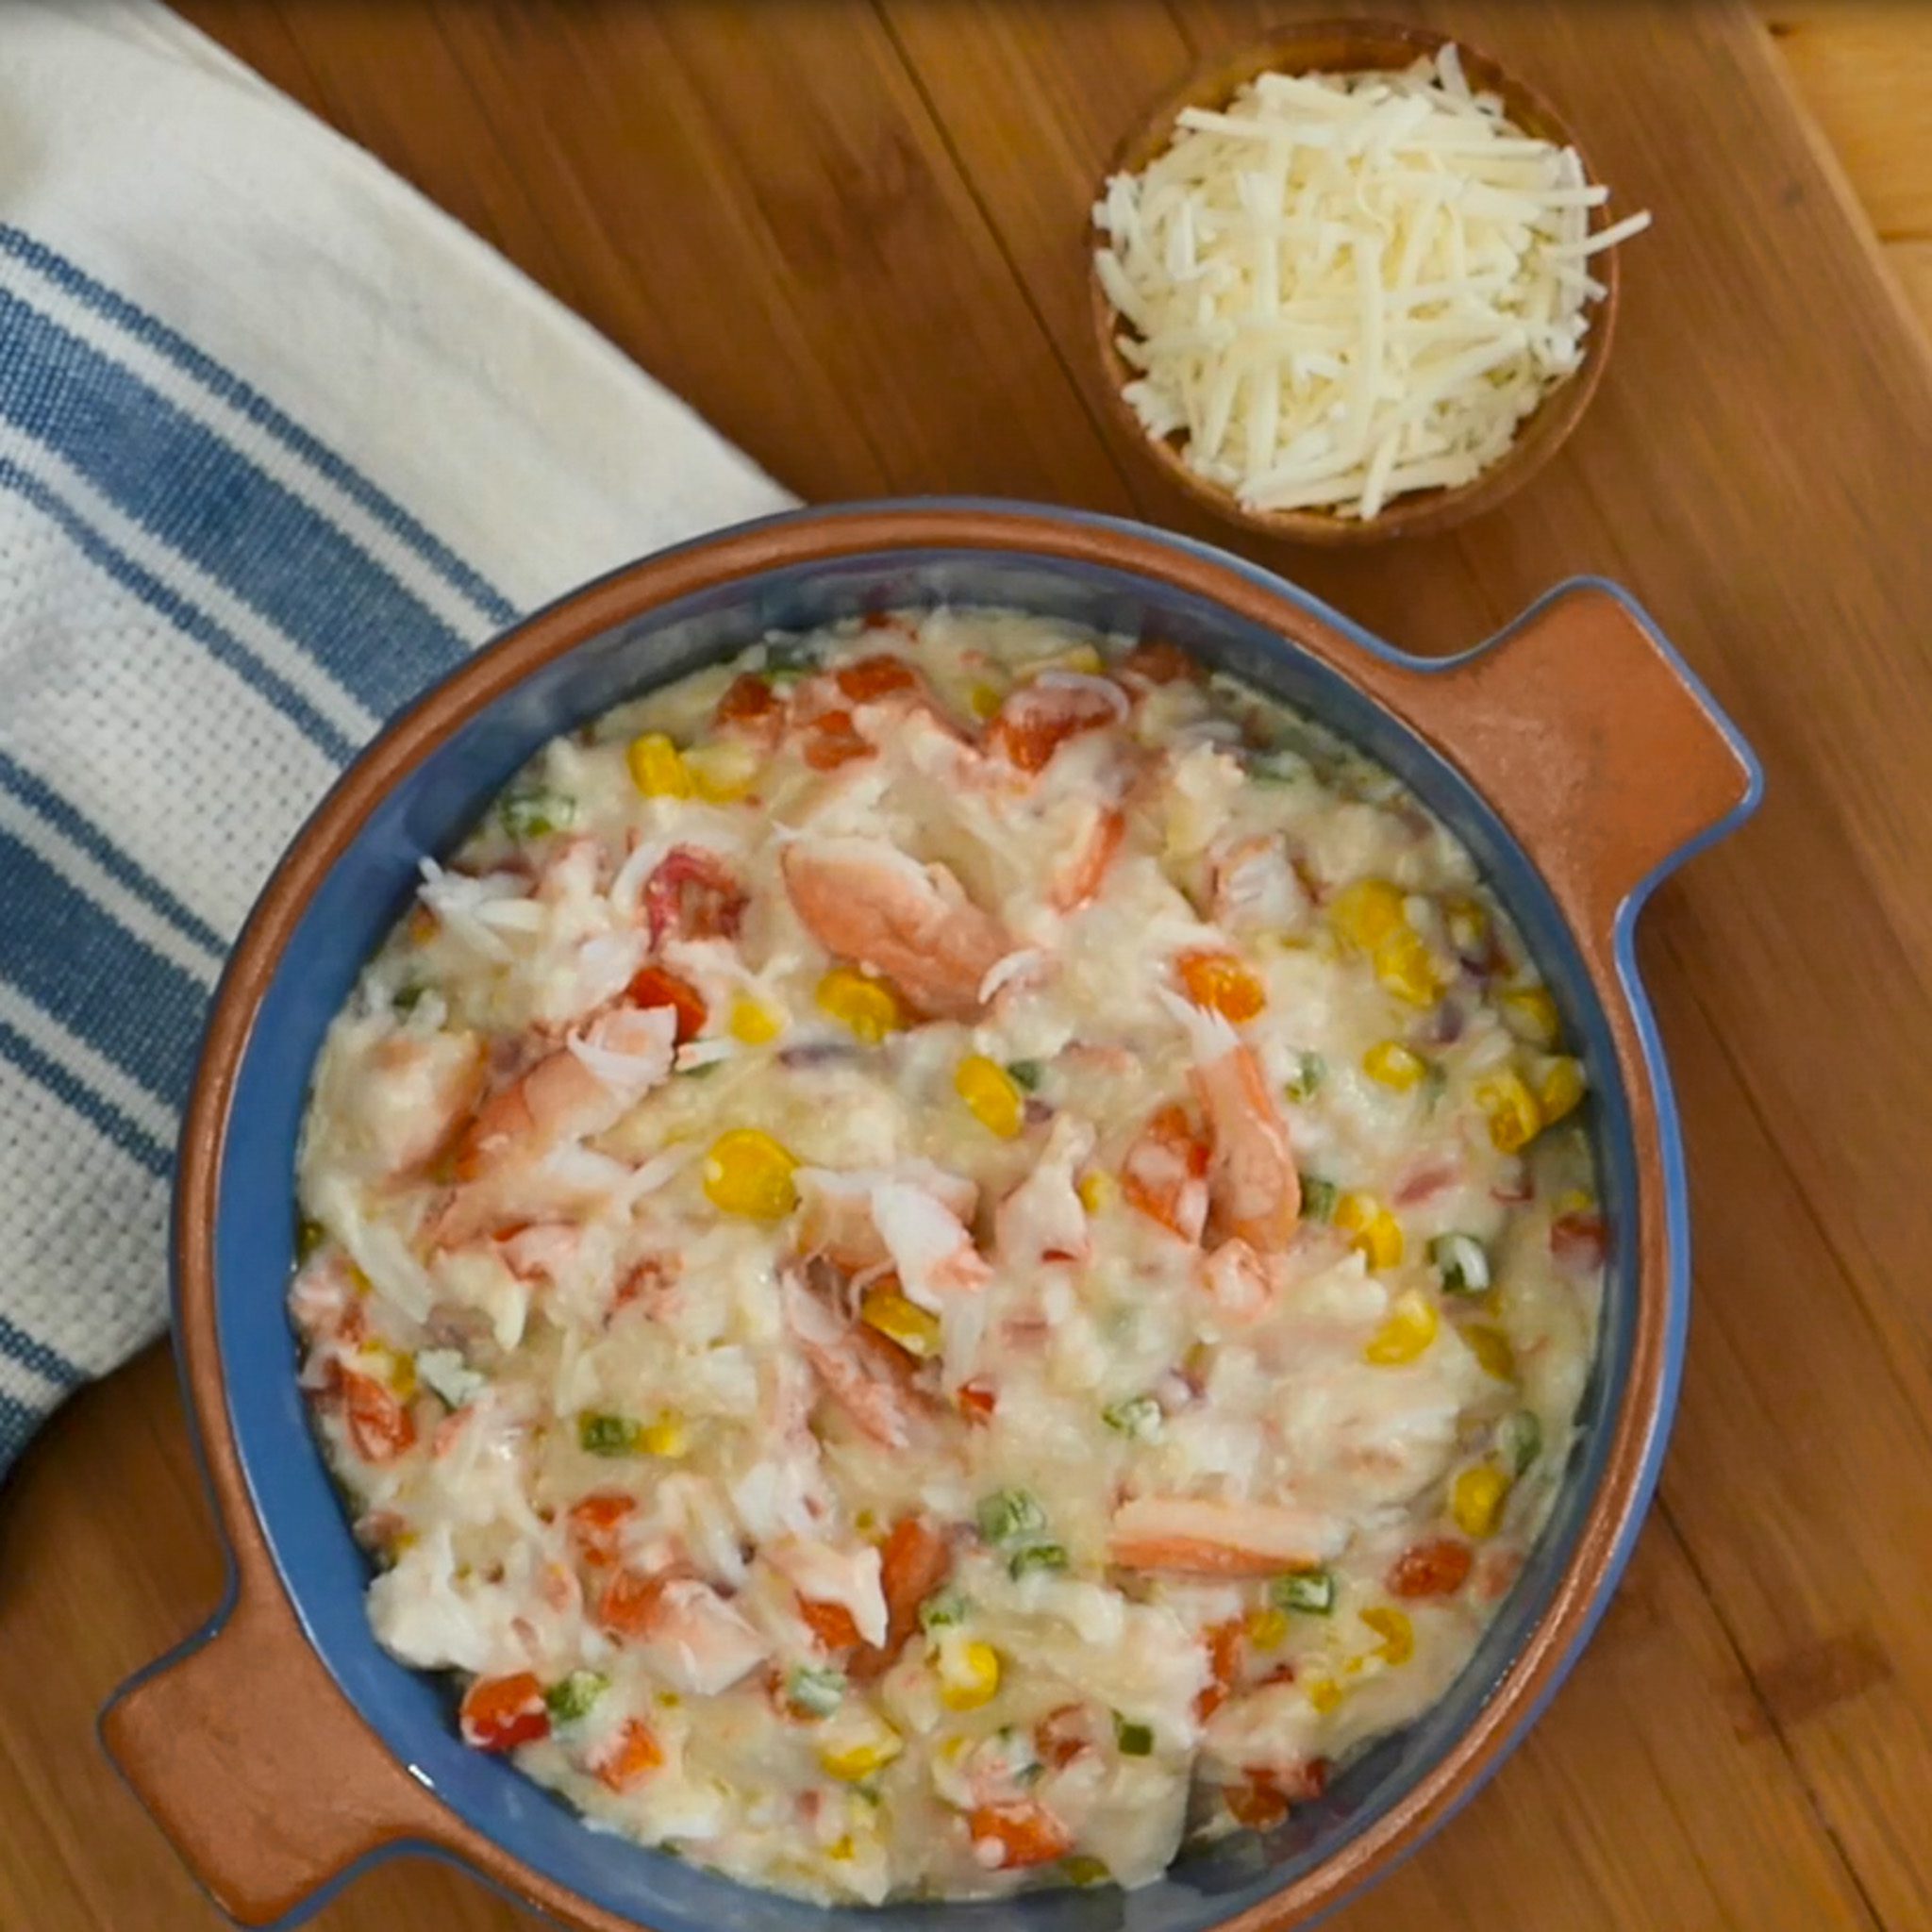
This Jalapeño Crab Dip is the ultimate party pleaser—whether you’re entertaining guests or just having a cozy night in with family. It’s creamy, cheesy, and a little bit spicy, with sweet corn and tender crab in every bite. Best of all? It’s easy to make ahead and pop in the oven right before serving!

The secret to this rich and decadent dip? Daisy Sour Cream. It adds a tangy, velvety creaminess that brings everything together and balances the heat of the jalapeño perfectly.
Jalapeño Crab Dip Ingredients
- Butter (2 tablespoons): Adds a rich flavor to the dip.
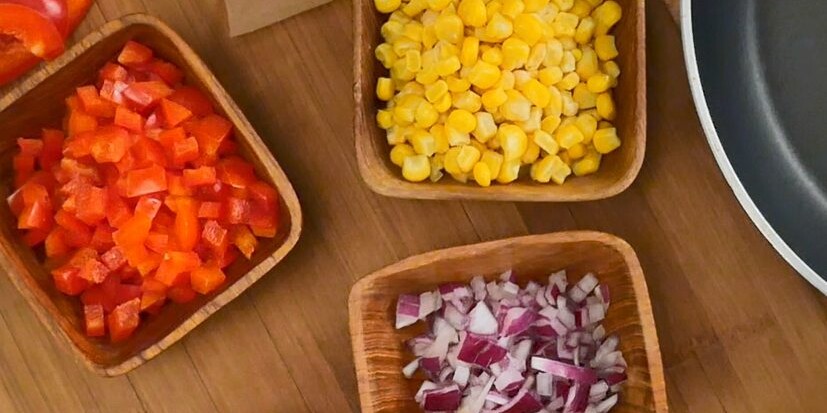
- Frozen Corn (1/2 cup): Picked at the peak of the season, the corn adds a sweet pop of texture and helps balance the heat of the jalapeno.
- Red Bell Pepper (1/2 cup, diced): Crunchy and juicy, with a sweet and mild flavor. Red bell peppers are a bit sweeter than green and add a burst of bright color to the dip.
- Red Onion (1/4 cup, finely diced): Adds a pop of color and a burst of bold, slightly peppery flavor.
- Garlic (1 clove, finely minced): Offers a warm, aromatic kick that’s pungent and a tad sharp. It pairs wonderfully with peppers and onion.
- Jalapeño (1 seeded and chopped): A fresh pepper with an earthy green bell pepper flavor but with more heat. They add a hint of heat to the dip. If you prefer hotter dips, you can add a bit more, or if you prefer milder dips, you can add only half.
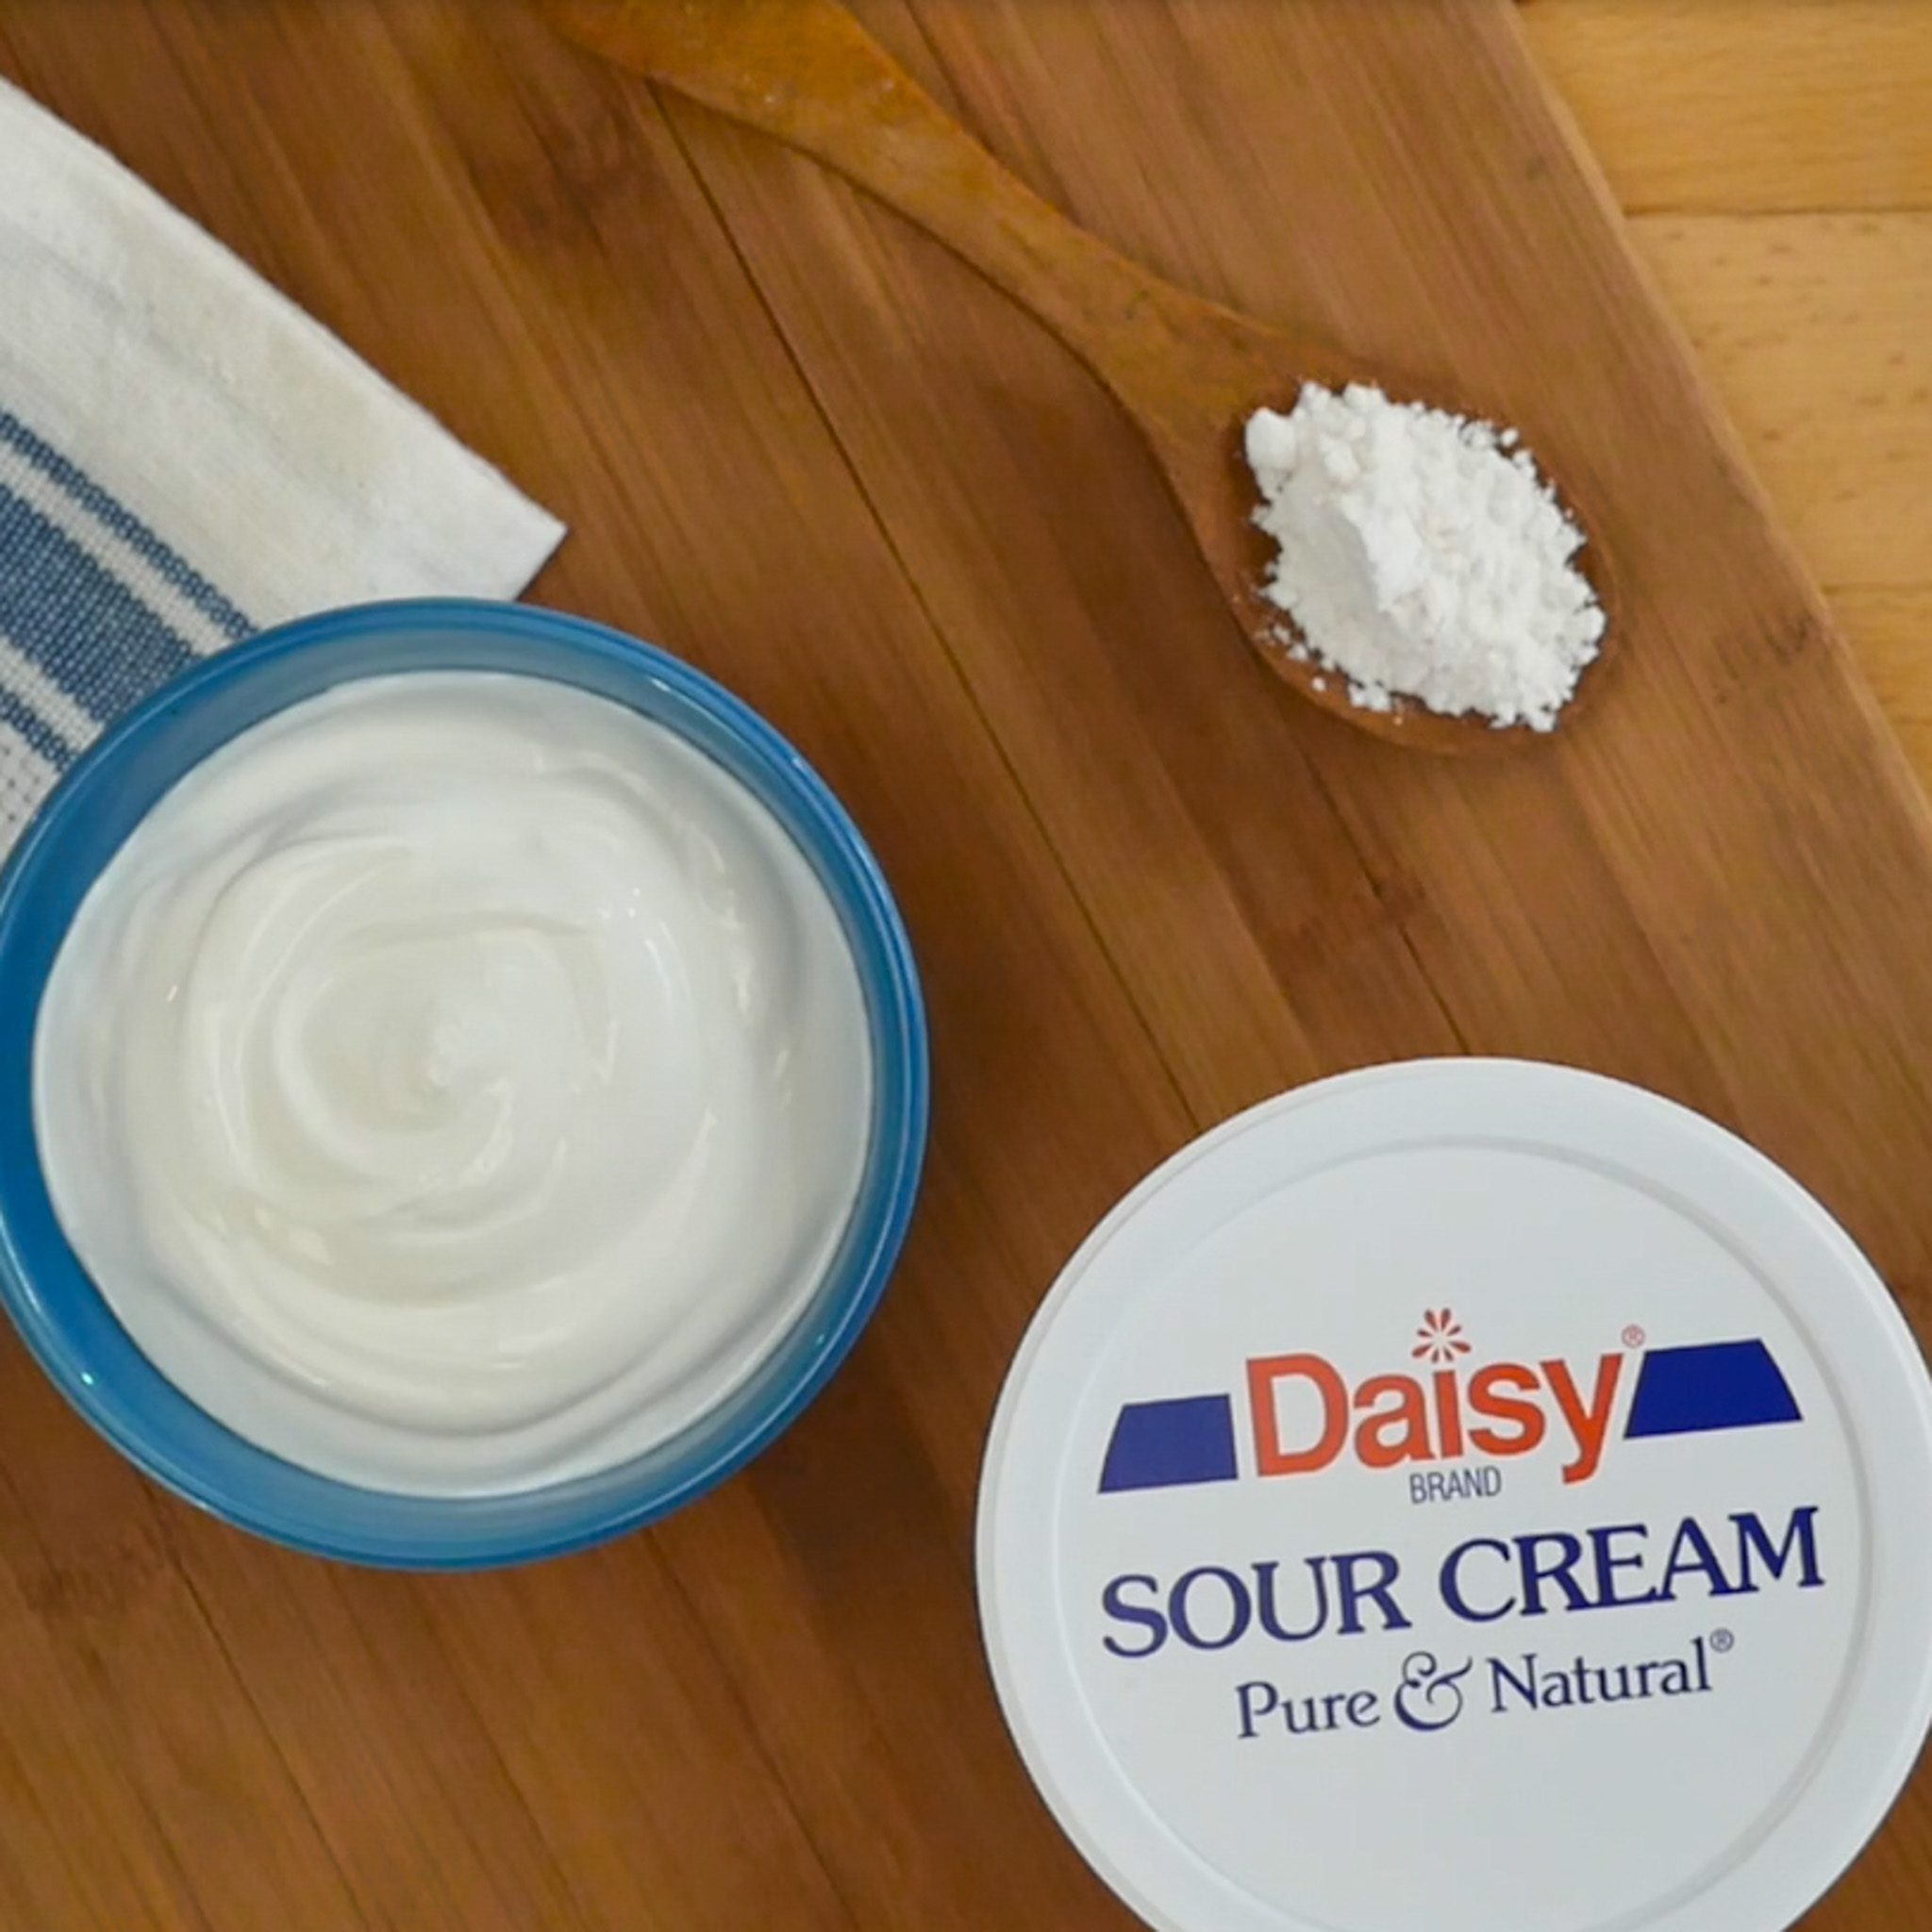
- All-Purpose Flour (2 teaspoons): Acts as a thickening agent, helping the dip reach the perfect consistency and texture.
- Daisy Sour Cream (1 cup): The secret ingredient in the dip that makes it extra rich, creamy, and decadent, while adding a slightly tangy flavor. It also helps tame the heat of the jalapeno.
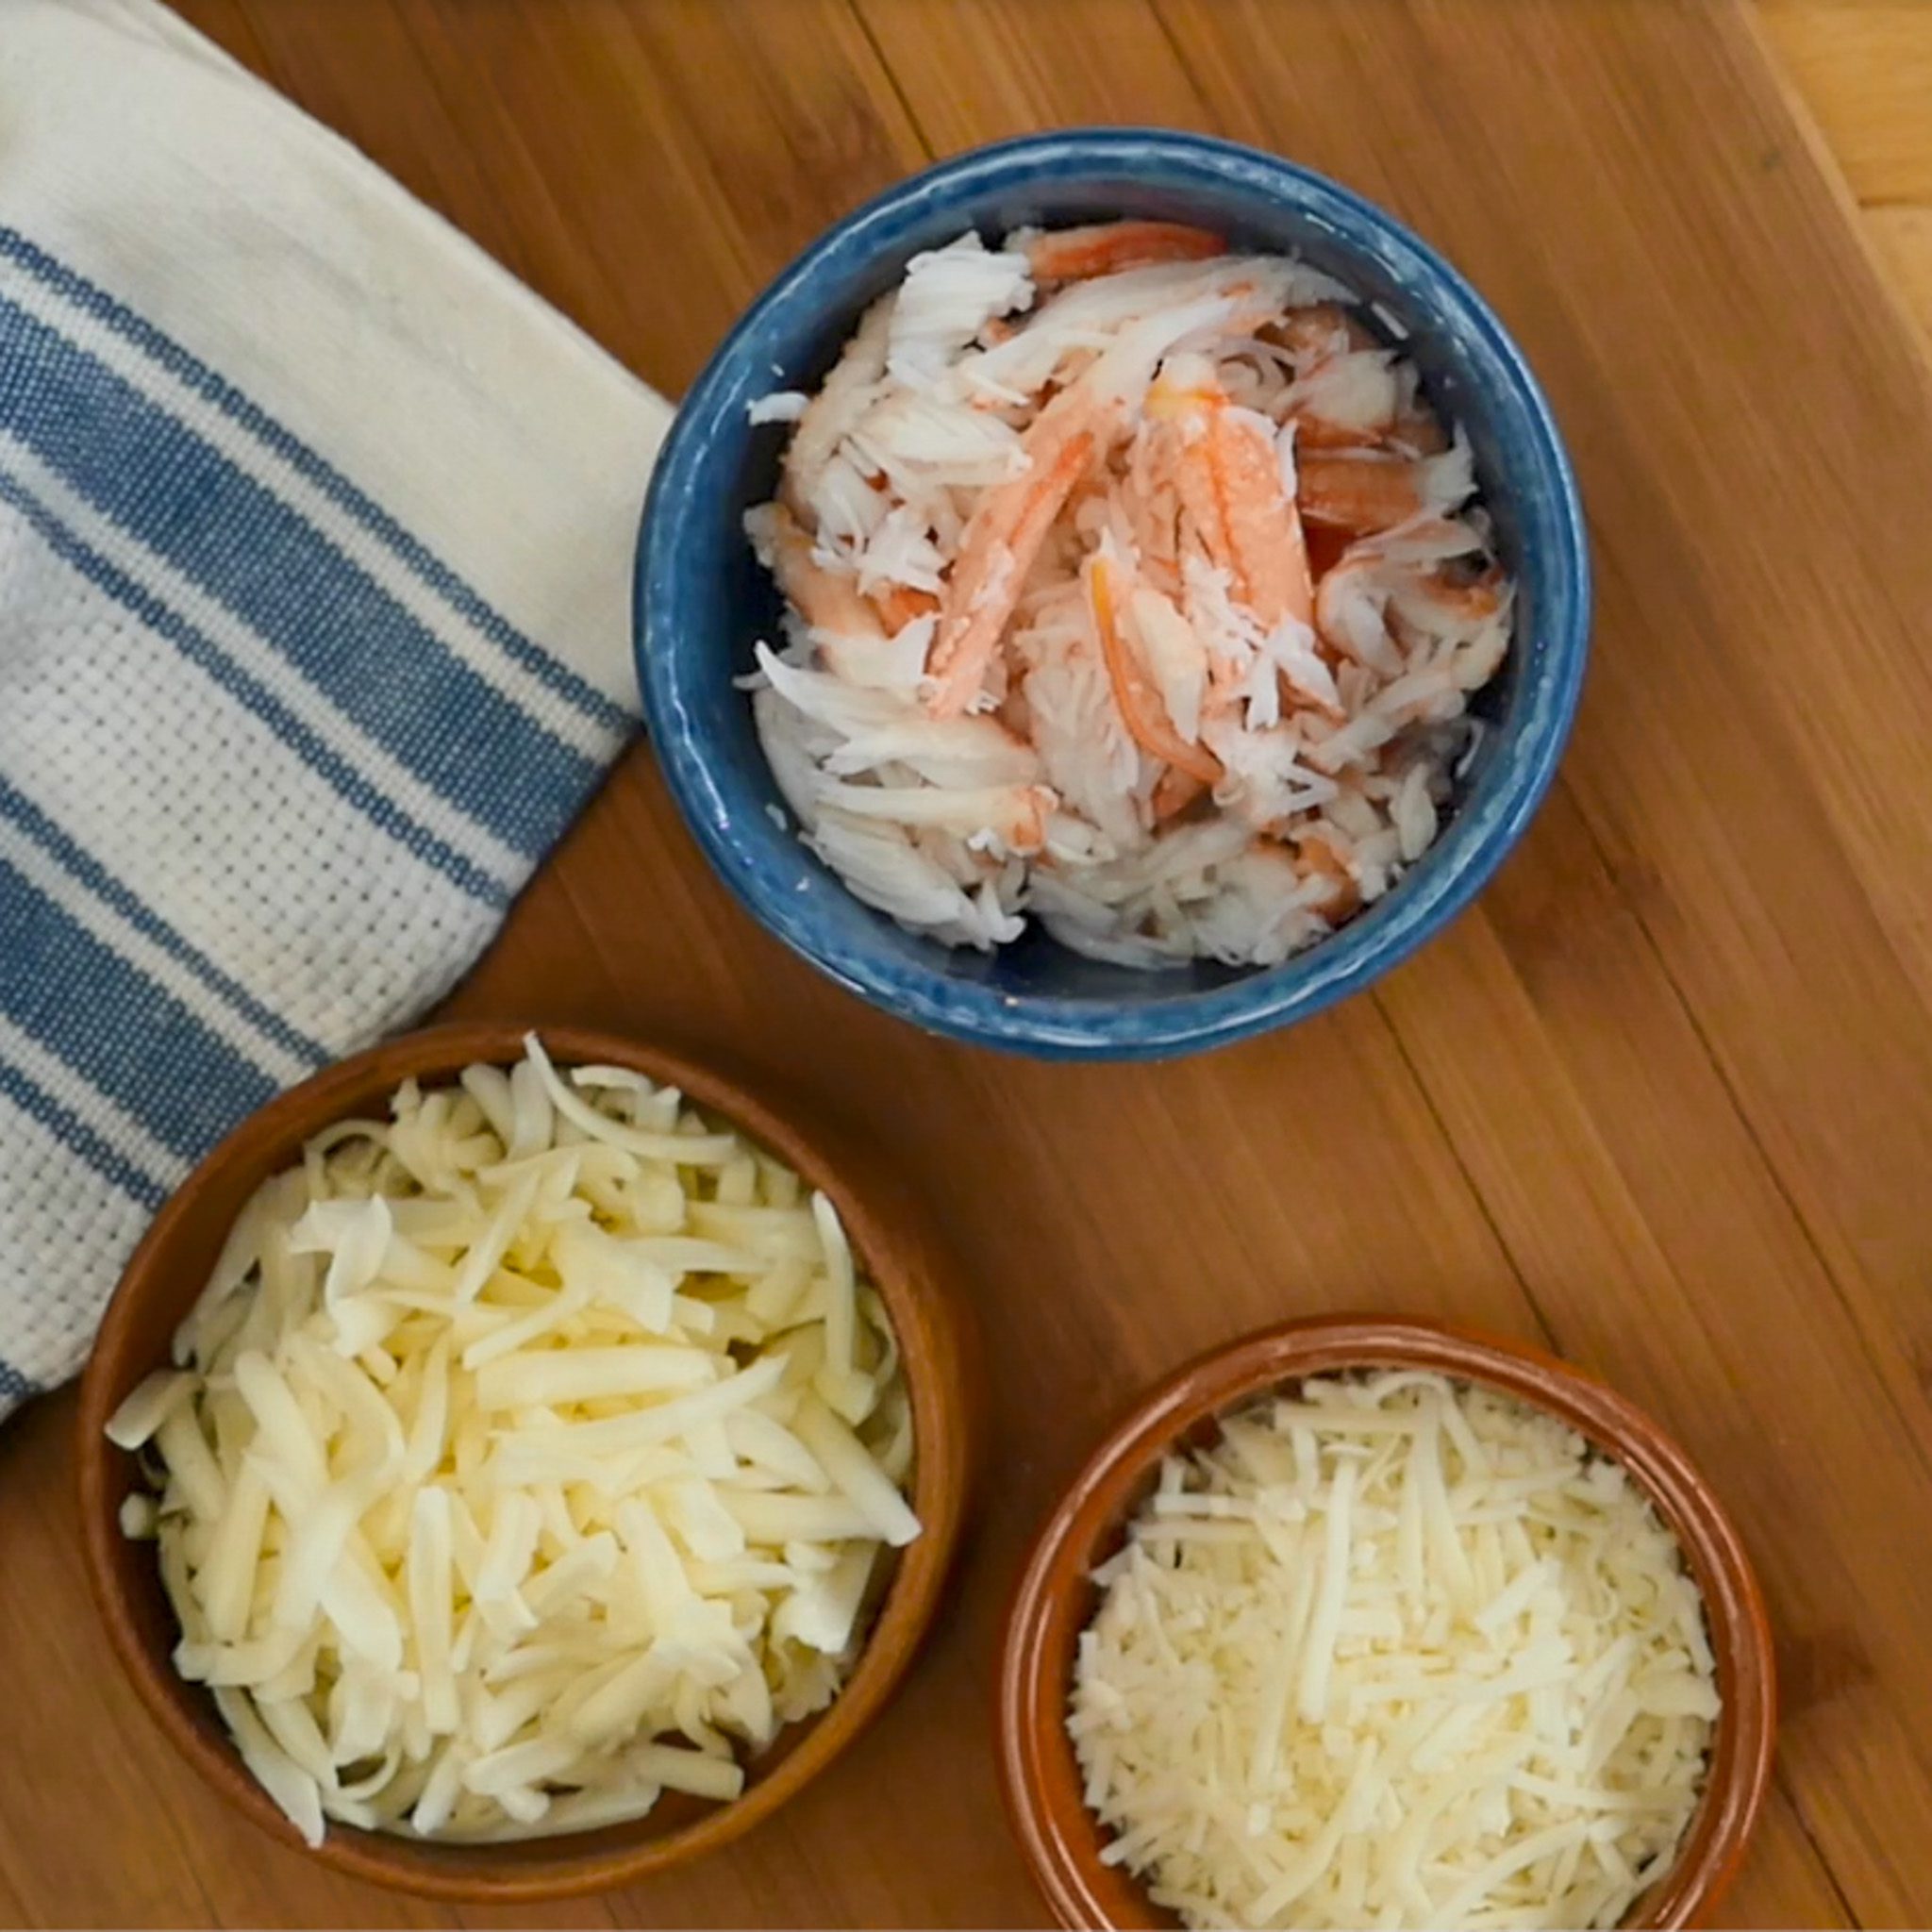
- Monterey Jack (1/2 cup, shredded): Adds a bit of flavor and the texture to the dip. It’s a great melting cheese with mild flavor.
- Asiago (1/2 cup, shredded): Similar to Parmesan, but nuttier in flavor and creamier in texture, it adds flavor and body to the dip.
- Lump Crab (6 ounces, drained): Sweet, mild, and briny, it adds a seafood flavor and elegance to the dip.
Substitutions, Variations, and Tips
- Canned corn works in place of frozen—just rinse and drain to reduce salt.
- Use any bell pepper—red, orange, and yellow are sweeter, while green is more earthy.
- Yellow onions offer a milder, slightly sweeter alternative to red.
- Prefer less heat? Swap jalapeño for paprika or go with a milder Fresno pepper.
- Muenster or Colby can replace Monterey Jack; Parmesan or Romano can sub for Asiago.
- Fresh or canned crab both work. Fresh crab is sweeter and more delicate; canned is saltier and more intense.
How to Make Jalapeño Crab Dip
- Preheat oven to 350°F. Spray a baking dish with nonstick spray.
- In a skillet, heat butter over medium-high. Add corn and cook for 5 minutes, stirring occasionally. Reduce heat to medium.
- Add bell pepper, onion, garlic, and jalapeño. Cook 3–4 minutes, stirring occasionally.
- In a small bowl, stir flour into sour cream, then stir the mixture into the skillet. Cook for 1 minute, then remove from heat.
- Stir in Monterey Jack, crab, and all but ¼ cup of the Asiago. Mix until cheese melts.
- Spoon into prepared dish, sprinkle remaining Asiago on top, and bake for 20 minutes, until bubbly.
- Serve warm with chips, crackers, or sliced baguette.

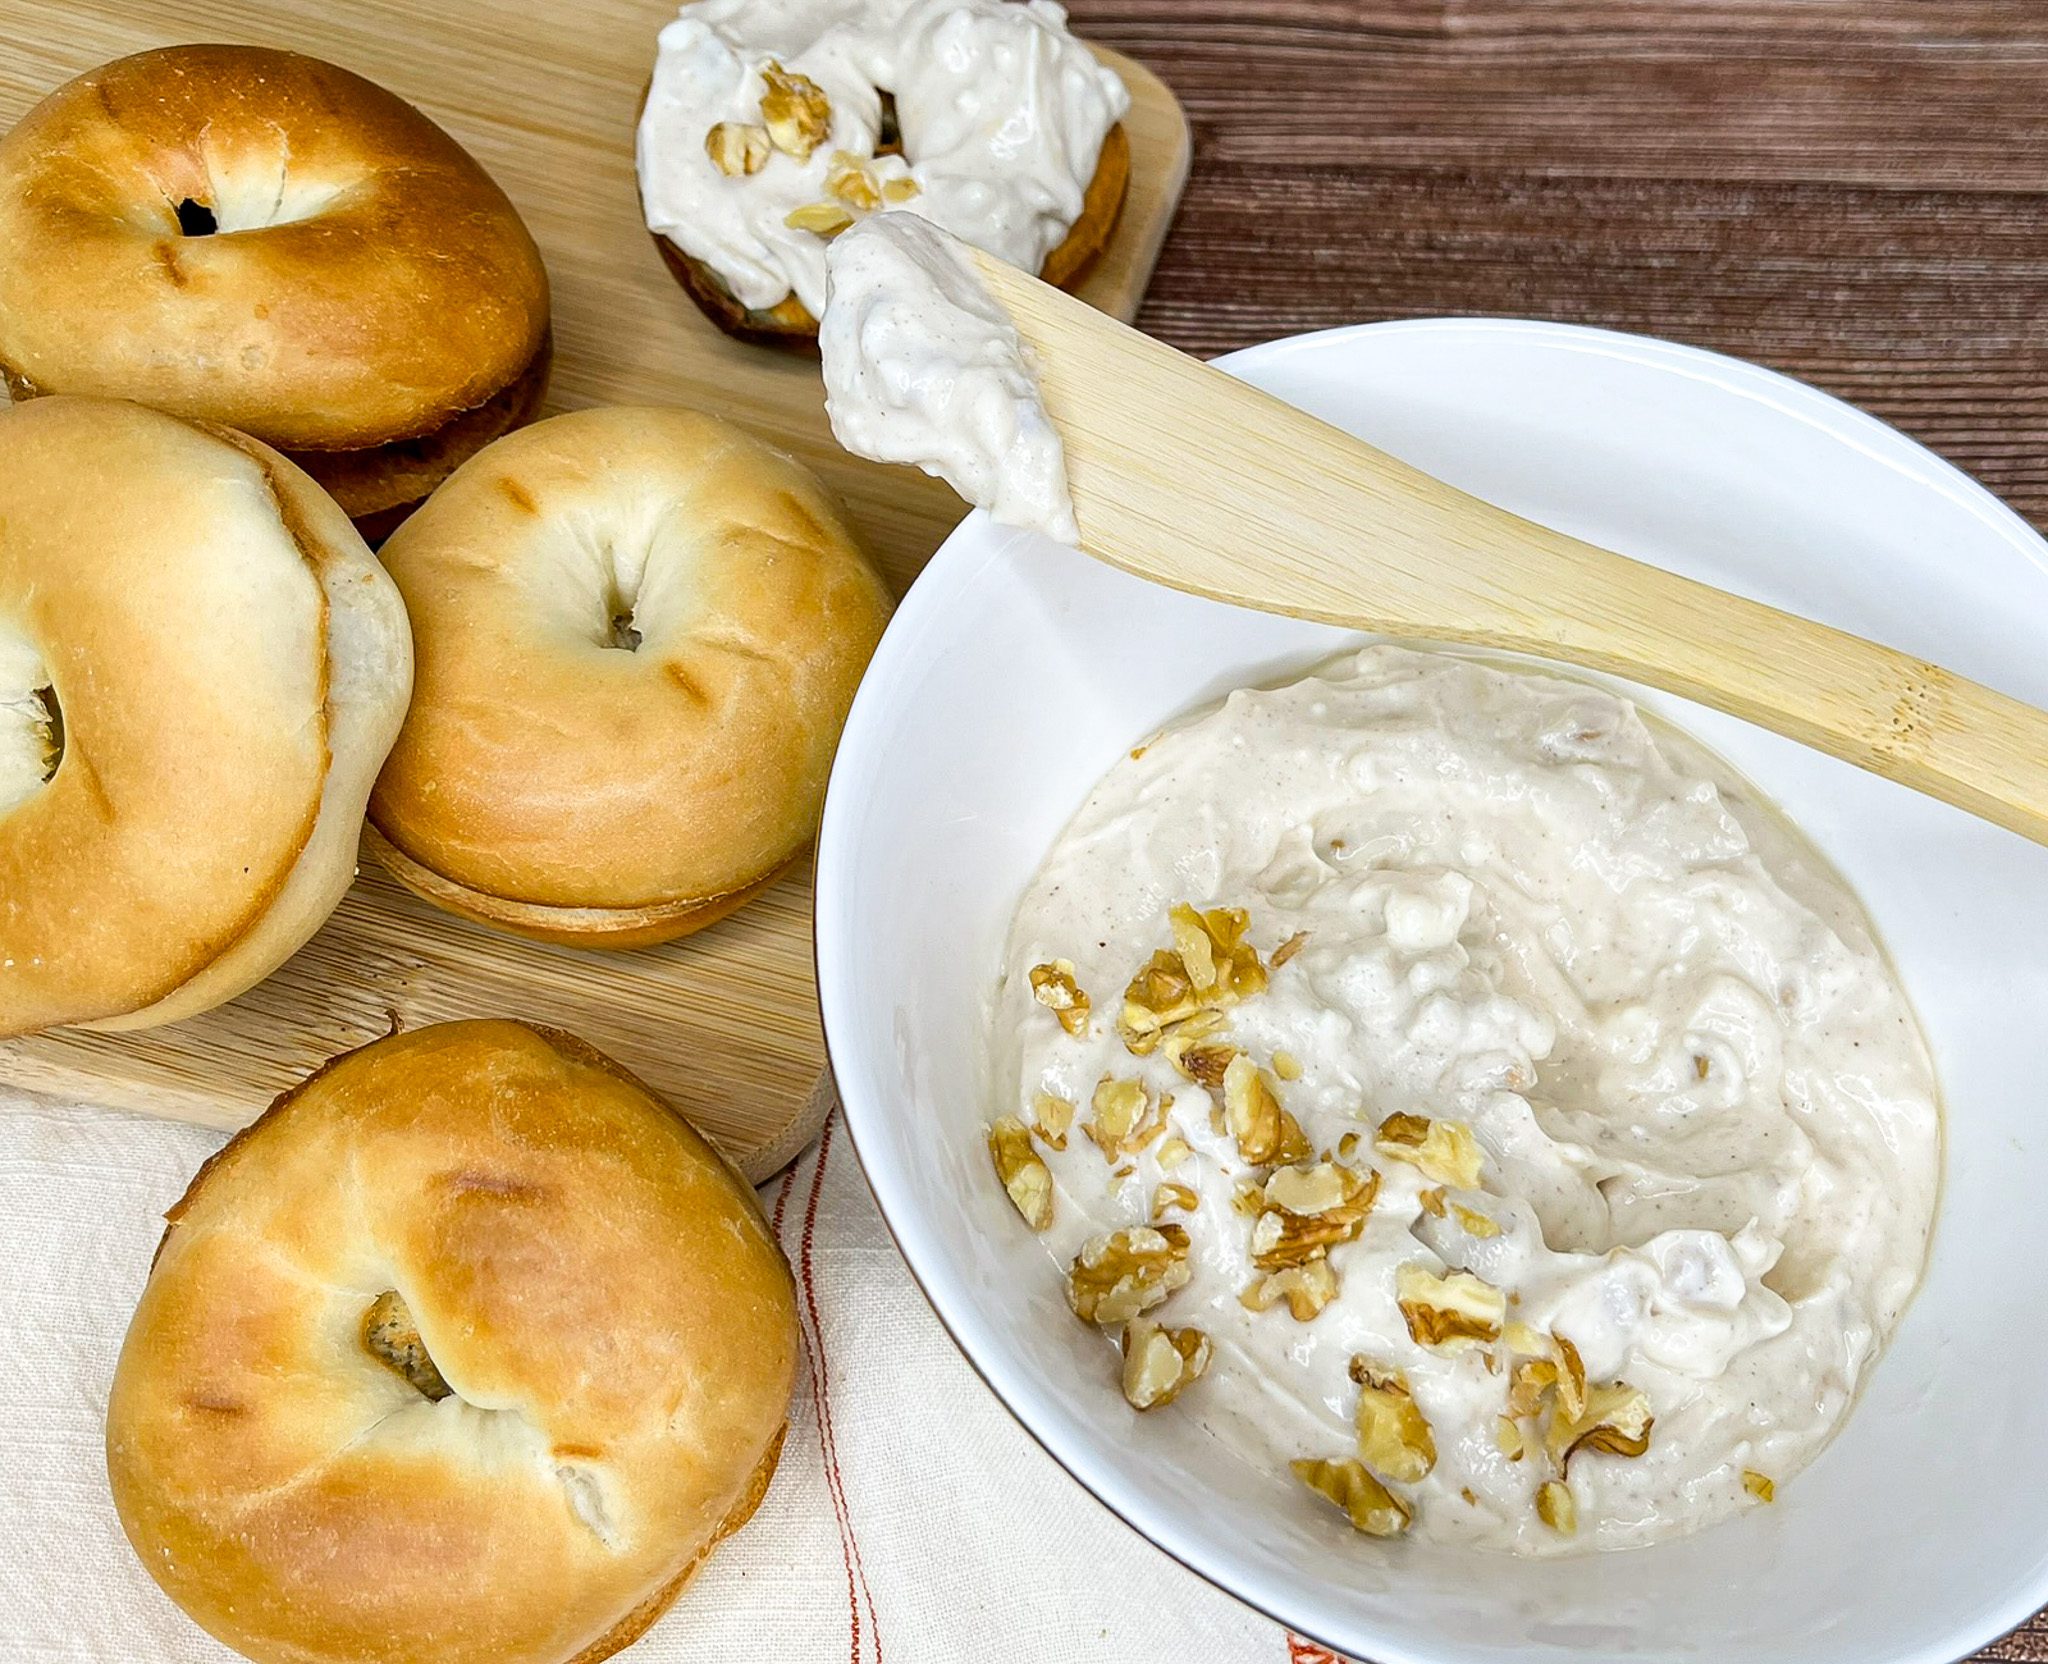
Honey Walnut Spread
Honey Walnut Spread
A Creamy, Protein-Packed Fall Favorite
Looking to add a cozy fall twist to your usual bagel spread? Try making your own with Daisy Cottage Cheese! Not only is it simple to whip up with just a few ingredients, but it’s also a lighter option—with two-thirds less fat than cream cheese.
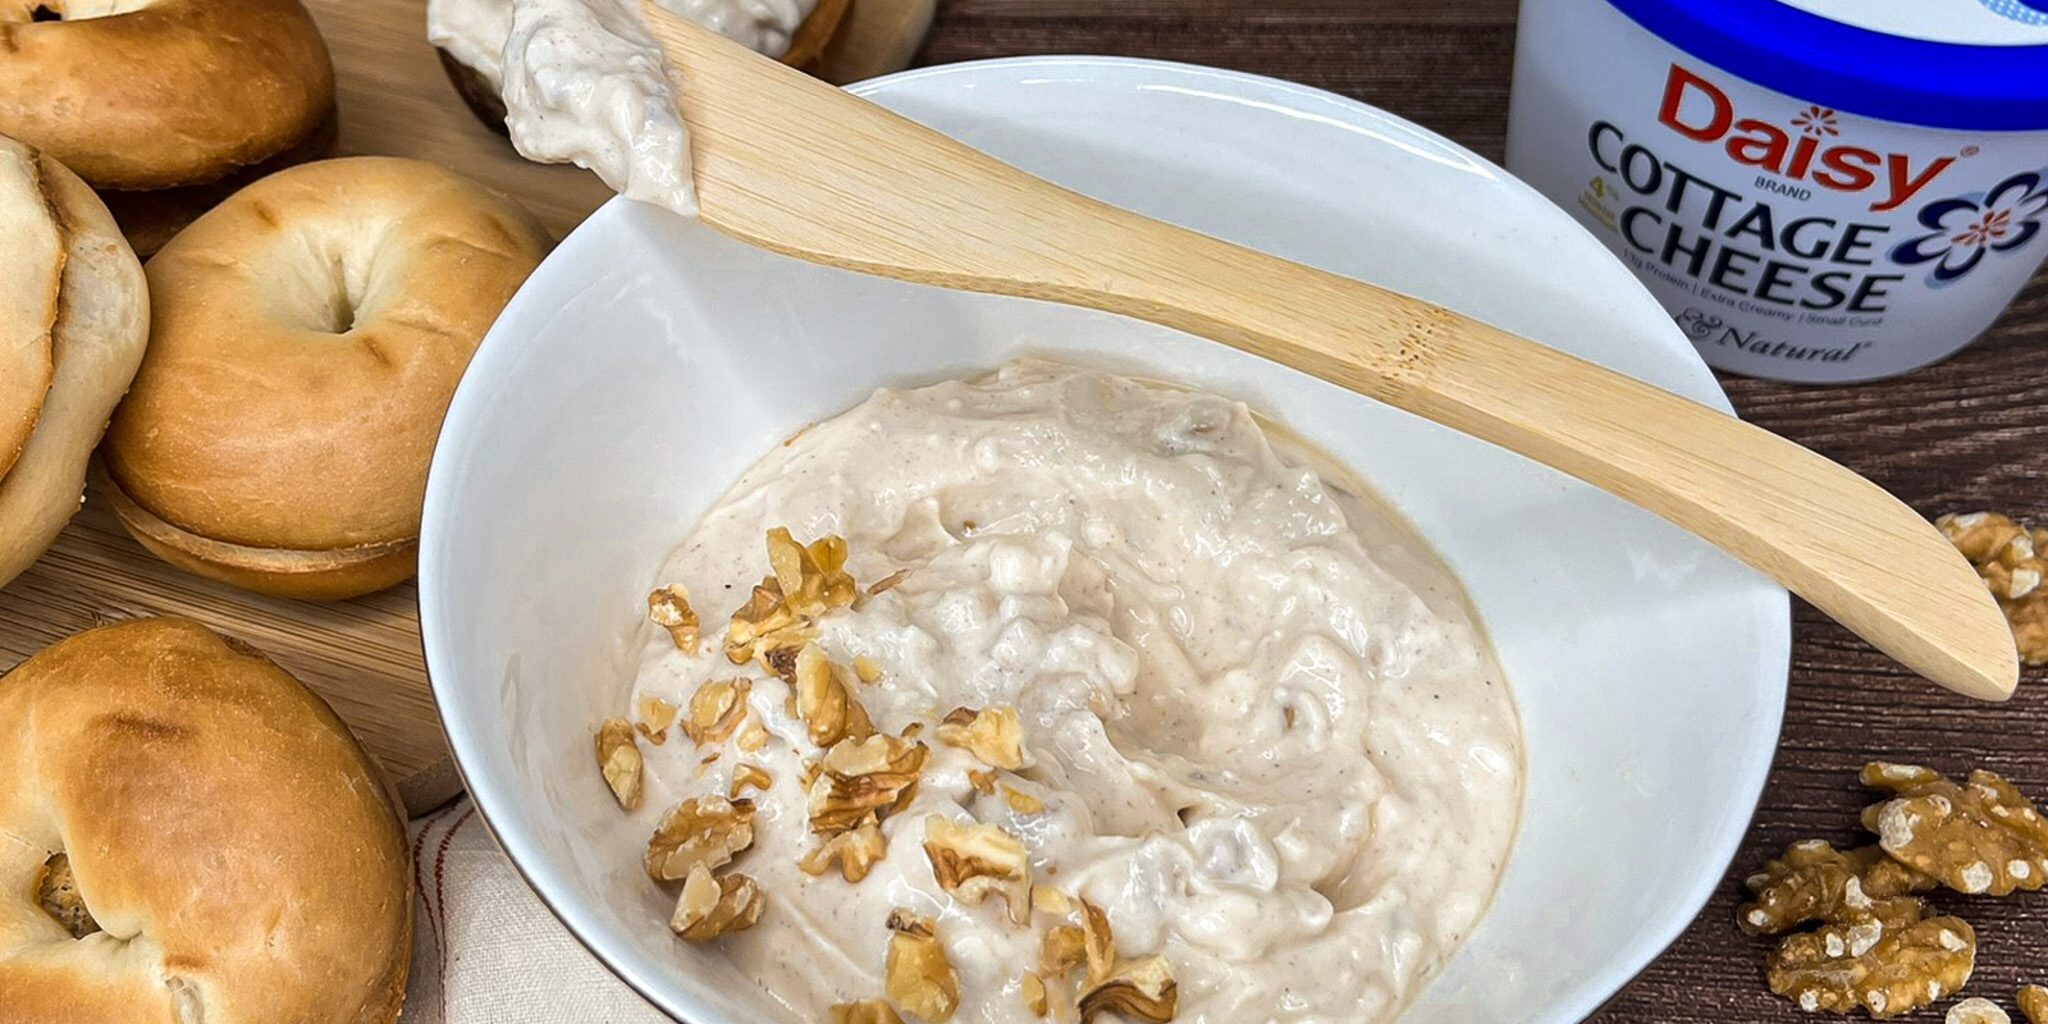
This spread is deliciously customizable and packed with protein, thanks to the creamy goodness of Daisy Cottage Cheese. Plus, the flavor combinations are endless!
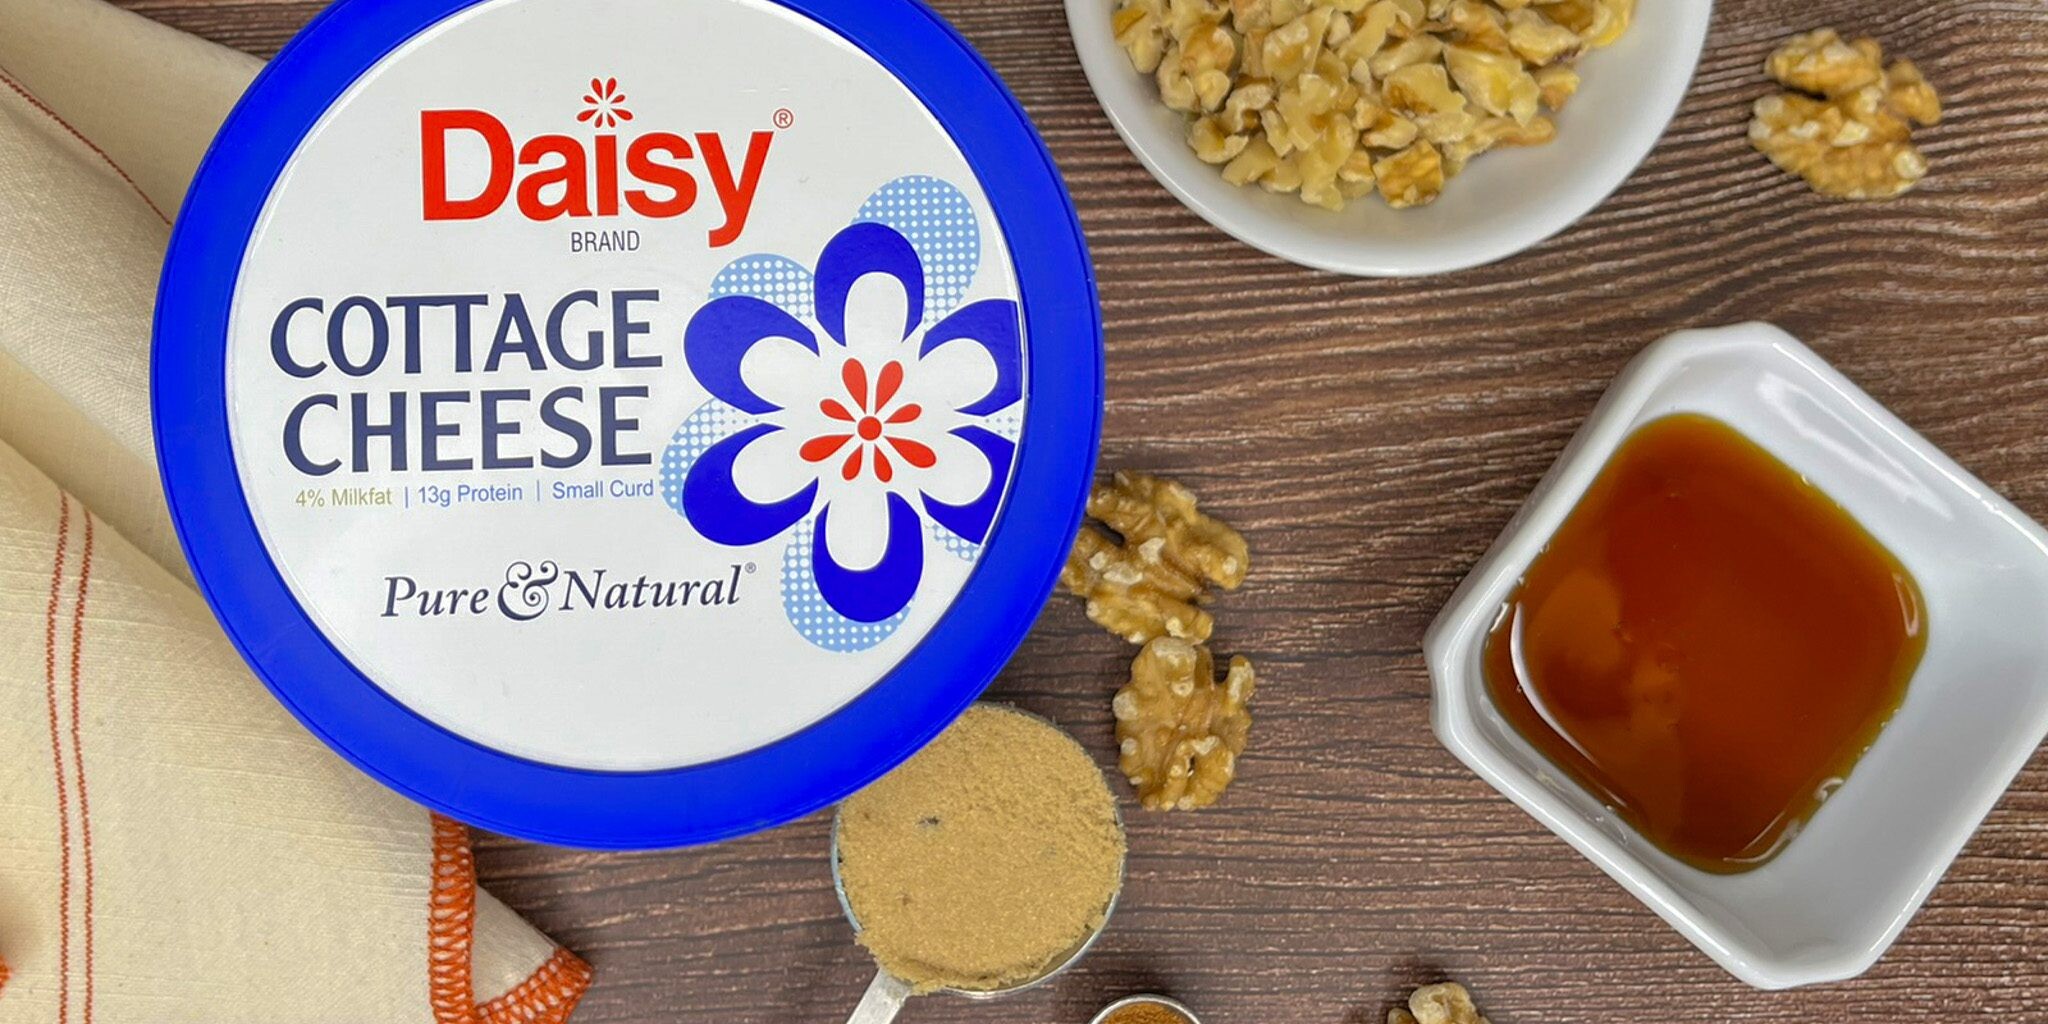
Honey Walnut Spread Ingredients
- Daisy Cottage Cheese (1 cup): The smooth, protein-packed base of your spread.
- Honey (1 tablespoon): A touch of natural sweetness.
- Light brown sugar (1 tablespoon): Adds subtle caramel flavor.
- Cinnamon (¼ teaspoon): Warm and cozy spice that tastes like fall.
- Chopped walnuts (3 tablespoons): For crunch and nutty flavor.
Substitutions, Variations, and Tips
- Add a dash of nutmeg or ginger for extra fall flair.
- Swap honey with agave, corn syrup, or your favorite sweetener.
- Use dark brown sugar for a deeper, richer flavor.
- Try pecans or other nuts instead of walnuts.
- Not just for bagels! It’s great as a dip for fruit or cookies, or on toast and crackers.
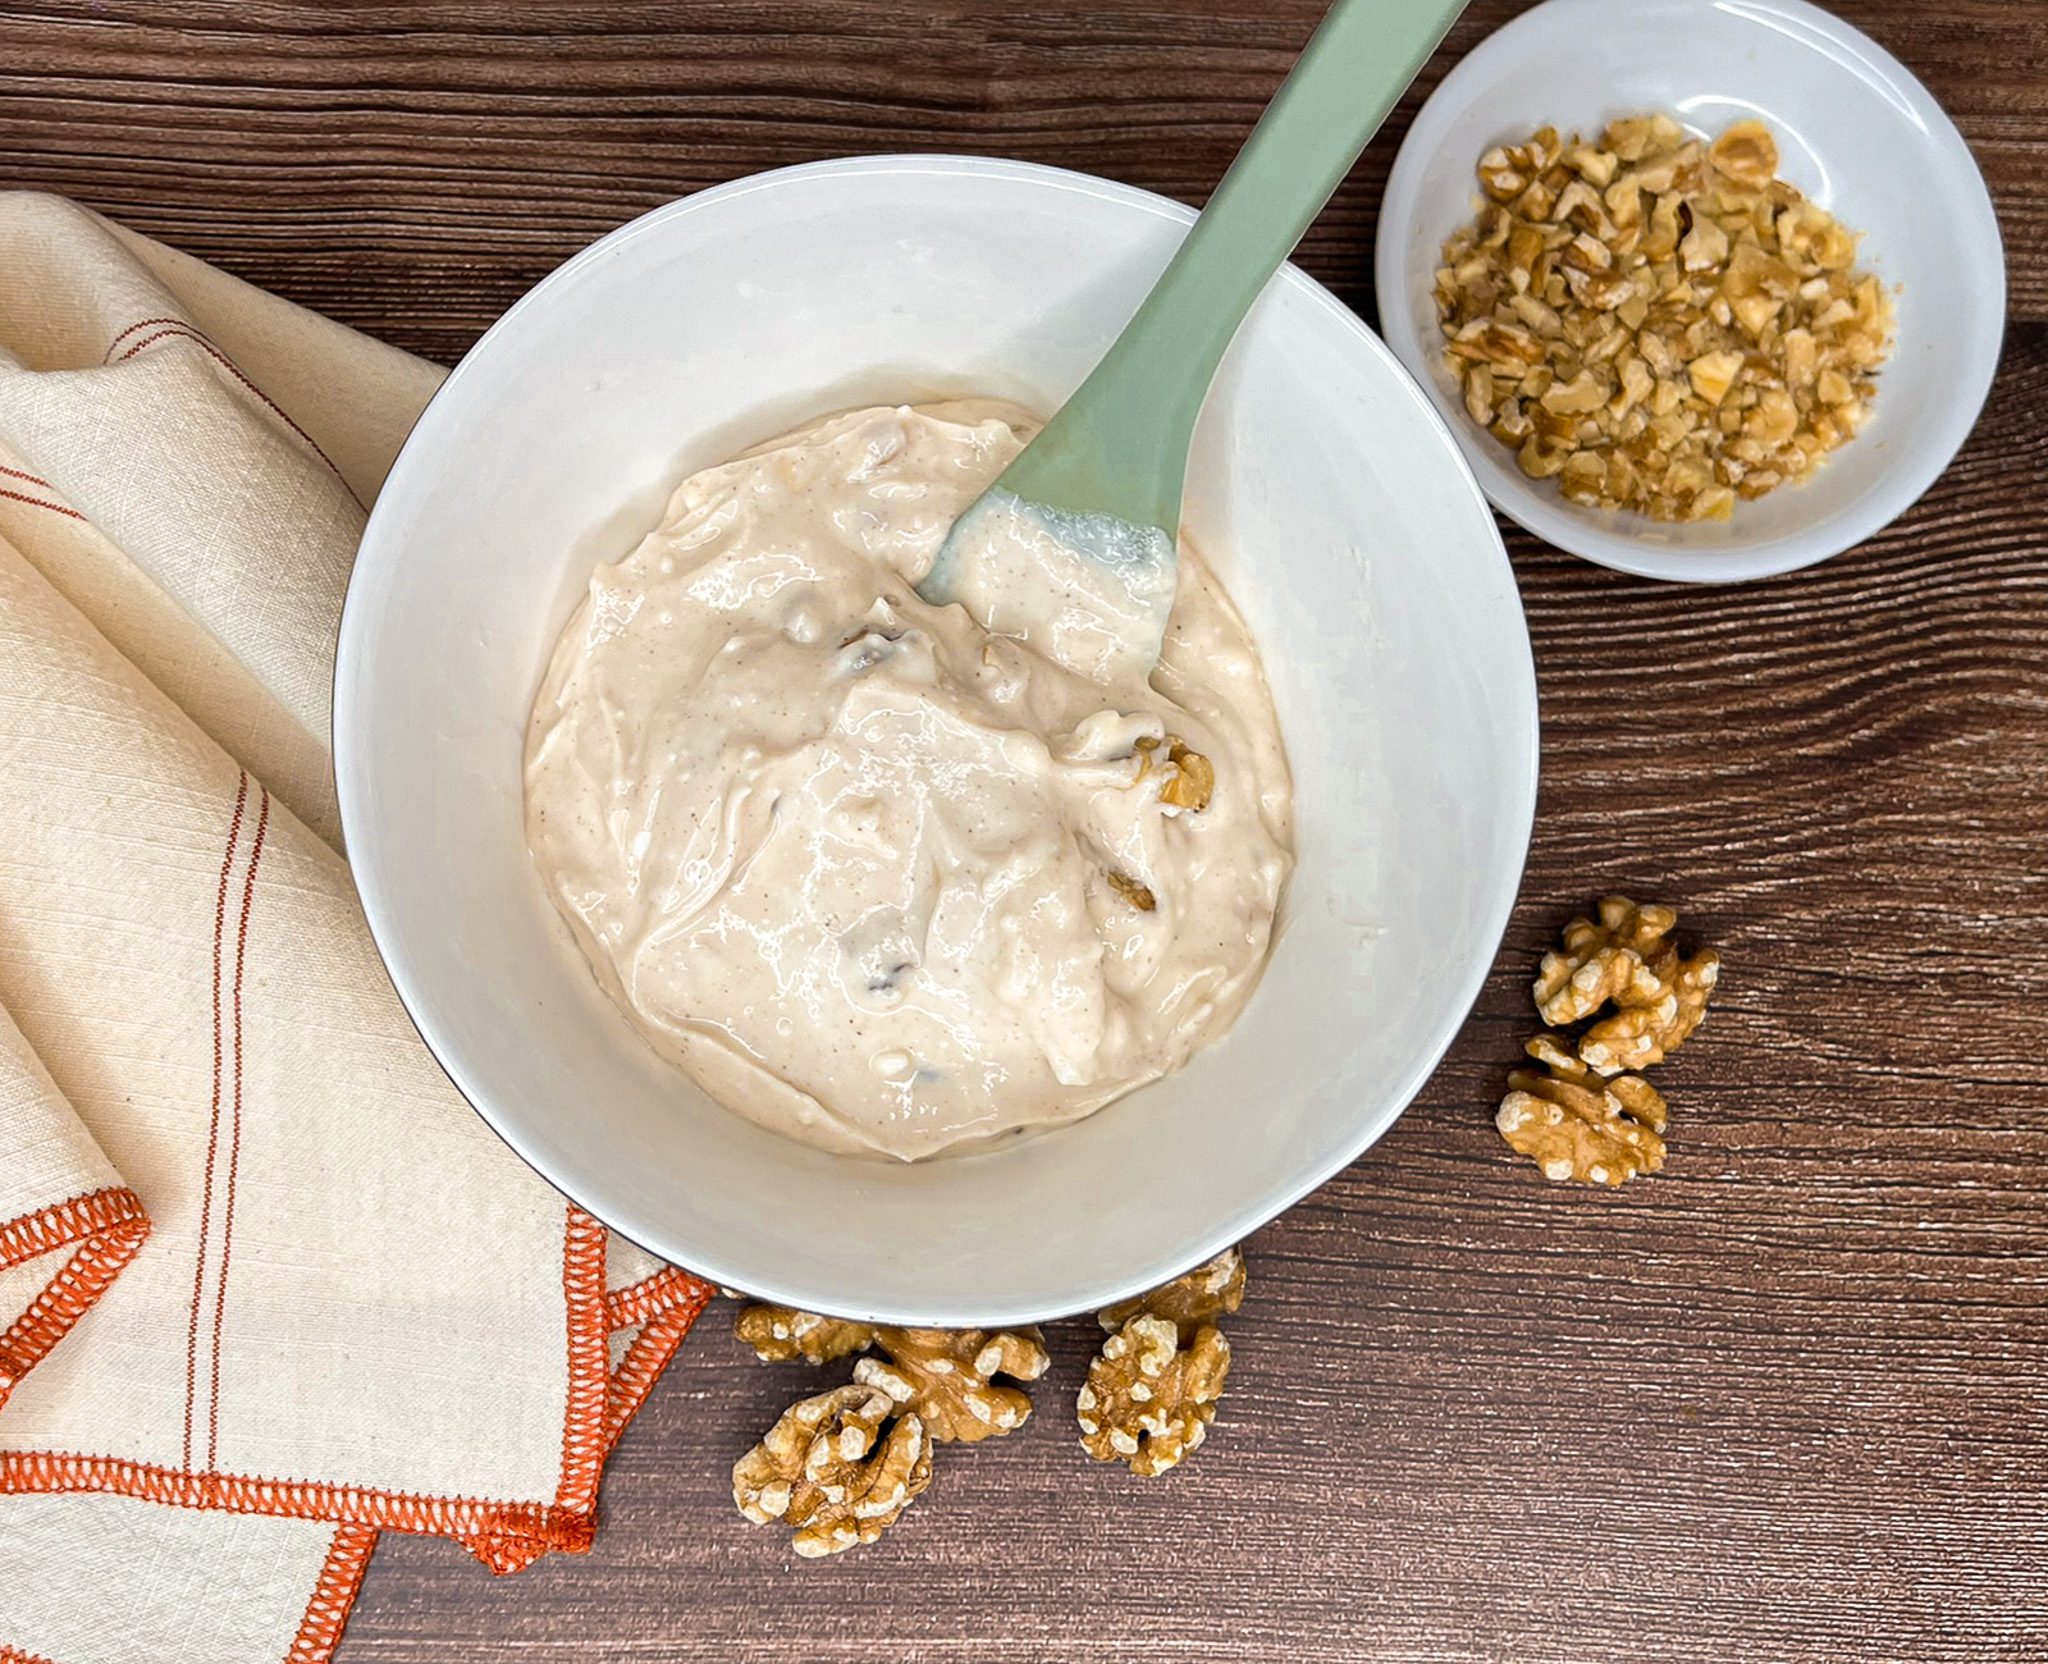
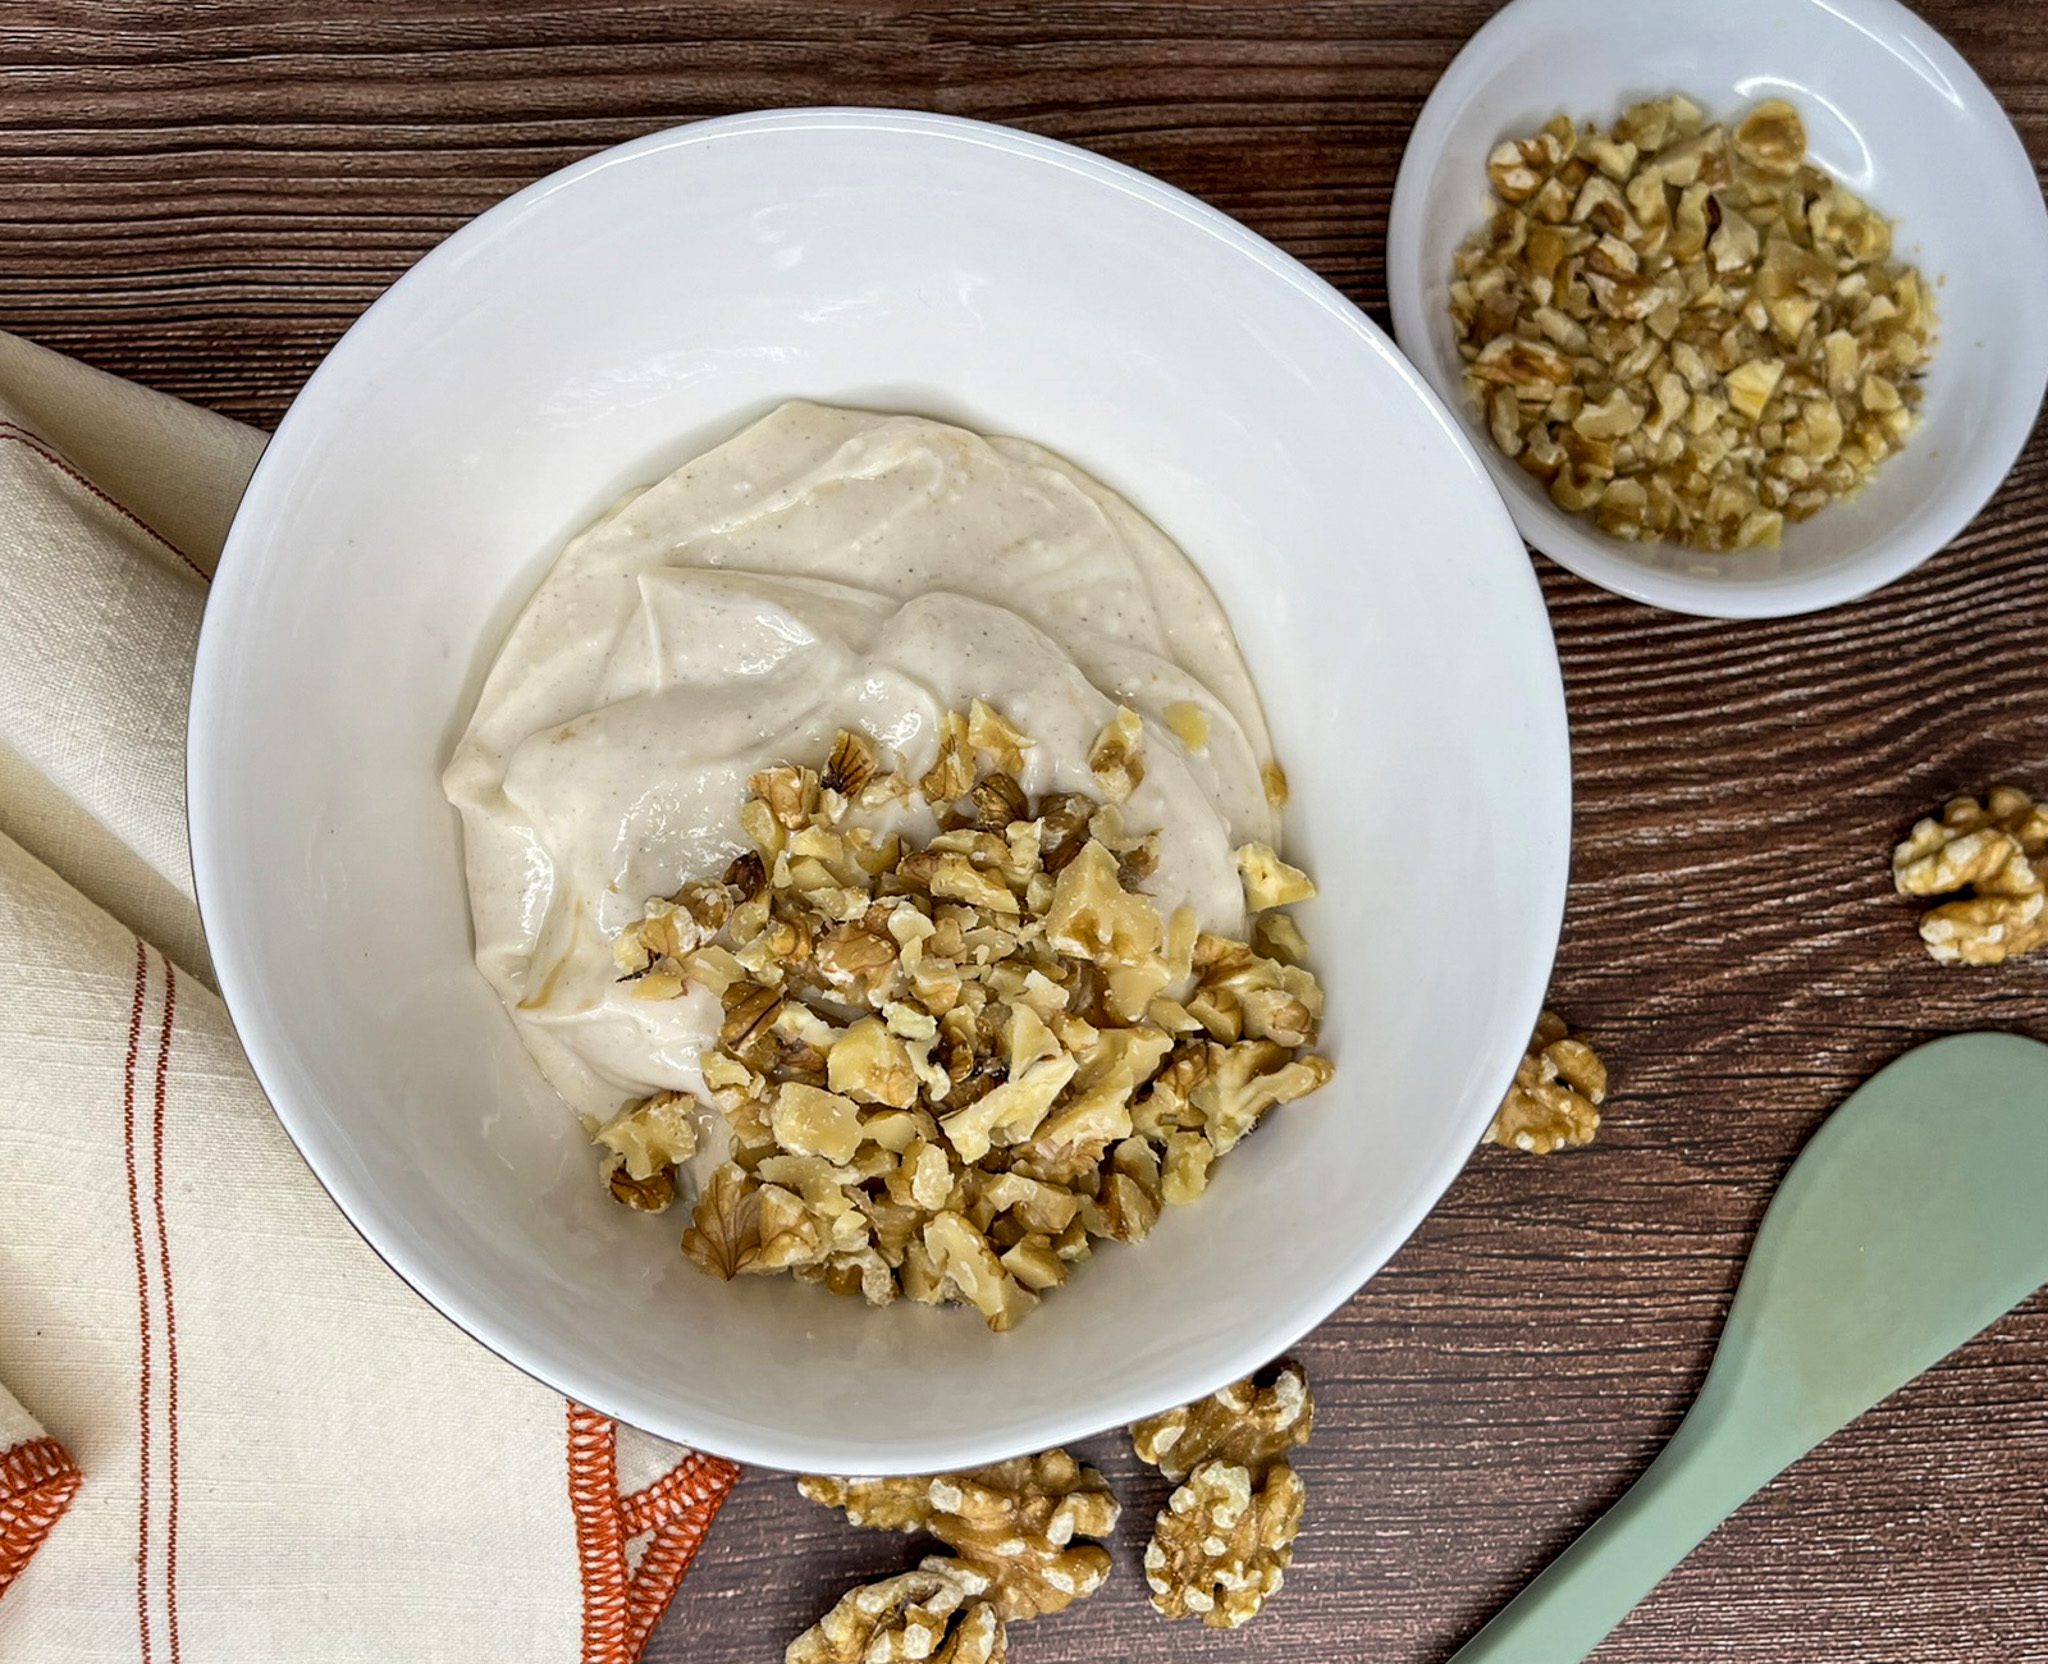
How to Make Honey Walnut Spread
- Process cottage cheese in food processor or blender until completely smooth (about 1 minute). Add freeze-dried fruit. Blend for an additional 30 seconds, or until smooth.
- Transfer to bowl and gently fold in fruit topping and honey. Cover and chill at least 30 minutes before serving.
- Enjoy on bagels, toast, or crackers. Refrigerate leftovers.
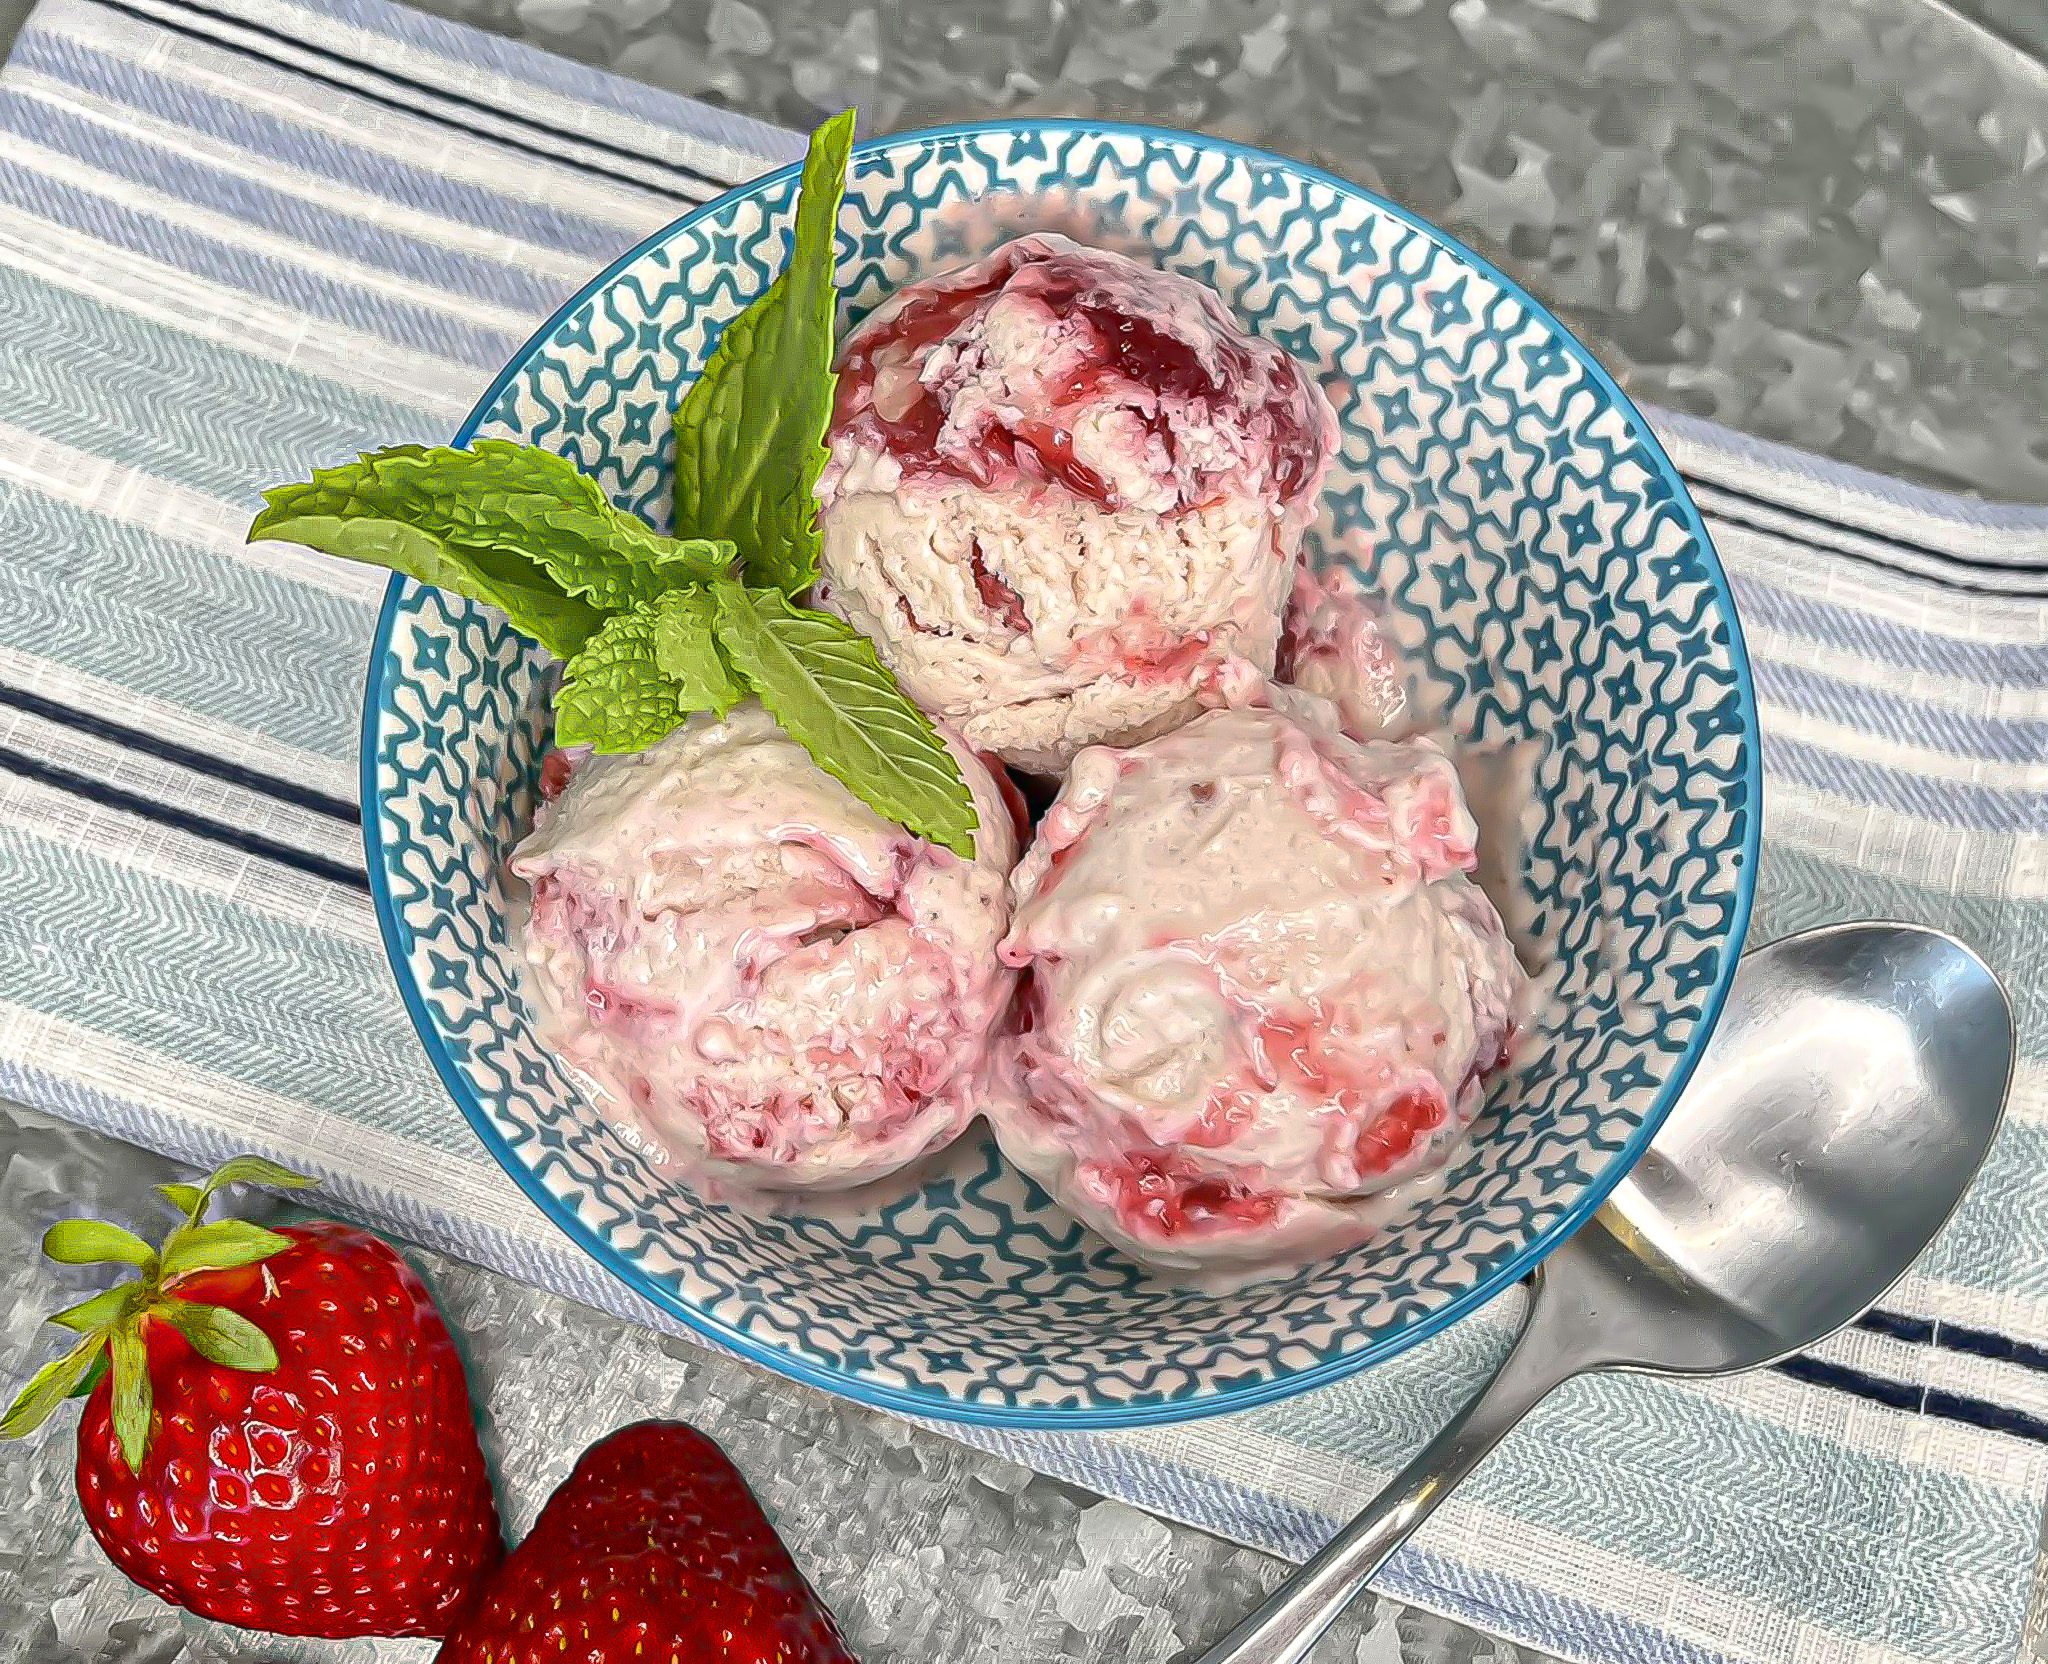
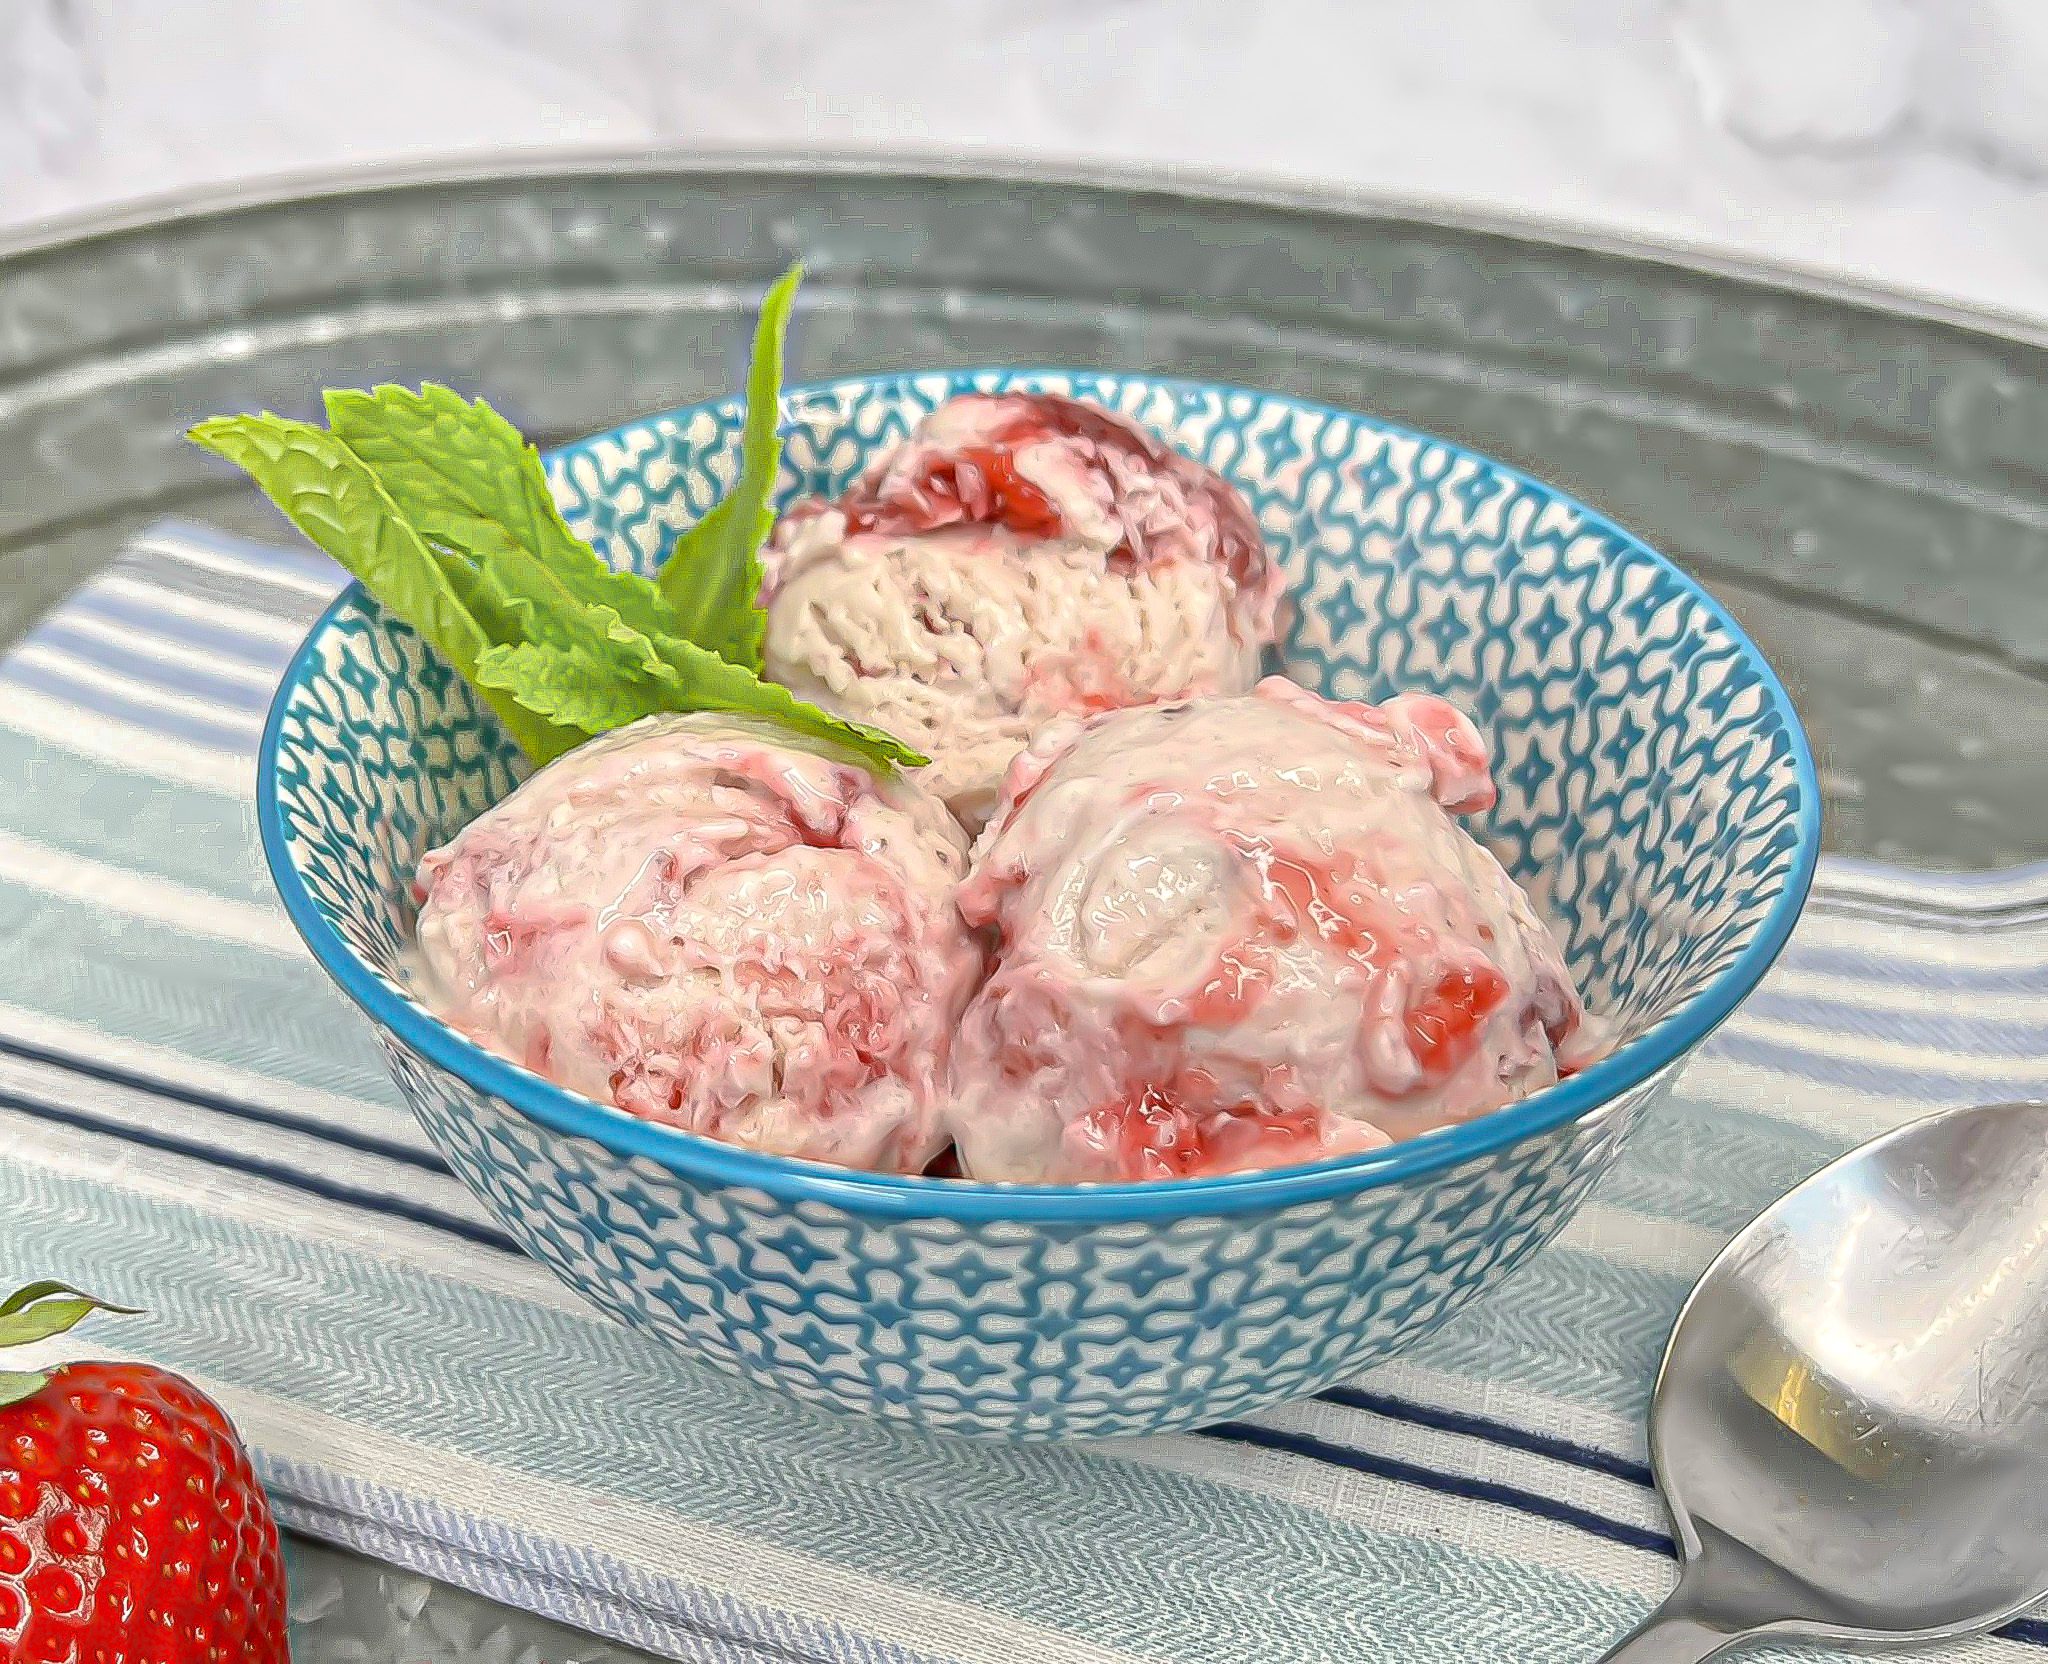
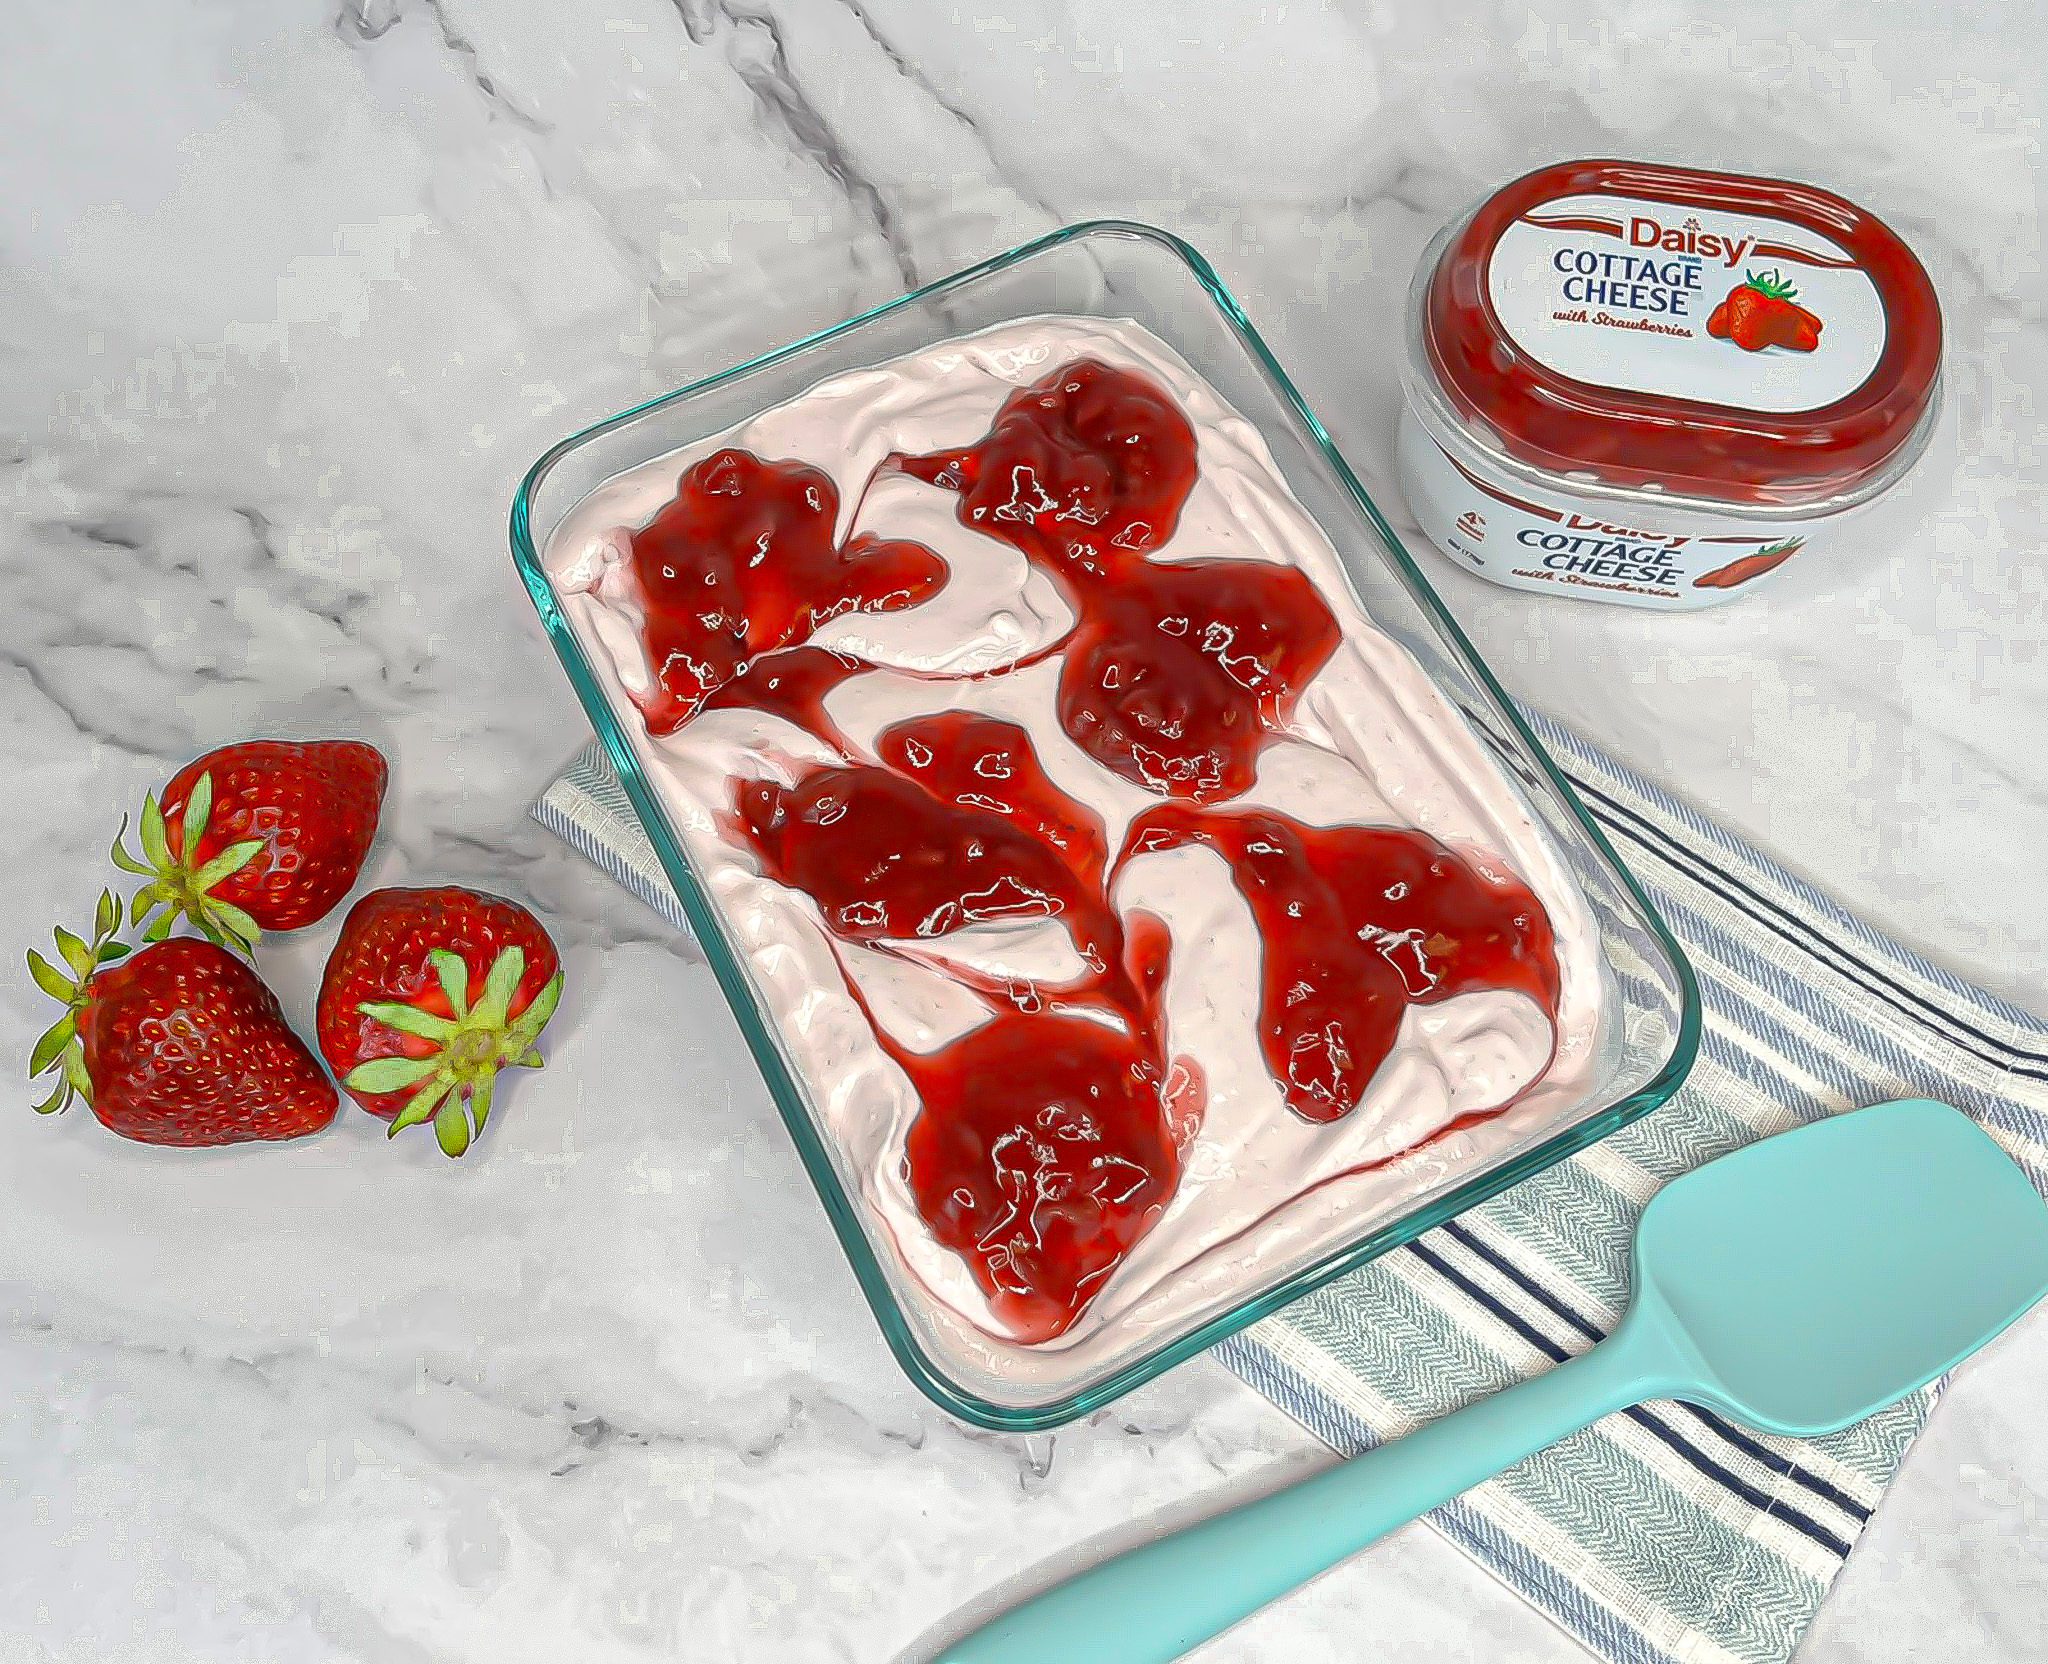
Easy Strawberry Ice Cream
Easy Strawberry Ice Cream
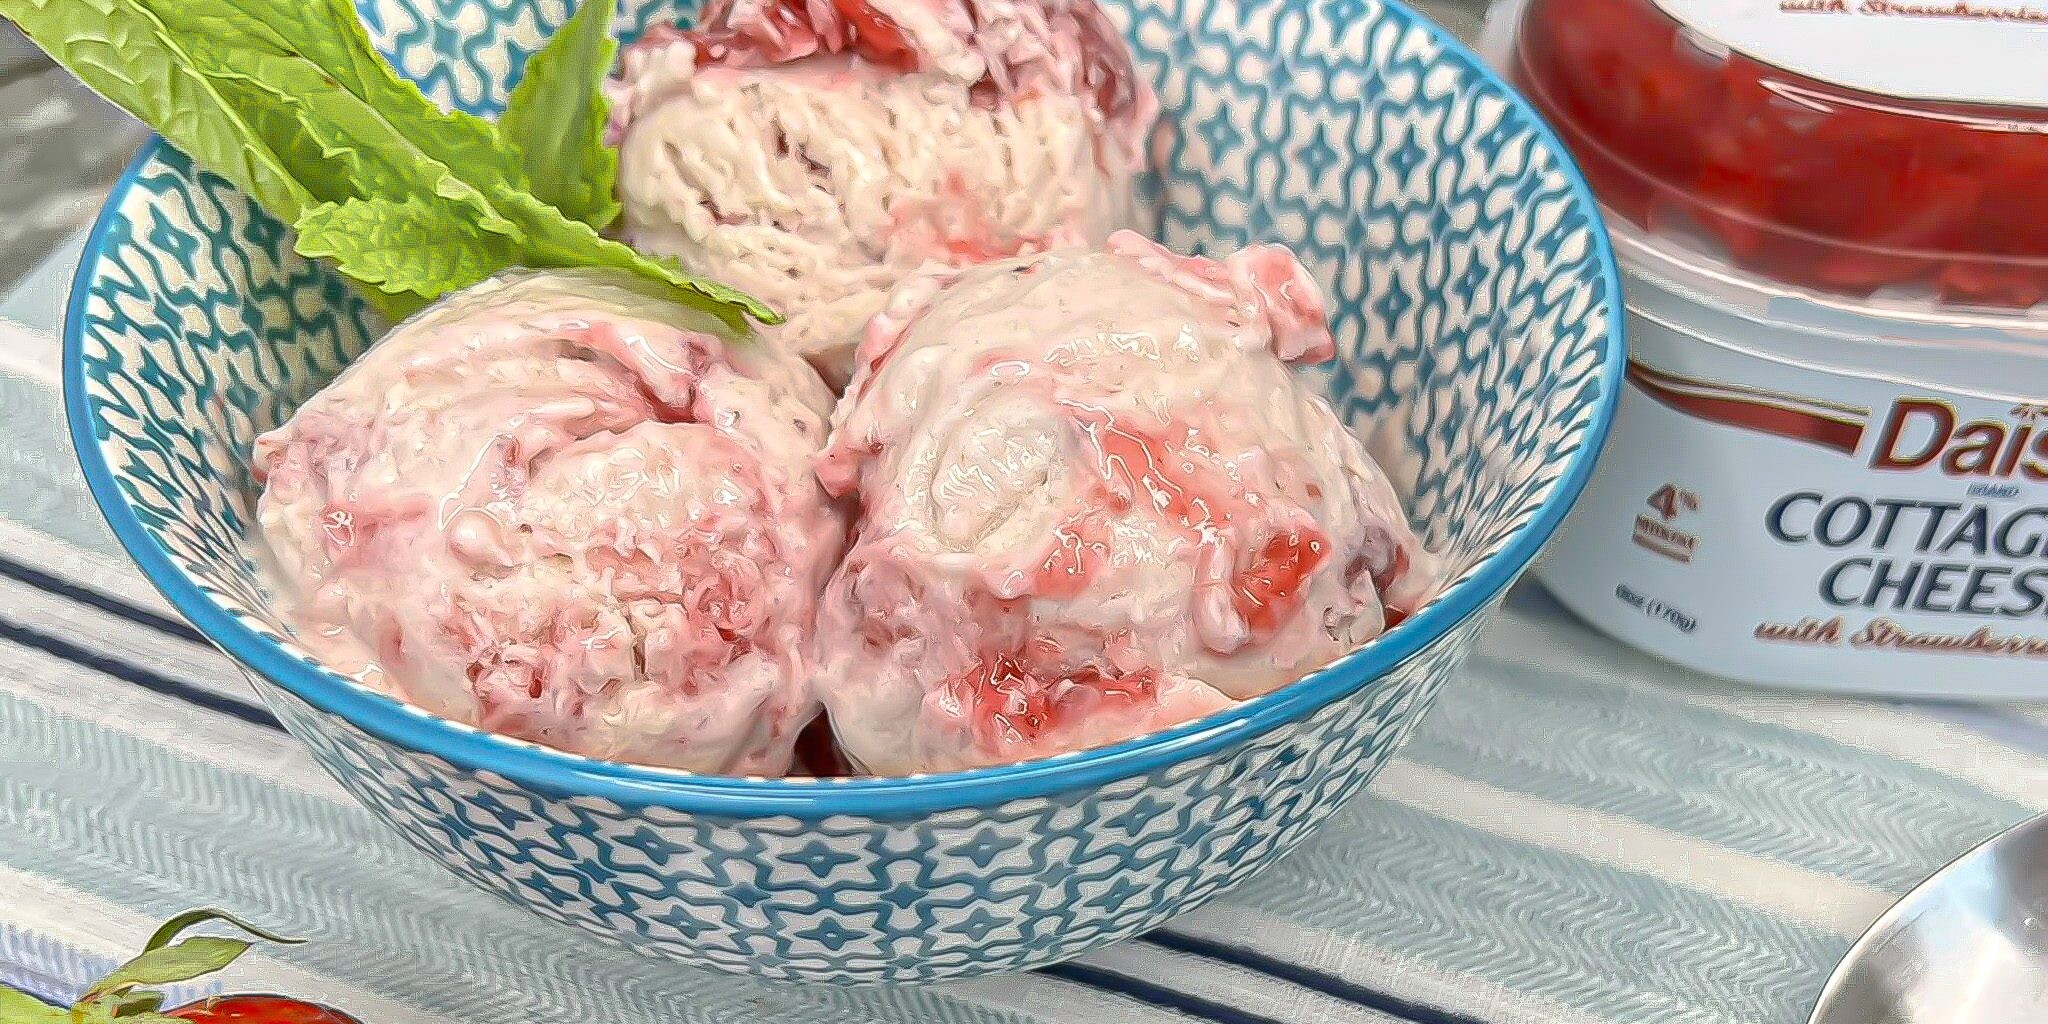
This Easy Strawberry Ice Cream is full of creamy deliciousness with decadent strawberry swirls. With only two ingredients, it has half the fat of traditional strawberry ice cream with more than double the protein. Now you can enjoy delicious ice cream without guilt. Our Easy Strawberry Ice Cream requires no special equipment (no ice cream machine needed) and only takes about 5-minute to prep.
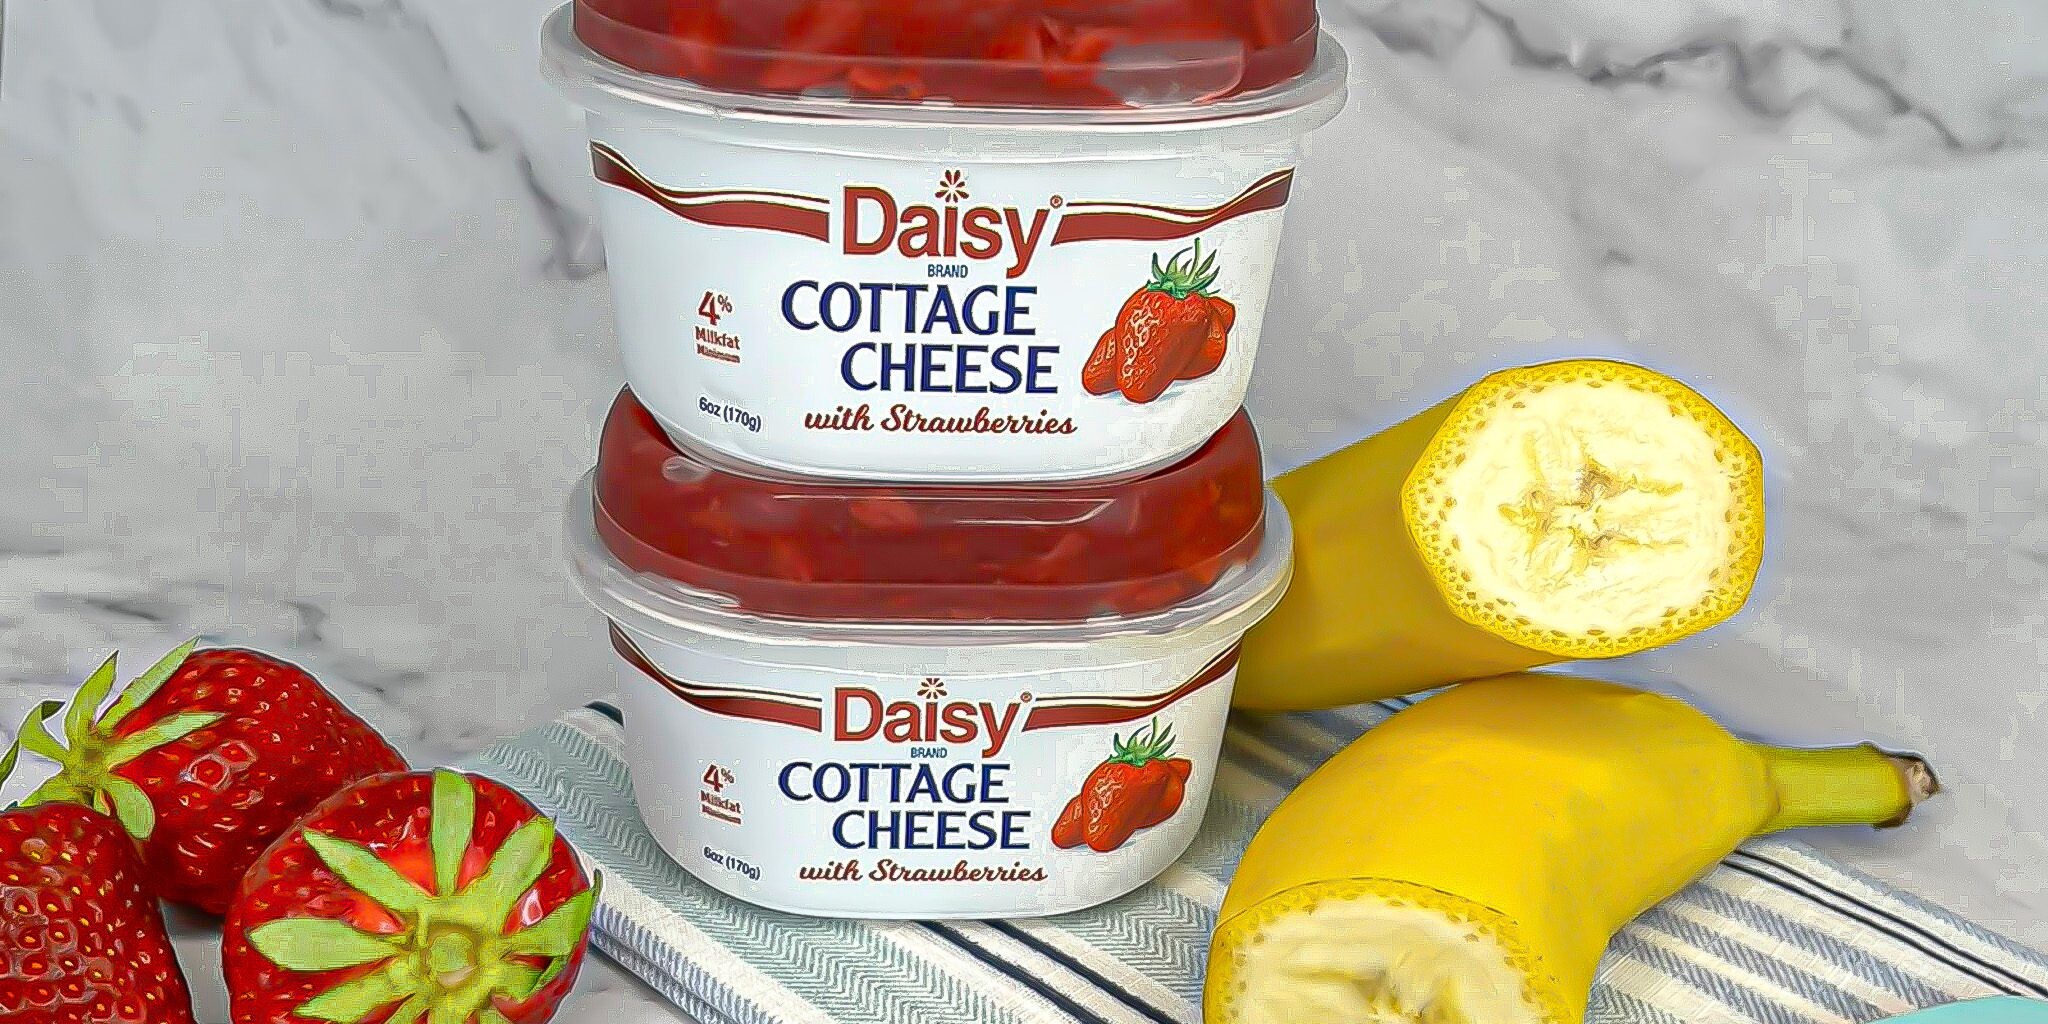
Easy Strawberry Ice Cream Ingredients
- Daisy Strawberry Cottage Cheese Singles (4 packages): The secret ingredient in this delicious ice cream. The cottage cheese portion creates the smooth, silky, creamy texture that you love. The strawberry compote adds the decadent strawberry swirl deliciousness.
- Frozen Bananas (2): Adds sweetness and helps with the custard-like consistency of ice cream.
Substitutions, Variations, and Tips
- The best bananas for ice cream are ones that are just on the point of turning brown. They are naturally sweeter when they are just over-ripe.
- To get the perfect texture, bananas need to be frozen hard. It’s ideal to freeze them overnight to make sure they are entirely frozen. Don’t take them out of the freezer until you’re ready to use them. The 2 best methods for freezing bananas for ice cream:
- Throw whole unpeeled bananas into the freezer (the peels will turn black as they freeze). Bananas will last about 3 months in the freezer. When ready to use, peel with a knife and chop the banana into pieces.
- Peel ripe bananas, slice or half, and arrange in a single layer on a baking sheet. Freeze for one hour. Transfer pieces to a zip-top bag, remove air, and store frozen bananas up to 3 months.
- Any fruit flavor of Daisy Cottage Cheese singles will work well. Try them all for other delicious flavors such as peach, pineapple, and blueberry.
- Don’t over-blend the ice cream. You want to blend until just thick and creamy. Over-blending will make the ice cream runny.
- 2 hours in the freezer will yield the ideal texture for the ice cream. Freezing it longer will make the ice cream too hard to scoop.
- Ice cream makers may also be used following the manufacturer’s instructions.
- Try topping with chopped pistachios, mini marshmallows, or your other favorite ice cream toppings.
- You can also enjoy for breakfast!
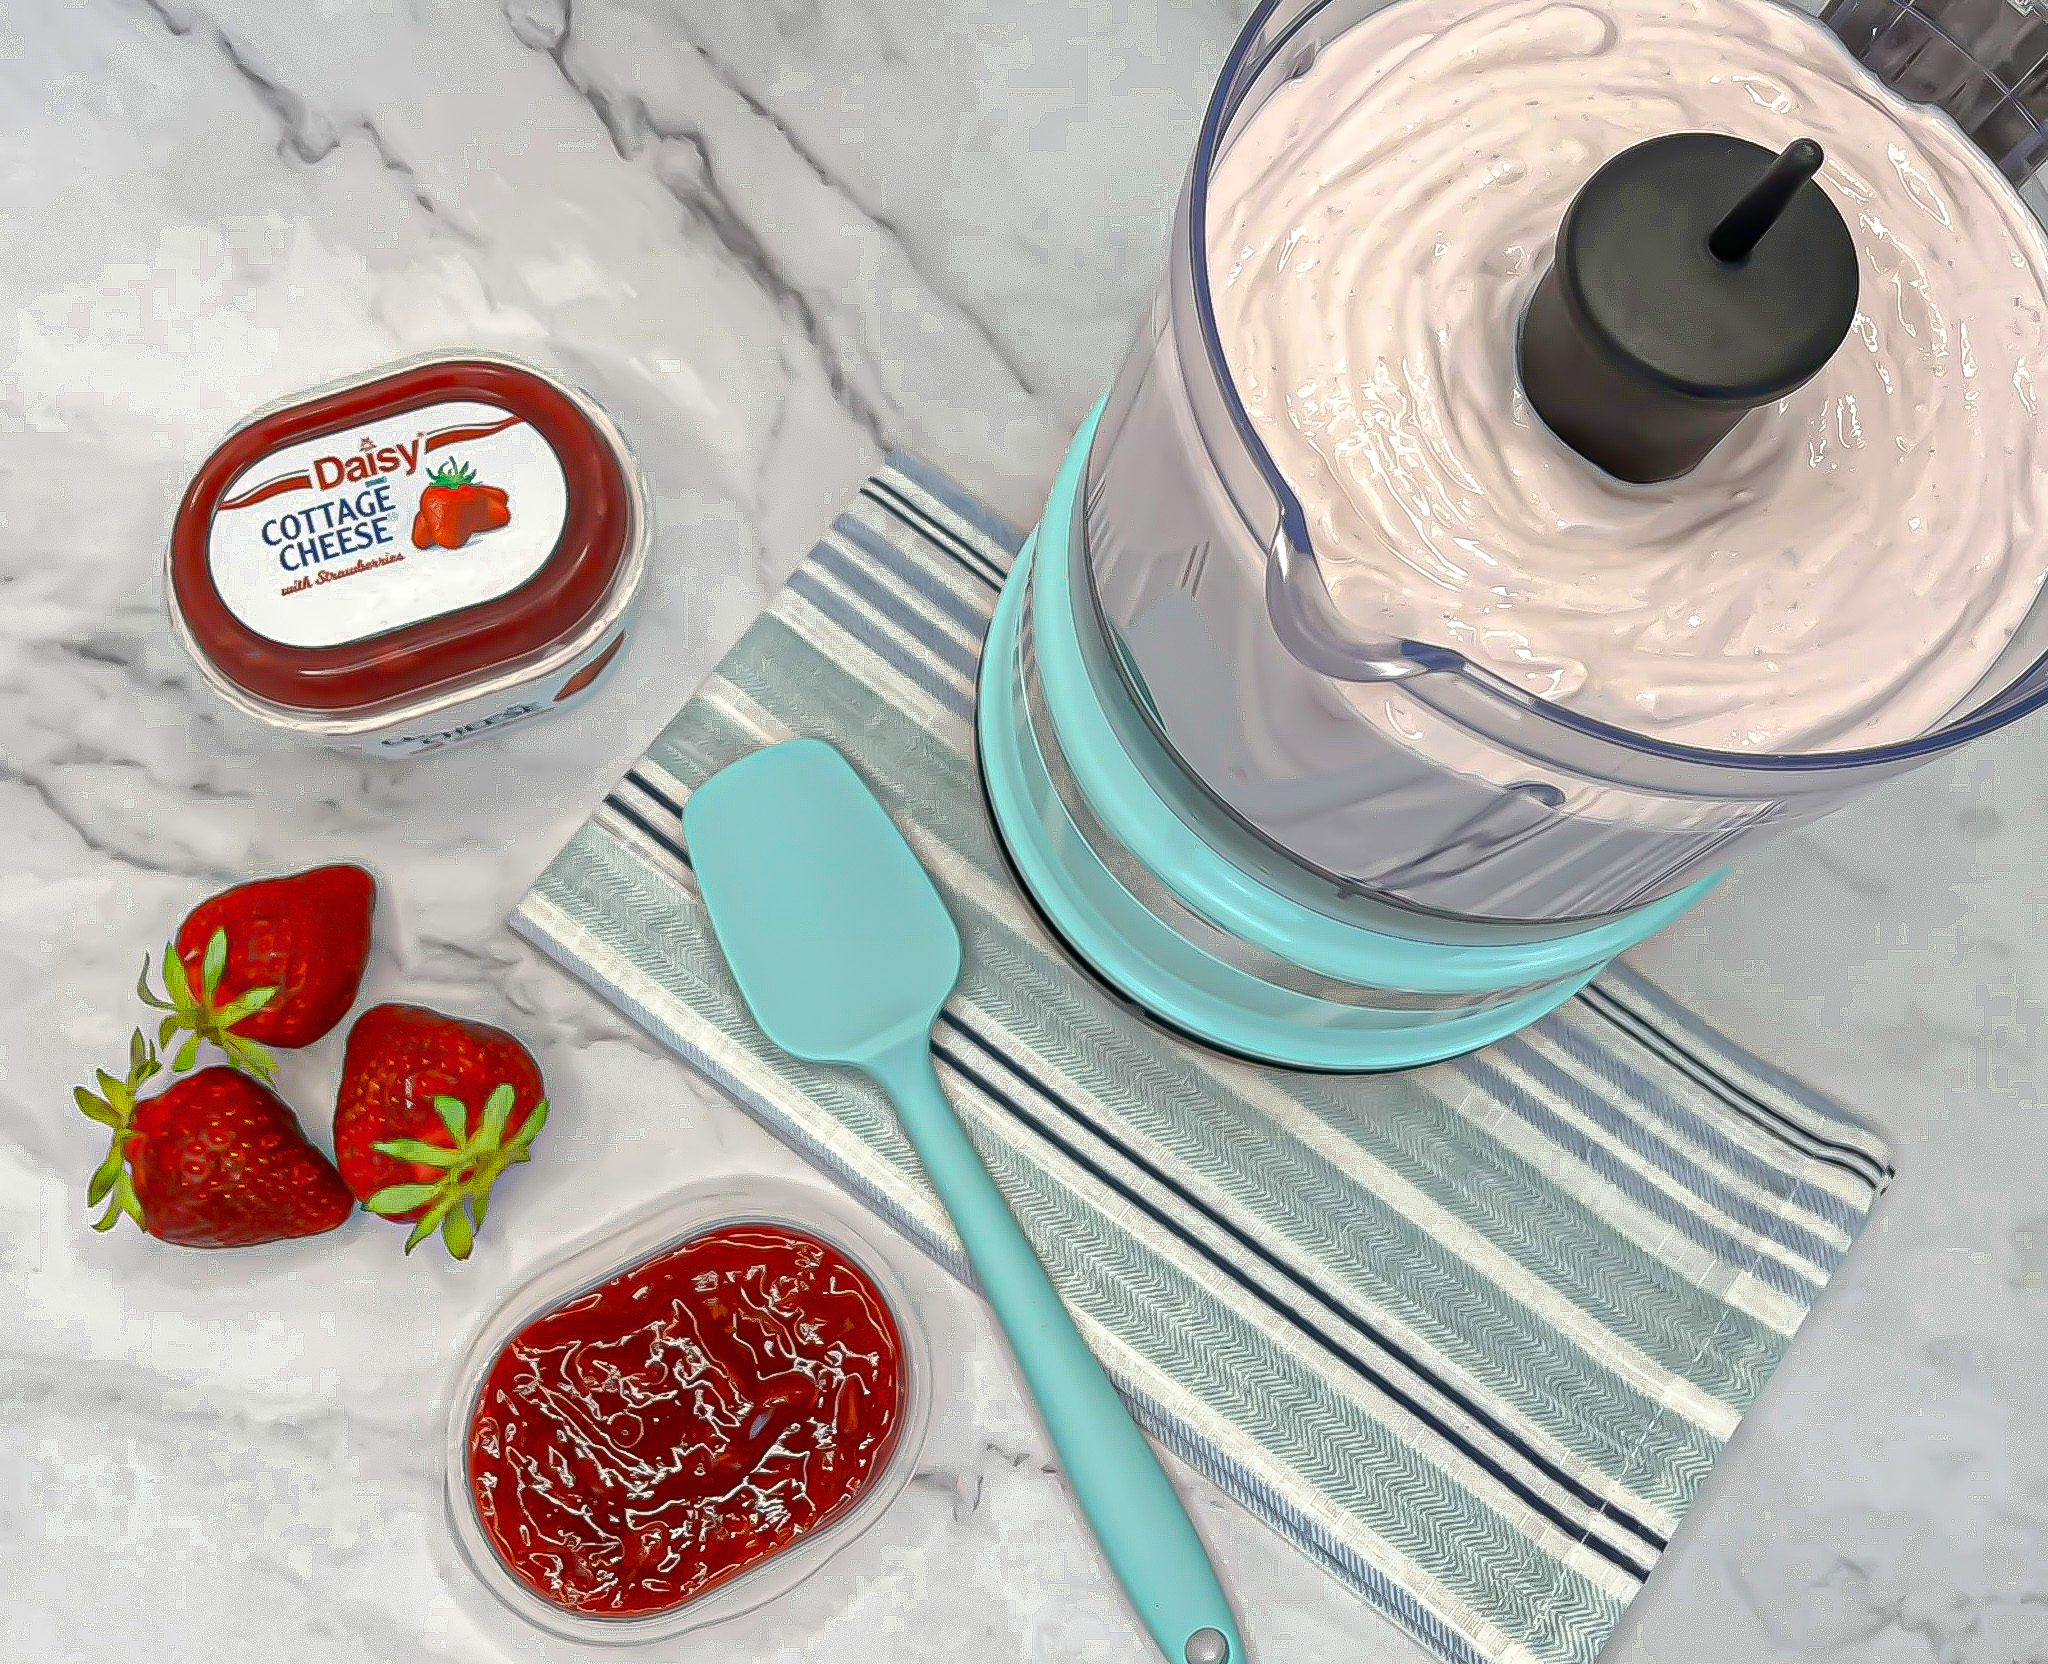
How to Make Easy Strawberry Ice Cream
- Reserve fruit compote from 2 packages for swirling.
- Combine cottage cheese, strawberry compote from 2 packages, and frozen bananas in blender. Blend until completely smooth.
- Transfer into pan lined with parchment paper. Swirl reserved strawberry compote on top. Freeze for 1-2 hours or until frozen (enjoy within 2 hours of freezing).
- Let ice cream sit at room temperature for 5-10 minutes before scooping and serving.